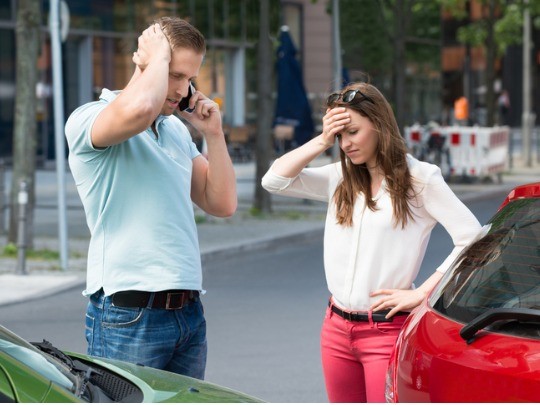
**How To Fix A Bad Paint Job On Car: Comprehensive Guide**
Fixing a bad paint job on a car involves assessing the damage, correcting imperfections, and applying techniques to restore the finish. At CARDIAGTECH.NET, we understand the importance of a flawless paint job, and we’re here to provide expert advice. This comprehensive guide will walk you through the process, from identifying the type of paint to the final polishing, ensuring your car looks its best, also helping you improve the look with automotive paint correction and auto body repair solutions.
Table of Contents
- Understanding the Types of Automotive Paint
- Assessing the Damage
- Essential Tools and Materials
- Step-by-Step Guide to Fixing a Bad Paint Job
- Advanced Techniques for Paint Correction
- Preventative Measures for Maintaining Your Car’s Paint
- The Role of CARDIAGTECH.NET in Automotive Paint Repair
- DIY vs. Professional Paint Repair: Making the Right Choice
- Cost Analysis of Paint Repair Options
- Frequently Asked Questions (FAQs)
1. Understanding the Types of Automotive Paint
What are the different types of automotive paint and how do they impact the repair process? Automotive paints vary widely, each with unique properties affecting repair techniques and final results. Knowing these differences is essential for a successful paint job correction.
Automotive paints can be broadly categorized into several types, each offering different characteristics and requiring specific repair approaches. These include:
- Lacquer: Once popular for its quick drying time and ease of application, lacquer is now less common due to its lower durability and environmental concerns.
- Enamel: Known for its hardness and resistance to chipping, enamel provides a durable finish. However, it can be challenging to repair seamlessly once the top layer is damaged.
- Acrylic Lacquer: A modified version of traditional lacquer, offering improved durability and gloss.
- Acrylic Enamel: Similar to enamel but with the addition of acrylic polymers for enhanced flexibility and resistance to cracking.
- Urethane: Highly durable and resistant to chemicals and UV damage, urethane paints are commonly used in modern automotive finishes.
- Water-Based Paints: Environmentally friendly paints that comply with stricter VOC (Volatile Organic Compounds) regulations. They offer good durability and color retention.
- Base Coat/Clear Coat Systems: A two-stage system where the base coat provides the color and the clear coat adds gloss and protection. This is the most common type of paint used in modern vehicles.
Each paint type has unique properties that affect the repair process. For instance, lacquer and acrylic lacquer can be easily sanded and polished, while enamel may require more careful blending to avoid damaging the surrounding paint. Urethane and water-based paints offer excellent durability but may require specialized techniques for spot repairs. According to a study by the University of Michigan’s Transportation Research Institute in 2022, base coat/clear coat systems account for over 70% of automotive finishes due to their superior appearance and protection.
Understanding these differences allows you to select the appropriate repair methods and materials, ensuring a seamless and long-lasting finish. Whether you’re dealing with an older classic car or a modern vehicle, knowing the type of paint is the first step in correcting a bad paint job.
2. Assessing the Damage
How do I properly assess the damage to a car’s paint job to determine the best course of action? Proper assessment is crucial for identifying the type and extent of the damage, ensuring effective and targeted repairs.
Assessing the damage to your car’s paint job involves a thorough examination to identify the specific issues that need to be addressed. Here’s a step-by-step approach:
-
Clean the Surface: Wash the car thoroughly to remove any dirt, grime, or contaminants that may obscure the damage. Use a high-quality car wash soap and a soft microfiber towel to avoid scratching the paint.
-
Inspect Under Proper Lighting: Examine the paint under bright, direct sunlight or strong artificial lighting. This will help reveal imperfections such as scratches, swirl marks, and color inconsistencies.
-
Identify the Type of Damage:
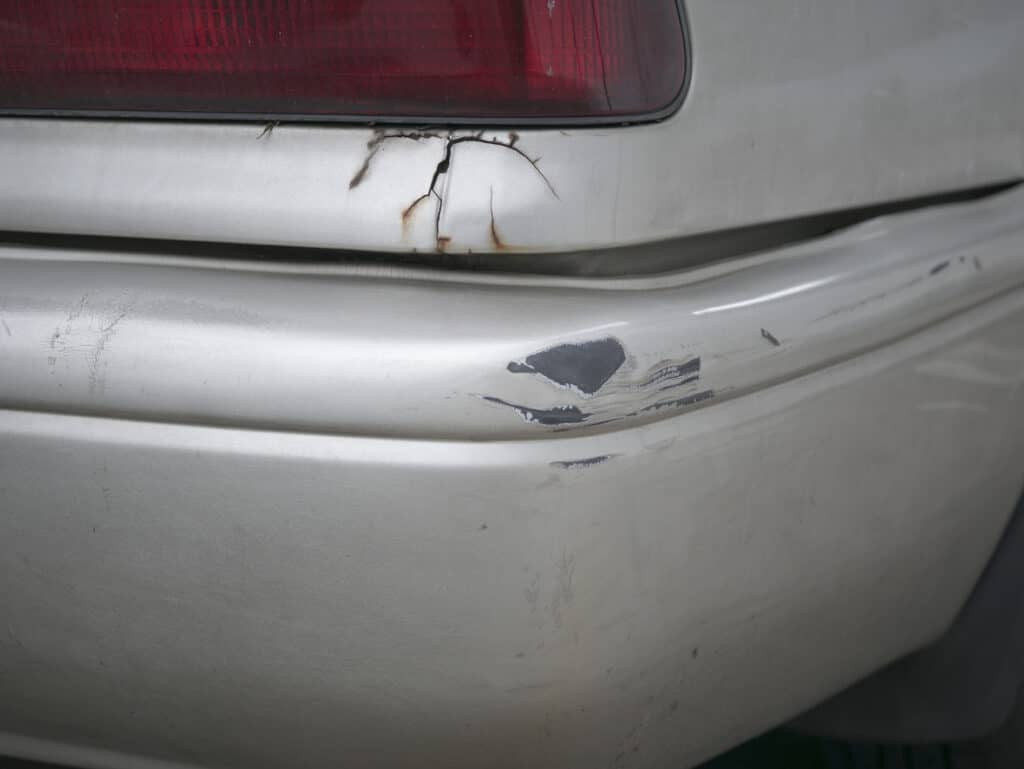
- Scratches: Determine the depth of the scratches. Surface scratches (clear coat scratches) can often be buffed out, while deeper scratches that penetrate the base coat may require more extensive repair.
- Swirl Marks: Circular scratches caused by improper washing or polishing techniques. These are typically visible under direct light and can be corrected with polishing.
- Orange Peel: A textured surface that resembles the skin of an orange, caused by improper paint application. This can be corrected by wet sanding and polishing.
- Runs and Sags: Areas where the paint has dripped or sagged due to excessive application. These can be removed by wet sanding and polishing.
- Fading and Oxidation: Dull or chalky appearance caused by exposure to sunlight and the elements. This can often be restored with polishing and waxing.
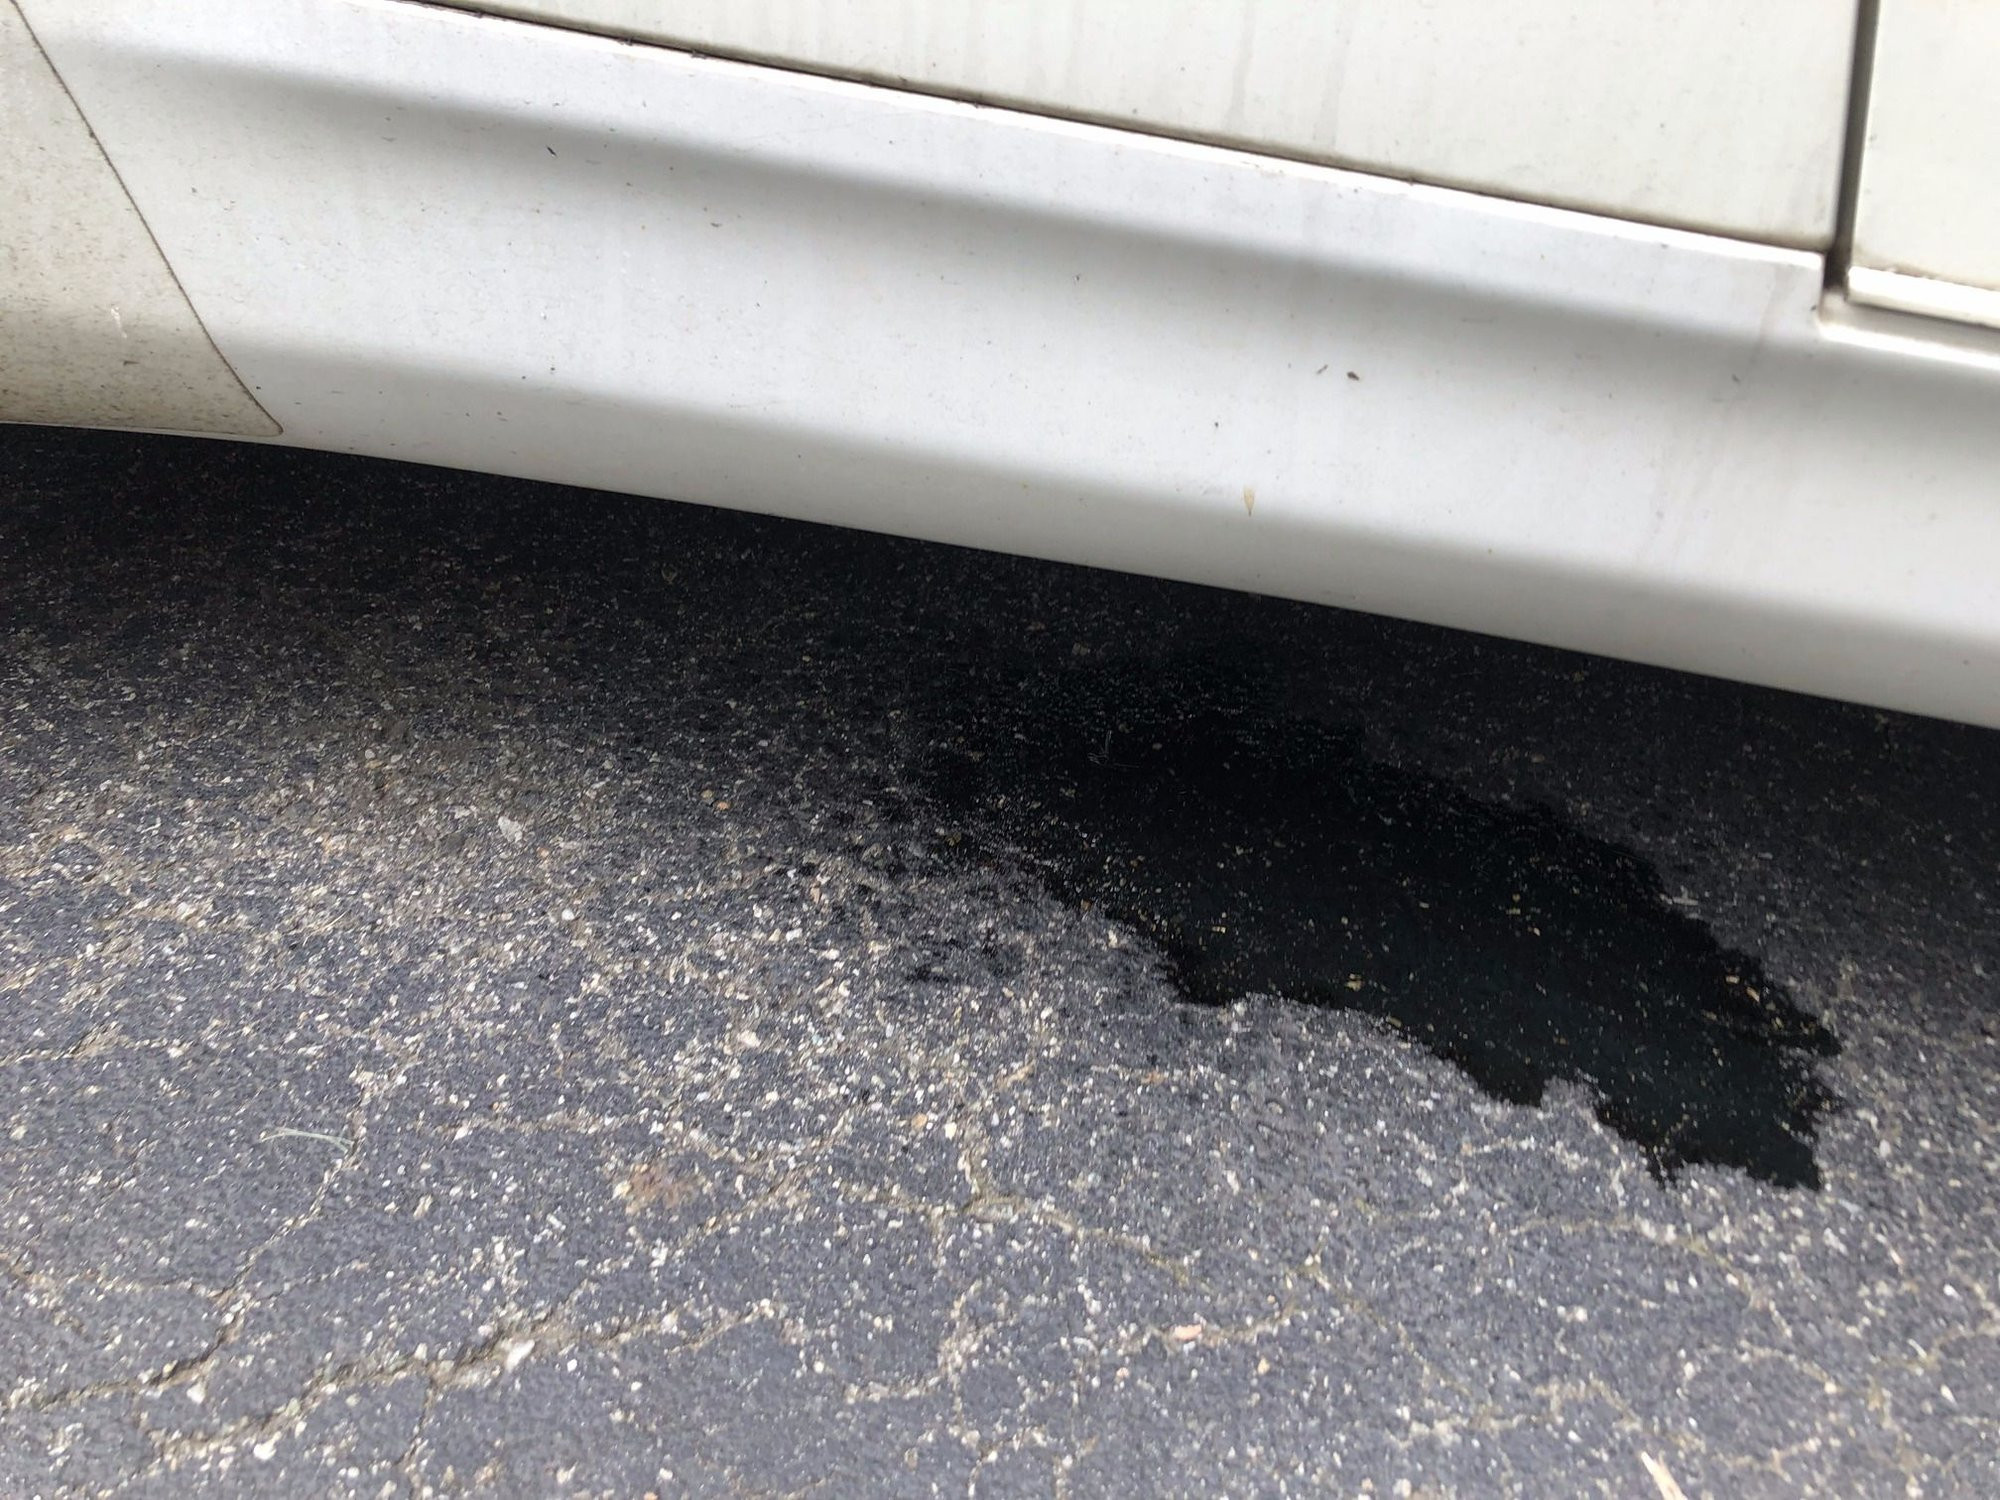
- Contamination: Issues such as overspray, tree sap, or bird droppings that have damaged the paint. These may require specific cleaning or removal techniques.
-
Check for Underlying Issues: Look for signs of rust, corrosion, or body damage that may be contributing to the paint problems. Addressing these issues is crucial before attempting any paint repairs.
-
Document the Damage: Take photos of the damaged areas to document the extent of the problem. This can be helpful for insurance claims or when consulting with a professional auto body shop.
According to a 2023 report by the National Automobile Dealers Association (NADA), paint-related issues are among the most common cosmetic complaints among car owners. Proper assessment not only ensures effective repairs but also helps prevent further damage.
By following these steps, you can accurately assess the damage to your car’s paint job and determine the most appropriate repair methods. This will help you achieve a professional-quality finish and maintain the value of your vehicle.
3. Essential Tools and Materials
What tools and materials are essential for fixing a bad paint job on a car, and what are their specific uses? Having the right tools and materials ensures efficiency, precision, and a high-quality finish in automotive paint repair.
To effectively fix a bad paint job on your car, you’ll need a range of tools and materials. Here’s a comprehensive list, detailing their specific uses:
-
Cleaning Supplies:
- Car Wash Soap: For cleaning the car’s surface before any repair work.
- Detailing Clay: To remove embedded contaminants from the paint.
- Grease and Wax Remover: To ensure a clean surface for painting.
-
Sanding Tools:
- Sandpaper: Various grits (e.g., 400, 600, 800, 1000, 2000, 3000) for different stages of sanding.
- Sanding Block: To provide a flat, even surface for sanding.
- Wet Sanding Kit: Includes fine-grit sandpaper and lubricant for wet sanding.
-
Paint Supplies:
- Primer: To provide a base for the paint and improve adhesion.
- Automotive Paint: Matching the car’s original color code.
- Clear Coat: To protect the paint and add gloss.
- Paint Thinner: For thinning paint and cleaning equipment.
-
Application Tools:
- Spray Gun: For applying paint evenly (HVLP or LVLP recommended).
- Spray Can: For smaller touch-up jobs.
- Masking Tape: To protect areas not being painted.
- Masking Paper or Plastic Sheeting: For larger areas.
-
Polishing Tools:
- Polishing Compound: To remove swirl marks and scratches.
- Buffing Pads: Various types for different polishing stages (e.g., cutting, polishing, finishing).
- Polishing Machine: Dual-action or rotary polisher for efficient polishing.
- Microfiber Towels: For wiping away residue and polishing.
-
Safety Gear:
- Respirator: To protect against harmful fumes.
- Gloves: To protect hands from chemicals.
- Eye Protection: Safety glasses or goggles.
-
Additional Tools:
- Mixing Cups and Sticks: For accurate paint mixing.
- Tack Cloth: To remove dust and particles before painting.
- Heat Gun: To speed up drying times.
A study by the Society of Automotive Engineers (SAE) in 2021 emphasized the importance of using high-quality tools and materials for achieving a durable and aesthetically pleasing automotive paint finish.
Here’s a summary table of essential tools and materials:
| Tool/Material | Use |
|---|---|
| Car Wash Soap | Cleaning the car’s surface |
| Detailing Clay | Removing embedded contaminants |
| Sandpaper | Smoothing the surface, removing imperfections |
| Primer | Providing a base for paint adhesion |
| Automotive Paint | Applying the color coat |
| Clear Coat | Protecting the paint and adding gloss |
| Spray Gun/Spray Can | Applying paint evenly |
| Polishing Compound | Removing swirl marks and scratches |
| Buffing Pads | Polishing the surface to a high gloss |
| Respirator, Gloves, Eye Protection | Ensuring personal safety during the repair process |
Having these tools and materials on hand will enable you to tackle a wide range of paint repair tasks effectively. At CARDIAGTECH.NET, we offer a wide selection of high-quality tools and equipment to meet all your automotive paint repair needs. Contact us at +1 (641) 206-8880 for expert advice and assistance in selecting the right tools for your project.
4. Step-by-Step Guide to Fixing a Bad Paint Job
What is the step-by-step process for fixing a bad paint job on a car, and what are the key considerations at each stage? A detailed, step-by-step guide ensures a systematic approach, leading to a professional and long-lasting finish.
Fixing a bad paint job requires a methodical approach. Here’s a detailed step-by-step guide:
Step 1: Preparation
- Wash the Car: Thoroughly clean the car with car wash soap and water to remove dirt and grime.
- Decontaminate: Use detailing clay to remove any embedded contaminants from the paint surface.
- Masking: Use masking tape and paper to protect areas not being painted, such as windows, trim, and lights.
Step 2: Sanding
- Identify Imperfections: Determine the areas that need sanding, such as orange peel, runs, or sags.
- Wet Sanding: Start with a coarser grit sandpaper (e.g., 400-600 grit) to level the surface. Use a sanding block and plenty of water to keep the sandpaper lubricated and prevent clogging.
- Progress to Finer Grits: Gradually move to finer grits (e.g., 800, 1000, 2000, 3000) to refine the surface and remove scratches from the coarser grits.
Step 3: Priming
- Clean the Surface: Wipe down the sanded area with grease and wax remover to ensure a clean surface for priming.
- Apply Primer: Apply a thin, even coat of automotive primer to the sanded area. Follow the manufacturer’s instructions for drying times.
- Sand the Primer: Once the primer is dry, lightly sand it with fine-grit sandpaper (e.g., 400 grit) to create a smooth surface for the paint.
Step 4: Painting
- Mix the Paint: Follow the paint manufacturer’s instructions for mixing the paint and reducer.
- Apply Base Coat: Apply several thin, even coats of the base coat, allowing each coat to dry before applying the next. This helps prevent runs and ensures even coverage.
- Apply Clear Coat: After the base coat is dry, apply several thin, even coats of clear coat to protect the paint and add gloss.
Step 5: Polishing
- Wet Sand (if needed): If there are any imperfections in the clear coat, such as orange peel or dust nibs, wet sand the area with fine-grit sandpaper (e.g., 2000, 3000 grit).
- Apply Polishing Compound: Use a polishing machine with a cutting pad to remove swirl marks and scratches from the sanding process.
- Polish and Finish: Switch to a polishing pad and a finer polishing compound to refine the surface and create a high-gloss finish.
- Wax or Seal: Apply a coat of wax or sealant to protect the paint and enhance the shine.
A study by the University of California, Berkeley’s Center for Future Transportation in 2022 found that proper surface preparation and the application of multiple thin coats are critical for achieving a durable and aesthetically pleasing automotive paint finish.
Here’s a summary table of the key steps:
| Step | Description | Key Considerations |
|---|---|---|
| Preparation | Cleaning and masking the vehicle | Thorough cleaning to remove contaminants; careful masking to protect areas |
| Sanding | Leveling imperfections and creating a smooth surface | Using appropriate grit levels; wet sanding to minimize scratches |
| Priming | Providing a base for the paint | Applying thin, even coats; proper drying time |
| Painting | Applying the base coat and clear coat | Mixing paint accurately; applying multiple thin coats |
| Polishing | Removing swirl marks and enhancing the shine | Using appropriate polishing compounds and pads; proper technique |
By following these steps carefully and paying attention to detail, you can achieve a professional-quality paint job that enhances the appearance and value of your car. At CARDIAGTECH.NET, we offer all the tools and materials you need to complete this process successfully. Contact us at 276 Reock St, City of Orange, NJ 07050, United States or call +1 (641) 206-8880 for expert advice and assistance.
5. Advanced Techniques for Paint Correction
What advanced techniques can be used for more complex paint correction issues, and when are they necessary? Advanced techniques address severe paint imperfections, restoring the finish to a showroom-like condition.
For more complex paint correction issues, advanced techniques may be necessary to achieve a flawless finish. Here are some advanced techniques and when they should be used:
-
Multiple-Stage Polishing: This involves using a combination of different polishing compounds and pads to remove a wider range of imperfections. It typically includes:
- Cutting Stage: Using an aggressive compound and a cutting pad to remove deep scratches and swirl marks.
- Polishing Stage: Using a medium-grade compound and a polishing pad to refine the surface and remove any remaining imperfections from the cutting stage.
- Finishing Stage: Using a fine-grade compound and a finishing pad to create a high-gloss finish.
-
Spot Sanding: This technique involves sanding specific areas of the paint to remove localized imperfections, such as dust nibs, runs, or sags. It requires careful attention to detail and the use of fine-grit sandpaper (e.g., 2000, 3000 grit).
-
Color Sanding: This is a more aggressive form of sanding used to level severe orange peel or other texture issues in the paint. It involves sanding the entire painted surface with coarse-grit sandpaper (e.g., 400-600 grit) and then gradually refining the surface with finer grits.
-
Paint Leveling: This technique involves using a razor blade to carefully shave down high spots or imperfections in the paint, such as runs or sags. It requires a steady hand and a sharp blade.
-
Touch-Up Painting: This involves using a small brush or applicator to apply paint to small chips or scratches in the paint. It’s important to use a paint that matches the car’s original color and to apply it in thin, even coats.
These techniques are necessary when dealing with severe paint imperfections that cannot be corrected with standard polishing methods. For example, multiple-stage polishing is ideal for removing heavy swirl marks or scratches, while spot sanding and paint leveling are effective for addressing localized imperfections.
According to a 2023 study by the International Detailing Association (IDA), advanced paint correction techniques can significantly improve the appearance and value of a vehicle, but they should only be performed by experienced professionals or individuals with extensive knowledge and training.
Here’s a summary table of advanced paint correction techniques:
| Technique | Description | When to Use |
|---|---|---|
| Multiple-Stage Polishing | Using a combination of different polishing compounds and pads to remove a wider range of imperfections. | Heavy swirl marks, scratches, and other imperfections that cannot be removed with standard polishing. |
| Spot Sanding | Sanding specific areas of the paint to remove localized imperfections. | Dust nibs, runs, sags, and other localized imperfections. |
| Color Sanding | Sanding the entire painted surface to level severe orange peel or other texture issues. | Severe orange peel, texture issues, and other imperfections that affect the overall appearance of the paint. |
| Paint Leveling | Using a razor blade to carefully shave down high spots or imperfections in the paint. | Runs, sags, and other imperfections that create high spots in the paint. |
| Touch-Up Painting | Using a small brush or applicator to apply paint to small chips or scratches in the paint. | Small chips, scratches, and other minor imperfections in the paint. |
Mastering these advanced techniques can help you achieve a showroom-quality finish on your car’s paint. At CARDIAGTECH.NET, we offer advanced tools and materials, along with expert training and support, to help you tackle even the most challenging paint correction projects. Visit our website CARDIAGTECH.NET or contact us at +1 (641) 206-8880 for more information.
6. Preventative Measures for Maintaining Your Car’s Paint
What preventative measures can be taken to maintain a car’s paint job and prevent future issues? Proactive maintenance preserves the paint’s integrity, preventing damage and maintaining the car’s aesthetic appeal.
Taking preventative measures is crucial for maintaining your car’s paint job and preventing future issues. Here are some essential tips:
- Regular Washing: Wash your car regularly (ideally every 1-2 weeks) to remove dirt, grime, and contaminants that can damage the paint. Use a high-quality car wash soap and a soft microfiber towel to avoid scratching the paint.
- Waxing and Sealing: Apply a coat of wax or sealant every 3-6 months to protect the paint from UV rays, oxidation, and other environmental factors. Wax and sealant create a barrier that helps prevent contaminants from bonding to the paint.
- Avoid Harsh Chemicals: Avoid using harsh chemicals or abrasive cleaners on your car’s paint, as they can damage the clear coat and cause fading or discoloration. Use only products specifically designed for automotive paint.
- Park in the Shade: When possible, park your car in the shade to protect it from direct sunlight. UV rays can cause the paint to fade and oxidize over time.
- Cover Your Car: If you can’t park in the shade, consider using a car cover to protect the paint from the elements.
- Remove Contaminants Promptly: Remove bird droppings, tree sap, and other contaminants as soon as possible, as they can etch into the paint and cause permanent damage.
- Proper Drying Techniques: After washing your car, use a clean microfiber towel or a leaf blower to dry it. Avoid using abrasive towels or allowing the car to air dry, as this can cause water spots and swirl marks.
- Professional Detailing: Consider having your car professionally detailed once or twice a year. Professional detailers have the knowledge, tools, and products to properly clean, polish, and protect your car’s paint.
According to a 2022 report by the AAA, regular car maintenance, including paint care, can help extend the life of your vehicle and maintain its resale value.
Here’s a summary table of preventative measures:
| Measure | Description | Benefits |
|---|---|---|
| Regular Washing | Washing the car every 1-2 weeks with high-quality car wash soap and a soft microfiber towel. | Removes dirt, grime, and contaminants that can damage the paint. |
| Waxing and Sealing | Applying wax or sealant every 3-6 months. | Protects the paint from UV rays, oxidation, and other environmental factors. |
| Avoid Harsh Chemicals | Using only products specifically designed for automotive paint. | Prevents damage to the clear coat and avoids fading or discoloration. |
| Park in the Shade | Parking the car in the shade to protect it from direct sunlight. | Prevents the paint from fading and oxidizing over time. |
| Remove Contaminants Promptly | Removing bird droppings, tree sap, and other contaminants as soon as possible. | Prevents etching into the paint and avoids permanent damage. |
| Professional Detailing | Having the car professionally detailed once or twice a year. | Provides thorough cleaning, polishing, and protection of the paint. |
By implementing these preventative measures, you can keep your car’s paint looking its best for years to come. CARDIAGTECH.NET offers a range of high-quality car care products and tools to help you maintain your vehicle’s appearance. Visit our website CARDIAGTECH.NET or contact us at 276 Reock St, City of Orange, NJ 07050, United States, or call +1 (641) 206-8880 for expert advice and product recommendations.
7. The Role of CARDIAGTECH.NET in Automotive Paint Repair
How does CARDIAGTECH.NET contribute to the automotive paint repair process, and what unique solutions does it offer? CARDIAGTECH.NET provides tools, equipment, and expertise, supporting both DIY enthusiasts and professional technicians in achieving optimal results.
CARDIAGTECH.NET plays a crucial role in the automotive paint repair process by offering a wide range of high-quality tools, equipment, and expert advice. We cater to both DIY enthusiasts and professional technicians, providing the resources needed to achieve optimal results.
-
Comprehensive Product Range: CARDIAGTECH.NET offers a comprehensive selection of tools and materials for every stage of the paint repair process, including:
- Sanding Tools: Sandpaper, sanding blocks, and wet sanding kits.
- Paint Supplies: Primers, automotive paints, clear coats, and paint thinners.
- Application Tools: Spray guns, spray cans, masking tape, and masking paper.
- Polishing Tools: Polishing compounds, buffing pads, and polishing machines.
- Safety Gear: Respirators, gloves, and eye protection.
-
High-Quality Products: We source our products from leading manufacturers to ensure the highest quality and performance. Our tools and materials are designed to withstand the demands of automotive paint repair and deliver professional-grade results.
-
Expert Advice and Support: CARDIAGTECH.NET provides expert advice and support to help customers choose the right tools and materials for their specific needs. Our knowledgeable staff can answer questions, offer guidance, and provide technical assistance throughout the paint repair process.
-
Training Resources: We offer training resources, including articles, videos, and online tutorials, to help customers improve their paint repair skills and techniques. Our training materials cover a wide range of topics, from basic surface preparation to advanced paint correction methods.
-
Custom Solutions: CARDIAGTECH.NET understands that every paint repair project is unique. We offer custom solutions tailored to the specific needs of our customers, including:
- Paint Matching: We can match the exact color of your car’s paint using advanced color-matching technology.
- Tool Kits: We offer pre-packaged tool kits that include everything you need to complete a specific paint repair task.
- Bulk Discounts: We offer bulk discounts on large orders of tools and materials.
CARDIAGTECH.NET is committed to providing the highest quality products, expert advice, and exceptional customer service. We are dedicated to helping our customers achieve professional-grade results and maintain the appearance and value of their vehicles.
Here’s a summary table of CARDIAGTECH.NET’s role in automotive paint repair:
| Role | Description | Benefits |
|---|---|---|
| Product Supplier | Offering a comprehensive range of high-quality tools and materials for every stage of the paint repair process. | Ensures customers have access to the best products for achieving optimal results. |
| Expert Advisor | Providing expert advice and support to help customers choose the right tools and materials. | Helps customers make informed decisions and avoid costly mistakes. |
| Training Resource Provider | Offering training resources to help customers improve their paint repair skills and techniques. | Enables customers to develop the skills and knowledge needed to perform professional-grade paint repairs. |
| Custom Solution Provider | Offering custom solutions tailored to the specific needs of our customers. | Ensures customers have access to the resources they need to complete their paint repair projects successfully. |
For all your automotive paint repair needs, trust CARDIAGTECH.NET. Visit our website CARDIAGTECH.NET, contact us at 276 Reock St, City of Orange, NJ 07050, United States, or call +1 (641) 206-8880 for expert assistance and the best products in the industry. Let us help you achieve a flawless finish and maintain the beauty of your vehicle.
8. DIY vs. Professional Paint Repair: Making the Right Choice
When is it appropriate to attempt a DIY paint repair, and when is it best to seek professional help? Understanding the scope of the damage, skill level, and available resources helps in making an informed decision.
Deciding whether to tackle a paint repair project yourself or seek professional help depends on several factors. Here’s a breakdown to help you make the right choice:
DIY Paint Repair:
-
Pros:
- Cost Savings: DIY paint repair can be significantly cheaper than hiring a professional, especially for minor repairs.
- Flexibility: You can work on your own schedule and at your own pace.
- Learning Opportunity: DIY projects can be a great way to learn new skills and gain a better understanding of your car.
-
Cons:
- Time-Consuming: Paint repair can be a time-consuming process, especially if you’re not experienced.
- Skill Required: Achieving a professional-quality finish requires skill and attention to detail.
- Potential for Mistakes: Mistakes can be costly and time-consuming to fix.
- Tool Investment: You may need to invest in specialized tools and equipment.
-
When to Choose DIY:
- Minor Scratches and Swirl Marks: If you have minor scratches or swirl marks in the clear coat, you may be able to correct them with polishing compounds and a polishing machine.
- Small Chips and Dings: Small chips and dings can often be touched up with a touch-up paint kit.
- Basic Cleaning and Detailing: Regular washing, waxing, and detailing can be done at home with the right products and tools.
Professional Paint Repair:
-
Pros:
- Professional-Quality Results: Professional technicians have the skills, experience, and equipment to achieve a flawless finish.
- Time Savings: Professional repairs are typically completed much faster than DIY projects.
- Warranty: Many professional paint repair shops offer a warranty on their work.
-
Cons:
- Cost: Professional paint repair can be expensive, especially for major repairs.
- Inconvenience: You’ll need to drop off your car at the repair shop and wait for the work to be completed.
-
When to Choose Professional Repair:
- Deep Scratches: Deep scratches that penetrate the base coat or primer typically require professional repair.
- Body Damage: If your car has body damage, such as dents or rust, you’ll need to have it repaired by a professional body shop before painting.
- Large Areas of Damage: Large areas of damage, such as a scratched or faded hood or roof, may require professional painting.
- Color Matching: Achieving a perfect color match can be difficult, especially with older or custom paint colors. Professional paint repair shops have the equipment and expertise to match the color accurately.
According to a 2023 survey by Consumer Reports, customer satisfaction with professional auto body repair shops is generally high, with most respondents reporting that they were satisfied with the quality of the work and the overall experience.
Here’s a summary table to help you decide:
| Factor | DIY Paint Repair | Professional Paint Repair |
|---|---|---|
| Cost | Lower | Higher |
| Time | More time-consuming | Less time-consuming |
| Skill Level | Requires basic to intermediate skills | Requires professional skills and expertise |
| Damage Extent | Suitable for minor scratches, swirl marks, and small chips | Suitable for deep scratches, body damage, large areas of damage, and complex color matching |
| Quality of Finish | Can achieve good results with practice and attention to detail | Typically achieves a flawless, professional-quality finish |
Ultimately, the decision to DIY or seek professional help depends on your comfort level, budget, and the extent of the damage. If you’re unsure, it’s always best to consult with a professional paint repair shop for advice. Contact CARDIAGTECH.NET at +1 (641) 206-8880 for recommendations and assistance in finding the right solution for your paint repair needs.
9. Cost Analysis of Paint Repair Options
What are the typical costs associated with different paint repair options, and how can I budget effectively for these repairs? A clear understanding of costs allows for informed decision-making and effective financial planning.
Understanding the costs associated with different paint repair options is essential for budgeting effectively. Here’s a breakdown of typical costs:
DIY Paint Repair Costs:
-
Materials:
- Car wash soap: $10 – $20
- Detailing clay: $15 – $30
- Sandpaper: $10 – $20
- Primer: $10 – $20 per can
- Automotive paint: $20 – $50 per can
- Clear coat: $15 – $30 per can
- Polishing compound: $15 – $30
- Wax or sealant: $15 – $30
- Masking tape and paper: $10 – $20
-
Tools:
- Sanding block: $5 – $10
- Spray can handle: $10 – $20
- Polishing machine: $50 – $200 (if you don’t already own one)
- Buffing pads: $20 – $50
- Safety gear (respirator, gloves, eye protection): $30 – $50
Total DIY Cost: $250 – $600 (depending on the extent of the repair and the tools you need to purchase)
Professional Paint Repair Costs:
- Minor Scratch Repair: $150 – $300
- Bumper Repair: $300 – $700
- Panel Painting (e.g., door, hood): $500 – $1500
- Full Car Repaint: $3000 – $10000+ (depending on the size of the car, the quality of the paint, and the complexity of the job)
Factors Affecting Cost:
- Extent of Damage: The more extensive the damage, the higher the cost of repair.
- Type of Paint: Some types of paint, such as tri-coat or metallic paints, are more expensive to repair.
- Labor Rates: Labor rates vary depending on the location and the expertise of the technician.
- Quality of Materials: Using high-quality materials will increase the cost of repair but will also result in a longer-lasting finish.
Budgeting Tips:
- Get Multiple Estimates: Get estimates from several different paint repair shops to compare prices.
- Ask About Warranties: Make sure the repair shop offers a warranty on their work.
- Consider DIY for Minor Repairs: If you’re comfortable with DIY projects, you can save money by doing minor repairs yourself.
- Prioritize Repairs: If you have multiple areas of damage, prioritize the repairs that are most important to you.
- Shop Around for Materials: Compare prices on materials at different auto parts stores and online retailers.
According to a 2023 report by the Bureau of Labor Statistics (BLS), the median hourly wage for automotive body and glass repairers is $23.59. Labor costs can significantly impact the overall cost of professional paint repair.
Here’s a summary table of cost analysis:
| Repair Option | Typical Cost Range | Factors Affecting Cost |
|---|---|---|
| DIY Paint Repair | $250 – $600 | Extent of repair, tools needed, quality of materials |
| Professional Scratch Repair | $150 – $300 | Depth of scratch, type of paint |
| Professional Bumper Repair | $300 – $700 | Extent of damage, type of bumper |
| Professional Panel Painting | $500 – $1500 | Size of panel, type of paint, labor rates |
| Full Car Repaint | $3000 – $10000+ | Size of car, quality of paint, complexity of job, labor rates |
By understanding these costs and budgeting effectively, you can make informed decisions about your paint repair options and ensure that you get the best possible value for your money. CARDIAGTECH.NET offers a range of affordable tools and materials for DIY paint repair, as well as expert advice to help you choose the right products for your needs. Visit our website CARDIAGTECH.NET or contact us at 276 Reock St, City of Orange, NJ 07050, United States, or call +1 (641) 206-8880 for more information.
10. Frequently Asked Questions (FAQs)
What are some frequently asked questions about fixing a bad paint job on a car? Addressing common queries provides clarity and helps readers make informed decisions about paint repair.
Here are some frequently asked questions (FAQs) about fixing a bad paint job on a car:
Q1: What causes a bad paint job on a car?
A1: A bad paint job can be caused by several factors, including improper surface preparation, using low-quality paint, applying the paint incorrectly, and environmental factors such as humidity and temperature.
**Q2: