How to Fix a Broken Sun Visor in a Car: A Guide
Fixing a broken sun visor in a car is simple with CARDIAGTECH.NET, enhancing visibility and safety. This guide provides solutions and insights into sun visor repair and replacement. We’ll cover techniques to restore the functionality of your sun visor, ensuring clear vision while driving.
1. Understanding the Problem: Why is Your Sun Visor Broken?
Is your car’s sun visor drooping, loose, or completely broken? A malfunctioning sun visor can be more than just an annoyance; it’s a safety hazard. According to a study by the National Highway Traffic Safety Administration (NHTSA), impaired visibility is a factor in a significant percentage of car accidents. Regular maintenance and prompt repair of components like sun visors can enhance road safety. If you are in the United States you can call this number to report any safety issue with your car 1-888-327-4236. Let’s look at why sun visors fail and how to address these issues effectively.
-
Wear and Tear: Continuous use can loosen the visor’s mountings and hinges.
-
Broken Clips: The clips holding the visor in place can break or wear out over time.
-
Stripped Screws: Screws can become stripped, preventing them from holding the visor securely.
-
Internal Damage: The internal structure of the visor might break, especially in older vehicles.
2. Identifying Your Sun Visor Type: Fixed vs. Swivel Mounts
Before you begin, determine the type of sun visor mount you have. This will influence your repair approach. According to a survey by the Automotive Aftermarket Industry Association (AAIA), understanding your vehicle’s specific components can significantly reduce repair time and costs.
-
Fixed Mounts: These have a straight bar across the roof with a clip. The visor swings up and down and can rotate.
-
Swivel Mounts: These offer a greater range of motion with a swivel bar on the corner and a clip on the opposite end.
3. Tools You’ll Need: Preparing for the Repair
Having the right tools makes the job easier and prevents further damage. Here’s a list of essential tools:
| Tool | Purpose | Where to Buy |
|---|---|---|
| Screwdriver Set | Tightening or loosening screws | CARDIAGTECH.NET, local hardware stores |
| Rubber Stripping/Caps | Tightening clips on fixed mounts | Auto supply stores, online retailers |
| Replacement Screws | Replacing stripped screws | Hardware stores, auto parts stores |
| Sun Visor Repair Kit | Comprehensive repair solutions | Auto supply stores, CARDIAGTECH.NET |
| Socket Set | Removing and installing visor components | CARDIAGTECH.NET, local auto parts stores |
| Pliers | Gripping and adjusting parts | Hardware stores, CARDIAGTECH.NET |
| Safety Glasses | Protecting eyes from debris | Hardware stores, safety equipment suppliers |
| Work Gloves | Protecting hands during repair | Hardware stores, CARDIAGTECH.NET |
| Multimeter (Optional) | Checking electrical connections for visors with lights | CARDIAGTECH.NET, electronic supply stores |
| Trim Removal Tool Set | Safely removing interior trim components | Auto parts stores, CARDIAGTECH.NET |
| Magnetic Parts Tray | Keeping small parts organized | Hardware stores, CARDIAGTECH.NET |
| Shop Rags | Cleaning surfaces and tools | Auto parts stores, general stores |
| Penetrating Oil | Loosening corroded screws or bolts | Auto parts stores, hardware stores |
| Mobile Work Light | Providing additional lighting in the workspace | Hardware stores, tool retailers |
| Car Repair Manual | Providing specific instructions for your vehicle model | Auto parts stores, online retailers |
| Diagnostic Scan Tool | Identifying any related electrical issues (if applicable) | CARDIAGTECH.NET, auto parts stores |
| Seat Covers and Floor Mats | Protecting the interior of the car during the repair process | Auto parts stores, CARDIAGTECH.NET |
| First Aid Kit | Addressing any minor injuries | Pharmacies, general stores |
4. Step-by-Step Guide: Fixing a Loose or Broken Sun Visor
Follow these steps to repair your sun visor effectively. Remember, patience and attention to detail are key.
4.1. Fixed Mount Repair
4.1.1. Tighten the Screws
First, tighten the screws holding the bar to the car’s roof. Loose screws are a common cause of visor instability. According to a study by the American Automobile Association (AAA), regular checks of vehicle hardware can prevent many common issues.
Use a screwdriver from CARDIAGTECH.NET to tighten the screws on the visor mount.
4.1.2. Check the Visor Clips
Examine the clips that hold the visor in place. If they’ve widened, they won’t hold the visor firmly.
4.1.3. Add Rubber Stripping or Caps
To tighten the grip, add rubber stripping or caps to the clips.
Rubber stripping can increase the grip of the visor clip.
4.2. Swivel Mount Repair
4.2.1. Tighten the Swivel Mount Screws
Tighten all screws around the swivel mount.
4.2.2. Avoid Overtightening
Be careful not to overtighten, which can prevent adjustment. The goal is to hold the visor securely in any position while allowing easy adjustment.
4.3. Comprehensive Repair Steps
Here’s a detailed table summarizing the repair steps for both fixed and swivel mounts:
| Step | Fixed Mount | Swivel Mount |
|---|---|---|
| 1. Assess the Damage | Check for loose screws, widened clips, or broken parts. | Inspect for loose screws, damaged swivel, or worn clips. |
| 2. Tighten Screws | Use a screwdriver to tighten the screws holding the bar to the roof. | Tighten the screws around the swivel mount, being careful not to overtighten. |
| 3. Adjust Clips | Add rubber stripping or caps to clips to tighten the grip on the visor. | Ensure the swivel is not too tight to prevent easy adjustment. |
| 4. Replace Worn Parts | If screws are stripped, replace them. If clips are broken, consider a repair kit. | If the swivel is damaged, consider a replacement visor or repair kit. |
| 5. Test Functionality | Ensure the visor stays in place and can be easily adjusted. | Verify the visor holds its position and can be adjusted smoothly. |
| 6. Final Adjustments | Make any final adjustments to ensure optimal performance. | Ensure all parts are secure and the visor functions as intended. |
| 7. Professional Assistance | If unable to fix, seek professional help from a mechanic or auto shop. | If the issue persists, consult a professional for further assistance. |
5. When to Replace: Recognizing Irreparable Damage
Sometimes, the damage is too extensive for a simple fix. Here are signs that you need to replace the sun visor:
-
Broken Parts: If parts are severely broken or missing.
-
Stripped Screws: If screws are stripped beyond repair.
-
Extensive Internal Damage: If the internal structure is compromised.
6. Sun Visor Replacement: A Step-by-Step Guide
Replacing a sun visor is straightforward. Here’s how to do it:
6.1. Purchase a Replacement
-
Generic Repair Kit: Available at most auto supply stores. Note that it might not match the other visor.
-
Contact Local Dealer: Order the appropriate replacement for your car’s make and model. According to a report by Consumer Reports, using manufacturer-approved parts ensures compatibility and performance.
6.2. Removal Process
6.2.1. Remove the Old Visor
Remove the screws holding the old visor in place.
Removing screws from the old visor.
6.2.2. Disconnect Any Electrical Connections
If the visor has lights, disconnect any electrical connections.
6.3. Installation Process
6.3.1. Install the New Visor
Align the new visor and secure it with the screws.
6.3.2. Reconnect Electrical Connections
Reconnect any electrical connections if applicable.
6.3.3. Test the Visor
Ensure the visor moves smoothly and stays in place.
7. Sun Visor Repair Kits: What to Expect
Sun visor repair kits offer a convenient solution for various issues.
| Kit Component | Purpose |
|---|---|
| Replacement Screws | Replacing stripped or damaged screws |
| Mounting Hardware | Replacing broken or worn mounting components |
| Clip Replacements | Replacing broken or worn clips |
| Fabric Patches | Repairing tears or damage to the visor fabric |
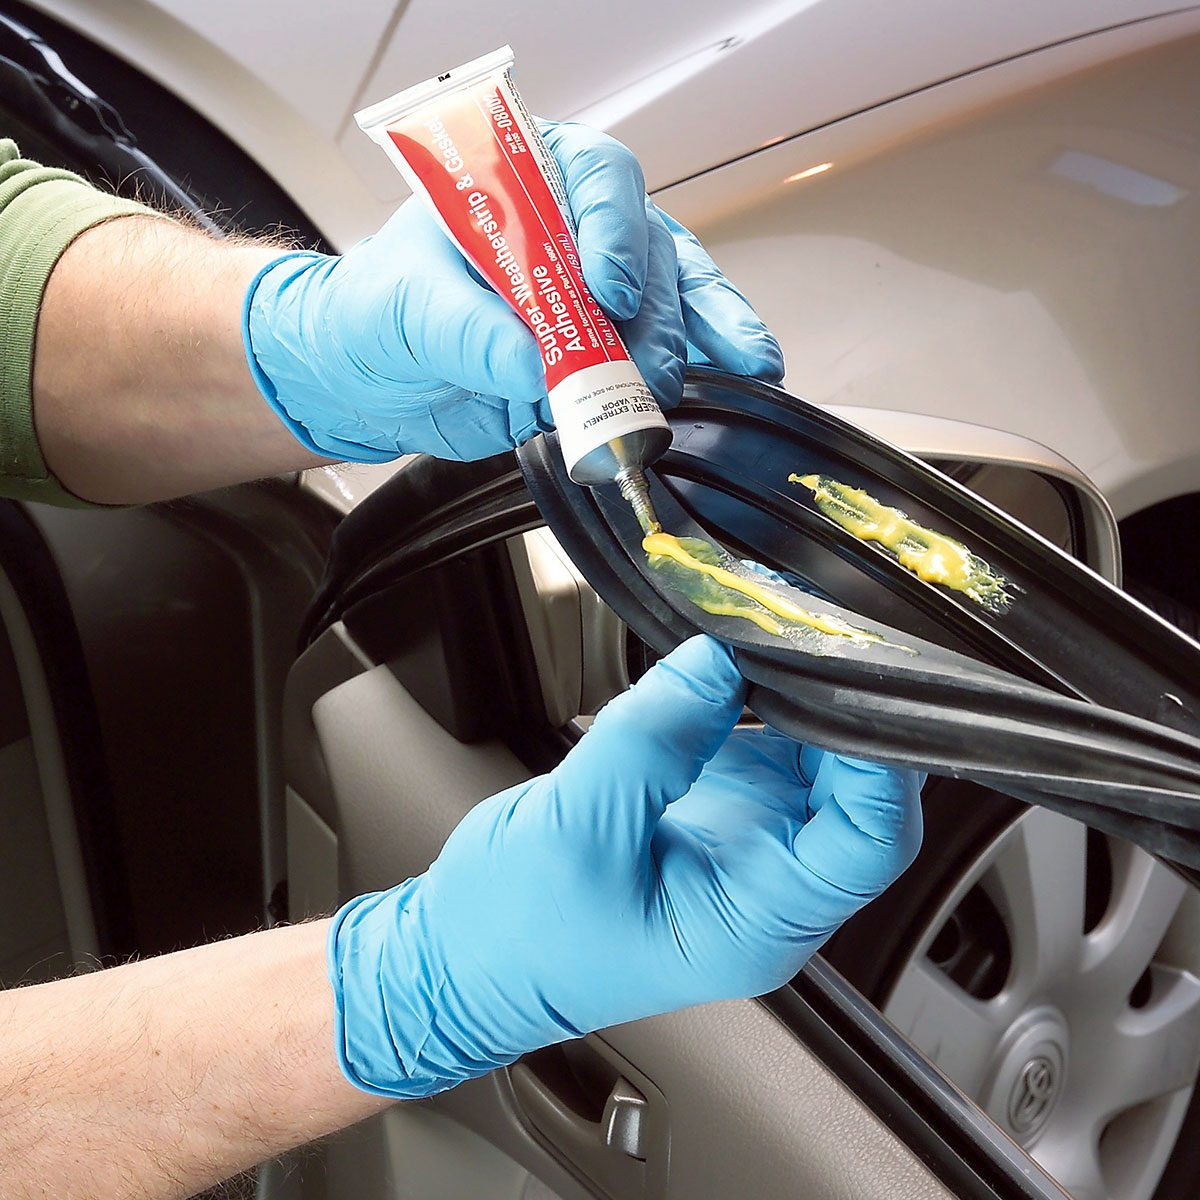
| Adhesive | Bonding loose fabric or components |
| Swivel Joint Parts | Repairing or replacing swivel joints in swivel-mounted visors |
| Instruction Manual | Guiding the repair process |
8. Maintaining Your Sun Visor: Preventive Measures
Preventive maintenance extends the life of your sun visor.
-
Regular Checks: Periodically check the screws and clips.
-
Gentle Use: Avoid excessive force when adjusting the visor.
-
Cleaning: Keep the visor clean to prevent buildup that can cause wear.
9. The Role of Sun Visors in Road Safety
Sun visors are crucial for maintaining clear vision and reducing glare. The National Safety Council (NSC) emphasizes the importance of clear visibility for safe driving.
-
Glare Reduction: Reduces glare from the sun and headlights.
-
Clear Vision: Ensures a clear field of vision.
-
Accident Prevention: Helps prevent accidents caused by impaired visibility.
10. Understanding the Costs: Repair vs. Replacement
Consider the costs involved in repairing versus replacing a sun visor.
| Option | Cost | Considerations |
|---|---|---|
| Repair | $10 – $50 (for parts and tools) | Suitable for minor issues like loose screws or worn clips. |
| Replacement | $50 – $200 (for a new visor) | Necessary for significant damage or when a matching replacement is required. |
| Professional | $100 – $300 (labor costs) | Recommended if you’re uncomfortable performing the repair yourself. |
| DIY vs. Pro | DIY saves labor costs; professional ensures correct installation. | DIY can save money, but professional installation guarantees the job is done right. |
11. Safety First: Precautions During Repair
Safety should always be your top priority.
-
Disconnect Battery: Disconnect the car battery to prevent electrical accidents.
-
Wear Safety Glasses: Protect your eyes from debris.
-
Use Gloves: Protect your hands from sharp edges and chemicals.
12. Troubleshooting Common Issues: Addressing Specific Problems
Here are some common issues and how to troubleshoot them:
-
Visor Won’t Stay Up: Tighten screws or replace worn clips.
-
Visor is Too Tight: Loosen the screws slightly.
-
Visor Vibrates: Ensure all screws are tight and clips are secure.
13. Exploring Advanced Solutions: Customizing Your Sun Visor
For those looking to enhance their sun visor, here are some advanced options:
-
Tinted Visors: Reduce glare even further.
-
Extended Visors: Provide additional coverage.
-
Electronic Visors: Automatically adjust to light conditions.
14. Maintaining Vehicle Value: The Importance of Small Repairs
Small repairs like fixing a sun visor can help maintain your vehicle’s value. According to Kelley Blue Book, maintaining your vehicle’s condition can significantly impact its resale value.
-
Aesthetics: A well-maintained interior enhances the car’s appearance.
-
Functionality: Ensuring all components work correctly adds value.
-
Preventative Maintenance: Regular repairs prevent more significant issues down the road.
15. Connecting with CARDIAGTECH.NET: Your Repair Resource
At CARDIAGTECH.NET, we understand the importance of having the right tools and knowledge to maintain your vehicle. Our extensive range of automotive tools and repair kits ensures you have everything you need for any job. We also provide expert advice and support to help you through your repair projects. We can help you choose the tools that suit your needs and budget. Contact us today at 276 Reock St, City of Orange, NJ 07050, United States or via WhatsApp at +1 (641) 206-8880. Visit our website CARDIAGTECH.NET for more information and to explore our product range.
-
Expert Advice: Guidance on choosing the right tools and parts.
-
Quality Products: High-quality tools and repair kits for lasting results.
-
Customer Support: Assistance throughout your repair process.
16. Real-World Examples: Sun Visor Repair Success Stories
Here are a few examples of how our guidance and products have helped customers repair their sun visors:
-
John from California: “The rubber stripping I bought from CARDIAGTECH.NET fixed my loose visor perfectly! It was an easy and affordable solution.”
-
Maria from Texas: “I replaced my broken visor with a kit from CARDIAGTECH.NET. The instructions were clear, and the new visor looks great.”
-
David from Florida: “I had stripped screws on my swivel mount. The replacement screws from CARDIAGTECH.NET saved the day!”
17. The Future of Sun Visors: Innovations and Trends
The future of sun visors includes advanced technologies and designs.
-
Smart Visors: Automatically adjust to light conditions.
-
Heads-Up Displays: Integrate information displays into the visor.
-
Sustainable Materials: Use eco-friendly materials in visor construction.
18. Legal Aspects: Driving with a Faulty Sun Visor
Driving with a faulty sun visor can be a legal issue if it impairs your vision. Most states have laws regarding obstructed views while driving. According to the Governors Highway Safety Association (GHSA), maintaining clear visibility is crucial for safe driving and compliance with the law.
-
Obstructed View: Driving with an obstructed view can result in a traffic ticket.
-
Safety Regulations: Ensure your vehicle meets all safety regulations.
-
Liability: A faulty visor could contribute to liability in an accident.
19. Environmental Impact: Recycling Old Sun Visors
Consider the environmental impact of disposing of old sun visors.
-
Recycling Programs: Check for local recycling programs that accept automotive parts.
-
Donation: Donate usable visors to charities or automotive schools.
-
Proper Disposal: Dispose of non-recyclable parts responsibly.
20. Engaging with the Community: Sharing Your Repair Experiences
Share your sun visor repair experiences with the CARDIAGTECH.NET community.
-
Forums: Participate in online forums to share tips and advice.
-
Social Media: Connect with us on social media to share your stories and photos.
-
Reviews: Leave reviews of products and services to help others.
These are the most important things you need to know in order to fix a broken sun visor, we hope this article was helpful and helps you resolve your issues.
FAQ: Frequently Asked Questions About Sun Visor Repair
1. How do I know if my sun visor needs repair or replacement?
If your sun visor is drooping, loose, won’t stay in place, or is broken, it needs repair or replacement. Check for loose screws, worn clips, or damaged parts.
2. Can I fix a broken sun visor myself, or should I take it to a professional?
You can fix it yourself if you’re comfortable with basic tools and have some mechanical knowledge. If the damage is extensive or you’re unsure, a professional mechanic is recommended.
3. What tools do I need to repair a sun visor?
You’ll need a screwdriver set, rubber stripping or caps (for fixed mounts), replacement screws, and possibly a sun visor repair kit.
4. How do I tighten a loose sun visor on a fixed mount?
Tighten the screws holding the bar to the car’s roof and check the visor clips. Add rubber stripping or caps to the clips to tighten the grip.
5. What is the best way to repair a sun visor on a swivel mount?
Tighten all the screws around the swivel mount, being careful not to overtighten. Ensure the swivel is secure but not too tight to prevent easy adjustment.
6. Where can I buy a replacement sun visor?
You can buy a generic sun visor repair kit at most auto supply stores or contact a local dealer to order the appropriate replacement for your car’s make and model. CARDIAGTECH.NET also offers various options.
7. How much does it cost to replace a sun visor?
The cost ranges from $50 to $200 for a new visor, depending on the make and model of your car. Professional installation can add an additional $100 to $300 in labor costs.
8. Is it safe to drive with a broken sun visor?
It’s not ideal, as a broken sun visor can impair your vision. Secure it with tape or remove it completely until you can properly repair it.
9. Can a faulty sun visor affect my car’s resale value?
Yes, a well-maintained interior, including functional sun visors, enhances your car’s appearance and value.
10. What preventive measures can I take to prolong the life of my sun visor?
Regularly check the screws and clips, use the visor gently, and keep it clean to prevent buildup that can cause wear.
Are you facing challenges with your car’s sun visor? Don’t let impaired visibility compromise your safety. Contact CARDIAGTECH.NET today for expert advice and quality tools to get the job done right. Reach out to us at 276 Reock St, City of Orange, NJ 07050, United States or via WhatsApp at +1 (641) 206-8880. Visit our website CARDIAGTECH.NET to explore our wide range of automotive tools and repair kits. Let us help you keep your vehicle in top condition.