How to Fix a Burn Hole in Your Car Seat: A Complete Guide
Fixing a burn hole in your car seat can be a straightforward process that restores your vehicle’s interior. CARDIAGTECH.NET offers solutions to revitalize your car seats, making them look new again. Learn the simple steps and essential products needed to repair those unsightly burns and maintain your car’s aesthetic appeal with practical repair advice.
1. Understanding the Damage: Assessing Burn Holes in Car Seats
Burn holes in car seats are common, whether from cigarettes or other mishaps. Identifying the extent of the damage is the first step toward a successful repair.
1.1. Types of Car Seat Materials
Knowing the material of your car seat is crucial for choosing the right repair method. Here’s a quick breakdown:
- Leather: Durable and luxurious but prone to cracking and fading.
- Vinyl: Affordable and easy to clean, but can be susceptible to burns.
- Fabric: Comfortable but stains and burns easily.
1.2. Evaluating the Burn Damage
Assess the burn hole’s size, depth, and impact on surrounding material. Minor burns may only require a surface-level fix, while larger burns may need more extensive repair.
Here’s a quick guide to help you determine the level of repair needed:
| Damage Type | Description | Recommended Action |
|---|---|---|
| Surface Burn | Slight discoloration, minor texture change | Gentle cleaning and color touch-up |
| Small Hole (1/4″) | Small puncture, minimal material loss | Fabric or leather filler and color matching |
| Medium Hole (1/2″) | Noticeable hole, some surrounding damage | Patching with backing material and filler |
| Large Hole (1″+) | Significant damage, extensive material loss | Professional upholstery repair recommended |
| Melted Material | Material melted and hardened, often with residue | Careful removal of melted material and patching |
| Burned Stitching | Damaged or broken seams | Restitching or seam repair |
| Smell of Smoke | Lingering odor from the burn | Thorough cleaning and odor removal treatments |
2. Essential Tools and Materials for Car Seat Burn Repair
Before starting any repair, gather the necessary tools and materials. Having everything on hand will streamline the process. CARDIAGTECH.NET provides a wide array of tools for interior car repair.
2.1. Comprehensive List of Repair Essentials
Here’s what you’ll need to repair a burn hole in your car seat:
- Sharp Scissors or Scalpel: For trimming damaged material.
- Canvas or Backing Material: To provide a base for the filler.
- Flexible Glue or Leather Filler: To fill the hole.
- Fine Grit Sandpaper: For smoothing the repaired area.
- ColorBond LVP Refinisher: To match the original seat color.
- Cleaning Solution: To prepare the area for repair.
- Application Tools: Such as spatulas or small brushes for applying filler and color.
2.2. Sourcing High-Quality Materials
Using high-quality materials ensures a durable and seamless repair. CARDIAGTECH.NET offers top-notch repair products designed for automotive interiors.
- Flexible Glue: Look for adhesives specifically designed for automotive upholstery. These glues are flexible and resistant to temperature changes. According to a study by Adhesive.org, flexible adhesives can increase the lifespan of upholstery repairs by up to 30%.
- Leather Filler: Opt for a filler that’s easy to sand and paint. A good filler will seamlessly blend with the existing material.
- ColorBond LVP Refinisher: This product is designed to restore and renew leather and vinyl car seats, providing a durable finish that closely matches the original leather appearance.
3. Step-by-Step Guide: Repairing a Burn Hole in a Car Seat
Follow these detailed steps to effectively repair a burn hole in your car seat.
3.1. Step 1: Cleaning and Preparation
Begin by cleaning the area around the burn hole. Use a vacuum to remove loose debris, then wipe the area with a mild cleaning solution to remove any remaining dirt or grime.
- Why it’s important: Cleaning ensures better adhesion of repair materials.
- Pro Tip: Use a soft-bristled brush to gently scrub the area without damaging the surrounding material.
3.2. Step 2: Trimming the Burned Edges
Using sharp scissors or a scalpel, carefully trim away the burned edges of the hole. Remove only the discolored and damaged material, keeping the trimming as smooth and even as possible.
- Precision is key: Avoid cutting into the undamaged material to prevent enlarging the hole unnecessarily.
- Technique: Pinch the leather or fabric at the sides of the hole to make trimming easier.
3.3. Step 3: Creating a Backing
Cut a small piece of canvas or similar backing material slightly larger than the hole. Insert the backing into the hole so that it covers the hole on the underside and extends underneath the edges.
- Purpose: The backing provides a stable base for the filler.
- Installation Tip: Fold the canvas in half, insert it into the hole, and then unfold it to spread it out on the underside.
3.4. Step 4: Applying the Filler
Apply a flexible glue or leather filler to the hole, smoothing it to an even layer. Ensure the filler extends to the edges of the hole. Allow the layer to dry thoroughly. Repeat this process until the hole is completely filled.
- Layering is important: Apply thin layers to prevent cracking and ensure proper drying.
- Drying Time: Allow each layer to dry for the time recommended by the product manufacturer.
3.5. Step 5: Sanding the Surface
Once the final layer of filler is dry, use fine-grit sandpaper to smooth the surface. Gently sand the layer so that it is level with the edges, matching the texture of the surrounding seat material.
- Technique: Use light, circular motions to avoid creating uneven surfaces.
- Goal: The repaired area should be flush with the rest of the seat.
3.6. Step 6: Color Matching and Painting
Use ColorBond LVP Refinisher to color-match the repaired area to the rest of the seat. Apply a thin, even coat and allow it to dry. Apply additional coats as needed, allowing two minutes of dry time between coats.
- Color Matching: Find the exact OEM color match for a seamless look. CARDIAGTECH.NET can assist with this.
- Application: Spray in a well-ventilated area and use smooth, even strokes.
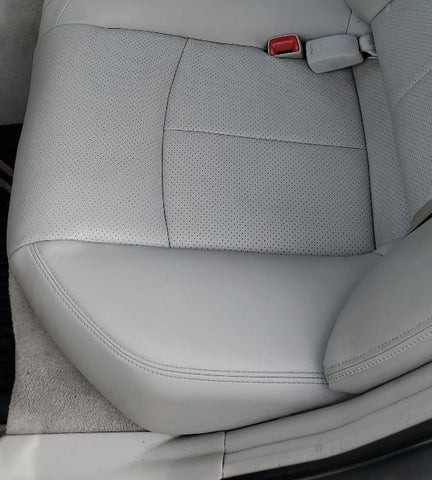
Car seat repair with ColorBond LVP Refinisher, showing a seamless color match and restored texture
3.7. Step 7: Final Touches and Sealing
After the paint has dried, inspect the area for any imperfections. If necessary, apply another thin coat of paint or lightly sand any rough spots. For added protection, consider applying a leather sealant to the repaired area.
- Sealing Benefits: Protects the repaired area from wear and tear.
- Inspection: Ensure the color and texture perfectly match the surrounding material for a seamless finish.
4. Advanced Techniques for Complex Burn Repairs
For more extensive damage, advanced techniques might be necessary to achieve a professional-quality repair.
4.1. Dealing with Large Burn Holes
Large burn holes require more than just filler. You’ll need to create a more substantial backing and possibly use a fabric patch that closely matches the original material.
- Fabric Patch: Cut a piece of matching fabric slightly larger than the hole and glue it to the backing.
- Securing the Patch: Ensure the patch is securely attached to the backing before applying the filler.
4.2. Restoring Damaged Stitching
If the burn has damaged the stitching, you’ll need to restitch the area. Use a curved needle and thread that matches the original stitching.
- Stitching Technique: Follow the original stitch pattern as closely as possible.
- Thread Matching: Use high-quality thread that matches the color and thickness of the original thread.
4.3. Working with Different Materials
Different car seat materials require different repair techniques. Leather requires specialized leather fillers and conditioners, while fabric may need fabric patches and dyes.
- Leather: Use leather-specific products to maintain the material’s natural look and feel.
- Fabric: Choose fabric patches that closely match the original material in color, texture, and pattern.
5. Maintaining Your Car Seat After Repair
Proper maintenance is essential to prolong the life of your repaired car seat and prevent future damage.
5.1. Regular Cleaning
Clean your car seats regularly to remove dirt, grime, and spills. Use a mild cleaning solution and a soft cloth to avoid damaging the material.
- Frequency: Clean your car seats at least once a month, or more often if needed.
- Cleaning Products: Use products specifically designed for automotive interiors to avoid damaging the material.
5.2. Conditioning Leather Seats
Leather seats require regular conditioning to prevent cracking and drying. Use a high-quality leather conditioner every few months to keep the leather supple and protected.
- Conditioning Benefits: Keeps the leather soft, prevents cracking, and protects against UV damage.
- Application: Apply the conditioner evenly and allow it to soak into the leather before wiping off the excess.
5.3. Protecting Against Future Damage
Take steps to protect your car seats from future damage, such as using seat covers, avoiding smoking in the car, and being careful with sharp objects.
- Seat Covers: Protect your seats from spills, stains, and wear and tear.
- Preventative Measures: Avoid eating or drinking in the car to prevent spills and stains.
6. Common Mistakes to Avoid When Repairing Burn Holes
Avoiding common mistakes can save you time and ensure a professional-looking repair.
6.1. Using the Wrong Materials
Using the wrong materials can lead to poor results and further damage. Always use products specifically designed for automotive interiors.
- Adhesives: Using the wrong type of glue can damage the upholstery or fail to provide a lasting bond. Always use flexible glue designed for automotive use.
- Fillers: Using a filler that is not designed for leather or vinyl can result in a repair that cracks or does not properly adhere to the surface.
6.2. Applying Too Much Filler
Applying too much filler can create an uneven surface and make the repair more noticeable. Apply thin layers and allow each layer to dry thoroughly.
- Technique: Apply filler in thin, even layers to prevent cracking and ensure proper drying.
- Sanding: Sand the filler smooth after each layer to maintain an even surface.
6.3. Neglecting Color Matching
Failing to properly color-match the repaired area can result in a noticeable patch. Use ColorBond LVP Refinisher to find the exact OEM color match for a seamless look.
- Color Selection: Identify the correct OEM color code for your car’s interior.
- Application: Apply the paint in thin, even coats, allowing each coat to dry before applying the next.
7. Why Choose Professional Repair Services?
While DIY repairs can be effective, professional repair services offer several advantages.
7.1. Expertise and Experience
Professional technicians have the expertise and experience to handle complex repairs and ensure a high-quality finish.
- Skill: Professionals have honed their skills through years of experience, allowing them to tackle even the most challenging repairs.
- Knowledge: They possess in-depth knowledge of materials, techniques, and products, ensuring the best possible outcome.
7.2. Access to Specialized Tools and Materials
Professionals have access to specialized tools and materials that are not readily available to the general public.
- Tools: Professional-grade tools allow for more precise and efficient repairs.
- Materials: Access to a wider range of high-quality materials ensures a durable and seamless repair.
7.3. Time and Convenience
Hiring a professional can save you time and effort, allowing you to focus on other tasks.
- Efficiency: Professionals can complete repairs quickly and efficiently, minimizing downtime for your vehicle.
- Convenience: You can avoid the hassle of DIY repairs and enjoy a professionally restored car seat.
8. CARDIAGTECH.NET: Your Partner in Automotive Repair Solutions
CARDIAGTECH.NET is dedicated to providing high-quality automotive repair solutions for professionals and DIY enthusiasts alike. We offer a wide range of tools, equipment, and materials to help you keep your vehicle in top condition.
8.1. Wide Range of Products
From diagnostic tools to repair materials, CARDIAGTECH.NET offers everything you need to tackle any automotive repair project. Our products are sourced from trusted manufacturers and are designed to meet the highest standards of quality and performance.
8.2. Expert Support and Guidance
Our team of experienced professionals is here to provide expert support and guidance to help you choose the right products and techniques for your repair needs. Whether you’re a seasoned technician or a DIY novice, we’re here to help you achieve the best possible results. Contact us via Whatsapp at +1 (641) 206-8880 for immediate assistance.
8.3. Commitment to Quality and Innovation
At CARDIAGTECH.NET, we’re committed to quality and innovation. We continuously update our product offerings to incorporate the latest technologies and techniques, ensuring that our customers have access to the best possible solutions.
9. Real-World Examples: Successful Car Seat Burn Repairs
Seeing successful repairs can inspire confidence and provide practical insights. Here are a few real-world examples of car seat burn repairs.
9.1. Case Study 1: Leather Seat Restoration
A luxury sedan had a significant cigarette burn on its leather seat. The owner opted for professional repair services. The technician carefully trimmed the damaged area, created a leather patch, and seamlessly integrated it with the existing seat. The result was a flawless repair that restored the seat to its original condition.
- Technique Used: Leather patching and color matching.
- Outcome: A seamless repair that restored the seat to its original condition.
9.2. Case Study 2: Fabric Seat Repair
A family car had a small burn hole on its fabric seat. The owner decided to tackle the repair themselves using a fabric repair kit from CARDIAGTECH.NET. They carefully followed the instructions, applied the fabric patch, and blended the colors. The repair was nearly invisible, saving the owner the cost of professional services.
- Technique Used: Fabric patching and color blending.
- Outcome: A cost-effective DIY repair that effectively concealed the burn hole.
9.3. Case Study 3: Vinyl Seat Refurbishment
A classic car had multiple small burns on its vinyl seats. The owner used ColorBond LVP Refinisher to restore the seats. After cleaning and preparing the surface, they applied several thin coats of the refinisher, carefully matching the original color. The seats looked brand new, enhancing the car’s overall aesthetic.
- Technique Used: Vinyl refinishing with ColorBond LVP Refinisher.
- Outcome: A complete restoration of the vinyl seats, enhancing the car’s overall appearance.
10. Frequently Asked Questions (FAQs) About Car Seat Burn Repair
Here are some frequently asked questions about car seat burn repair to help you better understand the process.
10.1. Can I repair a burn hole myself, or should I hire a professional?
Whether you can repair a burn hole yourself depends on the size and complexity of the damage, as well as your skill level and access to the right tools and materials. Small, surface-level burns can often be repaired successfully with a DIY kit. However, larger, more complex burns, or damage to leather seats, may require professional attention.
10.2. What is the best way to clean a car seat before repairing a burn hole?
Before repairing a burn hole, it’s essential to clean the area thoroughly to remove any dirt, debris, or grime. Use a vacuum cleaner to remove loose particles, then wipe the area with a mild cleaning solution and a soft cloth. For leather seats, use a cleaner specifically designed for leather.
10.3. How do I match the color of the repair material to my car seat?
Matching the color of the repair material to your car seat is crucial for a seamless repair. ColorBond LVP Refinisher is available in over 205 OEM certified colors, making it simple to find a matching color. You can also consult with a professional auto upholstery shop for color matching assistance.
10.4. What type of filler should I use for repairing a burn hole in a car seat?
The type of filler you should use depends on the material of your car seat. For leather seats, use a leather filler specifically designed for automotive use. For fabric seats, use a fabric filler or a combination of fabric patch and adhesive.
10.5. How long does it take to repair a burn hole in a car seat?
The time it takes to repair a burn hole in a car seat depends on the size and complexity of the damage, as well as your skill level. A small, surface-level burn may take as little as an hour to repair, while a larger, more complex burn may take several hours or even days.
10.6. Can I use household glue for repairing a burn hole in a car seat?
No, you should not use household glue for repairing a burn hole in a car seat. Household glue is not designed to withstand the temperature changes and wear and tear that car seats are subjected to. Use a flexible glue specifically designed for automotive upholstery.
10.7. How do I prevent future burn holes in my car seats?
To prevent future burn holes in your car seats, avoid smoking in the car, be careful with sharp objects, and use seat covers to protect your seats from spills, stains, and wear and tear.
10.8. Is it worth repairing a burn hole in a car seat, or should I just replace the seat?
Whether it’s worth repairing a burn hole in a car seat or replacing the seat depends on the extent of the damage, the value of your car, and your budget. If the damage is minor and the cost of repair is less than the cost of replacement, it may be worth repairing the seat. However, if the damage is extensive or the cost of repair is close to the cost of replacement, it may be more cost-effective to replace the seat.
10.9. What are the best products for maintaining car seats after repair?
After repairing a car seat, it’s essential to maintain it properly to prolong its life and prevent future damage. Use a mild cleaning solution and a soft cloth to clean your car seats regularly. For leather seats, use a high-quality leather conditioner every few months.
10.10. Where can I find high-quality car seat repair products?
You can find high-quality car seat repair products at CARDIAGTECH.NET. We offer a wide range of tools, equipment, and materials to help you keep your vehicle in top condition. Visit our website or contact us via Whatsapp at +1 (641) 206-8880 for immediate assistance. Our address is 276 Reock St, City of Orange, NJ 07050, United States.
Call to Action
Don’t let unsightly burn holes detract from the beauty and value of your vehicle. Contact CARDIAGTECH.NET today at +1 (641) 206-8880 for expert advice and high-quality repair solutions. Whether you’re a seasoned technician or a DIY enthusiast, we have everything you need to restore your car seats to their former glory. Visit CARDIAGTECH.NET to explore our wide range of products and take the first step towards a flawless interior. Let us help you enhance your driving experience with top-notch automotive repair solutions. Our address is 276 Reock St, City of Orange, NJ 07050, United States.