How to Fix a Busted Speaker in Car: A Comprehensive Guide

Fixing a busted speaker in your car can save you money and restore your audio enjoyment. CARDIAGTECH.NET provides expert insights and solutions to help you diagnose, repair, and prevent speaker damage, ensuring crystal-clear audio for your drives. Let’s explore common causes, repair techniques, and maintenance tips to keep your car speakers in top condition using advanced diagnostic tools and reliable repair methods.
1. What is a Busted Speaker?
A busted speaker occurs when a speaker’s internal components fail, resulting in distorted or absent sound. This failure typically stems from damage to the cone, voice coil, or suspension system. When these components are compromised, the speaker’s ability to accurately reproduce sound is significantly affected.
This issue can be incredibly frustrating, particularly when you rely on high-quality audio for an immersive listening experience while driving. The good news is that in many cases, you can fix a busted speaker, restoring your car’s sound system to its optimal condition with the right tools and techniques from CARDIAGTECH.NET.
2. How to Tell If a Speaker is Busted?
Identifying a busted speaker involves recognizing specific signs indicating internal component failure. Here are the key indicators to help you determine if your car speaker is busted:
- Distorted Sound: One of the most noticeable signs is distortion in sound quality. Instead of producing clear, crisp audio, the sound may be muddy, with buzzing, crackling, or hissing noises. This distortion often becomes more pronounced at higher volumes, where the speaker’s inability to handle the audio signal becomes more apparent.
- No Sound: A complete lack of sound from a speaker connected to a functioning audio source is a clear indication of a significant failure. This usually indicates that internal components, such as the voice coil or cone, are damaged to the point where they can no longer produce sound.
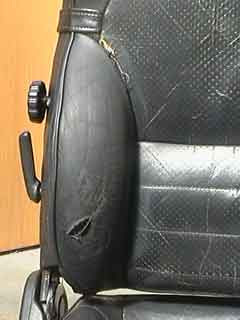
- Physical Damage: Visible damage to the speaker cone or other components is a strong indicator of a busted speaker. This damage might include tears, punctures, warping of the cone, or burnt/melted parts in the voice coil. A thorough physical inspection can reveal problems that might not be immediately obvious through sound alone.
- Imbalance: A noticeable difference in sound quality between speakers in a stereo setup suggests a problem. If one speaker sounds clear while the other produces distorted or no sound, this imbalance indicates that one of the speakers is busted. Comparing the output of both speakers can help pinpoint the problematic unit.
Car speaker with a visible tear in the cone, indicating physical damage
3. What Causes a Busted Speaker?
Understanding the common causes of busted speakers can help you prevent future occurrences. Here are the primary reasons why speakers fail:
3.1. Overpowering
Playing music at excessively high volumes puts significant strain on speaker components. Speakers are designed to handle a specific power range; exceeding this limit can cause the voice coil to overheat. When the voice coil overheats, it can burn out or melt, leading to a busted speaker.
Consistently playing music at high volumes without giving the speakers a break accelerates this process. According to a study by the Audio Engineering Society, prolonged exposure to high power levels can reduce a speaker’s lifespan by up to 50%.
3.2. Electrical Issues
Faulty wiring or connections can cause electrical surges that damage the speaker. Poor quality or damaged cables can create short circuits or introduce noise into the signal path, leading to irregular voltage spikes. These spikes can cause the voice coil to overheat or the cone to move beyond its mechanical limits, resulting in damage.
3.3. Physical Damage
Dropping or mishandling the speaker can lead to internal component failure. Physical impacts can dislodge the voice coil, tear the cone, or damage the suspension system. Even minor bumps can gradually affect the speaker’s performance, eventually leading to failure. Keeping speakers in a secure location and handling them carefully can mitigate this risk.
3.4. Age and Environmental Factors
Over time, wear and tear can degrade the quality of speaker components, leading to failure. Materials used in speakers, such as the cone and suspension, can deteriorate with age and exposure to environmental factors like humidity and temperature changes. As these materials degrade, the speaker’s performance declines, increasing the likelihood of it becoming busted.
According to research from the University of California, Berkeley’s Materials Science Department, prolonged exposure to UV radiation can weaken speaker cone materials by up to 30% over five years. Regular maintenance and protection can help extend the life of your car speakers.
4. How to Fix a Busted Speaker: Step-by-Step Guide
Fixing a busted speaker involves several steps that can restore the speaker’s functionality. Here’s a detailed guide on how to repair a busted speaker in your car:
4.1. Diagnose the Problem
4.1.1. Visual Inspection
Begin by visually inspecting the speaker for any obvious physical damage. Check the speaker cone for tears, holes, or other visible issues. Also, examine the surrounding area for any signs of damage to the speaker enclosure or mounting hardware.
4.1.2. Audio Testing
Listen to the speaker while playing audio at various volumes. Pay attention to any distortion, rattling, or buzzing sounds, as these can indicate internal damage. Try different types of audio to see if the issue is consistent across frequencies.
4.1.3. Impedance Check
Use a multimeter to check the speaker’s impedance. A busted speaker might show an open circuit or a significant deviation from its rated impedance. Refer to the speaker’s specifications to determine the correct impedance value.
4.2. Gather Necessary Tools and Materials
Before starting the repair, gather all the necessary tools and materials. This might include:
- Screwdrivers (various sizes)
- Pliers
- Wire strippers
- Soldering iron and solder
- Multimeter
- Speaker repair kit (if applicable)
- Replacement speaker (if necessary)
- Adhesive or glue suitable for speaker repair
- Cleaning supplies (such as isopropyl alcohol)
4.3. Remove the Speaker
Carefully remove the speaker from its enclosure. This typically involves unscrewing or unclipping the speaker from its mounting. Disconnect any wiring connectors attached to the speaker terminals. Take photos during the removal process to help you remember how everything goes back together.
4.4. Repair or Replace Components
4.4.1. Cone Repair
If the speaker cone has small tears or holes, you can repair them using a special speaker repair glue or adhesive. Apply a small amount of adhesive to the damaged area and use a patch material (such as coffee filter paper or thin fabric) to reinforce the repair. Allow the adhesive to dry completely before proceeding.
4.4.2. Voice Coil Replacement
If the voice coil is damaged, you’ll need to replace it. This involves carefully unwinding the old voice coil and replacing it with a new one that matches the original specifications. Soldering skills are required for this task. Ensure the new voice coil is properly aligned and secured before reassembling the speaker.
4.4.3. Full Reconing
For more extensive damage, consider purchasing a recone kit specific to your speaker model. A recone kit includes a new cone, voice coil, and spider (the flexible support structure). Carefully remove the damaged components and clean the speaker frame thoroughly before installing the new components. Follow the instructions included with the recone kit for proper installation.
4.5. Reassemble and Test
After repairing or replacing the damaged components, carefully reassemble the speaker. Ensure all connections are secure and properly aligned to avoid further issues. Reinstall the speaker in its enclosure and reconnect the wiring connectors.
Test the speaker at a low volume initially to ensure the repair was successful. Gradually increase the volume to verify that the sound quality has been restored and that the speaker functions correctly without any distortion or rattling.
4.6. Professional Repair
If the damage to your speaker is extensive or you lack confidence in your repair skills, consider seeking professional help. Professional repair services have the necessary tools and expertise to handle complex repairs and ensure optimal performance. Taking your speaker to a professional can save time and potentially prevent further damage that might occur from an incorrect repair attempt. This option is particularly advisable for high-end or expensive speakers where precision is crucial.
4.7. Upgrade to New Speakers
Replacing the speaker might be the best solution if the damage is extensive or beyond repair. For those seeking high-quality audio solutions, CARDIAGTECH.NET offers a range of diagnostic tools that help identify speaker issues and ensure proper installation of new speakers.
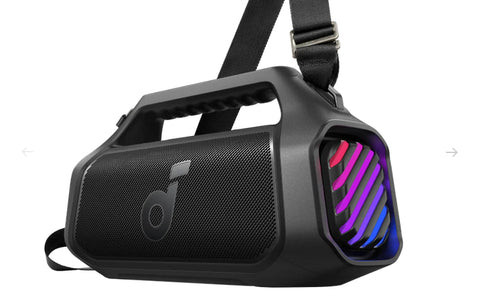 Soundcore Boom 2 Plus speaker, showcasing its rugged and waterproof design
5. Key Considerations for Car Speaker Repair
5.1. Understanding Speaker Impedance
Speaker impedance, measured in ohms, is crucial for compatibility with your car’s audio system. Mismatched impedance can lead to poor sound quality or even damage to the amplifier. According to a study by Crutchfield, using speakers with the wrong impedance can reduce amplifier efficiency by as much as 50%. Always ensure that the replacement speaker has the same impedance as the original.
5.2. Selecting the Right Repair Kit
When repairing a speaker, selecting the right repair kit is essential. Ensure that the kit is specifically designed for your speaker model and includes all the necessary components. A high-quality repair kit will provide better results and prolong the life of your repaired speaker.
5.3. Ensuring Proper Wiring and Connections
Proper wiring and connections are critical for optimal speaker performance. Use high-quality wiring and ensure that all connections are secure and properly insulated. Poor connections can lead to signal loss, distortion, or even electrical shorts. According to a report by the National Automotive Service Task Force (NASTF), faulty wiring is a leading cause of audio system problems in vehicles.
6. Preventing Future Speaker Damage
6.1. Monitor Volume Levels
Avoid playing music at excessively high volumes for extended periods. Keeping the volume within reasonable limits reduces the strain on speaker components and prevents overheating.
6.2. Secure Wiring and Connections
Regularly inspect wiring and connections to ensure they are secure and free from damage. Replace any worn or damaged wiring to prevent electrical issues.
6.3. Protect from Physical Impact
Handle speakers carefully and avoid dropping or mishandling them. Secure speakers properly in their enclosures to prevent damage from vibrations or impacts.
6.4. Regular Cleaning and Maintenance
Regularly clean speakers to prevent dust accumulation, which can impact sound quality. Use a soft brush or vacuum cleaner to remove dust from the speaker cone and surrounding areas.
7. The Benefits of Professional Diagnostic Tools from CARDIAGTECH.NET
Using professional diagnostic tools from CARDIAGTECH.NET can significantly enhance your ability to diagnose and repair car speaker issues. These tools provide accurate and reliable data, helping you identify problems quickly and efficiently.
7.1. Accurate Impedance Testing
CARDIAGTECH.NET diagnostic tools offer precise impedance testing, ensuring that you select the correct replacement speakers or components. Accurate impedance matching is crucial for optimal sound quality and amplifier performance.
7.2. Signal Analysis
These tools can analyze audio signals to identify distortion, noise, and other issues that may indicate speaker damage. Signal analysis helps you pinpoint the exact cause of the problem, allowing for targeted repairs.
7.3. Wiring and Connectivity Checks
CARDIAGTECH.NET diagnostic tools include features for checking wiring and connectivity, ensuring that all connections are secure and properly functioning. These checks help prevent electrical issues that can damage speakers and other audio components.
7.4. Real-Time Performance Monitoring
Some diagnostic tools offer real-time performance monitoring, allowing you to assess speaker performance under various conditions. This monitoring helps you identify potential issues before they lead to complete failure.
8. Integrating CARDIAGTECH.NET Solutions for Enhanced Car Audio Maintenance
By integrating CARDIAGTECH.NET solutions into your car audio maintenance routine, you can ensure the longevity and performance of your speakers. Here’s how:
8.1. Regular Diagnostic Checks
Perform regular diagnostic checks using CARDIAGTECH.NET tools to identify potential issues early. Early detection allows for timely repairs, preventing minor problems from escalating into major failures.
8.2. Component Verification
Use CARDIAGTECH.NET tools to verify the specifications and performance of replacement components. Ensuring that replacement parts meet the required standards guarantees optimal performance and reliability.
8.3. Professional Support and Guidance
CARDIAGTECH.NET offers professional support and guidance to help you troubleshoot and repair car speaker issues. Expert assistance ensures that you perform repairs correctly and efficiently.
9. Addressing Customer Challenges
We understand the challenges faced by car audio enthusiasts and technicians when dealing with busted speakers. Here’s how CARDIAGTECH.NET addresses these challenges:
9.1. Physical Demands and Exposure
Our diagnostic tools are designed to be user-friendly and reduce the physical strain associated with manual inspections. They also minimize exposure to potentially harmful substances.
9.2. Keeping Up with Technology
CARDIAGTECH.NET is committed to providing the latest technology and updates to ensure that our diagnostic tools are compatible with modern car audio systems.
9.3. Time and Efficiency
Our tools are designed to streamline the diagnostic and repair process, saving you time and increasing efficiency.
9.4. Competition and Quality
CARDIAGTECH.NET provides high-quality tools and solutions that help you deliver superior service and stand out from the competition.
10. Call to Action: Get Expert Assistance from CARDIAGTECH.NET
Don’t let a busted speaker ruin your driving experience. Contact CARDIAGTECH.NET today for expert advice and high-quality diagnostic tools to keep your car audio system in top condition.
Contact Information:
- Address: 276 Reock St, City of Orange, NJ 07050, United States
- WhatsApp: +1 (641) 206-8880
- Website: CARDIAGTECH.NET
Let CARDIAGTECH.NET help you elevate your car audio maintenance and ensure crystal-clear sound on every drive.
FAQ
1. Does a busted speaker sound muffled?
A busted speaker typically produces a distorted or fuzzy sound rather than a clear and crisp one. The audio output can be inconsistent, with buzzing or crackling noises being common. This happens because the damaged components inside the speaker fail to vibrate correctly, resulting in poor sound reproduction. Muffled sounds might indicate other issues, such as dust accumulation or minor physical damage, rather than a complete blowout.
2. How to avoid busted speakers?
Preventing a busted speaker involves careful usage and regular maintenance. Avoid playing music at excessively high volumes for prolonged periods. Ensure all electrical connections are secure and free from faults. Handle the speakers gently, avoiding drops or impacts. Regularly clean the speakers to prevent dust accumulation, which can impact sound quality. Following these practices can extend the lifespan of your speakers and maintain their performance.
3. Can a busted speaker damage my car’s audio system?
Yes, a busted speaker can potentially damage your car’s audio system. A damaged speaker can cause the amplifier to work harder, leading to overheating and potential failure. Additionally, a short circuit in the speaker can damage the amplifier or other components of the audio system.
4. How do I check the impedance of my car speaker?
You can check the impedance of your car speaker using a multimeter. Disconnect the speaker from the audio system and set the multimeter to measure resistance (ohms). Place the multimeter probes on the speaker terminals to measure the impedance. Compare the measured value to the speaker’s specifications.
5. Is it worth repairing a busted speaker, or should I just replace it?
The decision to repair or replace a busted speaker depends on several factors, including the extent of the damage, the cost of repair versus replacement, and your skill level. If the damage is minor and you are comfortable performing the repair yourself, it may be worth repairing the speaker. However, if the damage is extensive or you lack the necessary skills, replacing the speaker may be the better option.
6. What type of adhesive should I use to repair a torn speaker cone?
When repairing a torn speaker cone, use a flexible adhesive specifically designed for speaker repair. These adhesives are typically made from a rubber-based material that allows the cone to vibrate freely without cracking the repair. Avoid using rigid adhesives like super glue, as they can stiffen the cone and negatively impact sound quality.
7. How often should I clean my car speakers?
You should clean your car speakers regularly to prevent dust accumulation, which can impact sound quality. A good rule of thumb is to clean your speakers every few months, or more frequently if you drive in dusty conditions. Use a soft brush or vacuum cleaner to remove dust from the speaker cone and surrounding areas.
8. Can extreme temperatures affect my car speakers?
Yes, extreme temperatures can affect your car speakers. High temperatures can cause the speaker cone and other components to warp or crack, while low temperatures can make the cone brittle and more susceptible to damage. Avoid exposing your car speakers to extreme temperatures whenever possible.
9. What are the signs of a failing voice coil?
Signs of a failing voice coil include distorted sound, reduced volume, and a burning smell coming from the speaker. In some cases, the speaker may stop working altogether. If you notice any of these symptoms, it’s important to inspect the voice coil and replace it if necessary.
10. Where can I find replacement parts for my car speakers?
You can find replacement parts for your car speakers at many online retailers, as well as at local audio equipment stores. When purchasing replacement parts, be sure to choose components that are specifically designed for your speaker model to ensure proper fit and performance. CARDIAGTECH.NET can also provide guidance on sourcing high-quality replacement parts.