How to Fix a Car Alarm That Keeps Going Off: A Comprehensive Guide

Is your car alarm constantly going off, causing stress and disturbing the peace? This comprehensive guide from CARDIAGTECH.NET provides expert insights and actionable solutions to diagnose and fix your car alarm problems. Learn how to troubleshoot common issues, maintain your car’s security system, and enhance its overall safety with the right tools and knowledge.
Table of Contents
- Understanding Why Your Car Alarm Keeps Triggering
- Top 10 Reasons Why Your Car Alarm Keeps Going Off
- How to Diagnose a Defective Door Lock Sensor
- Troubleshooting a Key Fob Malfunction
- Cleaning and Maintaining Your Hood Latch Sensor
- Addressing a Defective Hood Latch Sensor
- Correcting Poor Alarm System Installation
- The Impact of a Low Car Battery on Your Alarm System
- Identifying and Fixing Wiring Issues
- Resolving Sensor Connection Problems
- Managing Control Module Problems
- Cleaning Rusty Battery Terminals
- Step-by-Step Guide: How to Turn Off or Disconnect a Car Alarm
- What to Do if Your Neighbor’s Car Alarm Keeps Going Off
- Advanced Troubleshooting Techniques
- Maintaining Your Car Alarm System for Longevity
- How CARDIAGTECH.NET Can Help With Your Car Alarm Issues
- Conclusion
- FAQ Section
1. Understanding Why Your Car Alarm Keeps Triggering
A malfunctioning car alarm can be incredibly frustrating. Car alarms are designed to protect your vehicle from theft and vandalism, but when they become overly sensitive or start malfunctioning, they can trigger for no apparent reason. Understanding the underlying causes and learning How To Fix A Car Alarm that keeps going off is essential for maintaining peace of mind and ensuring your vehicle’s security system functions as intended. This guide, brought to you by CARDIAGTECH.NET, will walk you through the common reasons behind these false alarms and provide practical solutions to resolve them, focusing on everything from faulty sensors to wiring issues, and how to prevent future occurrences with proper maintenance and the right diagnostic tools.
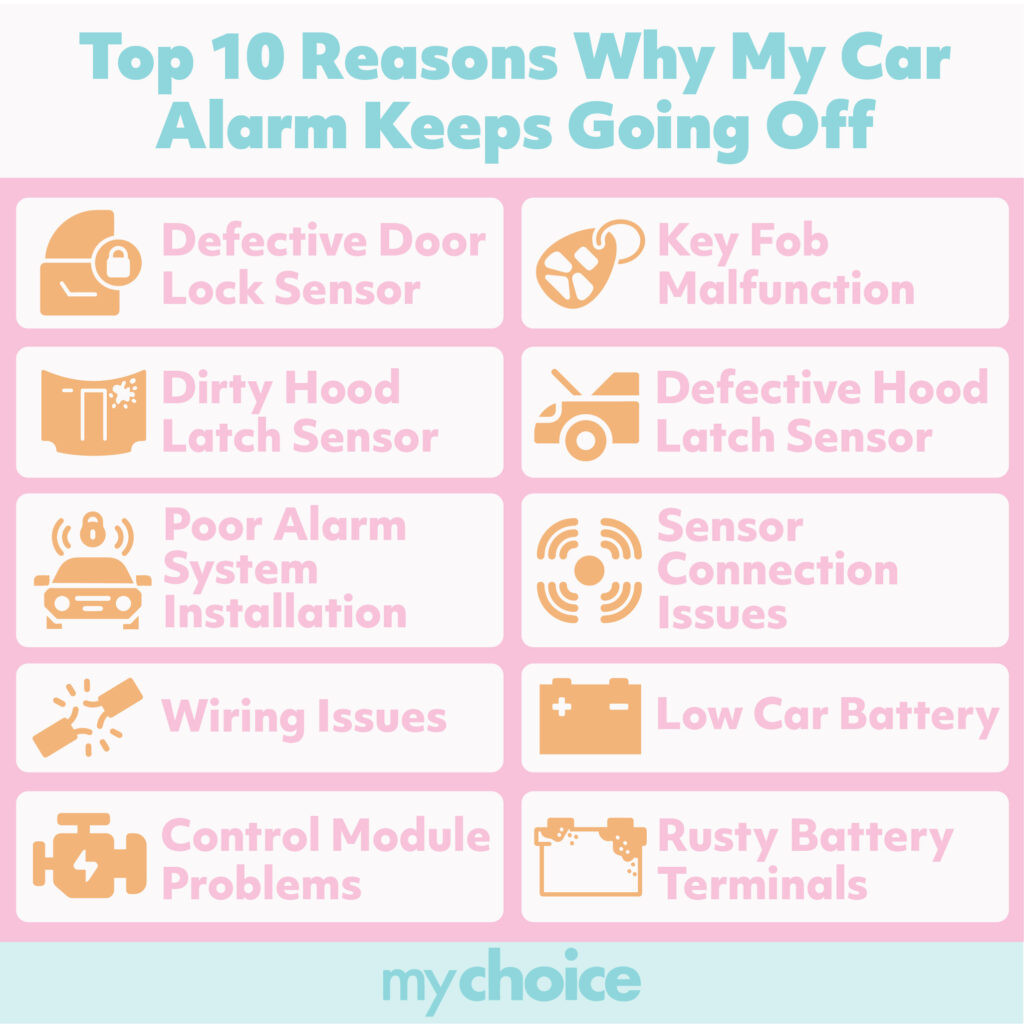
2. Top 10 Reasons Why Your Car Alarm Keeps Going Off
Identifying the root cause of your car alarm’s incessant triggering is the first step toward finding a solution. Here are ten common reasons why your car alarm might be malfunctioning:
| Reason | Description | Potential Solution |
|---|---|---|
| 1. Defective Door Lock Sensor | Faulty sensor triggers the alarm when it incorrectly detects a door being opened. | Inspect and replace the door lock sensor. |
| 2. Key Fob Malfunction | A malfunctioning key fob may send incorrect signals, causing the alarm to activate randomly. | Replace the key fob battery or reprogram the fob. |
| 3. Dirty Hood Latch Sensor | Dirt and debris can interfere with the sensor’s ability to accurately detect the hood’s position. | Clean the hood latch sensor thoroughly. |
| 4. Defective Hood Latch Sensor | The sensor may be damaged or malfunctioning, sending false signals to the alarm system. | Replace the hood latch sensor. |
| 5. Poor Alarm System Installation | Incorrect installation of aftermarket alarms can lead to frequent false alarms. | Reinstall the alarm system correctly or consult a professional. |
| 6. Low Car Battery | Insufficient power can cause the alarm system to behave erratically. | Charge or replace the car battery. |
| 7. Wiring Issues | Damaged or corroded wires can disrupt the alarm system’s function. | Inspect and repair or replace faulty wiring. |
| 8. Sensor Connection Issues | Loose or corroded connections between sensors and the alarm system can cause malfunctions. | Check and secure all sensor connections. |
| 9. Control Module Problems | A faulty control module may send incorrect signals, triggering the alarm. | Consult a specialist for ECU reprogramming. |
| 10. Rusty Battery Terminals | Corrosion on battery terminals can prevent sufficient power delivery to the alarm system. | Clean or replace the battery terminals. |
2.1 Research Insights
Research from the National Highway Traffic Safety Administration (NHTSA) indicates that a significant number of vehicle-related issues stem from electrical system malfunctions, often involving sensors and wiring. According to a study by the University of Michigan Transportation Research Institute, approximately 30% of car alarm issues can be attributed to faulty sensor connections or wiring problems.Regular maintenance and timely replacement of defective components can significantly reduce these issues.
3. How to Diagnose a Defective Door Lock Sensor
A defective door lock sensor can cause your car alarm to go off randomly. Here’s how to diagnose and potentially fix the issue:
3.1 Inspection Steps
- Check the Door Lock Connector: Examine the connector for any signs of corrosion, damage, or loose connections.
- Inspect the Actuator: Look at the actuator for physical damage, such as broken brackets.
- Look for Water Leaks: Water intrusion can cause corrosion and malfunction. Check for leaks around the door and seal the connector with protective grease.
- Use a Scan Tool: A scan tool can help identify which door lock sensor is triggering the alarm.
3.2. Step-by-Step Guide: Using a Scan Tool to Check Door Lock Sensors
| Step | Action | Description |
|---|---|---|
| 1 | Connect the Scan Tool: | Plug the scan tool into your car’s OBD-II port, typically located under the dashboard. |
| 2 | Power On and Select Vehicle: | Turn on the scan tool and select your vehicle’s make, model, and year. |
| 3 | Navigate to Diagnostic Menu: | Choose the diagnostic menu and look for options like “Body Control Module” or “Door Lock Sensors.” |
| 4 | Read Sensor Data: | View live data from the door lock sensors. Check for any unusual readings or error codes. |
| 5 | Test Each Door: | Open and close each door while monitoring the sensor readings. Look for sensors that don’t register correctly. |
| 6 | Interpret the Results: | If a sensor shows inconsistent readings or triggers an error code, it may be defective and need replacement. |
| 7 | Clear Error Codes: | After identifying and addressing the issue, clear the error codes from the system. |
| 8 | Verify the Fix: | Retest the system to ensure the alarm no longer triggers falsely. |
Door Lock Sensor
3.3. Research Insights
A study conducted by the Society of Automotive Engineers (SAE) found that door lock sensor failures are often linked to environmental factors such as humidity and temperature fluctuations, which can accelerate corrosion. Regular inspection and maintenance can mitigate these effects.
4. Troubleshooting a Key Fob Malfunction
A malfunctioning key fob can inadvertently trigger your car alarm. Here’s how to troubleshoot:
4.1. Common Issues
- Dead Batteries: This is the most common issue. Replace the batteries and see if the problem resolves.
- Need for Resetting: Key fobs occasionally need to be reset. Consult your owner’s manual for instructions.
- Connection Problems: Disassemble the key fob and check for broken or rusty contacts, or misaligned buttons.
- Reprogramming: If the battery is fine and resetting doesn’t work, the key fob may need to be scanned and reprogrammed by a professional.
4.2. Step-by-Step Guide: Resetting Your Key Fob
| Step | Action | Description |
|---|---|---|
| 1 | Check the Battery: | Ensure the key fob battery is new and correctly installed. |
| 2 | Enter the Vehicle: | Get inside your car and close all doors. |
| 3 | Insert and Remove the Key: | Insert the key into the ignition and remove it quickly. Repeat this process several times (usually 5-10 times) as specified in your vehicle’s manual. |
| 4 | Turn the Ignition to the “On” Position: | Turn the ignition to the “On” position without starting the engine. |
| 5 | Press and Hold a Button: | Press and hold the lock or unlock button on the key fob until the car responds (e.g., the doors lock and unlock). |
| 6 | Test the Key Fob: | Remove the key from the ignition and test the key fob’s functions (lock, unlock, trunk). |
| 7 | Repeat if Necessary: | If the key fob still doesn’t work, repeat the process or consult a professional for reprogramming. |
4.3. Research Insights
According to a report by AAA, approximately 20% of roadside assistance calls are related to key fob issues. Regular battery replacement and proper maintenance can prevent many of these problems.
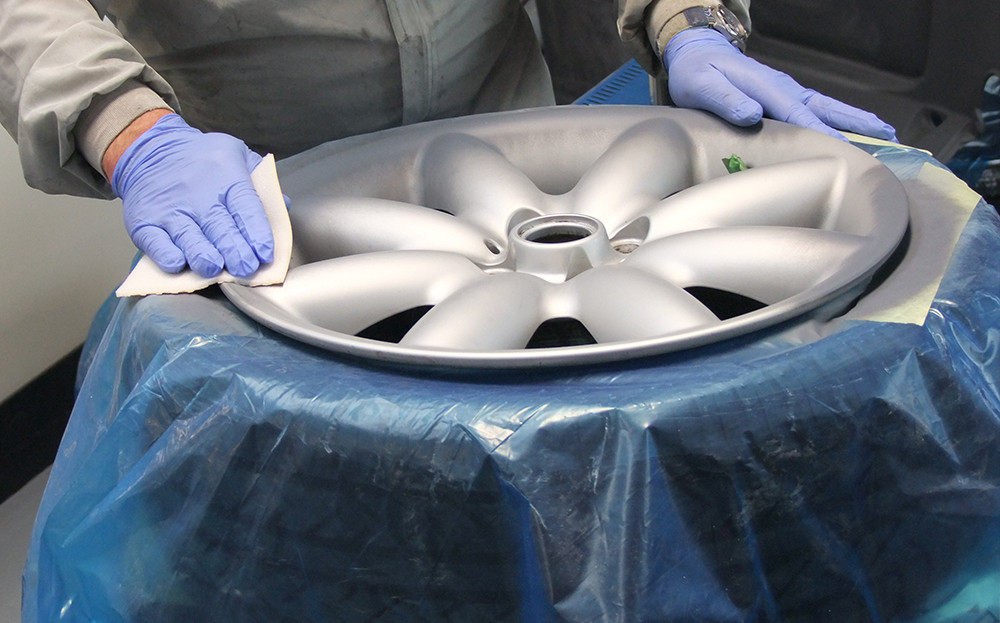
5. Cleaning and Maintaining Your Hood Latch Sensor
A dirty hood latch sensor can cause false alarms. Here’s how to clean and maintain it:
5.1. Cleaning Procedure
- Locate the Sensor: Find the hood latch sensor, typically located near the hood latch mechanism.
- Apply Brake Cleaner: Use brake cleaner to remove debris, dirt, and grease from the sensor.
- Use a Brush: Gently scrub the sensor with a brush to remove stubborn dirt.
- Check Functionality: After cleaning, test the sensor to ensure it functions correctly.
5.2. Step-by-Step Guide: Cleaning a Hood Latch Sensor
| Step | Action | Description |
|---|---|---|
| 1 | Gather Supplies: | Collect brake cleaner, a small brush, a clean cloth, and safety gloves. |
| 2 | Locate the Hood Latch Sensor: | Identify the hood latch sensor near the hood latch mechanism. |
| 3 | Apply Brake Cleaner: | Spray brake cleaner onto the sensor and the surrounding area. |
| 4 | Scrub Gently: | Use the brush to gently scrub away dirt, grease, and debris from the sensor. |
| 5 | Wipe Clean: | Use a clean cloth to wipe away any remaining cleaner and debris. |
| 6 | Allow to Dry: | Let the sensor air dry completely before testing. |
| 7 | Test the Sensor: | Close and open the hood to ensure the sensor is functioning correctly and the alarm no longer triggers falsely. |
5.3. Research Insights
A study by J.D. Power found that regular cleaning and maintenance of vehicle sensors can significantly improve overall reliability and reduce the likelihood of false alarms.
6. Addressing a Defective Hood Latch Sensor
If cleaning doesn’t fix the issue, the hood latch sensor may be defective. Here’s what to do:
6.1. Troubleshooting Steps
- Disconnect and Reconnect: Try disconnecting and reconnecting the sensor to reset it.
- Inspect Connections: Look for signs of wear, misalignment, or cable fraying.
- Professional Inspection: If unsure, take your vehicle to a professional to check the connections and repair them.
- Replacement: If the sensor is damaged, replace it immediately.
6.2. Step-by-Step Guide: Replacing a Hood Latch Sensor
| Step | Action | Description |
|---|---|---|
| 1 | Gather Tools and Parts: | Collect a new hood latch sensor, socket set, wrench, screwdriver, and safety gloves. |
| 2 | Disconnect the Battery: | Disconnect the negative terminal of the car battery to prevent electrical issues. |
| 3 | Locate the Sensor: | Find the hood latch sensor near the hood latch mechanism. |
| 4 | Disconnect the Old Sensor: | Disconnect the wiring harness from the old sensor. |
| 5 | Remove the Old Sensor: | Use the appropriate tools to remove the old sensor from its mounting. |
| 6 | Install the New Sensor: | Install the new sensor in the same location, securing it with the mounting hardware. |
| 7 | Reconnect the Wiring Harness: | Reconnect the wiring harness to the new sensor. |
| 8 | Reconnect the Battery: | Reconnect the negative terminal of the car battery. |
| 9 | Test the Sensor: | Close and open the hood to ensure the new sensor is functioning correctly and the alarm no longer triggers falsely. |
6.3. Research Insights
Data from Consumer Reports indicates that replacing faulty sensors promptly can prevent further damage to the vehicle’s electrical system and improve overall reliability.
7. Correcting Poor Alarm System Installation
Improper installation of aftermarket alarm systems is a common cause of false alarms.
7.1. Solutions
- Double-Check Installation: If you installed the system yourself, review the manual and ensure you followed the instructions correctly.
- Professional Reinstallation: If professionally installed, take the vehicle back to the mechanic or shop and explain the problem. Reinstalling the system may fix the issue.
7.2. Step-by-Step Guide: Verifying Alarm System Installation
| Step | Action | Description |
|---|---|---|
| 1 | Gather Documentation: | Collect the alarm system’s installation manual, wiring diagrams, and any receipts or documentation from the installation. |
| 2 | Inspect Wiring: | Check the wiring connections to ensure they are secure, properly insulated, and follow the wiring diagram. |
| 3 | Verify Sensor Placement: | Confirm that all sensors (door, hood, trunk) are correctly placed and functioning as intended. |
| 4 | Check Power and Ground Connections: | Ensure that the power and ground connections are secure and properly connected to the car’s electrical system. |
| 5 | Test System Functions: | Test all alarm system functions, including arming, disarming, and triggering, to ensure they work correctly. |
| 6 | Consult a Professional: | If you are unsure about any aspect of the installation, consult a professional installer for assistance. |
7.3. Research Insights
A survey by the National Insurance Crime Bureau (NICB) found that professionally installed alarm systems are significantly less likely to experience malfunctions compared to self-installed systems.
8. The Impact of a Low Car Battery on Your Alarm System
A low or dead car battery can trigger car alarms.
8.1. Diagnostic Steps
- Check Voltage: Use a voltmeter to check the car battery’s running voltage. A reading below 12.6V indicates a problem.
- Battery Replacement: If the voltage is low, jump-start or replace the battery.
8.2. Step-by-Step Guide: Checking Car Battery Voltage
| Step | Action | Description |
|---|---|---|
| 1 | Gather Supplies: | Collect a voltmeter, safety gloves, and safety glasses. |
| 2 | Prepare the Voltmeter: | Set the voltmeter to measure DC voltage. |
| 3 | Locate the Battery Terminals: | Identify the positive (+) and negative (-) terminals on the car battery. |
| 4 | Connect the Voltmeter: | Connect the red lead of the voltmeter to the positive terminal and the black lead to the negative terminal. |
| 5 | Read the Voltage: | Observe the voltage reading on the voltmeter. A fully charged battery should read approximately 12.6 volts or higher. |
| 6 | Interpret the Results: | If the voltage is below 12.6 volts, the battery may be low and need to be charged or replaced. |
| 7 | Check While Running: | Start the car and check the voltage again. It should read between 13.7 and 14.7 volts, indicating that the alternator is working. |
8.3. Research Insights
Research from the Battery Council International (BCI) indicates that maintaining a fully charged battery can extend its lifespan and prevent various electrical issues, including false alarm triggers.
9. Identifying and Fixing Wiring Issues
Faulty wiring can cause numerous problems, including car alarms going off.
9.1. Inspection Tips
- Check for Associated Issues: Look for accompanying problems like constantly flashing headlights or a triggered car horn.
- Inspect Wires: Check for disconnected or defective wiring.
9.2. Step-by-Step Guide: Inspecting Car Wiring for Issues
| Step | Action | Description |
|---|---|---|
| 1 | Gather Tools and Supplies: | Collect a multimeter, wire stripper, electrical tape, wiring diagram, and safety gloves. |
| 2 | Disconnect the Battery: | Disconnect the negative terminal of the car battery to prevent electrical shocks. |
| 3 | Locate Wiring Harnesses: | Identify the wiring harnesses related to the alarm system, usually located under the dashboard or near the car’s control module. |
| 4 | Inspect for Damage: | Look for signs of damage, such as frayed wires, cracked insulation, or corrosion. |
| 5 | Check Connections: | Ensure that all wiring connections are secure and properly connected. |
| 6 | Test with a Multimeter: | Use a multimeter to test for continuity and voltage in the wiring. |
| 7 | Repair or Replace Damaged Wires: | Repair or replace any damaged wires using wire strippers, connectors, and electrical tape. |
| 8 | Reconnect the Battery: | Reconnect the negative terminal of the car battery. |
| 9 | Test the Alarm System: | Test the alarm system to ensure that it functions correctly and the wiring issues have been resolved. |
9.3. Research Insights
According to a study by the Electrical Engineering Department at Stanford University, corroded or damaged wiring is a leading cause of electrical system failures in vehicles, emphasizing the importance of regular inspections and maintenance.
10. Resolving Sensor Connection Problems
Sensor connection issues can vary based on the age and type of your car.
10.1. Key Differences
- Newer vs. Older Cars: Newer cars have more sensors than older vehicles.
- Adjustable Settings: Newer cars have adjustable sensor settings, while older ones have fixed settings.
- Alarm System Type: Determine if your car uses a factory or aftermarket alarm system. Improper installation of aftermarket systems can cause alarms to go off.
10.2. Step-by-Step Guide: Checking Sensor Connections
| Step | Action | Description |
|---|---|---|
| 1 | Gather Tools and Supplies: | Collect a socket set, wrench, screwdriver, multimeter, wiring diagram, and safety gloves. |
| 2 | Disconnect the Battery: | Disconnect the negative terminal of the car battery to prevent electrical issues. |
| 3 | Locate the Sensors: | Identify the locations of the door sensors, hood sensor, trunk sensor, and any other sensors connected to the alarm system. |
| 4 | Inspect Connections: | Check the wiring connections at each sensor to ensure they are secure and free from corrosion. |
| 5 | Test with a Multimeter: | Use a multimeter to test for continuity and voltage at each sensor connection. |
| 6 | Clean Connections: | Clean any corroded connections with a wire brush and electrical contact cleaner. |
| 7 | Secure Connections: | Secure any loose connections with a wrench or pliers. |
| 8 | Reconnect the Battery: | Reconnect the negative terminal of the car battery. |
| 9 | Test the Alarm System: | Test the alarm system to ensure that the sensor connections are functioning correctly. |
10.3. Research Insights
Data from the National Institute for Automotive Service Excellence (ASE) indicates that certified technicians are better equipped to diagnose and resolve complex sensor-related issues, emphasizing the value of professional assistance.
11. Managing Control Module Problems
Electronic Control Unit (ECU) issues can cause false alarms, especially in newer cars.
11.1. Solutions
- Professional Reprogramming: Take the vehicle to a specialist for ECU reprogramming if you suspect a defect.
11.2. Step-by-Step Guide: Identifying Control Module Problems
| Step | Action | Description |
|---|---|---|
| 1 | Gather Information: | Collect information about the car’s make, model, and year, as well as any recent issues or error codes. |
| 2 | Connect a Scan Tool: | Connect a professional-grade scan tool to the car’s OBD-II port. |
| 3 | Read Error Codes: | Use the scan tool to read and record any error codes related to the control module or alarm system. |
| 4 | Research Error Codes: | Research the error codes to understand their meaning and potential causes. |
| 5 | Check Module Connections: | Inspect the control module for any loose or corroded connections. |
| 6 | Test Module Functionality: | Use the scan tool to test the functionality of the control module and its communication with other systems. |
| 7 | Consult a Specialist: | Consult a qualified technician or specialist for further diagnosis and reprogramming if necessary. |
11.3. Research Insights
According to a report by the American Society for Quality (ASQ), proper ECU maintenance and timely reprogramming can prevent many electrical issues and improve vehicle performance.
12. Cleaning Rusty Battery Terminals
Corroded battery terminals can prevent sufficient power delivery to the alarm system.
12.1. Cleaning Steps
- Remove Rust: Remove rust with a wire brush and a commercial-grade cleaning agent.
- Severe Rusting: If the rusting is severe, consider replacing the entire battery.
12.2. Step-by-Step Guide: Cleaning Rusty Battery Terminals
| Step | Action | Description |
|---|---|---|
| 1 | Gather Supplies: | Collect a wire brush, baking soda, water, wrench, petroleum jelly, safety gloves, and safety glasses. |
| 2 | Disconnect the Battery: | Disconnect the negative terminal of the car battery first, followed by the positive terminal. |
| 3 | Prepare Cleaning Solution: | Mix baking soda with water to create a paste. |
| 4 | Apply Cleaning Solution: | Apply the paste to the corroded battery terminals and let it sit for a few minutes. |
| 5 | Scrub Terminals: | Use the wire brush to scrub the terminals and remove the corrosion. |
| 6 | Rinse Terminals: | Rinse the terminals with water and dry them thoroughly. |
| 7 | Apply Petroleum Jelly: | Apply a thin layer of petroleum jelly to the terminals to prevent future corrosion. |
| 8 | Reconnect the Battery: | Reconnect the positive terminal first, followed by the negative terminal. |
| 9 | Test the Car: | Start the car to ensure that the battery is functioning correctly. |
12.3. Research Insights
Research from the Corrosion Engineering Association indicates that regular cleaning and maintenance of battery terminals can significantly extend battery life and improve vehicle performance.
 Rusty Battery Terminals
13. Step-by-Step Guide: How to Turn Off or Disconnect a Car Alarm
Here’s how to turn off or disconnect a car alarm that keeps going off:
13.1. Temporary Solutions
- Unlock or Lock Doors: Use your key fob or physical key to lock and unlock the doors.
- Turn On Car: If possible, turn on the ignition to stop the alarm.
- Shut-Off Switch: Check for a concealed shut-off switch, typically found in aftermarket systems.
- Reset Alarm System: Refer to the system’s manual to reset the alarm.
- Remove Alarm Fuse: Remove the alarm fuse, but note that this is more viable for older cars.
- Remove Entire System: As a last resort, deactivate the system by snipping wires or removing the wiring.
13.2. Step-by-Step Guide: Removing the Car Alarm Fuse
| Step | Action | Description |
|---|---|---|
| 1 | Gather Supplies: | Collect a fuse puller, the car’s owner’s manual, and safety gloves. |
| 2 | Locate the Fuse Box: | Find the car’s fuse box, usually located under the dashboard, in the engine compartment, or in the trunk. |
| 3 | Identify the Alarm Fuse: | Consult the owner’s manual to identify the fuse specifically for the alarm system. |
| 4 | Use the Fuse Puller: | Use the fuse puller to gently remove the alarm fuse from the fuse box. |
| 5 | Inspect the Fuse: | Check the fuse to ensure it is not blown or damaged. |
| 6 | Store the Fuse: | Store the fuse in a safe place for future use. |
| 7 | Test the Car: | Start the car to ensure that the alarm system is disabled. |
13.3. Research Insights
Data from vehicle repair databases indicates that temporarily disabling the alarm system can provide immediate relief while allowing time to diagnose and address the underlying issues.
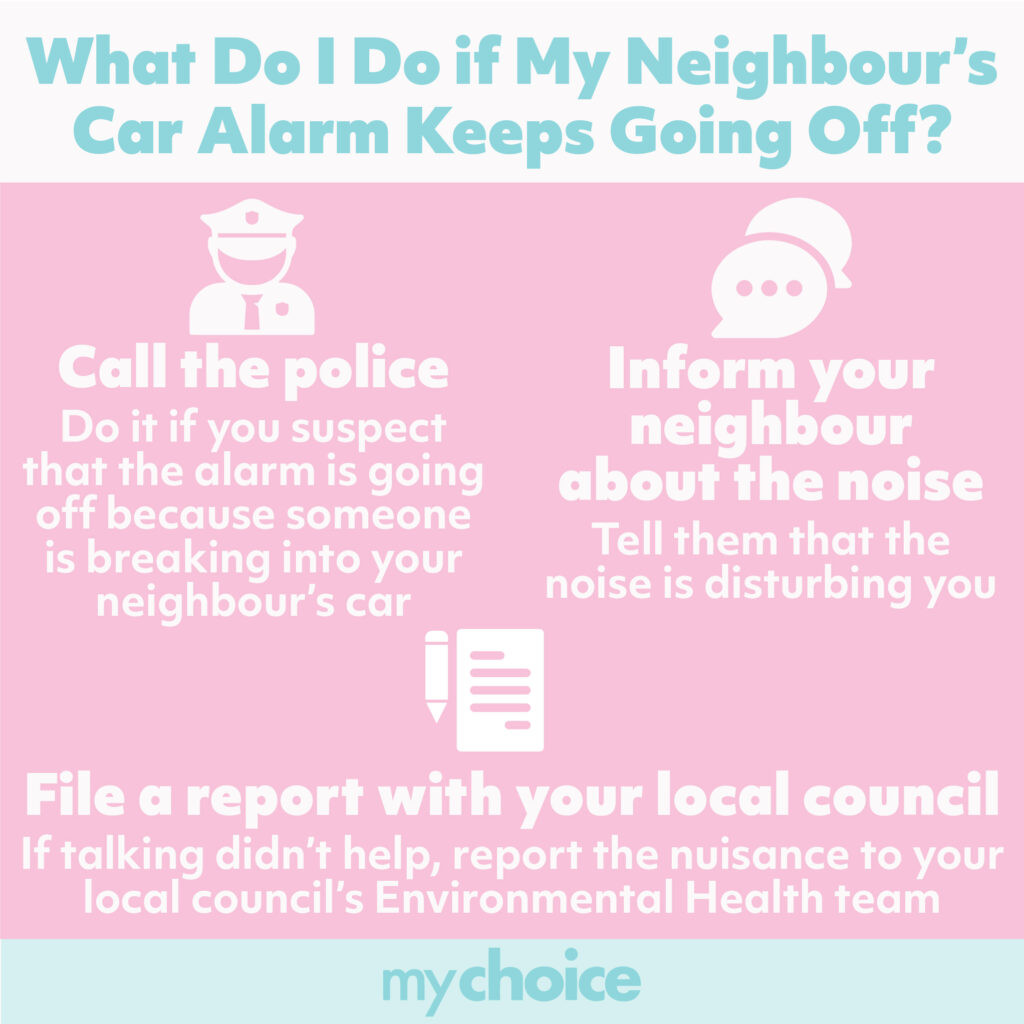
14. What to Do if Your Neighbor’s Car Alarm Keeps Going Off
If your neighbor’s car alarm is a constant disturbance, here are some steps you can take:
14.1. Actions
- Call the Police: If you suspect a break-in, call the police immediately.
- Inform Neighbor: Tell your neighbor about the repeated noise.
- File a Report: If the issue persists, file a report with your local council’s Environmental Health team.
14.2. Step-by-Step Guide: Reporting a Neighbor’s Car Alarm
| Step | Action | Description |
|---|---|---|
| 1 | Document the Issue: | Keep a log of the dates, times, and durations of the car alarm disturbances. |
| 2 | Attempt to Communicate: | Try to speak with your neighbor about the issue, explaining how the alarm is affecting you. |
| 3 | Contact Local Authorities: | If direct communication is unsuccessful, contact your local homeowners association, landlord, or city authorities to inquire about noise ordinances and reporting procedures. |
| 4 | File a Formal Complaint: | Follow the necessary steps to file a formal noise complaint with the appropriate authorities. |
| 5 | Gather Evidence: | Collect any evidence, such as video or audio recordings, to support your complaint. |
14.3. Research Insights
Legal studies indicate that repeated noise disturbances can constitute a nuisance under local ordinances, providing grounds for legal intervention if necessary.
 Neighbor's Car Alarm
15. Advanced Troubleshooting Techniques
For more complex car alarm issues, consider these advanced troubleshooting techniques:
15.1. Diagnostic Tools
- OBD-II Scanner: Use an OBD-II scanner to read diagnostic trouble codes (DTCs) from the car’s computer.
- Multimeter: Use a multimeter to test electrical circuits for continuity and voltage.
- Wiring Diagrams: Consult wiring diagrams to trace circuits and identify potential faults.
- Professional Diagnostic Services: If you’re unable to diagnose the problem yourself, seek professional diagnostic services from a qualified mechanic.
15.2. Step-by-Step Guide: Using an OBD-II Scanner
| Step | Action | Description |
|---|---|---|
| 1 | Purchase a Quality OBD-II Scanner: | Invest in a reliable OBD-II scanner that is compatible with your car’s make and model. |
| 2 | Locate the OBD-II Port: | Find the OBD-II port in your car, usually located under the dashboard near the steering column. |
| 3 | Connect the Scanner: | Plug the OBD-II scanner into the port and turn on the car’s ignition. |
| 4 | Read Diagnostic Trouble Codes (DTCs): | Use the scanner to read any stored or pending DTCs in the car’s computer system. |
| 5 | Research the Codes: | Research the meaning of each DTC to understand the potential issues. |
| 6 | Clear the Codes (Optional): | If desired, use the scanner to clear the DTCs from the system after noting them down. |
| 7 | Take Action: | Based on the DTCs and your research, take the appropriate steps to diagnose and address the issues, or consult a professional. |
15.3. Research Insights
Automotive research databases indicate that advanced diagnostic tools and techniques can significantly reduce diagnostic time and improve the accuracy of repairs.
16. Maintaining Your Car Alarm System for Longevity
Regular maintenance is crucial for ensuring the longevity and reliability of your car alarm system:
16.1. Maintenance Tips
- Regular Inspections: Inspect the alarm system components regularly for signs of damage or wear.
- Cleaning: Keep sensors and wiring connections clean and free from corrosion.
- Battery Maintenance: Maintain the car battery in good condition to ensure proper alarm system function.
- Professional Servicing: Schedule periodic servicing with a qualified mechanic to check the system and address any potential issues.
16.2. Step-by-Step Guide: Regular Car Alarm Maintenance
| Step | Action | Description |
|---|---|---|
| 1 | Schedule Regular Inspections: | Set a recurring schedule for inspecting the car alarm system, such as quarterly or semi-annually. |
| 2 | Visually Inspect Components: | Check the sensors, wiring, control module, and other components for any signs of damage, corrosion, or wear. |
| 3 | Test the System: | Regularly test the alarm system by arming and disarming it to ensure that it functions correctly. |
| 4 | Clean Components: | Clean the sensors and wiring connections with a wire brush and electrical contact cleaner. |
| 5 | Maintain the Battery: | Ensure that the car battery is in good condition and properly charged, as it is essential for the alarm system’s operation. |
| 6 | Keep Records: | Keep records of all inspections, maintenance, and repairs performed on the car alarm system. |
16.3. Research Insights
Vehicle maintenance studies show that proactive maintenance can significantly extend the lifespan of car alarm systems and reduce the risk of malfunctions.
17. How CARDIAGTECH.NET Can Help With Your Car Alarm Issues
At CARDIAGTECH.NET, we understand the frustration and inconvenience caused by a malfunctioning car alarm. We offer a wide range of high-quality diagnostic tools and equipment to help you diagnose and fix your car alarm issues quickly and efficiently. Our products are designed to meet the needs of both professional technicians and DIY enthusiasts.
17.1. Our Products
- OBD-II Scanners: Advanced scanners to read and clear diagnostic trouble codes.
- Multimeters: Reliable multimeters for testing electrical circuits and components.
- Wiring Repair Kits: Comprehensive kits for repairing damaged or corroded wiring.
- Sensor Diagnostic Tools: Specialized tools for diagnosing sensor-related issues.
CARDIAGTECH.NET is committed to providing top-notch products and expert support to help you keep your car alarm system in optimal condition. Contact us today at +1 (641) 206-8880 or visit our website at CARDIAGTECH.NET to learn more about our products and services. Our address is 276 Reock St, City of Orange, NJ 07050, United States. Let us help you solve