How To Fix A Sagging Car Ceiling: A Comprehensive Guide

Is your car’s ceiling sagging? CARDIAGTECH.NET offers expert solutions to restore your vehicle’s interior without costly replacements. Discover effective methods and preventative tips to maintain your car ceiling and keep it looking its best, using top-quality tools and techniques. Explore our guide and find the perfect fix, enhancing your car’s aesthetics with sagging headliner repair.
1. Understanding Car Headliners
A car headliner, or headlining, is the fabric adhered to the roof’s interior. It provides a smooth finish, reduces noise, and helps regulate temperature by insulating against heat and cold. Typically made of layers including polyurethane foam, the headliner is attached to a backing board that affixes to the roof’s inside. This design not only softens the interior visually but also enhances comfort by minimizing external noise and maintaining a consistent temperature. Without this insulation, a car parked in direct sunlight can become unbearably hot, and road noise becomes more noticeable, particularly at higher speeds. Furthermore, the headliner improves the acoustic properties of the interior, optimizing the performance of the car’s audio system.
Car headliner is a fabric secured to the roof framing
1.1. The Multi-Layered Construction
Headliners commonly consist of multiple layers, each serving a distinct purpose:
- Outer Fabric: This is the visible layer, typically made from cloth or synthetic materials, providing the interior’s aesthetic appeal.
- Foam Backing: Often made of polyurethane, this layer offers cushioning and sound insulation, enhancing the overall comfort of the cabin.
- Adhesive Layer: This layer bonds the fabric and foam to the headliner board, ensuring all components remain securely attached.
- Headliner Board: Made from fiberglass or cardboard, this rigid base provides shape and structure to the headliner, allowing it to be mounted to the car’s roof.
1.2. Functional Benefits
Beyond aesthetics, headliners offer significant functional benefits:
- Temperature Regulation: By providing an insulating layer, headliners help maintain a comfortable interior temperature, keeping the car cooler in summer and warmer in winter.
- Noise Reduction: The foam layer absorbs sound, reducing road noise and enhancing the in-cabin audio experience.
- Protection: Headliners protect the roof’s metal structure from condensation and physical damage, preserving the car’s structural integrity.
1.3. Headliner Materials and Their Characteristics
Different materials offer varying benefits and drawbacks:
| Material | Advantages | Disadvantages |
|---|---|---|
| Fabric | Offers a soft, appealing texture; available in various colors and patterns. | Can stain easily and may be challenging to clean. |
| Synthetic Fibers | Resistant to fading and wear; easier to clean and maintain than natural fabrics. | May lack the premium feel of higher-end materials. |
| Alcantara | Provides a luxurious, suede-like feel; durable and resistant to wear and fading. | More expensive than other materials; requires specialized cleaning products. |
| Vinyl | Easy to clean and highly resistant to moisture; offers a classic, durable finish. | Can become stiff and less comfortable in colder temperatures; limited aesthetic options compared to fabrics. |
2. Common Causes of Sagging Car Ceilings
Over time, headliners can detach from their backing board, leading to sagging. Extreme weather conditions, especially heat, contribute to this issue. The heat can melt the adhesive, causing the fabric to loosen. Moisture from humidity or leaks can also seep into the headliner, causing the foam backing to lose shape, resulting in warping and sagging. Poor initial installation with insufficient glue or improper techniques also leads to premature sagging. Some vehicles may lack adequate waterproofing, allowing water to infiltrate the foam, further deteriorating the adhesive.
Drivers with children or pets might also experience sagging headliners due to physical strain from playing, scratching, or pulling on the material, speeding up the deterioration process.
2.1. Impact of Heat and Sunlight
Exposure to intense heat and direct sunlight can significantly degrade the adhesive used to hold the headliner in place. Here’s how:
- Adhesive Breakdown: High temperatures cause the adhesive to soften and lose its bonding strength.
- Fabric Expansion: Heat can cause the headliner fabric to expand, placing additional stress on the adhesive.
- UV Damage: Prolonged exposure to ultraviolet (UV) rays can break down the fibers in the fabric, making it more prone to sagging.
2.2. The Role of Moisture and Humidity
Moisture can wreak havoc on a car headliner:
- Foam Degradation: The foam backing absorbs moisture, which leads to its disintegration and loss of structural integrity.
- Mold and Mildew: Damp conditions promote mold and mildew growth, further weakening the headliner.
- Adhesive Failure: Moisture interferes with the adhesive’s ability to bond, causing the fabric to separate from the backing board.
2.3. Inadequate Installation Practices
A subpar installation can lead to early headliner failure:
- Insufficient Adhesive: Using too little adhesive will not provide adequate bonding strength.
- Uneven Application: Applying adhesive unevenly can create weak spots where sagging is more likely to occur.
- Contamination: Dust, oil, or other contaminants on the surfaces to be bonded can compromise the adhesive’s effectiveness.
2.4. Wear and Tear from Physical Contact
Physical contact and general wear and tear contribute to sagging:
- Abrasion: Constant rubbing or touching can wear down the fabric and adhesive.
- Snagging: Sharp objects can snag the fabric, causing it to pull away from the backing board.
- Weight Stress: Hanging objects from the headliner can stretch the fabric and weaken the adhesive over time.
3. Step-by-Step Guide: Fixing a Sagging Car Ceiling Without Removal
When faced with a sagging headliner, several methods can restore its appearance without complete removal. These techniques range from simple fixes to more involved processes, catering to different levels of damage and DIY expertise. Here are some popular methods:
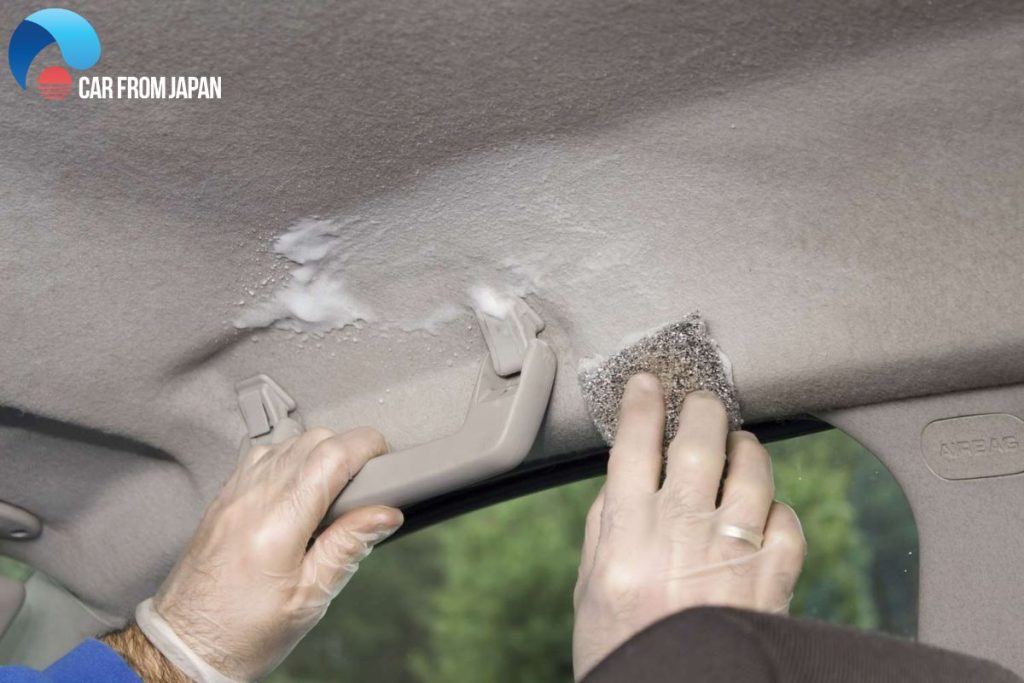 How to fix sagging headliner
3.1. Using Adhesive Spray
For partially sagged fabrics, especially around edges or corners, adhesive spray can be a straightforward solution. This method requires a special headlining adhesive, as ordinary glue will not suffice.
3.1.1. Materials Required
- Headliner adhesive spray
- Clean cloth
- Masking tape
3.1.2. Step-by-Step Instructions
- Preparation: Clean the sagging area with a clean cloth to remove any dust or debris.
- Masking: Use masking tape to protect surrounding areas from overspray.
- Application: Apply the adhesive spray evenly to both the back of the fabric and the corresponding area on the headliner board.
- Bonding: Allow the adhesive to become tacky (as per the product instructions), then carefully press the fabric back into place.
- Securing: Hold the fabric in place for a few minutes until the adhesive sets.
- Finishing: Remove the masking tape and allow the adhesive to cure fully.
3.2. Employing Twist Pins
Twist pins are an inexpensive and easy solution for securing a sagging headliner. These pins, also known as saggy stoppers, hold the headliner in place without causing further damage.
3.2.1. Materials Required
- Clear-headed twist pins
3.2.2. Step-by-Step Instructions
- Positioning: Gently push the headliner back into its original position.
- Pin Insertion: Insert the twist pins through the fabric and into the headliner board.
- Spacing: Space the pins evenly across the sagging area, typically every few inches, to provide uniform support.
- Adjustment: Adjust the pins as needed to ensure the fabric is held securely and smoothly.
3.3. Utilizing Steam Cleaner and Paint Roller
This method involves using a steam cleaner to soften the old adhesive, followed by a paint roller to smooth the fabric back into place. It is particularly effective for sagging around the edges.
3.3.1. Materials Required
- Steam cleaner
- Paint roller
- Clean cloth
3.3.2. Step-by-Step Instructions
- Steaming: Use the steam cleaner to gently heat the sagging area, softening the old adhesive.
- Smoothing: Immediately use the paint roller to smooth the fabric back onto the headliner board, working from the center outwards.
- Drying: Allow the area to dry completely. This can be sped up by using a fan or opening the car windows.
- Inspection: Check the area for any remaining wrinkles or creases and repeat the steaming and smoothing process as needed.
3.4. Installing Headliner Repair Buttons
Headliner repair buttons are designed to provide a more permanent fix for sagging fabric. These buttons attach through the headliner and secure it to the backing board.
3.4.1. Materials Required
- Headliner repair buttons
- Installation tool (usually included with the buttons)
3.4.2. Step-by-Step Instructions
- Positioning: Place the headliner back into its original position.
- Button Installation: Use the installation tool to push the buttons through the fabric and into the headliner board.
- Spacing: Space the buttons evenly across the sagging area to provide uniform support.
- Securing: Ensure each button is securely fastened to prevent future sagging.
3.5. Applying Fabric Glue with Syringe
For targeted application in hard-to-reach areas, a syringe can be used to inject fabric glue directly beneath the sagging fabric.
3.5.1. Materials Required
- Fabric glue
- Syringe with needle
- Clean cloth
3.5.2. Step-by-Step Instructions
- Preparation: Fill the syringe with fabric glue.
- Injection: Carefully insert the needle under the sagging fabric and inject a small amount of glue.
- Pressing: Gently press the fabric back into place, using a clean cloth to smooth out any excess glue.
- Drying: Allow the glue to dry completely, keeping the fabric in place with tape or clamps if necessary.
4. Preventing Car Ceiling Sagging: Proactive Measures
Prevention is always better than cure. Here are some effective ways to prevent your car’s headliner from sagging:
- Park in the Shade: Whenever possible, park your car in shaded areas to minimize exposure to direct sunlight and heat.
- Use Sunshades: Employ sunshades to block sunlight and reduce the interior temperature when parking in direct sun.
- Regular Cleaning: Regularly clean your headliner to remove dust and debris that can contribute to its deterioration.
- Avoid Hanging Objects: Refrain from hanging heavy objects from the headliner, as this can stretch the fabric and weaken the adhesive.
- Maintain Interior Humidity: Use a dehumidifier or silica gel packs inside your car to keep the interior dry and prevent moisture buildup.
- Inspect and Seal Leaks: Regularly check for and seal any leaks in the roof or windows to prevent water from damaging the headliner.
- Gentle Handling: Be gentle when cleaning or adjusting items near the headliner to avoid putting unnecessary stress on the fabric.
4.1. Controlling Interior Temperature
Maintaining a stable interior temperature is crucial for preventing headliner sagging:
- Ventilation: Use ventilation systems to circulate air and prevent heat buildup.
- Window Tinting: Apply window tinting to reduce the amount of sunlight entering the car.
- Regular Air Conditioning: Use air conditioning to keep the interior cool during hot weather.
4.2. Managing Moisture Levels
Controlling moisture levels inside the car is vital:
- Leak Prevention: Regularly inspect and seal any leaks in the roof, windows, or doors.
- Dehumidifiers: Use portable dehumidifiers to absorb excess moisture.
- Proper Ventilation: Ensure adequate ventilation to reduce humidity buildup.
4.3. Routine Maintenance Practices
Regular maintenance can significantly extend the life of your car headliner:
- Gentle Cleaning: Use a soft brush or vacuum to remove dust and debris.
- Avoid Harsh Chemicals: Refrain from using harsh chemicals or abrasive cleaners that can damage the fabric.
- Professional Inspections: Schedule regular professional inspections to identify and address potential issues early.
5. Professional Sagging Headliner Replacement: When to Seek Help
While DIY methods can address minor sagging, extensive damage or persistent issues might require professional headliner replacement. Factors such as the extent of the sagging, the condition of the backing board, and your comfort level with DIY repairs should influence your decision.
5.1. Signs You Need Professional Help
- Extensive Sagging: Large areas of the headliner are detached or sagging.
- Damaged Backing Board: The headliner board is cracked, warped, or otherwise damaged.
- Mold or Mildew: Mold or mildew is present, indicating significant moisture damage.
- Failed DIY Attempts: Previous DIY repairs have been unsuccessful.
- Lack of Time or Expertise: You lack the time, tools, or expertise to perform the repair yourself.
5.2. What to Expect from a Professional Replacement
Professional headliner replacement typically involves:
- Removal of Old Headliner: The old headliner is carefully removed from the car.
- Backing Board Preparation: The backing board is cleaned and repaired or replaced if necessary.
- New Fabric Installation: A new headliner fabric is installed and secured to the backing board.
- Reinstallation: The new headliner is reinstalled into the car.
5.3. Cost Considerations
The cost of professional headliner replacement varies depending on the vehicle model, the type of fabric used, and the labor rates in your area. Generally, the average cost to replace a car’s headliner ranges from $300 to $1,000 or more.
Cost Summary Table
| Vehicle Type | Average Cost |
|---|---|
| Simple-designed Sedan/Hatchback/Coupe (e.g., Accord/Corolla) | $300 – $750 |
| Large SUV/Crossover with sunroof/moonroof (e.g., RAV 4/X-Trail) | $500 – $900 |
| Luxury Vehicle with high-quality ceiling (e.g., BMW) | $1,000 – $6,000+ |
6. Essential Tools and Equipment for Headliner Repair
Having the right tools and equipment can make headliner repairs more efficient and effective. Here’s a list of essential items:
- Headliner Adhesive Spray: A specialized adhesive designed for headliner fabric.
- Clear-Headed Twist Pins: Inexpensive pins for temporarily securing sagging fabric.
- Steam Cleaner: For softening old adhesive and smoothing the fabric.
- Paint Roller: For smoothing the fabric after steaming.
- Headliner Repair Buttons: For providing a more permanent fix for sagging fabric.
- Fabric Glue: For targeted application in hard-to-reach areas.
- Syringe with Needle: For injecting fabric glue beneath the sagging fabric.
- Masking Tape: For protecting surrounding areas from adhesive overspray.
- Clean Cloths: For cleaning and smoothing surfaces.
- Scissors or Utility Knife: For trimming excess fabric.
- Screwdrivers and Pliers: For removing and reinstalling interior trim.
6.1. Where to Buy Quality Repair Tools
For top-quality repair tools, visit CARDIAGTECH.NET. We offer a wide range of specialized equipment designed for automotive repairs, ensuring you have the best tools for the job.
6.2. Recommendations for Specific Brands and Models
- Adhesive Spray: 3M Headliner Adhesive
- Steam Cleaner: McCulloch MC1275 Heavy-Duty Steam Cleaner
- Headliner Repair Buttons: Dorman Headliner Repair Kit
- Fabric Glue: Loctite Fabric Glue
7. Exploring Alternatives: DIY Headliner Replacement
For those who prefer a more hands-on approach, replacing the headliner yourself can be a rewarding project. However, it requires patience, attention to detail, and the right tools.
7.1. Gathering Necessary Materials
- New Headliner Fabric: Choose a fabric that matches your car’s interior.
- Headliner Board: A pre-cut headliner board or material to create one.
- Adhesive: Headliner adhesive spray.
- Tools: Screwdrivers, pliers, scissors, and a utility knife.
7.2. Step-by-Step DIY Replacement Guide
- Removal: Carefully remove the old headliner from the car.
- Preparation: Clean the headliner board, removing any old fabric and adhesive.
- Fabric Application: Apply adhesive to both the board and the new fabric, then carefully attach the fabric to the board.
- Trimming: Trim any excess fabric, leaving a clean edge.
- Reinstallation: Reinstall the new headliner into the car.
7.3. Tips and Tricks for a Successful DIY Project
- Take Your Time: Rushing the process can lead to mistakes.
- Work in a Clean Area: A clean environment will prevent contamination.
- Stretch the Fabric Evenly: Ensure the fabric is stretched evenly to avoid wrinkles.
- Use Quality Adhesive: A good adhesive will ensure a long-lasting bond.
8. Addressing Common Headliner Problems
Beyond sagging, headliners can encounter other issues, such as stains, tears, and discoloration. Here’s how to address these problems:
8.1. Cleaning Stains and Discoloration
- Spot Cleaning: Use a mild detergent and a soft cloth to spot clean stains.
- Steam Cleaning: Steam cleaning can remove stubborn stains and refresh the fabric.
- Professional Cleaning: For severe stains, consider professional cleaning services.
8.2. Repairing Tears and Holes
- Fabric Patches: Use fabric patches to cover small tears and holes.
- Fabric Glue: Apply fabric glue to secure the edges of the tear.
- Professional Repair: For larger tears, consider professional repair services.
8.3. Dealing with Mold and Mildew
- Ventilation: Ensure proper ventilation to dry out the headliner.
- Mildew Remover: Use a mildew remover to kill mold and mildew.
- Professional Cleaning: For severe mold, consider professional cleaning services.
9. Real-World Examples and Case Studies
Examining real-world examples can provide valuable insights into effective headliner repair strategies. Here are a few case studies:
9.1. Case Study 1: Minor Sagging in a 2010 Honda Civic
A 2010 Honda Civic experienced minor sagging around the edges of the headliner. The owner successfully used adhesive spray to reattach the fabric, saving hundreds of dollars on professional repairs.
9.2. Case Study 2: Extensive Sagging in a 2005 Ford Explorer
A 2005 Ford Explorer had extensive sagging throughout the headliner. The owner opted for a professional headliner replacement, which restored the car’s interior to its original condition.
9.3. Case Study 3: DIY Replacement in a 1998 Toyota Camry
A 1998 Toyota Camry owner decided to replace the headliner themselves. By following a step-by-step guide and using quality materials, they successfully completed the project and saved money on labor costs.
10. Maximizing Your Car’s Resale Value
Maintaining your car’s interior, including the headliner, can significantly impact its resale value. Here’s how to maximize your car’s value:
- Regular Cleaning: Keep the interior clean and well-maintained.
- Prompt Repairs: Address any issues, such as sagging or stains, promptly.
- Quality Materials: Use quality materials for repairs and replacements.
- Professional Service: Consider professional detailing services to enhance the car’s appearance.
10.1. The Role of Interior Condition
A well-maintained interior can increase your car’s resale value by:
- Attracting Buyers: A clean and attractive interior makes the car more appealing to potential buyers.
- Increasing Confidence: A well-maintained interior indicates that the car has been cared for.
- Justifying Price: A clean and well-maintained interior can justify a higher asking price.
10.2. Documenting Maintenance and Repairs
Keeping records of maintenance and repairs can further enhance your car’s resale value by:
- Providing Transparency: Records show potential buyers that the car has been properly maintained.
- Demonstrating Value: Records can justify the car’s asking price.
- Building Trust: Records build trust with potential buyers.
11. Why Choose CARDIAGTECH.NET for Your Automotive Needs
At CARDIAGTECH.NET, we understand the challenges faced by automotive technicians and garage owners. Our mission is to provide you with high-quality tools and equipment that enhance efficiency, accuracy, and profitability. Here’s how we can help:
11.1. Addressing Customer Challenges
We recognize the difficulties you face:
- Physical Demands: Our tools are designed to reduce physical strain and improve ergonomics.
- Exposure to Chemicals: We offer protective gear and tools that minimize contact with harmful substances.
- Keeping Up with Technology: We provide the latest diagnostic and repair tools to keep you ahead of the curve.
- Time Constraints: Our tools are designed to speed up repairs and increase productivity.
- Competition: We help you offer superior service and quality to stand out from the competition.
- Finding Quality Tools: We provide access to a wide range of high-quality tools that meet your needs.
11.2. Services Offered by CARDIAGTECH.NET
- Expert Guidance: Contact us for personalized advice on selecting the right tools for your specific needs.
- Comprehensive Product Range: We offer a wide range of tools, from basic hand tools to advanced diagnostic equipment.
- Competitive Pricing: We provide competitive pricing to help you maximize your budget.
- Customer Support: Our dedicated customer support team is available to answer your questions and provide assistance.
11.3. Call to Action: Contact CARDIAGTECH.NET for Expert Assistance
Ready to enhance your automotive repair capabilities? Contact CARDIAGTECH.NET today for expert guidance and assistance. Our team is ready to help you select the perfect tools for your needs and answer any questions you may have.
Contact Information
- Address: 276 Reock St, City of Orange, NJ 07050, United States
- WhatsApp: +1 (641) 206-8880
- Website: CARDIAGTECH.NET
12. FAQs: Addressing Common Headliner Queries
12.1. How do you know if your ceiling is sagging?
Signs of a sagging car ceiling include a cracking sound when the car shakes, drooping plasterboard, visible cracks, and tiny circles or blisters forming lines.
12.2. Is it OK to fix the headliner sagging myself?
Yes, you can fix minor headliner sagging yourself with repair kits and basic tools. However, extensive damage may require professional assistance.
12.3. Can I paint a headliner?
Painting a headliner is not recommended due to potential issues with temperature-related expansion and contraction, and the risk of uneven application.
12.4. Does car insurance cover the cost of car headliner replacement?
Most car insurance policies do not cover headliner replacement unless the damage is due to a covered event like a collision or natural disaster.
12.5. What causes a car headliner to sag?
Common causes include heat, moisture, poor installation, and physical wear and tear.
12.6. How long does it take to fix a sagging headliner?
DIY repairs can take a few hours, while professional replacements may take a day or two.
12.7. Can I use regular glue to fix a headliner?
No, you should use a specialized headliner adhesive spray for best results.
12.8. Are headliner repair buttons a permanent solution?
Headliner repair buttons provide a more permanent fix compared to temporary solutions like twist pins.
12.9. How can I clean my car headliner without damaging it?
Use a soft brush or vacuum to remove dust and debris, and spot clean stains with a mild detergent and a soft cloth.
12.10. What is the best way to prevent my car headliner from sagging?
Park in the shade, use sunshades, maintain interior humidity, and regularly inspect and seal leaks to prevent sagging.
By following this comprehensive guide, you can effectively address sagging car ceilings and maintain the aesthetic appeal of your vehicle’s interior. Remember to visit CARDIAGTECH.NET for all your automotive tool and equipment needs. We’re here to help you achieve professional results with our high-quality products and expert guidance.