How To Fix A Car In Limp Mode: Expert Guide
Fixing a car in limp mode involves diagnosing and addressing the underlying issue that triggered the safety mechanism. CARDIAGTECH.NET offers expert guidance and tools to help you identify and resolve these problems efficiently, restoring your vehicle’s performance. Addressing the root cause is the best approach to fixing limp mode issues, with potential solutions including sensor replacement, wiring repairs, and fluid top-ups.
1. Understanding Limp Mode: The Basics
Limp mode, also known as “limp home mode,” is a safety feature in modern vehicles designed to protect the engine and transmission from further damage when a critical fault is detected. When the car’s computer, the ECU (Electronic Control Unit), identifies a problem that could lead to significant mechanical issues, it activates limp mode. This mode restricts the engine’s power and speed, allowing you to drive the car to a safe location or a repair shop without causing further harm. It’s essential for every technician to understand this function to effectively diagnose and repair vehicles.
1.1. What Triggers Limp Mode?
Limp mode is activated by a variety of issues detected by the vehicle’s sensors and computer systems. These triggers can range from minor sensor malfunctions to serious mechanical problems. Here are some common causes:
- Engine Issues: Misfires, problems with the turbocharger, or issues with the fuel injection system.
- Transmission Problems: Difficulty in changing gears or transmission slippage.
- Brake Malfunctions: Seized brakes or leaks in the hydraulic system.
- Low Fluid Levels: Critically low levels of engine oil or coolant.
- Sensor Malfunctions: Faulty sensors related to the engine, transmission, or brakes.
- Wiring Problems: Damaged or corroded wiring harnesses causing erratic signals.
1.2. Recognizing the Symptoms of Limp Mode
Identifying the symptoms of limp mode is crucial for prompt action. The signs can vary slightly depending on the vehicle’s make and model, but generally include:
- Reduced Engine Power: Noticeable loss of acceleration and overall power.
- Limited Speed: The car may be restricted to a maximum speed of 30-50 mph.
- Restricted RPM: The engine’s RPM (revolutions per minute) may be limited to 2,000-3,000.
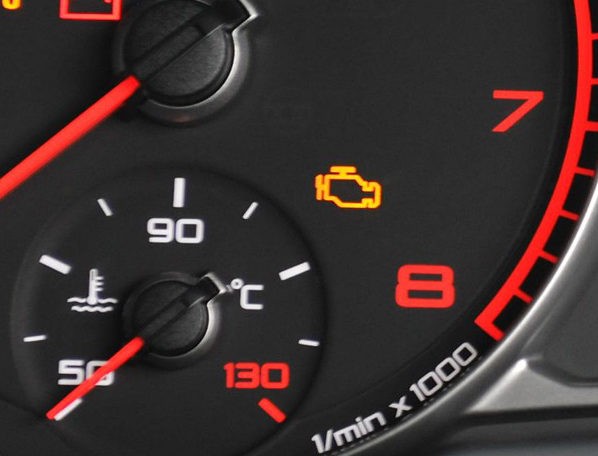
- Warning Lights: The check engine light, transmission warning light, or other warning indicators on the dashboard may illuminate.
- Gear Shifting Issues: Automatic transmissions may be stuck in a lower gear, and gear changes may be rough or delayed.
- Disabled Auxiliary Functions: Features like air conditioning or cruise control may stop working.
1.3. The Importance of Addressing Limp Mode Promptly
Ignoring limp mode can lead to more severe and costly damage. While the mode is designed to protect the vehicle, it is not a long-term solution. Continuing to drive in limp mode can exacerbate the underlying problem, leading to extensive repairs or even complete engine or transmission failure. Addressing the issue promptly can save time, money, and potential safety hazards.
Table: Consequences of Ignoring Limp Mode
| Consequence | Description |
|---|---|
| Increased Repair Costs | What starts as a minor issue can escalate into a major repair, costing significantly more in parts and labor. |
| Further Mechanical Damage | Driving with restricted performance can strain other components, leading to additional wear and tear and potential breakdowns. |
| Safety Risks | Reduced power and speed can make driving dangerous, especially on highways or in situations requiring quick acceleration. |
| Inconvenience | A breakdown far from home or a repair shop can cause significant disruption to your schedule and require towing services. |
| Potential for Total Failure | Neglecting the underlying issue can lead to catastrophic engine or transmission failure, requiring complete replacement or extensive rebuilding. |
2. Identifying the Root Cause of Limp Mode
Pinpointing the exact cause of limp mode is essential for effective repair. This often involves a combination of diagnostic tools, visual inspections, and a systematic approach to troubleshooting.
2.1. Using an OBD-II Scanner for Diagnostic Codes
An OBD-II (On-Board Diagnostics II) scanner is an indispensable tool for diagnosing limp mode. This device plugs into the car’s diagnostic port and retrieves trouble codes stored in the ECU. These codes provide valuable information about the specific system or component that triggered the limp mode.
Steps to Use an OBD-II Scanner:
- Locate the Diagnostic Port: Typically found under the dashboard on the driver’s side.
- Plug in the Scanner: Connect the OBD-II scanner to the port.
- Turn on the Ignition: Turn the key to the “on” position without starting the engine.
- Read the Codes: Follow the scanner’s instructions to retrieve the diagnostic trouble codes (DTCs).
- Record the Codes: Write down all the codes and their descriptions for further analysis.
Example of OBD-II Codes and Their Meanings:
| Code | Description | Possible Cause |
|---|---|---|
| P0300 | Random/Multiple Cylinder Misfire Detected | Faulty spark plugs, ignition coils, fuel injectors, or vacuum leaks |
| P0700 | Transmission Control System Malfunction | Faulty transmission sensors, solenoids, or internal transmission damage |
| P0128 | Coolant Thermostat (Coolant Temperature Below Regulating) | Faulty thermostat or coolant temperature sensor |
| P0299 | Turbocharger/Supercharger Underboost | Leaks in the intake system, faulty turbocharger, or malfunctioning sensors |
| C0040 | Right Front Wheel Speed Sensor Circuit Malfunction | Faulty wheel speed sensor, damaged wiring, or issues with the ABS system |
OBD-II Scanner
Using an OBD-II scanner to retrieve diagnostic trouble codes (DTCs) is the first step in diagnosing limp mode.
2.2. Visual Inspection for Obvious Issues
A thorough visual inspection can often reveal obvious problems that trigger limp mode. Check the following:
- Fluid Levels: Verify engine oil and coolant levels are within the recommended range.
- Leaks: Look for signs of fluid leaks under the car or around the engine and transmission.
- Wiring: Inspect wiring harnesses for damage, corrosion, or loose connections.
- Brakes: Check for seized brakes or signs of hydraulic leaks.
- Hoses: Examine hoses for cracks, leaks, or blockages.
2.3. Common Culprits Behind Limp Mode
Several common issues frequently cause limp mode. Being familiar with these can help narrow down the diagnosis:
- Faulty Mass Air Flow (MAF) Sensor: This sensor measures the amount of air entering the engine. A faulty MAF sensor can provide incorrect data to the ECU, leading to poor engine performance and limp mode.
- Defective Oxygen (O2) Sensors: Oxygen sensors monitor the exhaust gases to ensure proper fuel combustion. Faulty O2 sensors can cause the ECU to misadjust the air-fuel mixture, triggering limp mode.
- Failing Throttle Position Sensor (TPS): The TPS monitors the position of the throttle. A malfunctioning TPS can send incorrect signals to the ECU, resulting in erratic engine behavior and limp mode.
- Transmission Problems: Issues such as low transmission fluid, faulty solenoids, or internal damage can cause the transmission to malfunction and trigger limp mode.
- Clogged Catalytic Converter: A clogged catalytic converter restricts exhaust flow, leading to reduced engine performance and limp mode.
2.4. Understanding Sensor Data and Live Readings
Modern diagnostic tools can provide live data readings from various sensors in the vehicle. Analyzing this data can help identify sensors that are providing incorrect or erratic readings.
- How to Access Live Data:
- Connect the OBD-II scanner to the car.
- Navigate to the “Live Data” or “Data Stream” option on the scanner.
- Select the sensors you want to monitor (e.g., MAF sensor, O2 sensors, TPS).
- Start the engine and observe the sensor readings.
- Interpreting Sensor Data:
- MAF Sensor: Readings should increase smoothly as engine RPM increases. Erratic or flat readings indicate a problem.
- O2 Sensors: Readings should fluctuate rapidly between rich and lean. Slow or fixed readings suggest a faulty sensor.
- TPS: Readings should change smoothly as the throttle is opened and closed. Jumps or gaps in the readings indicate a problem.
3. Step-by-Step Guide to Fixing a Car in Limp Mode
Once you’ve identified the root cause of limp mode, you can proceed with the necessary repairs. Here’s a step-by-step guide to help you through the process.
3.1. Resetting the ECU
Sometimes, limp mode can be triggered by a temporary glitch or a minor issue that has been resolved. Resetting the ECU can clear the trouble codes and restore normal operation.
Methods to Reset the ECU:
- Using an OBD-II Scanner:
- Connect the scanner to the diagnostic port.
- Select the “Clear Codes” or “Erase Codes” option.
- Follow the scanner’s instructions to clear the codes.
- Start the engine and see if the limp mode is gone.
- Disconnecting the Battery:
- Turn off the engine and remove the key from the ignition.
- Locate the negative (-) terminal on the car battery.
- Loosen the nut on the terminal clamp using a wrench.
- Carefully disconnect the terminal clamp from the battery.
- Wait for 15-20 minutes to allow the ECU to reset.
- Reconnect the terminal clamp to the battery and tighten the nut.
- Start the engine and check if the limp mode is resolved.
Caution: Resetting the ECU will erase all stored diagnostic codes and may reset other settings, such as radio presets.
3.2. Addressing Common Issues: MAF Sensor, O2 Sensors, TPS
If the diagnostic codes or live data indicate a problem with the MAF sensor, O2 sensors, or TPS, follow these steps:
-
MAF Sensor Replacement:
- Locate the MAF sensor in the air intake system.
- Disconnect the electrical connector from the sensor.
- Loosen the clamps or screws holding the sensor in place.
- Remove the old sensor and install the new one.
- Reconnect the electrical connector.
- Reset the ECU and test the car.
Cost: The cost of a MAF sensor can range from $50 to $300, depending on the vehicle’s make and model. Labor costs can add an additional $50 to $150.
-
O2 Sensor Replacement:
- Locate the faulty O2 sensor (usually near the exhaust manifold or catalytic converter).
- Disconnect the electrical connector from the sensor.
- Use an O2 sensor socket to remove the old sensor.
- Install the new sensor and tighten it securely.
- Reconnect the electrical connector.
- Reset the ECU and test the car.
Cost: O2 sensors typically cost between $20 and $200 each, depending on the type and location. Labor costs can range from $50 to $200 per sensor.
-
TPS Replacement:
- Locate the TPS on the throttle body.
- Disconnect the electrical connector from the sensor.
- Remove the screws holding the sensor in place.
- Install the new sensor and tighten the screws.
- Reconnect the electrical connector.
- Reset the ECU and test the car.
Cost: A TPS can cost between $30 and $150, depending on the vehicle. Labor costs for replacement typically range from $50 to $150.
3.3. Checking and Replacing Fluids
Low fluid levels are a common cause of limp mode. Check and top up the following fluids:
-
Engine Oil: Use the dipstick to check the oil level. Add oil if it is below the “min” mark.
Cost: Engine oil typically costs $20 to $50 per oil change, including the filter.
-
Coolant: Check the coolant level in the radiator or coolant reservoir. Add coolant if it is below the “min” mark.
Cost: Coolant typically costs $10 to $30 per gallon.
-
Transmission Fluid: Check the transmission fluid level using the dipstick (if equipped) or by consulting the vehicle’s service manual. Add fluid if it is low.
Cost: Transmission fluid typically costs $10 to $40 per quart.
3.4. Inspecting and Repairing Wiring Issues
Damaged or corroded wiring can cause erratic signals and trigger limp mode. Inspect the wiring harnesses for damage and repair as needed:
- Visual Inspection:
- Check for frayed, cracked, or melted wires.
- Look for corrosion or rust on connectors.
- Ensure all connectors are securely plugged in.
- Testing Wires:
- Use a multimeter to check for continuity in the wires.
- Repair or replace damaged wires as needed.
Cost: Wiring repairs can range from a simple fix costing $20 to $50 to more extensive repairs costing several hundred dollars, depending on the complexity.
3.5. Addressing Transmission Problems
Transmission issues can be complex and may require professional help. However, some basic checks and maintenance can be done:
- Check Transmission Fluid: Ensure the fluid is at the correct level and in good condition (not burnt or discolored).
- Fluid and Filter Change: Changing the transmission fluid and filter can sometimes resolve minor transmission issues.
- Professional Inspection: If the problem persists, consult a transmission specialist for further diagnosis and repair.
Cost: A transmission fluid and filter change can cost between $80 and $250. More extensive transmission repairs can range from $500 to several thousand dollars, depending on the severity.
4. Tools and Equipment Recommended by CARDIAGTECH.NET
Having the right tools and equipment is essential for effectively diagnosing and repairing cars in limp mode. CARDIAGTECH.NET recommends the following:
4.1. Essential Diagnostic Tools
-
OBD-II Scanner: A high-quality OBD-II scanner is crucial for retrieving diagnostic codes and accessing live data.
- Recommended Model: Autel MaxiCOM MK808
- Features: Comprehensive diagnostic functions, live data streaming, and code clearing.
- Price Range: $500 – $800
-
Multimeter: A multimeter is essential for testing electrical circuits and checking for continuity.
- Recommended Model: Fluke 115 Digital Multimeter
- Features: Accurate voltage, current, and resistance measurements.
- Price Range: $150 – $250
4.2. Specialized Tools for Sensor Replacement
-
O2 Sensor Socket: This specialized socket is designed to remove and install oxygen sensors without damaging them.
- Recommended Model: Lisle 25980 Oxygen Sensor Socket Set
- Features: Includes various sizes to fit different O2 sensors.
- Price Range: $20 – $50
-
Fuel Pressure Tester: For checking fuel pressure, ensuring the fuel system is functioning correctly.
- Recommended Model: OTC 5630 Fuel Pressure Test Kit
- Features: Comprehensive kit for testing various fuel systems.
- Price Range: $80 – $150
4.3. General Repair Tools
-
Socket Set: A comprehensive socket set is essential for various repair tasks.
- Recommended Model: Craftsman 230-Piece Mechanics Tool Set
- Features: Includes a wide range of sockets, wrenches, and other tools.
- Price Range: $200 – $400
-
Wrench Set: A good set of wrenches is necessary for tightening and loosening bolts and nuts.
- Recommended Model: GearWrench 81910 10-Piece Metric Ratcheting Wrench Set
- Features: Ratcheting wrenches for easy and efficient use.
- Price Range: $100 – $200
4.4. Safety Equipment
-
Safety Glasses: Protecting your eyes is crucial when working on cars.
- Recommended Model: 3M Virtua CCS Protective Eyewear
- Features: Lightweight and comfortable with clear lenses.
- Price Range: $10 – $20
-
Gloves: Protect your hands from grease, oil, and chemicals.
- Recommended Model: Mechanix Wear M-Pact Gloves
- Features: Durable and provides excellent grip.
- Price Range: $20 – $40
5. Advanced Diagnostic Techniques
For more complex cases of limp mode, advanced diagnostic techniques may be necessary. These techniques require a deeper understanding of automotive systems and specialized equipment.
5.1. Using a Scan Tool for Advanced Diagnostics
Advanced scan tools can perform more in-depth diagnostics, such as component testing, sensor calibration, and module programming.
-
Component Testing: These tools can activate individual components, such as fuel injectors or solenoids, to verify their functionality.
-
Sensor Calibration: Some sensors require calibration after replacement. Advanced scan tools can perform this calibration.
-
Module Programming: In some cases, the ECU or other modules may need to be reprogrammed to resolve issues causing limp mode.
- Recommended Model: Snap-on Zeus Scan Tool
- Features: Advanced diagnostic capabilities, component testing, and module programming.
- Price Range: $5,000 – $10,000
5.2. Checking for Vacuum Leaks
Vacuum leaks can cause a variety of engine problems, including limp mode. Use a smoke machine to detect vacuum leaks:
-
Connect the Smoke Machine: Connect the smoke machine to the intake system.
-
Introduce Smoke: Introduce smoke into the system and look for leaks.
-
Identify and Repair Leaks: Repair any leaks found in hoses, gaskets, or seals.
- Recommended Model: Smoke Wizard GLD-40
- Features: Quickly detects vacuum leaks in various automotive systems.
- Price Range: $800 – $1500
5.3. Testing Fuel System Components
A malfunctioning fuel system can trigger limp mode. Test the following components:
-
Fuel Pump: Check fuel pressure and flow rate.
-
Fuel Injectors: Test the injectors for proper spray pattern and flow.
-
Fuel Pressure Regulator: Ensure the regulator is maintaining the correct fuel pressure.
- Tools Required: Fuel pressure tester, fuel injector tester
- Estimated Cost: $100 – $300 for testing equipment
5.4. Evaluating Exhaust System Performance
A restricted exhaust system can cause limp mode. Check the following:
-
Catalytic Converter: Inspect for clogs or damage.
-
Exhaust Pipes: Look for restrictions or blockages.
-
Backpressure Test: Perform a backpressure test to measure exhaust restriction.
- Tools Required: Backpressure gauge
- Estimated Cost: $50 – $100 for testing equipment
6. Preventing Limp Mode: Maintenance Tips
Preventing limp mode involves regular maintenance and addressing minor issues before they escalate. Here are some essential maintenance tips:
6.1. Regular Fluid Checks and Changes
- Engine Oil: Change the oil and filter according to the manufacturer’s recommendations.
- Coolant: Flush and replace the coolant every 2-3 years.
- Transmission Fluid: Change the transmission fluid and filter as recommended.
- Brake Fluid: Flush and replace the brake fluid every 2-3 years.
6.2. Inspecting and Replacing Worn Components
- Spark Plugs: Replace spark plugs at the recommended intervals.
- Air Filter: Replace the air filter regularly to ensure proper airflow to the engine.
- Belts and Hoses: Inspect belts and hoses for cracks or wear and replace as needed.
6.3. Addressing Minor Issues Promptly
- Warning Lights: Do not ignore warning lights on the dashboard. Have the vehicle inspected as soon as possible.
- Unusual Noises or Symptoms: Investigate any unusual noises or symptoms, such as rough idling or poor acceleration.
- Regular Maintenance: Follow the manufacturer’s recommended maintenance schedule to keep the vehicle in good condition.
6.4. Using Quality Parts and Fluids
Using high-quality parts and fluids can help prevent premature wear and failure of components. Always use parts and fluids that meet or exceed the manufacturer’s specifications.
Table: Recommended Maintenance Schedule
| Maintenance Task | Frequency |
|---|---|
| Oil and Filter Change | Every 5,000 – 7,500 miles |
| Coolant Flush | Every 2-3 years |
| Transmission Service | Every 30,000 – 60,000 miles |
| Brake Fluid Flush | Every 2-3 years |
| Spark Plug Replacement | Every 30,000 – 100,000 miles |
| Air Filter Replacement | Every 12,000 – 15,000 miles |
| Belt and Hose Inspection | Annually |
7. When to Seek Professional Help
While many limp mode issues can be resolved with DIY repairs, some cases require professional help. Seek assistance from a qualified mechanic in the following situations:
7.1. Complex Diagnostic Codes
If the OBD-II scanner retrieves complex or multiple diagnostic codes, it may be difficult to pinpoint the exact cause of limp mode without advanced diagnostic equipment and expertise.
7.2. Transmission Problems
Transmission issues can be complex and may require specialized knowledge and equipment to diagnose and repair.
7.3. Engine Problems
Serious engine problems, such as internal damage or major component failure, require professional attention.
7.4. Recurring Limp Mode
If limp mode recurs after performing repairs, it indicates an underlying issue that has not been resolved. A professional mechanic can perform further diagnostics to identify and address the root cause.
7.5. Lack of Experience or Tools
If you lack the experience, tools, or confidence to perform the necessary repairs, it is best to seek professional help.
8. Case Studies: Real-World Examples of Fixing Limp Mode
Understanding how limp mode has been resolved in real-world scenarios can provide valuable insights. Here are a couple of case studies:
8.1. Case Study 1: Faulty MAF Sensor
- Vehicle: 2015 Honda Civic
- Symptoms: Reduced engine power, check engine light on, limp mode activated.
- Diagnostic Codes: P0101 (Mass Air Flow Circuit Range/Performance)
- Diagnosis: Faulty MAF sensor
- Solution:
- Replaced the MAF sensor with a new one.
- Cleared the diagnostic codes using an OBD-II scanner.
- Test drove the vehicle to ensure the problem was resolved.
- Outcome: The vehicle returned to normal operation, and limp mode was deactivated.
8.2. Case Study 2: Transmission Solenoid Issue
- Vehicle: 2012 Toyota Camry
- Symptoms: Difficulty shifting gears, transmission warning light on, limp mode activated.
- Diagnostic Codes: P0770 (Shift Solenoid E Malfunction)
- Diagnosis: Faulty transmission solenoid
- Solution:
- Removed the transmission pan to access the solenoids.
- Replaced the faulty shift solenoid.
- Reinstalled the transmission pan with a new gasket.
- Filled the transmission with new fluid.
- Cleared the diagnostic codes using an OBD-II scanner.
- Test drove the vehicle to ensure the problem was resolved.
- Outcome: The vehicle shifted smoothly, and limp mode was deactivated.
9. Optimizing Your Repair Shop with CARDIAGTECH.NET
For professional mechanics, CARDIAGTECH.NET offers a wide range of diagnostic tools and equipment to optimize your repair shop. Here are some of the benefits:
9.1. Access to High-Quality Tools
CARDIAGTECH.NET provides access to high-quality diagnostic tools and equipment from leading brands. This ensures that you have the tools you need to diagnose and repair vehicles efficiently and accurately.
9.2. Expert Support and Training
CARDIAGTECH.NET offers expert support and training to help you get the most out of your diagnostic tools and equipment. Our team of experienced technicians can provide guidance on using the tools and troubleshooting complex issues.
9.3. Competitive Pricing
CARDIAGTECH.NET offers competitive pricing on all our products, helping you save money on the tools and equipment you need to run a successful repair shop.
9.4. Streamlined Operations
By using CARDIAGTECH.NET’s diagnostic tools and equipment, you can streamline your repair shop operations, reduce diagnostic time, and improve overall efficiency.
9.5. Enhanced Customer Satisfaction
Providing accurate and efficient diagnostic services can enhance customer satisfaction and build a loyal customer base. CARDIAGTECH.NET helps you deliver top-notch service to your customers.
Don’t let these challenges hold you back. CARDIAGTECH.NET is here to help you overcome these obstacles and achieve your business goals. Contact us today at +1 (641) 206-8880 or visit our website at CARDIAGTECH.NET to learn more about our products and services. Our address is 276 Reock St, City of Orange, NJ 07050, United States. Let us help you enhance your efficiency, accuracy, and customer satisfaction.
10. Frequently Asked Questions (FAQs) About Limp Mode
10.1. Can I drive my car in limp mode?
Yes, but only for a short distance and at a reduced speed. Limp mode is designed to allow you to drive the car to a safe location or a repair shop without causing further damage.
10.2. How fast can I drive in limp mode?
Typically, limp mode restricts the vehicle to a maximum speed of 30-50 mph.
10.3. Will turning off the engine reset limp mode?
Sometimes, but not always. Turning off the engine may temporarily reset limp mode, but if the underlying issue persists, it will likely return.
10.4. How much does it cost to fix limp mode?
The cost to fix limp mode can vary widely depending on the cause. Simple repairs, such as replacing a sensor, may cost $100-$300. More complex repairs, such as transmission work, can cost several thousand dollars.
10.5. Can low oil cause limp mode?
Yes, critically low levels of engine oil can trigger limp mode to protect the engine from damage.
10.6. Can a bad battery cause limp mode?
In some cases, a weak or failing battery can cause erratic electrical signals that trigger limp mode.
10.7. How do I know if it’s safe to drive in limp mode?
If the vehicle is running smoothly (albeit at reduced power) and there are no unusual noises or symptoms, it may be safe to drive a short distance in limp mode. However, if there are any concerning issues, it is best to have the vehicle towed.
10.8. What are the most common diagnostic codes associated with limp mode?
Common codes include P0300 (misfire), P0700 (transmission malfunction), P0101 (MAF sensor), and P0128 (coolant thermostat).
10.9. Can I permanently disable limp mode?
It is not recommended to permanently disable limp mode. This safety feature is designed to protect the engine and transmission from damage.
10.10. Does CARDIAGTECH.NET offer support for diagnosing limp mode issues?
Yes, CARDIAGTECH.NET offers expert support and training to help you diagnose and repair limp mode issues. Contact us at +1 (641) 206-8880 or visit our website at CARDIAGTECH.NET for more information.
By following this comprehensive guide, you can effectively diagnose and fix a car in limp mode, ensuring its safe and reliable operation. Remember to always prioritize safety and seek professional help when needed. CARDIAGTECH.NET is here to support you with high-quality tools, equipment, and expert guidance.