How To Fix A Car Scratch From A Key

Fixing a car scratch from a key can seem daunting, but CARDIAGTECH.NET offers solutions to restore your vehicle’s appearance. This guide provides expert techniques and product recommendations to eliminate key scratches and protect your car’s paint, ensuring a professional-quality finish. With the right tools and methods, you can effectively repair minor abrasions, deep gouges, and paint damages, enhancing your vehicle’s aesthetics and resale value.
1. Understanding the Severity of the Scratch
Before diving into the repair process, it’s crucial to assess the depth and extent of the key scratch. This evaluation determines the appropriate repair method and tools required. Key scratches vary in severity, ranging from superficial clear coat damage to deep gouges that penetrate the primer or even the metal.
1.1 Types of Car Scratches
- Clear Coat Scratches: These are the most superficial, affecting only the clear coat layer. They appear as light, hairline marks and can often be removed with simple polishing techniques.
- Paint Scratches: These scratches penetrate the clear coat and reach the paint layer. They are more noticeable and require more intensive repair methods, such as touch-up paint application.
- Primer Scratches: These deep scratches go through the clear coat and paint, exposing the primer layer. Repairing primer scratches involves filling the gouge with primer before applying paint.
- Metal Scratches: These are the most severe, reaching the bare metal of the car. They require immediate attention to prevent rust and corrosion, often involving body filler and extensive painting.
1.2 Assessing the Damage
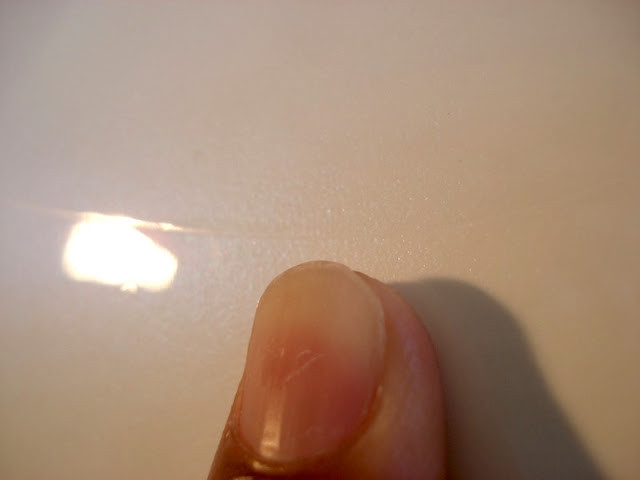
To accurately assess the damage, clean the scratched area thoroughly with soap and water, then dry it with a microfiber cloth. Inspect the scratch under good lighting to determine its depth. If you can feel the scratch with your fingernail, it likely penetrates the clear coat and possibly the paint layer.
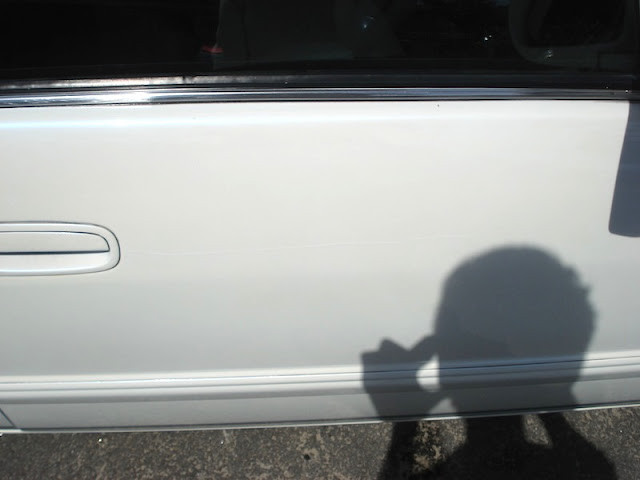
Close-up of car door showing a deliberate key scratch extending from front to back, revealing damage beyond the clear coat.
1.3 Why Proper Assessment Matters
Misjudging the scratch’s severity can lead to ineffective repairs or further damage. For instance, attempting to polish a scratch that has reached the primer will not yield satisfactory results and may worsen the appearance. Accurate assessment ensures you use the right products and techniques, saving time and money.
CARDIAGTECH.NET provides diagnostic tools to evaluate paint damage and recommend suitable repair solutions. Contact us at Whatsapp: +1 (641) 206-8880 for expert advice.
2. Essential Tools and Materials
Having the right tools and materials is essential for effectively fixing a car scratch from a key. The specific items you’ll need depend on the severity of the scratch, but a basic toolkit should include the following:
2.1 Cleaning Supplies
- Car Wash Soap: To clean the area around the scratch and remove dirt or debris.
- Microfiber Cloths: Soft cloths for washing, drying, and polishing without scratching the paint.
- Rubbing Alcohol: To degrease the area before applying touch-up paint.
2.2 Sanding Materials
- Sandpaper (Various Grits): Including 2000, 2500, and 3000 grit for smoothing the scratched area.
- Sanding Block: To provide a flat, even surface for sanding.
- Water Spray Bottle: To keep the sandpaper and surface wet during sanding.
2.3 Polishing and Buffing
- Rubbing Compound: An abrasive compound to remove fine scratches and imperfections.
- Polishing Compound: A less abrasive compound to restore shine after using rubbing compound.
- Wax or Paint Sealant: To protect the repaired area and enhance the paint’s gloss.
- Foam Polishing Pads: For applying rubbing and polishing compounds.
- Buffing Machine (Optional): For faster and more effective polishing.
2.4 Touch-Up Paint
- Touch-Up Paint: Matching your car’s exact color code.
- Fine-Tip Applicator Brush: For precise application of touch-up paint.
- Clear Coat: To protect the touch-up paint and blend it with the surrounding area.
2.5 Safety Gear
- Gloves: To protect your hands from chemicals.
- Respirator or Mask: To avoid inhaling harmful fumes from paints and compounds.
- Eye Protection: Safety glasses or goggles to protect your eyes.
2.6 Advanced Tools
- Paint Depth Gauge: Measures the thickness of paint layers to avoid over-sanding.
- Color Matching System: Ensures accurate paint color matching.
- Heat Gun: Cures paint faster and improves adhesion.
Table: Essential Tools and Materials for Fixing Car Scratches
| Category | Item | Description |
|---|---|---|
| Cleaning | Car Wash Soap | Removes dirt and debris |
| Microfiber Cloths | Soft cloths for washing, drying, and polishing | |
| Rubbing Alcohol | Degreases the area | |
| Sanding | Sandpaper (2000-3000 grit) | Smooths the scratched area |
| Sanding Block | Provides a flat surface for sanding | |
| Water Spray Bottle | Keeps the sandpaper and surface wet | |
| Polishing/Buffing | Rubbing Compound | Removes fine scratches |
| Polishing Compound | Restores shine | |
| Wax/Paint Sealant | Protects and enhances gloss | |
| Foam Polishing Pads | Applies compounds | |
| Touch-Up Paint | Touch-Up Paint | Matches car’s color code |
| Fine-Tip Brush | Precise application | |
| Clear Coat | Protects and blends paint | |
| Safety | Gloves | Protects hands |
| Respirator/Mask | Avoids inhaling fumes | |
| Eye Protection | Protects eyes | |
| Advanced Tools (Opt) | Paint Depth Gauge | Measures paint thickness |
| Color Matching System | Accurate paint matching | |
| Heat Gun | Cures paint faster |
By gathering these essential tools and materials, you’ll be well-prepared to tackle the task of fixing a car scratch from a key. Visit CARDIAGTECH.NET for high-quality tools and expert advice. For inquiries, contact us at 276 Reock St, City of Orange, NJ 07050, United States, or call Whatsapp: +1 (641) 206-8880.
3. Step-by-Step Guide to Fixing a Minor Key Scratch
Minor key scratches, often confined to the clear coat, can be effectively addressed with a few simple steps. This section provides a detailed guide on how to repair these superficial blemishes, restoring your car’s finish.
3.1 Cleaning the Area
Start by thoroughly cleaning the area around the scratch. Use car wash soap and water to remove any dirt, wax, or contaminants. Rinse the area well and dry it with a clean microfiber cloth. This step ensures that the polishing compound can effectively adhere to the surface.
3.2 Applying Rubbing Compound
Apply a small amount of rubbing compound to a foam polishing pad. Gently rub the compound onto the scratched area using circular motions. Apply moderate pressure and work the compound into the scratch for several minutes. The rubbing compound will help to level the clear coat and remove the scratch.
3.3 Polishing the Surface
After using the rubbing compound, switch to a polishing compound. Apply a small amount to a clean foam polishing pad and repeat the circular motions over the same area. The polishing compound will refine the finish, removing any swirl marks left by the rubbing compound and restoring the paint’s shine.
3.4 Applying Wax or Sealant
To protect the repaired area and enhance the paint’s gloss, apply a coat of wax or paint sealant. Follow the manufacturer’s instructions for application. Typically, this involves applying a thin layer of wax or sealant with a clean applicator pad, allowing it to dry, and then buffing it off with a microfiber cloth.
3.5 Inspecting the Results
After completing these steps, inspect the repaired area under good lighting. The scratch should be significantly reduced or completely gone. If the scratch is still visible, you may need to repeat the process or consider more advanced repair techniques.
Detailed Steps for Minor Scratch Repair
- Wash: Clean the area with car wash soap and water.
- Dry: Dry with a microfiber cloth.
- Rubbing Compound: Apply and rub in circular motions.
- Polishing Compound: Apply and polish to restore shine.
- Wax/Sealant: Protect and enhance gloss.
- Inspect: Check for improvement.
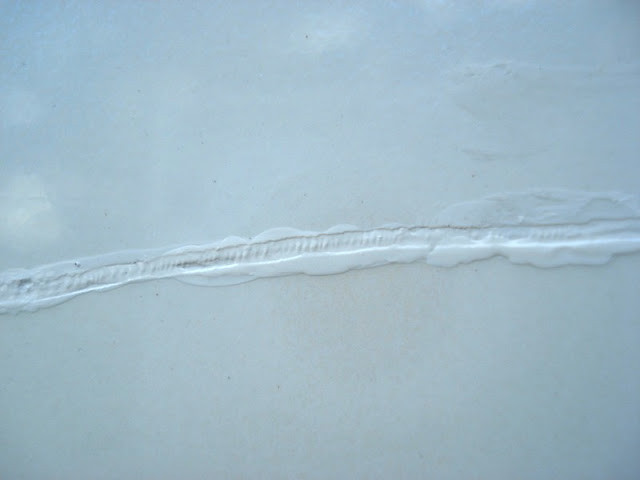
 Application of rubbing compound to a car scratch, preparing the surface for polishing and restoration.
3.6 Tips for Best Results
- Use high-quality microfiber cloths to avoid introducing new scratches.
- Work in a shaded area to prevent the compound from drying too quickly.
- Keep the polishing pad clean by frequently wiping it with a brush or clean cloth.
- Apply even pressure to ensure uniform removal of the scratch.
CARDIAGTECH.NET offers a range of high-quality polishing compounds and applicators to achieve professional results. Contact us at Whatsapp: +1 (641) 206-8880 for expert advice and product recommendations.
4. Addressing Deeper Key Scratches with Touch-Up Paint
Deeper key scratches that penetrate the clear coat and reach the paint layer require a more involved repair process using touch-up paint. This section outlines the steps to effectively fill and blend these scratches, restoring your car’s appearance.
4.1 Preparing the Area
Begin by thoroughly cleaning the area around the scratch with car wash soap and water. Dry it with a microfiber cloth. Next, use rubbing alcohol to degrease the surface, ensuring that the touch-up paint adheres properly.
4.2 Applying Touch-Up Paint
Shake the touch-up paint bottle well to ensure the paint is thoroughly mixed. Use a fine-tip applicator brush to carefully apply the paint to the scratch, filling it in thin layers. Allow each layer to dry completely before applying the next. This prevents the paint from running or sagging.
4.3 Leveling the Paint
Once the touch-up paint is completely dry, use fine-grit sandpaper (2000-3000 grit) to gently level the paint with the surrounding surface. Wrap the sandpaper around a sanding block and wet-sand the area, using light pressure and a back-and-forth motion. Be careful not to remove too much paint.
4.4 Polishing and Buffing
After sanding, use rubbing compound to remove any sanding marks and blend the touch-up paint with the surrounding paint. Apply the compound to a foam polishing pad and rub it onto the area in circular motions. Follow with polishing compound to restore the shine and remove any swirl marks.
4.5 Applying Clear Coat
To protect the touch-up paint and blend it seamlessly with the surrounding area, apply a thin layer of clear coat. Allow the clear coat to dry completely, then polish and buff the area to achieve a uniform finish.
Step-by-Step Guide: Repairing Deep Scratches with Touch-Up Paint
- Clean: Wash and dry the scratched area.
- Degrease: Use rubbing alcohol to prepare the surface.
- Apply Touch-Up Paint: Fill the scratch in thin layers.
- Level: Wet-sand with fine-grit sandpaper.
- Polish: Use rubbing and polishing compounds.
- Clear Coat: Apply and buff for a seamless finish.
 Application of touch-up paint to a car scratch using a fine-tip brush for precise coverage and repair.
4.6 Tips for Achieving a Professional Finish
- Use a paint depth gauge to avoid over-sanding the clear coat.
- Apply multiple thin layers of touch-up paint rather than one thick layer.
- Allow sufficient drying time between coats of paint and clear coat.
- Use a high-quality clear coat for maximum protection and shine.
CARDIAGTECH.NET offers color-matched touch-up paints and clear coats to ensure a perfect repair. Contact us at 276 Reock St, City of Orange, NJ 07050, United States, or call Whatsapp: +1 (641) 206-8880 for personalized assistance.
5. Repairing Scratches That Reach the Primer or Metal
When key scratches penetrate through the clear coat and paint layers to expose the primer or bare metal, a more comprehensive repair is necessary to prevent rust and maintain the structural integrity of the car. This section details the steps for addressing these severe scratches.
5.1 Preparing the Damaged Area
Start by cleaning the area thoroughly with car wash soap and water. Use a microfiber cloth to dry the surface. If there is any rust present, remove it with a wire brush or rust remover. Ensure the area is completely clean and dry before proceeding.
5.2 Applying Rust Inhibitor
For scratches that have reached the bare metal, apply a rust inhibitor to prevent corrosion. Follow the manufacturer’s instructions for application. This step is crucial to protect the metal from moisture and oxidation.
5.3 Applying Body Filler
If the scratch is deep, you may need to use body filler to level the surface. Mix the body filler according to the manufacturer’s instructions and apply it to the scratch with a plastic spreader. Allow the filler to dry completely.
5.4 Sanding the Body Filler
Once the body filler is dry, sand it down to match the contour of the surrounding surface. Start with a coarse-grit sandpaper (180-220 grit) to remove excess filler, then switch to a finer-grit sandpaper (320-400 grit) to smooth the surface.
5.5 Applying Primer
After sanding the body filler, apply a coat of primer to the repaired area. This will provide a smooth, uniform surface for the touch-up paint to adhere to. Allow the primer to dry completely before proceeding.
5.6 Applying Touch-Up Paint and Clear Coat
Once the primer is dry, apply the touch-up paint in thin layers, allowing each layer to dry before applying the next. After the touch-up paint is dry, apply a clear coat to protect the paint and blend it with the surrounding area.
Repairing Primer/Metal Scratches: A Detailed Guide
- Clean: Wash and dry the area, removing any rust.
- Rust Inhibitor: Apply to bare metal.
- Body Filler: Level deep scratches.
- Sand: Smooth the filler to match the surface.
- Primer: Apply for a uniform base.
- Paint/Clear Coat: Apply touch-up paint and clear coat.
 Wet sanding of a car surface after applying body filler and primer, preparing for a smooth paint finish.
5.7 Final Polishing
After the clear coat is dry, polish the repaired area with rubbing compound and polishing compound to achieve a seamless finish. Apply wax or paint sealant to protect the repaired area and enhance the paint’s gloss.
5.8 Safety Precautions
- Always wear gloves, a respirator, and eye protection when working with body filler, primer, and paint.
- Work in a well-ventilated area to avoid inhaling harmful fumes.
- Follow the manufacturer’s instructions for all products used.
CARDIAGTECH.NET provides a wide range of body repair tools and materials to handle even the most severe scratches. For expert guidance, contact us at 276 Reock St, City of Orange, NJ 07050, United States, or call Whatsapp: +1 (641) 206-8880.
6. Advanced Techniques for Blending and Finishing
Achieving a flawless finish when repairing car scratches requires advanced techniques for blending and finishing the repaired area. This section explores methods to seamlessly integrate the repaired section with the surrounding paint, ensuring a professional-quality result.
6.1 Wet Sanding for Blending
Wet sanding is a technique used to smooth the transition between the repaired area and the original paint. After applying touch-up paint and clear coat, use fine-grit sandpaper (2000-3000 grit) to gently sand the area. Keep the sandpaper and surface wet to minimize scratching.
6.2 Feathering the Edges
When wet sanding, focus on feathering the edges of the repaired area. This involves gradually reducing the amount of material removed as you move away from the center of the repair. Feathering helps to blend the edges of the touch-up paint with the surrounding paint, creating a seamless transition.
6.3 Using a Rotary Buffer
A rotary buffer can be used to efficiently polish and blend the repaired area. Apply rubbing compound to a foam polishing pad and use the buffer to gently polish the area. Keep the buffer moving and avoid applying too much pressure to prevent damaging the paint.
6.4 Applying Heat
Applying heat can help to cure the touch-up paint and clear coat more quickly, improving adhesion and durability. Use a heat gun to gently warm the repaired area, being careful not to overheat the paint.
6.5 Color Matching Techniques
Accurate color matching is essential for achieving a seamless repair. Use a color matching system to ensure that the touch-up paint matches your car’s exact color code. If necessary, blend the touch-up paint with a small amount of blending solvent to achieve a perfect match.
6.6 Final Inspection and Adjustments
After completing the repair, inspect the area under good lighting to ensure that the scratch is completely gone and the finish is uniform. If necessary, repeat the polishing and blending steps to achieve a flawless result.
Advanced Techniques for Seamless Car Scratch Repair
- Wet Sanding: Smooth the repaired area.
- Feathering: Blend edges seamlessly.
- Rotary Buffer: Efficient polishing.
- Heat Application: Cure paint for durability.
- Color Matching: Ensure accurate paint match.
- Final Inspection: Verify flawless finish.
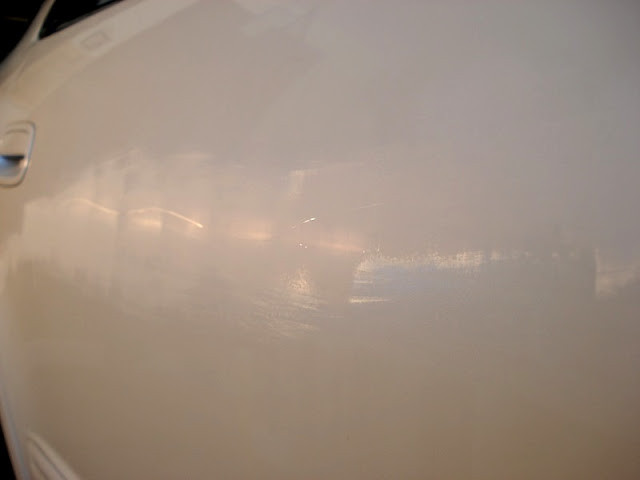
 Close-up of a polished car surface after scratch repair, showing a near-invisible blend with the original paint.
6.7 Professional Tips
- Practice on a test panel before attempting to repair a scratch on your car.
- Use high-quality products and tools for best results.
- Take your time and be patient. Achieving a flawless finish requires attention to detail.
CARDIAGTECH.NET offers a range of advanced tools and materials for achieving professional-quality car scratch repairs. For personalized advice, contact us at 276 Reock St, City of Orange, NJ 07050, United States, or call Whatsapp: +1 (641) 206-8880.
7. Preventing Future Key Scratches
While knowing how to fix a car scratch from a key is valuable, preventing such incidents from occurring in the first place is even better. This section outlines various strategies to protect your vehicle from key scratches and maintain its pristine condition.
7.1 Parking Strategically
- Choose Well-Lit Areas: Park in well-lit and high-traffic areas to deter vandals.
- Avoid Tight Spaces: Opt for parking spots that provide ample space around your car to reduce the risk of accidental scratches.
- Use Parking Sensors and Cameras: If your car is equipped with parking sensors or cameras, use them to avoid collisions with other vehicles or objects.
7.2 Installing Protective Films and Coatings
- Paint Protection Film (PPF): Apply PPF to vulnerable areas of your car, such as the doors, fenders, and bumpers. PPF is a transparent film that protects the paint from scratches, chips, and other damage.
- Ceramic Coating: Apply ceramic coating to your car’s paint for added protection. Ceramic coating creates a hard, durable layer that resists scratches, UV damage, and chemical contaminants.
7.3 Using Car Covers
- Indoor Car Cover: Use a soft, breathable car cover when storing your car indoors to protect it from dust, dirt, and accidental scratches.
- Outdoor Car Cover: Use a waterproof, UV-resistant car cover when parking your car outdoors to protect it from the elements and potential vandalism.
7.4 Installing Security Systems
- Car Alarm: Install a car alarm system to deter vandals and alert you to any suspicious activity around your vehicle.
- Dash Camera: Install a dash camera to record video footage of your car while it is parked. This can provide valuable evidence in case of vandalism or theft.
7.5 Maintaining a Clean Vehicle
- Regular Washing: Wash your car regularly to remove dirt, grime, and contaminants that can scratch the paint.
- Waxing: Wax your car regularly to protect the paint and enhance its gloss. Wax creates a barrier between the paint and the elements, reducing the risk of scratches and fading.
7.6 Being Aware of Your Surroundings
- Pay Attention: Be aware of your surroundings and avoid parking in areas known for vandalism or crime.
- Report Suspicious Activity: If you see anyone acting suspiciously around your car, report it to the authorities.
Protecting Your Car: Prevention Strategies
- Strategic Parking: Choose safe, well-lit spots.
- Protective Films: Apply PPF for scratch resistance.
- Ceramic Coating: Durable layer against damage.
- Car Covers: Protect from dust and elements.
- Security Systems: Deter vandals with alarms.
- Regular Maintenance: Wash and wax your car.
- Awareness: Be vigilant in your surroundings.
 Car parked in a well-lit area, showcasing a strategic approach to preventing vandalism and key scratches.
7.7 Professional Advice
- Consult with a professional detailing service for recommendations on the best protective films and coatings for your car.
- Have your car’s paint inspected regularly for any signs of damage.
CARDIAGTECH.NET offers a variety of car care products and security systems to help you protect your vehicle from key scratches and other damage. Contact us at 276 Reock St, City of Orange, NJ 07050, United States, or call Whatsapp: +1 (641) 206-8880 for expert advice and product information.
8. Cost Considerations for DIY vs. Professional Repair
Deciding whether to fix a car scratch from a key yourself or hire a professional involves weighing the costs, time commitment, and potential results. This section provides a detailed comparison of DIY repair versus professional services.
8.1 DIY Repair Costs
- Materials: The cost of materials for DIY repair can range from $20 to $100, depending on the severity of the scratch and the quality of the products used.
- Tools: If you don’t already own the necessary tools, such as sandpaper, polishing pads, and a buffer, you may need to invest in these items, which can add to the overall cost.
- Time: DIY repair can take several hours, depending on your skill level and the complexity of the repair.
8.2 Professional Repair Costs
- Estimates: Professional repair costs can vary widely depending on the extent of the damage, the type of paint, and the labor rates of the repair shop.
- Minor Scratches: Repairing minor scratches may cost between $150 and $300.
- Deeper Scratches: Repairing deeper scratches that require body filler and painting can cost $300 to $800 or more.
8.3 DIY vs. Professional: A Cost Comparison
| Repair Type | DIY Costs | Professional Costs |
|---|---|---|
| Minor Scratch | $20 – $50 | $150 – $300 |
| Deeper Scratch | $50 – $100 | $300 – $800+ |
| Tools (if needed) | $50 – $200+ | N/A |
8.4 Factors to Consider
- Skill Level: If you have experience with car detailing and paint repair, DIY may be a viable option. However, if you are not comfortable working with tools and chemicals, it may be best to leave the repair to a professional.
- Quality of Results: Professional repair shops have the expertise and equipment to achieve a flawless finish. DIY repairs may not always yield the same level of quality.
- Time Commitment: DIY repair requires a significant time commitment. If you are short on time, hiring a professional may be the better option.
8.5 Getting a Professional Estimate
Before making a decision, get a professional estimate from a reputable repair shop. This will give you a clear idea of the cost and scope of the repair.
8.6 Value for Money
Consider the value for money when deciding between DIY and professional repair. While DIY may be cheaper upfront, professional repair may provide a better long-term value due to the higher quality of the results and the peace of mind that comes with knowing the repair was done correctly.
CARDIAGTECH.NET offers tools and materials for both DIY and professional car scratch repair. For expert advice and product recommendations, contact us at 276 Reock St, City of Orange, NJ 07050, United States, or call Whatsapp: +1 (641) 206-8880.
9. Choosing the Right Products from CARDIAGTECH.NET
Selecting the right products from CARDIAGTECH.NET is crucial for achieving professional-quality results when fixing a car scratch from a key. We offer a range of high-quality tools and materials designed to meet the needs of both DIY enthusiasts and professional technicians.
9.1 Diagnostic Tools
- Paint Depth Gauges: Accurately measure the thickness of paint layers to avoid over-sanding.
- Color Matching Systems: Ensure precise paint color matching for seamless repairs.
9.2 Cleaning and Preparation
- Car Wash Soaps: Effective and safe for removing dirt and contaminants without damaging the paint.
- Microfiber Cloths: Soft, lint-free cloths for washing, drying, and polishing.
- Rubbing Alcohol: For degreasing surfaces to ensure proper adhesion of touch-up paint.
9.3 Sanding Materials
- Sandpaper Assortment: Various grits (2000, 2500, 3000) for smoothing and leveling surfaces.
- Sanding Blocks: Provide a flat, even surface for consistent sanding.
9.4 Polishing and Buffing
- Rubbing Compounds: Abrasive compounds for removing fine scratches and imperfections.
- Polishing Compounds: Less abrasive compounds for restoring shine and removing swirl marks.
- Wax and Paint Sealants: Protect and enhance the paint’s gloss.
- Foam Polishing Pads: For applying rubbing and polishing compounds with precision.
- Buffing Machines: For efficient and effective polishing.
9.5 Touch-Up Paint and Clear Coats
- Color-Matched Touch-Up Paints: Precisely matched to your car’s color code for seamless repairs.
- Clear Coats: Protect touch-up paint and blend with the surrounding area.
9.6 Body Repair Materials
- Body Fillers: For leveling deep scratches and dents.
- Rust Inhibitors: Prevent corrosion on bare metal surfaces.
- Primers: Provide a smooth, uniform surface for paint to adhere to.
9.7 Safety Gear
- Gloves: Protect hands from chemicals and contaminants.
- Respirators and Masks: Avoid inhaling harmful fumes.
- Eye Protection: Safety glasses and goggles to protect eyes.
9.8 Expert Recommendations
Our team at CARDIAGTECH.NET can provide expert recommendations on the best products for your specific repair needs. Contact us for personalized advice and assistance.
CARDIAGTECH.NET: Your Partner in Car Scratch Repair
- High-quality tools and materials
- Expert advice and support
- Wide range of products for DIY and professional use
- Color matching systems for seamless repairs
- Safety gear to protect you during the repair process
For inquiries, contact us at 276 Reock St, City of Orange, NJ 07050, United States, or call Whatsapp: +1 (641) 206-8880. Visit CARDIAGTECH.NET today to find the perfect products for fixing a car scratch from a key and keeping your vehicle looking its best.
10. Case Studies: Successful Key Scratch Repairs
Examining real-world examples of successful key scratch repairs can provide valuable insights and practical tips for tackling similar issues. This section presents case studies illustrating various repair techniques and their outcomes.
10.1 Case Study 1: Minor Clear Coat Scratch
- Vehicle: 2018 Honda Civic
- Scratch Type: Minor clear coat scratch on the driver’s side door
- Repair Method: Polishing with rubbing compound and polishing compound
- Products Used:
- Meguiar’s Ultimate Compound
- Meguiar’s Ultimate Polish
- Microfiber cloths
- Foam polishing pads
- Process:
- Washed and dried the area around the scratch.
- Applied Meguiar’s Ultimate Compound to a foam polishing pad and rubbed it onto the scratch in circular motions.
- Switched to Meguiar’s Ultimate Polish and repeated the process.
- Wiped the area clean with a microfiber cloth.
- Applied wax for added protection.
- Result: The scratch was completely removed, and the paint’s shine was restored.
10.2 Case Study 2: Deeper Paint Scratch
- Vehicle: 2015 Toyota Camry
- Scratch Type: Deeper scratch that penetrated the clear coat and reached the paint layer
- Repair Method: Touch-up paint application
- Products Used:
- Toyota touch-up paint (matched to the car’s color code)
- Fine-tip applicator brush
- 2000-grit sandpaper
- Rubbing compound
- Polishing compound
- Clear coat
- Process:
- Cleaned and degreased the area around the scratch.
- Applied touch-up paint in thin layers, allowing each layer to dry.
- Wet-sanded the area with 2000-grit sandpaper to level the paint.
- Polished with rubbing compound and polishing compound.
- Applied clear coat and buffed for a seamless finish.
- Result: The scratch was effectively filled and blended, with a near-invisible repair.
10.3 Case Study 3: Scratch Reaching the Primer
- Vehicle: 2020 Ford F-150
- Scratch Type: Deep scratch that reached the primer layer
- Repair Method: Body filler and touch-up paint
- Products Used:
- Bondo body filler
- Sandpaper (180-grit, 320-grit)
- Primer
- Ford touch-up paint (matched to the car’s color code)
- Clear coat
- Process:
- Cleaned the area and removed any rust.
- Applied Bondo body filler to level the surface.
- Sanded the filler to match the contour of the surrounding area.
- Applied primer and allowed it to dry.
- Applied touch-up paint and clear coat.
- Polished for a seamless finish.
- Result: The scratch was completely repaired, with a smooth and uniform finish.
 Before-and-after comparison of a car scratch repair, demonstrating the effectiveness of proper techniques and products.
10.4 Key Takeaways
- Proper Assessment: Accurate assessment of the scratch’s severity is crucial for choosing the right repair method.
- Quality Products: Using high-quality products from CARDIAGTECH.NET ensures better results.
- Patience and Attention to Detail: Achieving a flawless finish requires patience and attention to detail.
CARDIAGTECH.NET is your trusted partner for car scratch repair. For expert guidance and product recommendations, contact us at 276 Reock St, City of Orange, NJ 07050, United States, or call Whatsapp: +1 (641) 206-8880.
Frequently Asked Questions (FAQ)
Q1: What is the best way to assess the depth of a car scratch?
A: Clean the area thoroughly and run your fingernail across the scratch. If your nail catches, the scratch has likely penetrated the clear coat and may require more than just polishing.
Q2: Can I use any type of rubbing compound for car scratches?
A: No, use a rubbing compound specifically designed for automotive paint. Avoid abrasive compounds that can damage the clear coat.
Q3: How do I match the touch-up paint to my car’s color?
A: Find your car’s color code (usually located on a sticker in the driver’s side doorjamb or in the owner’s manual) and use that code when purchasing touch-up paint.
Q4: Is it necessary to use clear coat after applying touch-up paint?
A: Yes, clear coat protects the touch-up paint and blends it with the surrounding area, providing a more seamless finish.
Q5: What grit sandpaper should I use for wet sanding?
A: Use 2000-grit to 3000-grit sandpaper for wet sanding after applying touch-up paint.
Q6: How can I prevent rust from forming in a deep scratch?
A: Apply a rust inhibitor to the area before applying