How To Fix A Car Seat Mechanism Easily
Fixing a car seat mechanism can seem daunting, but it doesn’t have to be. At CARDIAGTECH.NET, we provide the tools and expertise you need to tackle this task efficiently, ensuring both safety and comfort in your vehicle. Discover how to repair and maintain your car seat mechanism, keeping your seats in top condition and enhancing your driving experience with our premium automotive repair tools.
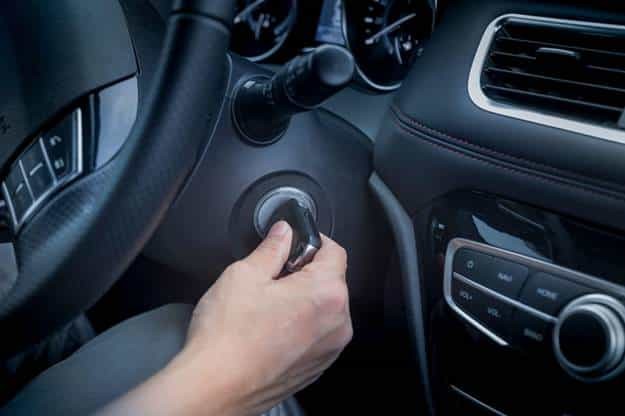
1. Understanding the Car Seat Mechanism
The car seat mechanism is a complex system that allows you to adjust your seat for optimal comfort and safety. It typically includes levers, cables, and gears that control the seat’s position, height, and lumbar support. Understanding how each component works is crucial for effective repairs.
Key Components of a Car Seat Mechanism:
- Adjustment Levers: These levers control the forward, backward, up, and down movements of the seat.
- Cables: Cables connect the levers to the adjustment mechanism, translating the lever’s movement into seat adjustments.
- Gears: Gears help to smoothly adjust the seat, providing precise control over its position.
- Lumbar Support: This feature provides support for the lower back and can be adjusted for comfort.
- Headrest Mechanism: Allows adjustment of the headrest height and angle for neck support.
2. Identifying Common Issues with Car Seat Mechanisms
Before you begin any repairs, it’s important to identify the specific problem with your car seat mechanism. Common issues include:
- Stuck Seat: The seat won’t move forward, backward, up, or down.
- Broken Lever: The adjustment lever is broken or detached.
- Cable Issues: Cables are stretched, broken, or disconnected.
- Gear Problems: Gears are worn out or jammed.
- Lumbar Support Failure: The lumbar support no longer functions properly.
- Headrest Problems: The headrest is loose or won’t stay in position.
Recognizing these issues early can save you time and prevent further damage.
3. Essential Tools for Car Seat Mechanism Repair
Having the right tools is essential for a successful car seat mechanism repair. Here’s a list of tools you’ll likely need:
- Socket Set: For removing and tightening bolts and screws.
- Screwdrivers: Both Phillips head and flathead screwdrivers of various sizes.
- Pliers: For gripping and manipulating cables and small parts.
- Wrench Set: For loosening and tightening nuts and bolts.
- Trim Removal Tools: To remove plastic trim pieces without causing damage.
- Lubricant: To lubricate moving parts and prevent sticking.
- Multimeter: To test electrical components if the seat has power functions.
- Work Gloves: To protect your hands.
- Safety Glasses: To protect your eyes.
- Shop Towels: For cleaning and wiping up spills.
Investing in quality tools from CARDIAGTECH.NET ensures that you’re well-equipped for any repair job.
4. Step-by-Step Guide to Fixing a Stuck Car Seat
A stuck car seat can be frustrating, but it’s often a simple fix. Here’s a step-by-step guide to get your seat moving again:
4.1. Preliminary Inspection
Begin by inspecting the seat tracks for any visible obstructions. Look for coins, debris, or other items that may be blocking the mechanism.
4.2. Applying Lubricant
Spray a generous amount of lubricant, such as WD-40, onto the seat tracks and moving parts. Allow the lubricant to penetrate for about 15-20 minutes.
4.3. Attempting Movement
Try moving the seat back and forth. Apply gentle pressure while wiggling the adjustment lever. Avoid using excessive force, as this could damage the mechanism.
4.4. Checking the Cables
If the seat remains stuck, inspect the cables connected to the adjustment lever. Make sure they are properly connected and not damaged. If a cable is loose, reconnect it securely.
4.5. Removing the Seat (If Necessary)
If the above steps don’t work, you may need to remove the seat for a more thorough inspection. Disconnect the battery before removing the seat to avoid accidental airbag deployment. Remove the bolts holding the seat in place and carefully lift the seat out of the vehicle.
4.6. Inspecting the Mechanism
With the seat removed, inspect the entire mechanism for damage or obstructions. Clean any debris and lubricate all moving parts.
4.7. Reinstalling the Seat
Reinstall the seat and reconnect the battery. Test the seat movement to ensure it is functioning properly.
Alternative Text: Detailed car seat mechanism illustration highlighting adjustment levers, cables, and gears.
5. How to Repair a Broken Car Seat Lever
A broken car seat lever can make it impossible to adjust your seat. Here’s how to repair or replace it:
5.1. Assessing the Damage
Determine the extent of the damage. Is the lever cracked, broken, or simply detached? This will help you decide whether to repair or replace it.
5.2. Ordering a Replacement Lever
Order a replacement lever from CARDIAGTECH.NET or a local auto parts store. Make sure to get the correct lever for your vehicle’s make and model.
7L6885682E7D6 body hardware, seats & tracks, rear seat components, latch assy SEAT BACK COMPONENTS, brown Right $71.82
5.3. Removing the Old Lever
Remove the old lever by unscrewing or unclipping it from the seat frame. Use trim removal tools to avoid damaging the surrounding plastic.
5.4. Installing the New Lever
Install the new lever by attaching it to the seat frame in the same manner as the old lever. Make sure it is securely fastened.
5.5. Testing the Lever
Test the new lever to ensure it is functioning properly. Adjust the seat to different positions to verify that the lever is working smoothly.
6. Fixing Car Seat Cable Issues
Cables play a critical role in the car seat mechanism, transmitting movement from the levers to the seat adjustments. Here’s how to address common cable issues:
6.1. Identifying the Problem
Determine if the cable is stretched, broken, or disconnected. A stretched cable may cause the seat to move sluggishly, while a broken or disconnected cable will prevent movement altogether.
6.2. Replacing a Broken Cable
If the cable is broken, you’ll need to replace it. Order a replacement cable from CARDIAGTECH.NET or a local auto parts store.
6.3. Accessing the Cable
Access the cable by removing the seat and any necessary trim pieces. Follow the manufacturer’s instructions for your specific vehicle model.
6.4. Installing the New Cable
Install the new cable by connecting it to the adjustment lever and the seat mechanism. Make sure the cable is properly routed and secured.
6.5. Adjusting Cable Tension
Adjust the cable tension to ensure smooth seat movement. Some cables have adjustment screws or nuts that allow you to fine-tune the tension.
6.6. Reassembling the Seat
Reassemble the seat and test the adjustment mechanism to ensure the new cable is working properly.
7. Addressing Gear Problems in Car Seat Mechanisms
Worn or damaged gears can cause the seat to jam or move erratically. Here’s how to address gear problems:
7.1. Inspecting the Gears
Inspect the gears for wear, damage, or debris. Use a flashlight to get a clear view of the gears.
7.2. Cleaning the Gears
Clean the gears with a brush and solvent to remove any dirt or debris.
7.3. Lubricating the Gears
Lubricate the gears with a high-quality grease to ensure smooth operation.
7.4. Replacing Worn Gears
If the gears are severely worn or damaged, you may need to replace them. Order replacement gears from CARDIAGTECH.NET or a local auto parts store.
7.5. Reassembling the Mechanism
Reassemble the seat mechanism and test the seat movement to ensure the gears are working properly.
8. Restoring Lumbar Support Functionality
If your car’s lumbar support is no longer functioning, here’s how to troubleshoot and repair it:
8.1. Checking the Power Supply
If your lumbar support is electric, check the power supply to ensure it is receiving power. Use a multimeter to test the voltage at the lumbar support motor.
8.2. Inspecting the Motor
Inspect the lumbar support motor for damage or wear. If the motor is faulty, you may need to replace it.
8.3. Examining the Air Bladders
If your lumbar support uses air bladders, check them for leaks or damage. Replace any damaged air bladders.
8.4. Adjusting the Control Switch
Check the lumbar support control switch for proper function. Clean or replace the switch if necessary.
8.5. Reassembling the System
Reassemble the lumbar support system and test its functionality.
9. Resolving Headrest Issues
A loose or malfunctioning headrest can be a safety hazard. Here’s how to resolve common headrest issues:
9.1. Tightening Loose Headrests
If the headrest is loose, try tightening any screws or bolts that hold it in place.
9.2. Replacing Broken Clips
If the headrest won’t stay in position, the clips that hold it in place may be broken. Replace the broken clips with new ones.
9.3. Adjusting the Headrest Mechanism
Adjust the headrest mechanism to ensure it is functioning properly. Some headrests have adjustable tension settings.
9.4. Ensuring Proper Alignment
Ensure the headrest is properly aligned with the seat back. Misalignment can cause discomfort and reduce its effectiveness in a collision.
10. Reinforcing Car Seat Mechanisms for Longevity
To prevent future issues, consider reinforcing your car seat mechanism. Here are some tips:
10.1. Using Epoxy
Apply Loctite two-part epoxy to reinforce plastic components. This can help prevent cracks and breaks.
10.2. Adding Reinforcement Plates
Add metal reinforcement plates to areas that are prone to stress or breakage.
10.3. Regular Lubrication
Regularly lubricate all moving parts to reduce friction and wear.
10.4. Avoiding Overloading the Seat
Avoid overloading the seat with excessive weight, as this can strain the mechanism.
10.5. Careful Use of Adjustment Levers
Use the adjustment levers gently and avoid forcing them beyond their intended range of motion.
Alternative Text: Reinforcing car seat mechanism plastic parts with Loctite epoxy for added durability.
11. Safety Precautions During Car Seat Repair
Safety should always be your top priority when working on car seat repairs. Here are some essential safety precautions:
11.1. Disconnecting the Battery
Disconnect the battery before working on any electrical components to prevent accidental airbag deployment or electrical shock.
11.2. Wearing Safety Gear
Wear safety glasses and work gloves to protect your eyes and hands.
11.3. Using Proper Lifting Techniques
Use proper lifting techniques to avoid back injuries when removing or reinstalling the seat.
11.4. Working in a Well-Ventilated Area
Work in a well-ventilated area when using solvents or lubricants.
11.5. Following Manufacturer’s Instructions
Follow the manufacturer’s instructions for your specific vehicle model and car seat components.
12. Cost-Effective Solutions for Car Seat Mechanism Maintenance
Maintaining your car seat mechanism doesn’t have to break the bank. Here are some cost-effective solutions:
12.1. Regular Cleaning and Lubrication
Regular cleaning and lubrication can prevent many common issues and extend the life of your car seat mechanism.
12.2. DIY Repairs
Performing DIY repairs can save you money on labor costs. CARDIAGTECH.NET provides the tools and resources you need to tackle these repairs yourself.
12.3. Sourcing Parts Online
Sourcing parts online from CARDIAGTECH.NET can often be cheaper than buying them from a local auto parts store.
12.4. Salvaging Parts
Consider salvaging parts from a junkyard if you’re on a tight budget.
12.5. Preventive Maintenance
Preventive maintenance, such as checking cables and gears regularly, can help you catch small problems before they become major repairs.
13. Understanding Car Seat Safety Standards
Car seat safety is paramount, especially when dealing with children’s car seats. Here’s an overview of car seat safety standards:
13.1. NHTSA Standards
The National Highway Traffic Safety Administration (NHTSA) sets safety standards for car seats in the United States. These standards cover everything from crash testing to labeling requirements.
13.2. Types of Car Seats
There are several types of car seats, including:
- Rear-Facing Seats: For infants and young children.
- Forward-Facing Seats: For older children who have outgrown rear-facing seats.
- Booster Seats: For children who are too big for forward-facing seats but not yet big enough to use a seat belt alone.
13.3. Proper Installation
Proper installation is crucial for car seat safety. Always follow the manufacturer’s instructions and consider having your car seat installation checked by a certified technician.
13.4. LATCH System
The LATCH (Lower Anchors and Tethers for Children) system is a standardized system for installing car seats using lower anchors and a top tether.
13.5. Seat Belt Installation
If your car doesn’t have the LATCH system, you can install a car seat using the seat belt. Make sure the seat belt is properly routed and tightened.
14. When to Seek Professional Help
While many car seat mechanism repairs can be done DIY, there are times when you should seek professional help. Here are some situations:
14.1. Complex Repairs
If the repair is complex or involves specialized tools, it’s best to consult a professional mechanic.
14.2. Airbag Issues
If the car seat mechanism is connected to the airbag system, it’s crucial to have a professional handle the repair to avoid accidental airbag deployment.
14.3. Lack of Experience
If you lack experience or are uncomfortable working on car seat repairs, it’s best to leave it to the professionals.
14.4. Safety Concerns
If you have any safety concerns, such as damaged seat belts or a compromised seat frame, seek professional help immediately.
14.5. Warranty Issues
If your car is still under warranty, having a professional perform the repair may be necessary to maintain your warranty coverage.
15. Choosing the Right Car Seat Repair Tools from CARDIAGTECH.NET
CARDIAGTECH.NET offers a wide range of tools for car seat repair. Here’s how to choose the right tools for your needs:
15.1. Socket Sets
A high-quality socket set is essential for removing and tightening bolts and screws. Look for a set with a variety of sizes and a durable construction.
15.2. Screwdrivers
Choose a set of screwdrivers with both Phillips head and flathead options in various sizes. Look for screwdrivers with comfortable handles and magnetic tips.
15.3. Pliers
Pliers are useful for gripping and manipulating cables and small parts. Choose a set with different types of pliers, such as needle-nose pliers and slip-joint pliers.
15.4. Trim Removal Tools
Trim removal tools are essential for removing plastic trim pieces without causing damage. Look for a set with a variety of shapes and sizes.
15.5. Multimeters
A multimeter is useful for testing electrical components. Choose a multimeter with a clear display and a variety of functions.
15.6. Wrenches
A good set of wrenches is essential for loosening and tightening nuts and bolts.
15.7. OBD2 Scanners
An OBD2 scanner can help diagnose issues with your car’s computer system, providing valuable insights for repairs.
16. How To Find The Right Car Seat Replacement Parts
Finding the right car seat replacement parts is essential for a successful repair. Here’s how to ensure you get the correct components:
16.1. Identify the Exact Part Number
The most reliable way to find the correct replacement part is by identifying the exact part number. This number is usually stamped on the original part or listed in your car’s service manual.
16.2. Check Your Vehicle’s Make, Model, and Year
When searching for replacement parts, always specify your vehicle’s make, model, and year. This ensures that the parts you find are compatible with your car.
16.3. Use Online Parts Catalogs
Many online retailers, including CARDIAGTECH.NET, offer parts catalogs where you can search for components based on your vehicle’s specifications.
16.4. Consult with Automotive Professionals
If you’re unsure about which part to order, consult with automotive professionals or mechanics. They can provide expert advice and help you identify the correct replacement.
16.5. Read Customer Reviews
Before purchasing a replacement part, read customer reviews to ensure its quality and compatibility. Other customers’ experiences can provide valuable insights.
17. Preparing Your Workspace for Car Seat Repair
A well-prepared workspace can significantly improve the efficiency and safety of your car seat repair project. Here’s how to set up your workspace:
17.1. Choose a Clean, Well-Lit Area
Select a workspace that is clean, dry, and well-lit. Good lighting is essential for seeing small parts and details.
17.2. Gather All Necessary Tools and Materials
Before starting the repair, gather all the necessary tools, replacement parts, and materials. This prevents interruptions and keeps you focused on the task.
17.3. Protect Your Vehicle’s Interior
Use seat covers and floor mats to protect your vehicle’s interior from dirt, grease, and accidental damage.
17.4. Use a Parts Tray
Use a parts tray or magnetic dish to keep small parts organized and prevent them from getting lost.
17.5. Keep a First Aid Kit Nearby
Keep a well-stocked first aid kit nearby in case of minor injuries.
18. The Benefits of Professional Car Seat Cleaning Services
While repairing the car seat mechanism is crucial, maintaining the cleanliness of your car seats is also important for comfort and hygiene. Here are the benefits of professional car seat cleaning services:
18.1. Thorough Cleaning
Professional cleaners use specialized equipment and techniques to thoroughly clean car seats, removing dirt, stains, and allergens.
18.2. Fabric Protection
Professional cleaning services often include fabric protection treatments that help prevent future stains and damage.
18.3. Odor Removal
Professional cleaners can effectively remove odors caused by spills, pets, or smoke.
18.4. Improved Air Quality
Clean car seats can improve the air quality inside your vehicle by reducing allergens and dust.
18.5. Extended Lifespan
Regular professional cleaning can extend the lifespan of your car seats by preventing wear and tear.
19. Long-Term Car Seat Maintenance Tips
To keep your car seats in excellent condition and prevent future issues with the mechanism, follow these long-term maintenance tips:
19.1. Regular Cleaning
Clean your car seats regularly using a vacuum cleaner and a mild upholstery cleaner.
19.2. Prompt Spill Cleanup
Clean up spills immediately to prevent stains and odors.
19.3. Use Seat Covers
Use seat covers to protect your car seats from dirt, wear, and UV damage.
19.4. Avoid Sharp Objects
Avoid placing sharp objects on your car seats, as they can puncture or tear the fabric.
19.5. Periodic Inspections
Periodically inspect your car seats for signs of wear or damage, and address any issues promptly.
20. Addressing Specific Car Brands and Their Seat Mechanism Peculiarities
Different car brands may have unique car seat mechanisms with specific issues. Here’s a brief overview:
20.1. Toyota
Toyota car seats are generally reliable but may experience issues with lumbar support and adjustment levers.
20.2. Honda
Honda car seats may have problems with cable connections and seat track alignment.
20.3. Ford
Ford car seats can experience issues with electric seat motors and headrest mechanisms.
20.4. BMW
BMW car seats often have complex electronic systems that may require professional attention.
20.5. Mercedes-Benz
Mercedes-Benz car seats are known for their luxurious features, but they can also be prone to electronic issues and wear on leather upholstery.
Understanding the specific issues associated with your car brand can help you diagnose and address problems more effectively.
By following these comprehensive steps and utilizing the right tools and resources from CARDIAGTECH.NET, you can effectively fix your car seat mechanism and maintain your car seats for years to come.
Don’t let car seat mechanism problems keep you from enjoying a comfortable and safe driving experience. CARDIAGTECH.NET is here to provide you with the expert guidance and top-quality tools you need to get the job done right. Contact us today at Whatsapp: +1 (641) 206-8880 or visit our website at CARDIAGTECH.NET, located at 276 Reock St, City of Orange, NJ 07050, United States, and let our team help you find the perfect tools for your car seat repair needs. We’re committed to helping you enhance your vehicle’s comfort and safety.
FAQ: Car Seat Mechanism Repairs
1. What are the most common problems with car seat mechanisms?
Common issues include stuck seats, broken levers, cable problems, gear issues, lumbar support failure, and headrest problems.
2. Can I fix a car seat mechanism myself, or do I need a professional?
Many repairs can be done DIY, but complex issues or those involving airbags should be handled by a professional.
3. What tools do I need to repair a car seat mechanism?
Essential tools include socket sets, screwdrivers, pliers, trim removal tools, lubricant, and multimeters. CARDIAGTECH.NET offers a comprehensive range of high-quality tools for all your repair needs.
4. How do I know if a car seat cable is broken?
If the seat moves sluggishly or not at all when you use the adjustment lever, the cable may be stretched or broken.
5. How do I clean a car seat mechanism?
Use a brush and solvent to remove dirt and debris, then lubricate the moving parts with high-quality grease.
6. What is the LATCH system for car seats?
The LATCH (Lower Anchors and Tethers for Children) system is a standardized system for installing car seats using lower anchors and a top tether, providing a secure and easy installation.
7. How often should I maintain my car seat mechanism?
Regularly cleaning and lubricating the mechanism every 6-12 months can prevent many common issues and extend its lifespan.
8. Where can I find replacement parts for my car seat?
You can find replacement parts at CARDIAGTECH.NET, local auto parts stores, or online retailers. Ensure you have the correct part number and vehicle specifications.
9. How do I reinforce a car seat mechanism to prevent future problems?
Use epoxy to reinforce plastic components, add metal reinforcement plates, and regularly lubricate moving parts.
10. What safety precautions should I take when repairing a car seat mechanism?
Disconnect the battery, wear safety glasses and work gloves, use proper lifting techniques, and work in a well-ventilated area.
Looking for reliable tools to fix your car seat mechanism? Contact CARDIAGTECH.NET today at Whatsapp: +1 (641) 206-8880 and let our experts guide you in choosing the best equipment for your needs. Our commitment is to provide you with top-quality tools and excellent service.