How To Fix A Crack In Car Body: Expert Guide
Fixing a crack in car body doesn’t always mean a costly replacement. CARDIAGTECH.NET provides expert solutions for repairing auto body damage, ensuring your vehicle looks its best. Discover cost-effective techniques, professional tips, and essential tools to restore your car’s appearance and structural integrity, with access to top-quality equipment designed to make the repair process seamless and efficient, enhancing the value and longevity of your vehicle.
1. Understanding Automotive Plastic Repairs
Automotive plastic repairs are increasingly prevalent, thanks to the expanded use of plastics in modern vehicle construction. Therefore, when a vehicle arrives at your body shop with a cracked bumper, prioritize assessing whether a repair is viable before considering a full replacement. This approach can save both time and money for your clients.
In some instances, however, a replacement is inevitable. Certain manufacturers advise against repairing specific vehicle models, necessitating a bumper replacement. Bumpers with extensive damage or multiple cracks might also demand replacement. A thorough inspection is crucial to determine the appropriate course of action.
For minor cracks or dents, SMART repairs offer a cost-effective solution. These localized repairs can be performed without removing the bumper, providing a faster and more economical alternative to a full bumper replacement.
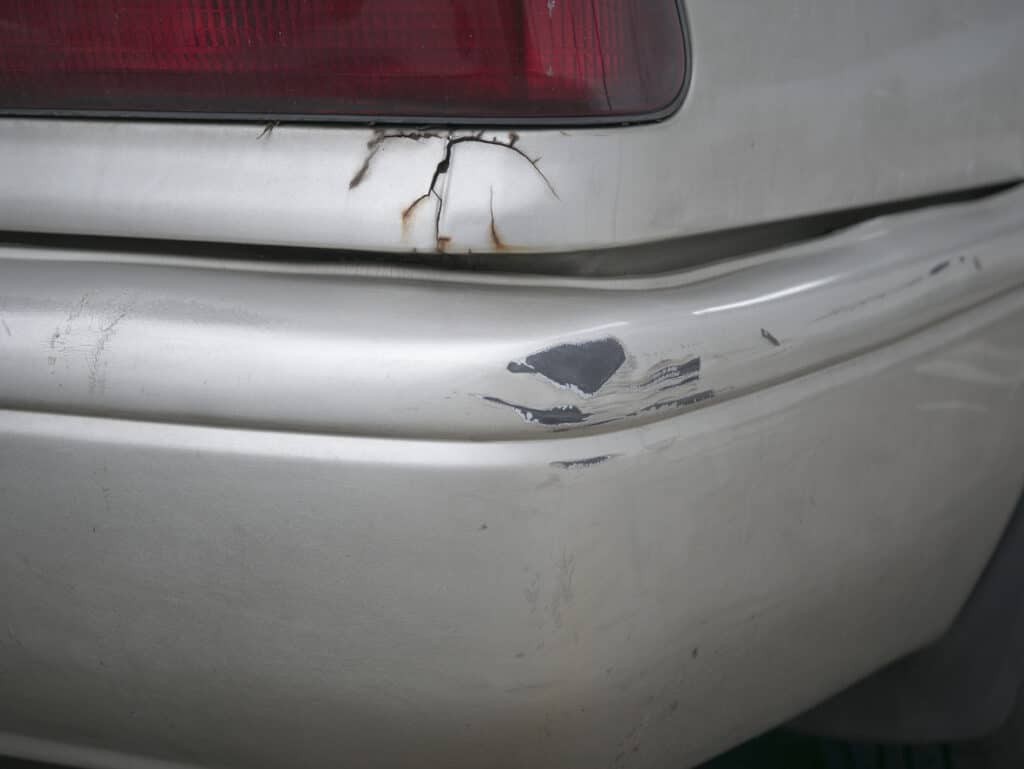
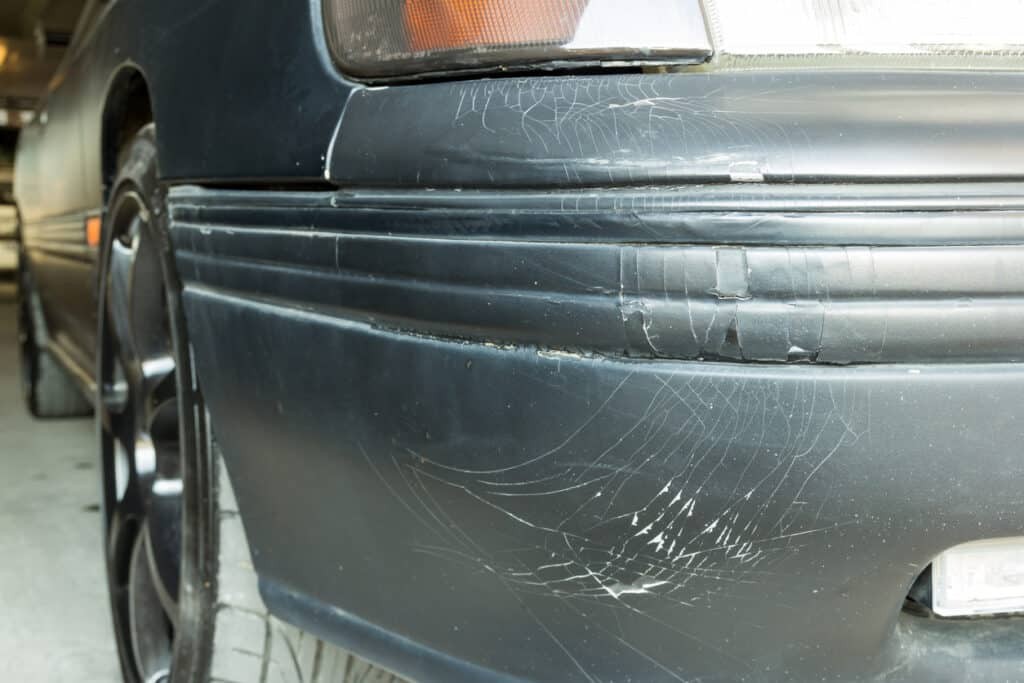
Zoomed in photo of a cracked bumper
2. Assessing the Damage: Repair or Replace?
Evaluating damage on a case-by-case basis is critical to determining whether a repair is sufficient or a replacement is required. Here’s a structured approach to help your team decide:
2.1. Feasibility Check
Begin by carefully examining the damage to ascertain if a repair is feasible. Consult the vehicle manufacturer’s guide to confirm whether bumper repairs are permitted, as some models mandate replacements. Evaluate the crack’s size and depth, as these factors can compromise the bumper’s structural integrity and preclude repair.
2.2. Safety Considerations
Safety must always be a top priority. When considering a repair, assess whether the bumper’s structural integrity meets the necessary standards. Bumpers are engineered to protect drivers and passengers, and any compromise in structural integrity could pose a risk in future collisions. Always adhere to manufacturer guidelines regarding replacements and consider replacement if the underlying structure is damaged or if repairs could impact the vehicle’s safety systems and sensors.
2.3. Efficiency Analysis
For single, minor cracks, a repair is likely the most efficient option. However, extensive damage might take longer to repair, suggesting that a full replacement is more appropriate. A Vehicle Damage Assessor (VDA) can estimate the repair time, which should be compared to the cost of a new bumper, as well as parts availability and delivery times. This comparison will help identify the most cost-effective solution.
2.4. Customer-Centric Approach
Your team should always prioritize the customer’s best interests. If a repair is only a temporary solution to a more significant problem, advise your customers accordingly. SMART bumper repairs may be suitable for minor damage requiring a quick fix, while larger cracks or dents may necessitate a more comprehensive repair or replacement. Discuss the options with your customer, considering their timeline and budget.
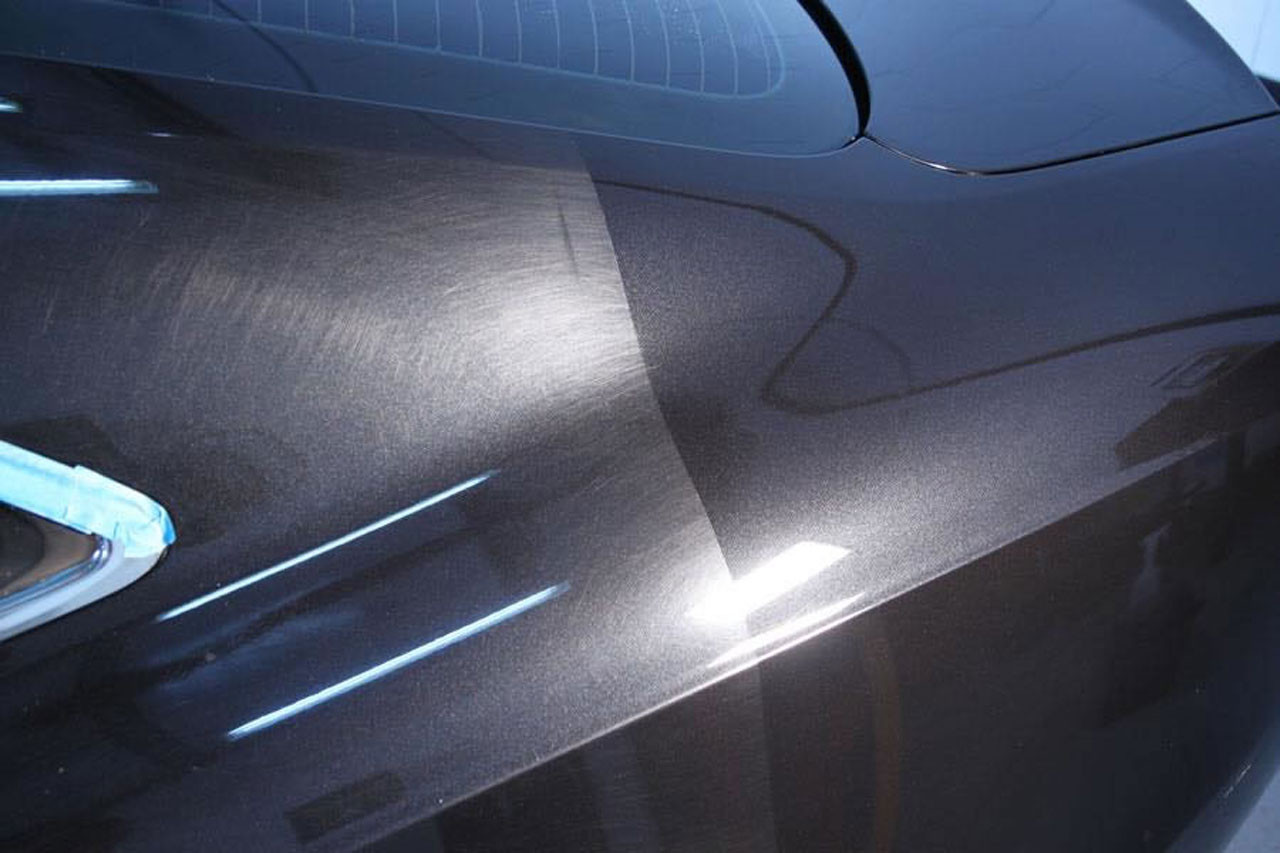
 Zoomed in photo of a front bumper
3. Step-by-Step Guide: How to Fix a Cracked Bumper
Once you decide to repair a cracked bumper, follow these steps to achieve a flawless finish efficiently:
3.1. Damage Assessment
Carefully assess the severity of the damage. Removing the bumper allows for a comprehensive view of the crack and any hidden damage. This will reinforce your decision on whether to repair or replace the bumper.
3.2. Masking
Protect adjacent panels from drilling, sanding, and painting by applying JTAPE Premium Cloth Protection Tape around the bumper’s edges. This double-strength automotive cloth protection tape prevents unwanted damage or overspray, ensuring a clean, high-quality finish.
3.3. Drilling
Drill two 6mm holes, one at each end of the damaged area. These holes act as a barrier, preventing further cracking of the bumper.
3.4. Carving and Grinding
Create a larger bonding surface by carving a V-shaped groove into the front-facing edges of the repair area. Use a grinder and a sharp knife to remove excess plastic, following a ‘V’ pattern.
3.5. Sanding
Sand the damaged area on both the front and back of the bumper using medium-grit sandpaper. This removes damage and creates micro-abrasions that enhance plastic adhesion and paint adherence.
3.6. Applying Adhesion Promoter
Proper preparation is essential for ensuring the plastic adheres correctly. Apply a plastic adhesion promoter to both sides of the damaged area to facilitate proper epoxy and filler adhesion, resulting in a smooth finish.
3.7. Epoxy Application
Apply epoxy to both sides of the bumper, allowing time for drying. Begin with the back, smoothing the application with a spreader, and then move to the more visible front. This strengthens the area before applying body filler.
3.8. Surface Preparation
Once the epoxy is hardened, sand the area again to create a smooth base for the body filler. Feather the edges of the repair area, creating a slight dip where the crack was.
3.9. Body Filler Application
Apply pre-mixed automotive body filler evenly to the repair area, carefully following the bumper’s curves and corners. Smooth it over with a spreader to ensure a professional finish. Once dry, lightly sand the area in preparation for painting.
3.10. Painting
Paint the plastic bumper to restore its original appearance. JTAPE Foam Masking Tapes are ideal for masking off surrounding panels, providing a soft-edge finish for seamless blending. Apply an even coat of primer, allow it to dry, and then spray several coats of the base color, allowing each layer to dry before proceeding. Finish with a few clear coat layers. After the paint has cured, remove the foam masking tape to reveal a high-quality, blended finish.
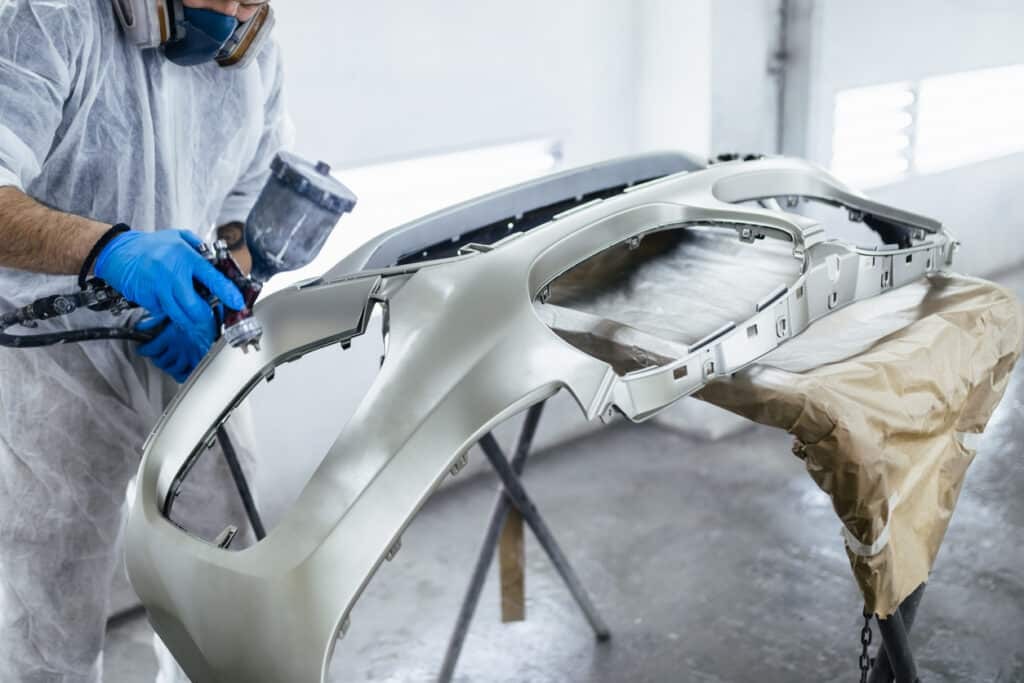 Engineer fixing a silver bumper
For minor scuffs, scratches, and cracks, removing the bumper is unnecessary. However, for significant damage or suspected defects on the bumper’s back, removal may be required to fully assess the situation.
If bumper removal is necessary, lift the car with a jack and locate the pins, latches, and screws securing the bumper. These are typically found in the wheel arches closest to the bumper. Remove these fasteners along with any electrical connections or screws holding the bumper in place.
If the crack extends to the bumper’s edge, replacement is recommended due to compromised structural integrity.
Note: While this guide focuses on repairing cracks in car bodies, CARDIAGTECH.NET also provides comprehensive solutions for other types of auto body damage. Explore our website for more information and resources.
4. Advanced Techniques for Bumper Repair
To elevate your bumper repair skills, consider these advanced techniques:
4.1. Plastic Welding
Plastic welding is an effective method for repairing more significant cracks and tears in plastic bumpers. This technique involves using a specialized tool to melt the plastic material together, creating a strong and durable bond.
Equipment:
- Plastic welder
- Welding rods (matching the bumper material)
- Safety glasses
- Gloves
Procedure:
- Clean the area around the crack thoroughly.
- Heat the plastic welder to the appropriate temperature.
- Apply the welding rod to the crack, melting it into the existing plastic.
- Allow the welded area to cool slowly.
- Sand the area smooth and prepare for painting.
4.2. Reinforcement Mesh
For bumpers with extensive damage, reinforcing the repair with a mesh can add extra strength and durability. This involves embedding a metal or plastic mesh into the bumper to provide additional support.
Materials:
- Reinforcement mesh (metal or plastic)
- Epoxy resin
- Hardener
- Gloves
- Scissors
Procedure:
- Cut the reinforcement mesh to fit the damaged area.
- Mix the epoxy resin and hardener according to the manufacturer’s instructions.
- Apply a layer of epoxy to the back of the bumper.
- Embed the reinforcement mesh into the epoxy.
- Apply another layer of epoxy over the mesh.
- Allow the epoxy to cure completely.
- Sand the area smooth and prepare for painting.
4.3. Heat Forming
Heat forming can be used to reshape deformed or warped plastic bumpers. This technique involves using heat to soften the plastic, allowing it to be molded back into its original shape.
Tools:
- Heat gun
- Gloves
- Metal or wooden forming tools
Procedure:
- Heat the damaged area of the bumper with a heat gun.
- Use forming tools to gently reshape the plastic.
- Allow the plastic to cool in the desired shape.
- Repair any cracks or damage as needed.
- Sand the area smooth and prepare for painting.
4.4. Bumper Texture Repair
Many modern bumpers have a textured surface that can be challenging to replicate after a repair. Several products and techniques are available to restore the original texture.
Products:
- Texture coating spray
- Texture pads
- Texture rollers
Procedure:
- Apply a texture coating spray to the repaired area.
- Use texture pads or rollers to create the desired texture.
- Allow the coating to dry completely.
- Sand the area lightly and prepare for painting.
4.5. Color Matching Techniques
Achieving an exact color match is essential for a seamless repair. Here are some advanced techniques to ensure accurate color matching:
Tools:
- Spectrophotometer
- Color mixing software
- Spray-out cards
Procedure:
- Use a spectrophotometer to analyze the existing paint color.
- Use color mixing software to create a matching formula.
- Spray out a sample on a spray-out card to verify the match.
- Adjust the formula as needed to achieve an exact match.
- Apply the paint to the repaired area.
By mastering these advanced techniques, you can offer your customers top-quality bumper repairs that restore their vehicles to like-new condition.
5. The Importance of Using High-Quality Tools
When repairing a cracked car body, the quality of your tools can significantly impact the final result. High-quality tools not only make the job easier and more efficient but also ensure a durable and professional finish. Here’s why investing in top-notch tools is essential:
5.1. Precision and Accuracy
High-quality tools are designed with precision in mind. This precision allows for accurate cuts, sanding, and shaping, which are crucial for achieving a seamless repair. For instance, using a high-quality sander ensures that you remove material evenly, preventing uneven surfaces and unsightly imperfections.
5.2. Durability and Longevity
Premium tools are built to last. They are made from durable materials that can withstand the rigors of frequent use. Investing in durable tools means you won’t have to replace them often, saving you money in the long run. Additionally, reliable tools reduce the risk of breakdowns during critical stages of the repair process.
5.3. Efficiency and Time Savings
Quality tools often come with advanced features that enhance efficiency. For example, a high-speed grinder can remove material faster, cutting down on the time it takes to prepare a surface for repair. Similarly, a precision paint sprayer can apply coatings more evenly, reducing the need for multiple coats and saving time on the painting process.
5.4. Enhanced Safety
Safety is paramount when working on car body repairs. High-quality tools are designed with safety features that protect you from potential hazards. For example, a well-designed welding helmet provides superior eye and face protection, while ergonomic tools reduce the risk of strain and injury.
5.5. Professional Results
Ultimately, using high-quality tools translates to professional-looking results. Whether you’re repairing a small crack or a significant dent, the right tools help you achieve a finish that is both aesthetically pleasing and structurally sound. This level of quality can significantly enhance customer satisfaction and boost your reputation as a skilled auto body repair professional.
5.6. Specific Tools to Consider
- Sanders: Invest in a high-quality orbital sander for efficient and even material removal.
- Grinders: A versatile grinder with adjustable speed settings is essential for shaping and smoothing surfaces.
- Welding Equipment: If you perform plastic welding, choose a reliable plastic welder with precise temperature control.
- Paint Sprayers: A professional-grade paint sprayer ensures even coating and reduces the risk of runs and drips.
- Body Fillers and Adhesives: Opt for premium body fillers and adhesives that offer superior adhesion and durability.
By prioritizing high-quality tools, you can elevate the standard of your car body repairs, ensuring customer satisfaction and long-lasting results. Remember, the right tools are an investment in your craft and your business.
6. Cost-Effective Repair Strategies
Repairing a cracked car body can be a cost-effective alternative to replacement, but it’s essential to employ strategies that maximize savings without compromising quality. Here are some tips for keeping repair costs down:
6.1. Accurate Damage Assessment
An accurate assessment of the damage is the first step in cost-effective repair. Determine whether the damage is superficial or structural. Superficial damage, such as minor cracks and scratches, can often be repaired quickly and inexpensively. Structural damage, on the other hand, may require more extensive repairs or even replacement.
6.2. SMART Repairs
SMART (Small to Medium Area Repair Technique) repairs are designed to address minor damage without the need for extensive disassembly or replacement of parts. SMART repairs are ideal for small cracks, dents, and scratches on car bodies. By targeting only the damaged area, you can minimize labor and material costs.
6.3. DIY Repairs (When Appropriate)
For minor damage, such as small scratches or paint chips, consider offering DIY repair kits to your customers. These kits typically include all the necessary materials and instructions for performing a basic repair. While DIY repairs may not be suitable for all types of damage, they can be a cost-effective option for minor cosmetic issues.
6.4. Sourcing Affordable Parts
If replacement parts are necessary, explore options for sourcing affordable alternatives. Consider using aftermarket parts or recycled parts, which are often significantly less expensive than OEM (Original Equipment Manufacturer) parts. However, ensure that any aftermarket or recycled parts meet quality standards and are compatible with the vehicle.
6.5. Negotiating with Suppliers
Building strong relationships with your suppliers can help you negotiate better prices on materials and parts. Inquire about bulk discounts, special promotions, and other cost-saving opportunities. By shopping around and comparing prices, you can often find significant savings on essential repair supplies.
6.6. Optimizing Labor Costs
Labor costs can account for a significant portion of the total repair bill. Look for ways to optimize labor efficiency without compromising quality. This may involve investing in training for your technicians, streamlining repair processes, and using efficient tools and equipment.
6.7. Transparent Pricing
Be transparent with your customers about pricing. Provide a detailed estimate that outlines all costs associated with the repair, including labor, materials, and parts. Explain the different repair options available and their associated costs, allowing customers to make informed decisions about their repairs.
6.8. Preventative Maintenance
Encourage your customers to practice preventative maintenance to minimize the risk of future damage. This may involve regular washing and waxing, applying paint protection films, and promptly addressing minor issues before they escalate into more significant problems.
By implementing these cost-effective repair strategies, you can provide affordable solutions to your customers while maintaining the quality and integrity of your repairs.
7. Safety Measures During Car Body Repair
Ensuring safety during car body repair is paramount. Automotive repair work can expose technicians to various hazards, making adherence to safety protocols essential. Here’s a comprehensive guide to the safety measures that should be followed:
7.1. Personal Protective Equipment (PPE)
Always wear appropriate PPE to protect yourself from potential hazards. This includes:
- Safety Glasses: Protect your eyes from debris, dust, and chemical splashes.
- Gloves: Use chemical-resistant gloves to protect your hands from solvents, paints, and other hazardous materials.
- Respirator: Wear a respirator to avoid inhaling harmful fumes, dust, and particles. Choose a respirator that is appropriate for the specific tasks and materials you are working with.
- Ear Protection: Use earplugs or earmuffs to protect your hearing from loud noises, such as grinding and hammering.
- Protective Clothing: Wear overalls or other protective clothing to shield your skin from chemicals, dirt, and abrasions.
- Steel-Toed Boots: Protect your feet from falling objects and sharp materials.
7.2. Ventilation
Ensure adequate ventilation in the work area to prevent the buildup of harmful fumes and dust. Use exhaust fans to remove contaminants from the air and provide a constant supply of fresh air. When working with paints, solvents, and other volatile substances, use a spray booth with a proper ventilation system.
7.3. Fire Safety
Automotive repair shops are prone to fire hazards due to the presence of flammable materials. Take the following precautions to prevent fires:
- No Smoking: Enforce a strict no-smoking policy in the work area.
- Flammable Liquids: Store flammable liquids in approved containers and in a designated area away from ignition sources.
- Fire Extinguishers: Keep fire extinguishers readily accessible and ensure they are regularly inspected and maintained.
- Welding Safety: When welding, use a welding screen to protect nearby workers from sparks and radiation. Keep a fire extinguisher nearby and be aware of flammable materials in the vicinity.
7.4. Electrical Safety
Electrical hazards are common in automotive repair shops. Take the following precautions to prevent electrical shocks and injuries:
- Inspect Tools: Regularly inspect power tools and electrical cords for damage. Replace or repair any damaged equipment immediately.
- Grounding: Ensure that all electrical equipment is properly grounded.
- Lockout/Tagout: Follow lockout/tagout procedures when working on electrical systems to prevent accidental energization.
- Avoid Water: Never use electrical equipment in wet or damp conditions.
7.5. Chemical Safety
Many chemicals used in automotive repair work can be harmful if not handled properly. Follow these guidelines to ensure chemical safety:
- Read Labels: Always read and follow the instructions on chemical labels.
- Proper Storage: Store chemicals in their original containers and in a well-ventilated area.
- Spill Control: Have spill control materials readily available in case of accidents.
- Waste Disposal: Dispose of chemical waste properly according to local regulations.
7.6. Ergonomics
Prolonged or repetitive tasks can lead to musculoskeletal disorders. Practice good ergonomics to reduce the risk of injuries:
- Proper Posture: Maintain a good posture while working. Avoid bending, twisting, and reaching excessively.
- Lifting Techniques: Use proper lifting techniques to avoid back injuries. Lift with your legs, not your back, and avoid lifting heavy objects alone.
- Tool Positioning: Position tools and equipment within easy reach to minimize strain.
- Regular Breaks: Take regular breaks to stretch and move around.
7.7. Equipment Maintenance
Regularly inspect and maintain all equipment to ensure it is in safe working condition. Follow the manufacturer’s recommendations for maintenance and servicing. Remove any damaged or malfunctioning equipment from service until it can be repaired or replaced.
By adhering to these safety measures, you can create a safe working environment for yourself and your colleagues, minimizing the risk of accidents and injuries during car body repair.
8. Essential Tools and Equipment for Car Body Repair
Having the right tools and equipment is crucial for performing effective and efficient car body repairs. Here’s a list of essential items that every auto body shop should have:
| Tool Category | Tool Name | Description |
|---|---|---|
| Hand Tools | Socket Set | A comprehensive set of sockets and ratchets for tightening and loosening nuts and bolts. |
| Wrench Set | A variety of wrenches, including open-end, box-end, and adjustable wrenches, for various fastening tasks. | |
| Screwdriver Set | A set of screwdrivers with different head types (Phillips, flathead, Torx) and sizes for removing and installing screws. | |
| Pliers Set | Assorted pliers, including slip-joint, needle-nose, and locking pliers, for gripping, cutting, and bending. | |
| Hammer Set | A set of hammers with different head types (ball-peen, rubber mallet) for shaping and forming metal. | |
| Power Tools | Angle Grinder | A versatile tool for cutting, grinding, and polishing metal surfaces. |
| Orbital Sander | An essential tool for sanding and smoothing body filler and paint surfaces. | |
| Air Compressor | Provides compressed air to power pneumatic tools such as spray guns, grinders, and sanders. | |
| Spray Gun | Used for applying primer, paint, and clear coat to vehicle surfaces. | |
| Welding Machine | A welding machine, such as a MIG or TIG welder, for joining metal parts together. | |
| Body Repair Tools | Dent Puller | Used for pulling out dents in metal panels. |
| Body Filler Applicator | For applying body filler smoothly and evenly. | |
| Sanding Block Set | A set of sanding blocks with different shapes and sizes for sanding curved and flat surfaces. | |
| Heat Gun | Used for heat shrinking plastic and vinyl materials, as well as for softening adhesives. | |
| Measuring & Alignment | Measuring Tape | For measuring dimensions and distances accurately. |
| Level | Used for ensuring surfaces are level. | |
| Alignment Tool | For aligning body panels and components. | |
| Safety Equipment | Safety Glasses | Protects eyes from debris and chemicals. |
| Gloves | Protects hands from chemicals and sharp edges. | |
| Respirator | Protects lungs from harmful fumes and particles. | |
| Ear Protection | Protects hearing from loud noises. | |
| Miscellaneous | Masking Tape and Paper | Used for masking off areas that should not be painted. |
| Cleaning Supplies | Includes degreasers, wax and grease removers, and surface cleaners for preparing surfaces for repair and painting. | |
| Lighting | Good lighting is essential for inspecting damage and performing repairs accurately. |
Having this comprehensive set of tools and equipment will enable you to perform a wide range of car body repairs efficiently and effectively. Always invest in high-quality tools from trusted brands to ensure durability and reliability.
9. The Importance of Staying Updated with Industry Trends
The automotive industry is continuously evolving, with new technologies, materials, and repair techniques emerging regularly. Staying updated with the latest trends is crucial for auto body repair professionals to provide high-quality service and remain competitive. Here’s why keeping up with industry trends is essential:
9.1. New Materials and Technologies
Automakers are increasingly using advanced materials such as high-strength steel, aluminum, and carbon fiber in vehicle construction. These materials require specialized repair techniques and equipment. Staying updated with these trends ensures that you have the knowledge and tools necessary to work with these new materials effectively.
9.2. Advanced Driver-Assistance Systems (ADAS)
Modern vehicles are equipped with ADAS, which includes features such as automatic emergency braking, lane departure warning, and adaptive cruise control. These systems rely on sensors and cameras that are often integrated into the car’s body. Repairing vehicles with ADAS requires careful calibration and alignment of these sensors to ensure they function correctly.
9.3. Electric and Hybrid Vehicles
The popularity of electric and hybrid vehicles is growing rapidly. These vehicles have unique repair requirements due to their high-voltage electrical systems and specialized components. Staying updated with the latest training and certifications for electric and hybrid vehicle repair is essential for servicing these vehicles safely and effectively.
9.4. Sustainable Repair Practices
Consumers are becoming increasingly aware of the environmental impact of their choices. Adopting sustainable repair practices can help reduce waste, conserve resources, and attract environmentally conscious customers. This includes using eco-friendly paints, recycling materials, and minimizing energy consumption.
9.5. Digitalization and Connectivity
The automotive industry is becoming increasingly digitalized and connected. Telematics, over-the-air updates, and connected car services are transforming the way vehicles are maintained and repaired. Staying updated with these trends allows you to leverage data and connectivity to improve the efficiency and effectiveness of your repair services.
9.6. Regulatory and Compliance Standards
The automotive industry is subject to various regulatory and compliance standards related to safety, emissions, and repair procedures. Staying updated with these standards ensures that you are operating legally and ethically. This includes adhering to guidelines for hazardous waste disposal, worker safety, and data protection.
9.7. Training and Certification
Investing in training and certification programs is essential for staying updated with the latest industry trends. Organizations such as I-CAR (Inter-Industry Conference on Auto Collision Repair) offer training and certification programs that cover a wide range of topics related to auto body repair.
9.8. Industry Events and Publications
Attending industry events and reading trade publications are valuable ways to stay informed about the latest trends. Trade shows, conferences, and seminars provide opportunities to network with other professionals, learn about new products and technologies, and attend educational sessions.
By staying updated with industry trends, you can provide high-quality service, attract new customers, and remain competitive in the ever-evolving automotive industry.
10. CARDIAGTECH.NET: Your Partner in Automotive Repair Solutions
At CARDIAGTECH.NET, we understand the challenges faced by auto body repair professionals. That’s why we offer a comprehensive range of tools, equipment, and resources to help you succeed.
10.1. High-Quality Tools and Equipment
We source our tools and equipment from leading manufacturers to ensure durability, reliability, and performance. Whether you need hand tools, power tools, or specialized body repair equipment, we have everything you need to get the job done right.
10.2. Expert Advice and Support
Our team of experienced professionals is available to provide expert advice and support. Whether you have questions about a specific tool or need guidance on a repair procedure, we are here to help.
10.3. Competitive Pricing
We offer competitive pricing on all our products to ensure that you get the best value for your money. We also offer financing options to help you manage your cash flow.
10.4. Fast and Reliable Shipping
We understand that time is money. That’s why we offer fast and reliable shipping to get your tools and equipment to you as quickly as possible.
10.5. Commitment to Customer Satisfaction
We are committed to providing excellent customer service. If you are not satisfied with your purchase, we will do everything we can to make it right.
10.6. Contact Us
Ready to upgrade your auto body repair capabilities? Contact CARDIAGTECH.NET today:
- Address: 276 Reock St, City of Orange, NJ 07050, United States
- WhatsApp: +1 (641) 206-8880
- Website: CARDIAGTECH.NET
Let CARDIAGTECH.NET be your trusted partner in automotive repair solutions.
FAQ: How to Fix a Crack in Car Body
-
What are the primary factors to consider when deciding whether to repair or replace a cracked car bumper?
- The size and depth of the crack.
- Manufacturer guidelines on repairs.
- Safety and structural integrity.
- Cost-effectiveness.
-
What is a SMART repair, and when is it suitable for bumper repair?
- SMART (Small to Medium Area Repair Technique) is a localized repair method suitable for minor cracks and dents that don’t affect the bumper’s structural integrity.
-
What tools are essential for repairing a cracked bumper?
- Sanding tools, plastic adhesion promoter, epoxy, body filler, masking tape, and painting equipment.
-
How do you prevent further cracking when repairing a bumper?
- Drill small holes at each end of the crack to prevent it from spreading.
-
What is the purpose of using a plastic adhesion promoter?
- To ensure that the epoxy and body filler adhere properly to the plastic, resulting in a smooth finish.
-
Why is it important to properly mask off the area before painting?
- To protect adjacent panels from overspray and ensure a clean, professional finish.
-
When is it necessary to remove the bumper for repair?
- For significant damage, suspected defects on the back of the bumper, or when the crack extends to the edge of the bumper.
-
What safety precautions should be taken when repairing a car bumper?
- Wearing safety glasses, gloves, and a respirator, ensuring proper ventilation, and following fire safety protocols.
-
How can you ensure a seamless paint finish when repairing a bumper?
- Using foam masking tapes, applying even coats of primer, base color, and clear coat, and allowing each layer to dry before proceeding.
-
What are some advanced techniques for bumper repair?
- Plastic welding, reinforcement mesh, heat forming, bumper texture repair, and color matching techniques.