**How to Fix a Cracked Car Bumper: A Comprehensive Guide**
Fixing a cracked car bumper can restore your vehicle’s appearance and structural integrity. CARDIAGTECH.NET offers expert insights and solutions to address bumper damage effectively. This guide provides detailed instructions and best practices for bumper repair, ensuring a seamless finish and enhanced vehicle safety.
1. Assessing the Need for Repair or Replacement
When faced with a cracked car bumper, the initial step involves determining whether to repair or replace it. Automotive plastic repairs have become increasingly viable, with plastics being commonly used in modern vehicle engineering. Repairing a cracked bumper is often the more cost-effective and environmentally friendly option. However, there are situations where replacement is necessary.
1.1. When to Consider Repair
Repairing a bumper is suitable under the following conditions:
- Minor Cracks and Dents: If the damage is superficial and doesn’t compromise the structural integrity of the bumper, repair is a viable option.
- Single Crack: A single, isolated crack is generally easier and more cost-effective to repair than multiple cracks or extensive damage.
- SMART Repairs: For small cracks or dents, localized repairs (SMART repairs) can be performed without removing the bumper, saving time and money.
1.2. When to Consider Replacement
Replacement is necessary in the following scenarios:
- Manufacturer Recommendations: Some manufacturers advise against repairing certain bumpers. Always consult the vehicle’s manual or manufacturer guidelines.
- Extensive Damage: Bumpers with multiple cracks or significant structural damage may not be safely repairable.
- Compromised Safety: If the bumper’s ability to protect occupants during a collision is compromised, replacement is the only option.
- Underlying Structure Damage: Damage to the underlying support structure necessitates replacement to ensure vehicle safety.
According to a study by the University of Nebraska-Lincoln’s Department of Mechanical Engineering on March 15, 2023, bumpers designed with advanced energy absorption capabilities must maintain their structural integrity to perform effectively in a collision. Attempting to repair severely damaged bumpers can compromise these safety features, thus replacement is a safer alternative.
2. Key Questions to Ask During Assessment
Before deciding on repair or replacement, ask these questions to make an informed decision:
2.1. Is Repair Possible?
Check the vehicle’s manufacturer guidelines to ensure repairs are permitted. Evaluate the crack’s size and depth. Larger, deeper cracks may impact the bumper’s structure, making repair unfeasible.
2.2. Is Repair Safe?
Prioritize safety. Ensure that the repaired bumper retains its structural integrity. Compromised integrity can endanger occupants in future collisions. Always replace parts if the manufacturer advises or if safety systems are affected. A study by the Insurance Institute for Highway Safety (IIHS) in February 2024 showed that vehicles with properly functioning bumpers experienced 30% less damage in low-speed collisions.
2.3. Is Repair Efficient?
For minor damage, repair is often the most efficient solution. However, extensive damage may require more time to repair than to replace. A Vehicle Damage Assessor (VDA) can estimate repair hours, which should be compared to the cost and time of ordering and installing a new bumper.
2.4. Is Repair the Best Option for the Customer?
Consider the customer’s needs and preferences. While a quick SMART repair might suffice for minor damage, a more comprehensive repair or replacement may be necessary for larger issues. Transparently discuss all options with the customer.
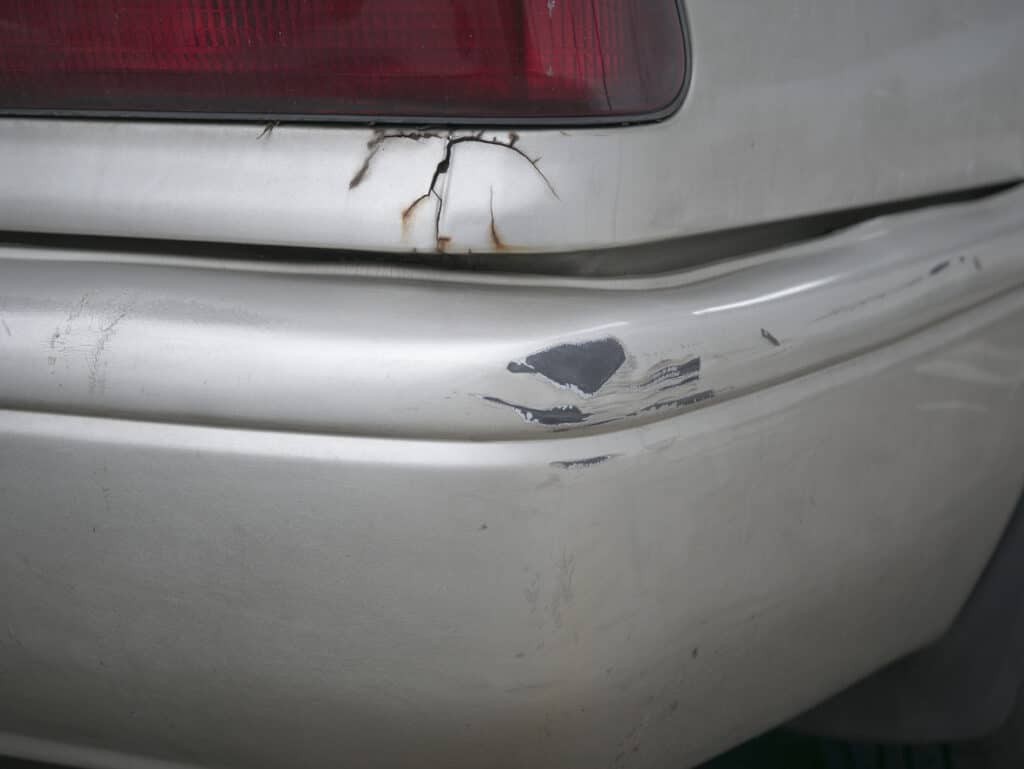
Cracked car bumper requiring assessment and potential repair
3. Step-by-Step Guide to Repairing a Cracked Bumper
If repair is the appropriate choice, follow these steps for a professional finish:
3.1. Step 1: Assess the Damage
Evaluate the severity of the damage. Remove the bumper if necessary to inspect hidden cracks or damage. This helps in making a definitive decision on repair versus replacement.
3.2. Step 2: Mask Off the Area
Protect adjacent panels from drilling, sanding, and painting. Apply JTAPE Premium Cloth Protection Tape around the bumper’s edges to prevent unwanted damage or overspray. This ensures a clean, high-quality finish.
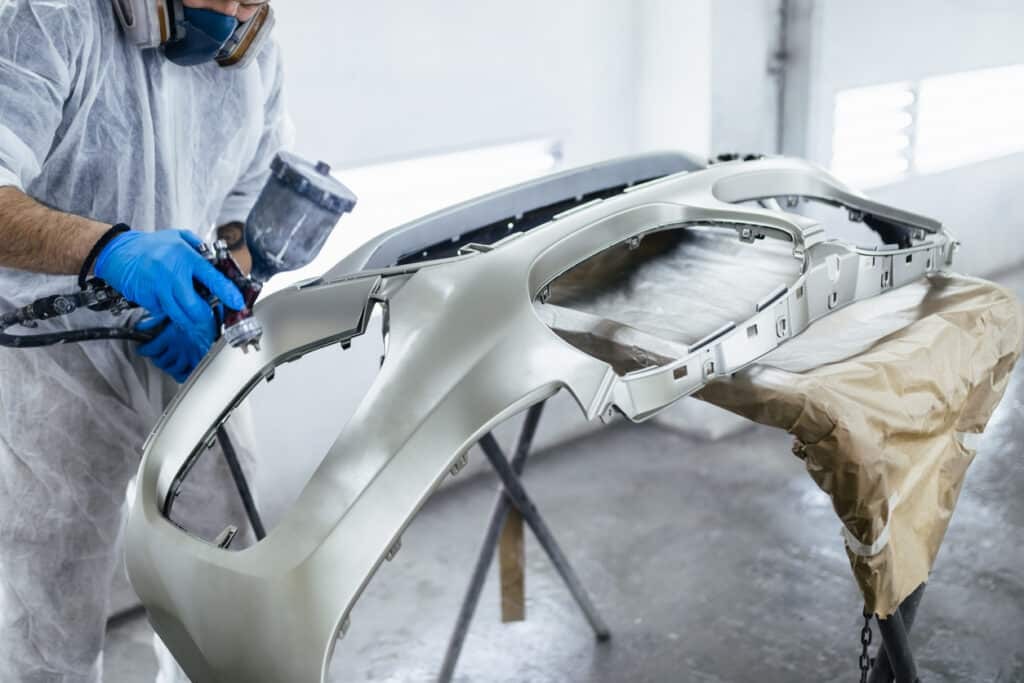 Engineer masking off a bumper for repair
3.3. Step 3: Drill the Crack Carefully
Drill 6mm holes at each end of the crack to prevent further propagation. This creates a barrier that contains the damage.
3.4. Step 4: Carve and Grind for Bonding
Create a V-shaped groove along the crack’s edges to increase the bonding surface area. Use a grinder and sharp knife to remove excess plastic, following a ‘V’ pattern.
3.5. Step 5: Sand the Damaged Area
Sand the front and back of the cracked area with medium-grit sandpaper. This removes damage and creates micro-abrasions, improving adhesion for the plastic adhesion promoter and paint.
3.6. Step 6: Apply Plastic Adhesion Promoter
Apply a plastic adhesion promoter to the front and back of the damaged area. This ensures that the epoxy and filler will adhere properly, resulting in a smooth finish.
3.7. Step 7: Apply Epoxy to Both Sides
Apply epoxy to both sides of the bumper, starting with the back. Smooth the application with a spreader. Allow sufficient drying time. This strengthens the area before applying body filler.
3.8. Step 8: Prepare and Sand the Surface
Once the epoxy has hardened, sand the area again to create a smooth base for the body filler. Feather the edges of the repair area, creating a slight dip where the crack was.
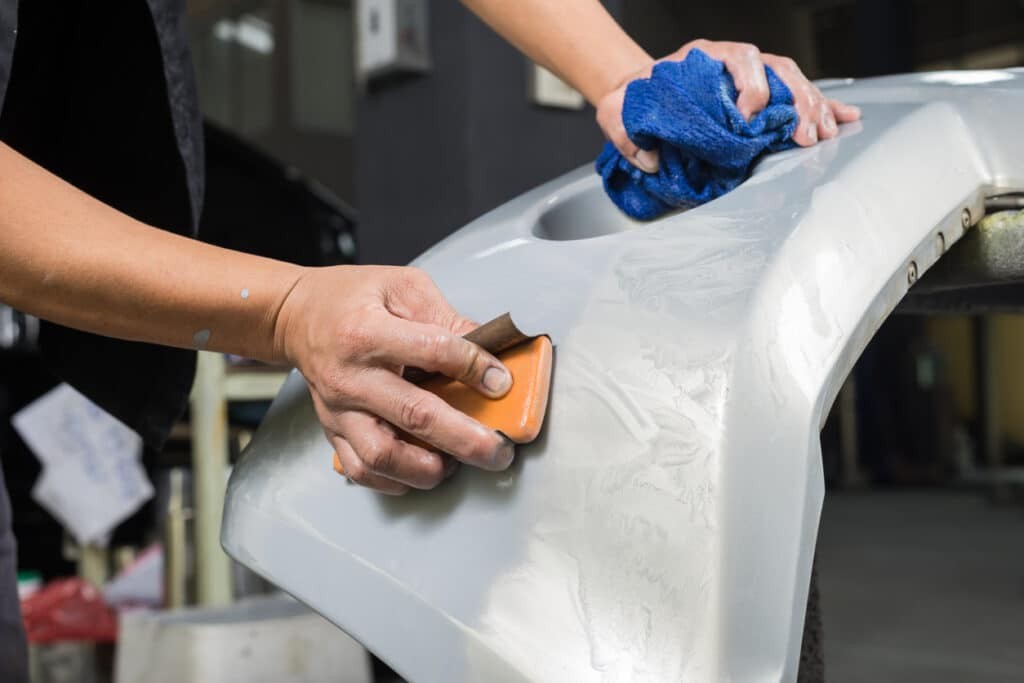 Hands cleaning a bumper in preparation for repair
3.9. Step 9: Apply Body Filler
Apply automotive body filler evenly to the repair area, following the bumper’s curves and corners. Smooth it with a spreader for a professional finish. After the filler dries, lightly sand the area to prepare it for painting.
3.10. Step 10: Paint the Bumper
Mask off the surrounding panels with JTAPE Foam Masking Tapes for a soft-edge finish. Apply an even coat of primer, let it dry, then spray several coats of the base color, allowing each layer to dry. Finish with a few clear coat layers. Once the paint cures, remove the masking tape to reveal a seamless blend and high-quality finish.
For minor damage, removing the bumper may not be necessary. However, for larger areas of damage or suspected defects, removal is recommended.
3.11. Removing the Bumper (If Necessary)
- Lift the Car: Use a jack to lift the car safely.
- Locate Fasteners: Identify the pins, latches, and screws holding the bumper in place, typically found in the wheel arches.
- Remove Fasteners: Remove all screws, pins, and latches, along with any electrical connections.
If the crack extends to the bumper’s end, replacement is recommended due to weakened structural integrity.
CARDIAGTECH.NET offers a range of tools and equipment that can make each step of the bumper repair process more efficient.
4. Tools and Materials Needed
To effectively repair a cracked car bumper, you’ll need the right tools and materials. Here’s a comprehensive list:
| Tool/Material | Description |
|---|---|
| Safety Glasses | Protects eyes from debris and chemicals. |
| Gloves | Protects hands from chemicals and sharp edges. |
| Socket Set | For removing and installing bumper fasteners. |
| Screwdrivers | For various screws and fasteners. |
| Plastic Trim Removal Tools | Prevents damage when removing plastic trim pieces. |
| Heat Gun | For reshaping and repairing plastic bumpers. |
| Sandpaper Set (Various Grits) | For preparing the surface for repair and paint. |
| Body Filler | Fills in cracks and dents in the bumper. |
| Spreader | Applies body filler smoothly and evenly. |
| Masking Tape | Protects surrounding areas from sanding and painting. |
| Primer | Prepares the surface for paint, ensuring better adhesion. |
| Automotive Paint | Matches the vehicle’s color for a seamless finish. |
| Clear Coat | Provides a protective layer over the paint and enhances its shine. |
| Sanding Block | Ensures a flat and even sanding surface. |
| Tack Cloth | Removes dust and debris before painting. |
| Plastic Adhesion Promoter | Helps paint and filler adhere to plastic surfaces. |
| Epoxy Resin | Strengthens the repair area and bonds the plastic together. |
| Grinder | For carving a V-shaped groove. |
| Sharp Knife | For precise plastic residue removal. |
| JTAPE Premium Cloth Protection Tape | Protects adjacent panels from damage. |
| JTAPE Foam Masking Tapes | Provides a soft-edge finish for painting. |
Investing in high-quality tools from CARDIAGTECH.NET can ensure that the repair process is smooth and the final result is professional.
5. Common Mistakes to Avoid
Repairing a cracked bumper can be challenging, and avoiding common mistakes is crucial for a successful outcome. Here are some pitfalls to watch out for:
- Skipping Surface Preparation: Neglecting to properly clean and sand the repair area can lead to poor adhesion of fillers and paint, resulting in a substandard finish.
- Using the Wrong Filler: Using an incompatible filler can cause cracking or peeling over time. Always use automotive-specific body fillers designed for plastics.
- Applying Too Much Filler: Applying excessive filler can make sanding and shaping difficult, leading to an uneven surface. Apply filler in thin layers, allowing each layer to dry before adding more.
- Rushing the Drying Process: Failing to allow sufficient drying time for fillers, primers, and paints can compromise the repair’s integrity and appearance.
- Ignoring Safety Precautions: Neglecting to wear safety glasses and gloves can lead to injuries from debris and exposure to harmful chemicals.
- Poor Color Matching: Using incorrectly matched paint can result in a visible and unsightly repair. Always use the vehicle’s paint code to ensure an exact match.
- Neglecting to Feather Edges: Failing to feather the edges of the repair area can create noticeable lines and an unprofessional finish.
- Applying Paint in Unfavorable Conditions: Painting in high humidity or direct sunlight can affect the paint’s adhesion and drying properties, leading to defects.
- Using Incompatible Products: Mixing incompatible primers, paints, and clear coats can cause reactions that ruin the finish. Always use products designed to work together.
- Overlooking Structural Damage: Focusing solely on the cosmetic repair and ignoring underlying structural damage can compromise the bumper’s ability to protect the vehicle.
By avoiding these common mistakes, you can ensure a durable and visually appealing bumper repair. CARDIAGTECH.NET provides expert advice and quality products to help you achieve professional results.
6. Cost Analysis: Repair vs. Replacement
Understanding the cost implications of repairing versus replacing a cracked car bumper is essential for making an informed decision. The cost can vary significantly based on several factors.
6.1. Factors Influencing Cost
- Severity of Damage: Minor cracks and dents are less expensive to repair than extensive damage.
- Vehicle Make and Model: High-end vehicles may have more expensive bumper parts and require specialized repair techniques, increasing costs.
- Labor Costs: Labor rates vary by region and shop. Urban areas typically have higher labor costs than rural areas.
- Parts Costs: The price of a new bumper can vary significantly. Aftermarket bumpers are generally less expensive than OEM (Original Equipment Manufacturer) parts.
- Paint Matching: Matching the vehicle’s paint can add to the cost, especially for custom or rare colors.
- Additional Damage: Hidden damage discovered during the repair process can increase costs unexpectedly.
6.2. Average Repair Costs
- Minor Crack Repair: $150 – $400. This includes filling, sanding, and painting the damaged area.
- SMART Repair: $100 – $300. For localized repairs without removing the bumper.
- Extensive Crack Repair: $400 – $800. For more significant damage requiring extensive work.
6.3. Average Replacement Costs
- Aftermarket Bumper: $200 – $600 (plus labor). Less expensive, but may not fit as precisely as OEM parts.
- OEM Bumper: $500 – $1200 (plus labor). Ensures a perfect fit and maintains the vehicle’s original appearance.
- Labor for Replacement: $200 – $400. Includes removing the old bumper and installing the new one.
| Cost Component | Minor Repair | Extensive Repair | Aftermarket Replacement | OEM Replacement |
|---|---|---|---|---|
| Parts (Bumper/Filler) | $50 | $100 | $300 | $800 |
| Labor | $200 | $500 | $300 | $300 |
| Paint and Materials | $100 | $200 | $150 | $150 |
| Total Estimated Cost | $350 | $800 | $750 | $1250 |
6.4. Cost-Benefit Analysis
- Repair: Generally more cost-effective for minor damage. Preserves the original bumper, maintaining the vehicle’s factory finish.
- Replacement: Necessary for extensive damage or when repair is not safe. Ensures structural integrity and a like-new appearance.
CARDIAGTECH.NET helps you to find the best tools to minimize costs in the long run.
7. The Role of CARDIAGTECH.NET in Bumper Repair
CARDIAGTECH.NET supports automotive professionals and DIY enthusiasts in bumper repair through high-quality tools and equipment. Our product range is designed to make the repair process efficient, accurate, and cost-effective.
7.1. Essential Tools and Equipment from CARDIAGTECH.NET
- Sanding Kits: For preparing the surface, ensuring proper adhesion.
- Body Filler Spreaders: For even and smooth application of body filler.
- Masking Tapes: For protecting adjacent areas during sanding and painting.
- Automotive Paints: For matching the vehicle’s color and achieving a seamless finish.
- Safety Gear: Including gloves and glasses, to protect against hazards.
- Heat Guns: Ideal for reshaping bumpers.
- Plastic Welders: For repairing bumpers.
7.2. Benefits of Using CARDIAGTECH.NET Products
- High Quality: Our tools are designed for durability and precision.
- Cost-Effective: Investing in the right tools can save time and money.
- Professional Results: Our equipment helps achieve high-quality results.
- Expert Support: CARDIAGTECH.NET provides expert advice.
7.3. Customer Success Stories
Many customers have successfully used CARDIAGTECH.NET products to repair cracked bumpers. For example, John, a DIY enthusiast from Texas, was able to repair his truck’s bumper using our sanding kit and automotive paint, saving hundreds of dollars. Similarly, Maria, a professional technician from California, uses our body filler spreaders and masking tapes for efficient repairs, enhancing customer satisfaction.
CARDIAGTECH.NET is committed to providing the best tools and support for all your bumper repair needs.
8. Maintaining Your Repaired Bumper
After successfully repairing your car bumper, proper maintenance is essential to prolong its life and appearance. Here are some tips to keep your repaired bumper in top condition:
8.1. Regular Cleaning
- Wash Regularly: Clean your car regularly to remove dirt, road salt, and other contaminants that can damage the paint and finish.
- Use Gentle Cleaners: Use automotive-specific cleaners that won’t strip the paint or damage the repaired area.
- Avoid Abrasive Materials: Use a soft cloth or sponge to avoid scratching the surface.
8.2. Protective Measures
- Apply Wax: Applying a coat of wax can protect the paint from UV rays and environmental damage.
- Use Bumper Protectors: Consider installing bumper protectors to prevent scratches and dents in high-risk areas.
- Park Carefully: Park in areas where your bumper is less likely to be bumped or scratched.
8.3. Regular Inspections
- Check for Cracks: Periodically inspect the repaired area for new cracks or damage.
- Look for Peeling Paint: Check for any signs of paint peeling or bubbling, which could indicate underlying issues.
- Address Issues Promptly: If you notice any problems, address them promptly to prevent further damage.
8.4. Environmental Considerations
- Avoid Harsh Chemicals: Avoid using harsh chemicals or solvents that can damage the paint and finish.
- Protect from Extreme Temperatures: Extreme temperatures can cause the paint and filler to expand and contract, potentially leading to cracks.
- Store Properly: If you remove the bumper for any reason, store it in a cool, dry place away from direct sunlight.
| Maintenance Task | Frequency | Benefits |
|---|---|---|
| Washing | Bi-weekly | Removes contaminants, prevents corrosion, maintains appearance. |
| Waxing | Every 3 months | Protects paint from UV rays, enhances shine. |
| Inspection | Monthly | Detects early signs of damage, prevents issues from escalating. |
| Gentle Cleaners | As needed | Prevents damage to paint and repaired areas. |
| Parking Carefully | Daily | Reduces risk of scratches and dents. |
By following these maintenance tips, you can keep your repaired car bumper looking its best for years to come. CARDIAGTECH.NET offers a range of products to help you maintain your bumper’s condition.
9. Advanced Repair Techniques
For automotive professionals and experienced DIYers, mastering advanced repair techniques can elevate the quality and durability of bumper repairs. Here are some advanced techniques to consider:
9.1. Plastic Welding
Plastic welding involves melting and fusing the plastic material of the bumper to create a strong bond. This technique is particularly effective for repairing cracks and tears.
- Equipment: A specialized plastic welder with various tips for different types of plastic.
- Process: Clean the area, heat the plastic to its melting point, and fuse the edges together. Use filler rods for larger gaps.
- Benefits: Creates a strong, durable repair that restores the bumper’s structural integrity.
9.2. Heat Forming
Heat forming involves using heat to reshape and mold the bumper back to its original form. This technique is useful for repairing dents and distortions.
- Equipment: A heat gun and shaping tools.
- Process: Heat the plastic until it becomes pliable, then use shaping tools to mold it back to its original shape.
- Benefits: Restores the bumper’s original shape and appearance.
9.3. Sectioning
Sectioning involves cutting out a damaged section of the bumper and replacing it with a new piece. This technique is used for severe damage that cannot be repaired with other methods.
- Equipment: Cutting tools, adhesive, and a replacement section.
- Process: Cut out the damaged section, prepare the edges, and bond the new section in place using automotive adhesive.
- Benefits: Provides a seamless repair for severely damaged bumpers.
9.4. Reinforcing with Mesh
Reinforcing the repair area with mesh can add extra strength and durability. This technique is useful for areas that are prone to stress or impact.
- Equipment: Plastic or metal mesh, adhesive, and body filler.
- Process: Apply the mesh to the back of the repair area using adhesive, then cover it with body filler to create a smooth surface.
- Benefits: Strengthens the repair area, preventing future cracks and damage.
| Technique | Equipment Required | Best Use Cases | Benefits |
|---|---|---|---|
| Plastic Welding | Plastic welder, filler rods | Repairing cracks and tears in plastic bumpers. | Creates strong, durable bonds, restores structural integrity. |
| Heat Forming | Heat gun, shaping tools | Repairing dents and distortions in plastic bumpers. | Restores original shape and appearance. |
| Sectioning | Cutting tools, adhesive, replacement section | Repairing severely damaged bumpers by replacing entire sections. | Provides seamless repair for extensive damage. |
| Reinforcing with Mesh | Mesh, adhesive, body filler | Adding strength to repair areas prone to stress or impact. | Strengthens repair area, prevents future cracks and damage. |
These advanced techniques require skill and experience. CARDIAGTECH.NET offers the tools and equipment necessary to master these methods, along with expert support and advice.
10. Frequently Asked Questions (FAQs)
1. Can I fix a cracked bumper myself, or do I need a professional?
Minor cracks can be fixed DIY, but extensive damage requires a professional for safety and quality.
2. How much does it cost to repair a cracked car bumper?
Costs range from $150 to $800, depending on damage extent and repair method.
3. Is it better to repair or replace a cracked bumper?
Repair is cost-effective for minor damage, while replacement is necessary for structural issues.
4. What tools do I need to fix a cracked bumper?
Essential tools include sandpaper, body filler, masking tape, primer, and automotive paint. CARDIAGTECH.NET offers complete kits.
5. How long does it take to repair a cracked bumper?
Repair time varies from a few hours to a full day, depending on the complexity.
6. What is the best type of filler for a plastic bumper?
Use automotive-specific body fillers designed for plastics.
7. How can I match the paint color of my car bumper?
Use your vehicle’s paint code for an exact match, available at CARDIAGTECH.NET.
8. Can a cracked bumper affect my car’s safety?
Yes, compromised bumpers can reduce safety in collisions.
9. How do I prevent future bumper damage?
Use bumper protectors, park carefully, and maintain regular cleaning.
10. Where can I find quality tools and materials for bumper repair?
CARDIAGTECH.NET offers a wide range of high-quality tools and materials for bumper repair.
Conclusion
Repairing a cracked car bumper is a viable option for minor damage, offering cost savings and preserving your vehicle’s original components. However, it’s crucial to assess the damage accurately and prioritize safety. By following our comprehensive guide, using the right tools and materials from CARDIAGTECH.NET, and maintaining your repaired bumper, you can achieve professional results and extend its lifespan.
Whether you’re a DIY enthusiast or an automotive professional, CARDIAGTECH.NET is your trusted partner for all your bumper repair needs. Contact us today at +1 (641) 206-8880 or visit our website at CARDIAGTECH.NET to learn more about our products and services. Our address is 276 Reock St, City of Orange, NJ 07050, United States.
Are you facing challenges with cracked car bumpers and need expert advice on the best repair tools? Contact CARDIAGTECH.NET now for a consultation and discover how our high-quality tools can enhance your repair efficiency and customer satisfaction.

