How To Fix A Cracked Leather Car Seat
Fixing a cracked leather car seat is achievable with the right knowledge and tools. This guide, brought to you by CARDIAGTECH.NET, provides a comprehensive, step-by-step approach to repairing those unsightly cracks and restoring your car’s interior. Learn about leather repair techniques, crack prevention methods, and recommended products.
1. Understanding Leather Damage In Car Seats
Leather car seats, while luxurious, are prone to cracking due to various factors. Recognizing the causes and types of damage is the first step in effective repair.
1.1. Common Causes of Leather Cracks
Several factors contribute to the development of cracks in leather car seats:
- Sun Exposure: Ultraviolet (UV) rays can dry out the leather, causing it to lose its natural oils and become brittle.
- Temperature Fluctuations: Extreme temperature changes, such as those experienced in hot summers and cold winters, can cause the leather to expand and contract, leading to cracks.
- Lack of Maintenance: Neglecting regular cleaning and conditioning can allow dirt, oils, and other contaminants to accumulate, accelerating the leather’s deterioration.
- Wear and Tear: Regular use of the car seats leads to friction and pressure, which can gradually wear down the leather’s surface.
- Humidity: Both high and low humidity levels can affect leather. High humidity can cause mold and mildew, while low humidity can dry the leather out.
- Harsh Cleaning Products: Using incorrect or harsh cleaning products strips the leather of its natural oils, making it prone to cracking.
1.2. Types of Leather Damage
Understanding the specific type of damage will help in selecting the appropriate repair method:
| Type of Damage | Description |
|---|---|
| Surface Cracks | Small, shallow cracks that only affect the surface layer of the leather. |
| Deep Cracks | Cracks that penetrate deeper into the leather, potentially affecting its structural integrity. |
| Color Fading | Loss of color due to UV exposure or wear, often occurring alongside cracking. |
| Stains | Discoloration caused by spills, dirt, or other contaminants. |
| Scratches | Superficial damage caused by sharp objects or friction. |
| Tears | Rips or breaks in the leather, often requiring patching. |
| Dryness | Leather feels stiff and brittle due to lack of moisture. |
2. Essential Tools And Materials For Leather Repair
Before beginning any repair, it’s important to gather the necessary tools and materials. Using high-quality products from CARDIAGTECH.NET ensures a professional finish and long-lasting results.
2.1. Cleaning Supplies
- Leather Cleaner: A pH-balanced cleaner designed specifically for leather to remove dirt and grime without damaging the surface.
- Soft Microfiber Cloths: For gentle cleaning and application of products.
- Soft-Bristled Brush: Helps to agitate dirt in textured areas and crevices.
- Vacuum Cleaner: To remove loose debris and dirt from the seats.
2.2. Repair Materials
- Leather Filler: A flexible compound used to fill cracks and imperfections.
- Leather Glue: For bonding loose edges or patches.
- Leather Patch: To reinforce or replace damaged sections of leather.
- Leather Dye or Colorant: To match the original color of the leather.
- Leather Finish or Sealer: To protect the repaired area and blend it with the surrounding leather.
2.3. Application Tools
- Palette Knife or Spreader: For applying leather filler smoothly.
- Small Brushes: For precise application of dye and finish.
- Sanding Block or Fine-Grit Sandpaper: For smoothing the repaired area.
- Heat Gun or Hair Dryer: To accelerate drying and curing times.
- Gloves: To protect your hands from chemicals and dyes.
- Mask: To avoid inhaling harmful vapors.
3. Step-By-Step Guide To Repairing Cracked Leather Car Seats
This detailed guide provides a step-by-step process for repairing cracked leather car seats, ensuring a professional and durable finish. Remember to always test products in an inconspicuous area first.
3.1. Step 1: Cleaning The Leather
Purpose: Remove dirt, grime, and contaminants to prepare the surface for repair.
- Vacuum: Thoroughly vacuum the car seats to remove loose debris and dirt.
- Apply Leather Cleaner: Spray a small amount of leather cleaner onto a microfiber cloth.
- Wipe Gently: Gently wipe the leather surface in a circular motion.
- Use a Brush: For textured areas or crevices, use a soft-bristled brush to agitate dirt, then wipe clean.
- Dry: Allow the leather to air dry completely.
3.2. Step 2: Preparing The Cracked Area
Purpose: Create a smooth surface for the leather filler to adhere to.
- Inspect: Carefully examine the cracked area for loose or flaking pieces of leather.
- Trim Loose Edges: Use a sharp utility knife or razor blade to carefully trim any loose or frayed edges.
- Sand: Gently sand the edges of the crack with fine-grit sandpaper (320-400 grit) to smooth them.
- Clean Again: Wipe the area with a clean, damp cloth to remove any sanding dust.
- Dry: Ensure the area is completely dry before proceeding.
3.3. Step 3: Applying Leather Filler
Purpose: Fill the cracks to create a smooth, even surface.
- Apply Filler: Use a palette knife or spreader to apply a thin layer of leather filler to the cracked area.
- Smooth: Smooth the filler evenly, making sure to press it into the cracks.
- Remove Excess: Wipe away any excess filler with a clean, damp cloth.
- Dry: Allow the filler to dry completely according to the manufacturer’s instructions (usually 30 minutes to an hour). A heat gun or hair dryer on a low setting can be used to speed up the drying process.
- Sand: Once dry, gently sand the filled area with fine-grit sandpaper (400-600 grit) to blend it with the surrounding leather.
- Repeat: Repeat the application and sanding process as needed until the cracks are filled and the surface is smooth.
3.4. Step 4: Applying Leather Dye Or Colorant
Purpose: Restore the color to the repaired area and blend it with the surrounding leather.
- Match Color: Use a leather dye or colorant that closely matches the original color of the leather. CARDIAGTECH.NET offers color-matching services to ensure a perfect match.
- Apply Dye: Apply the dye or colorant to the repaired area using a small brush or sponge.
- Blend: Feather the edges of the dyed area to blend it seamlessly with the surrounding leather.
- Dry: Allow the dye to dry completely according to the manufacturer’s instructions.
- Repeat: Apply additional coats as needed to achieve the desired color and coverage.
3.5. Step 5: Applying Leather Finish Or Sealer
Purpose: Protect the repaired area and blend it with the surrounding leather.
- Apply Finish: Apply a thin layer of leather finish or sealer to the dyed area using a small brush or sponge.
- Blend: Feather the edges of the finished area to blend it seamlessly with the surrounding leather.
- Dry: Allow the finish to dry completely according to the manufacturer’s instructions.
- Repeat: Apply additional coats as needed to achieve the desired level of protection and sheen.
3.6. Step 6: Conditioning The Leather
Purpose: Replenish the leather’s natural oils and keep it supple.
- Apply Conditioner: Apply a small amount of leather conditioner to a microfiber cloth.
- Massage: Gently massage the conditioner into the entire leather surface, including the repaired area.
- Absorb: Allow the conditioner to absorb into the leather for 15-20 minutes.
- Wipe Excess: Wipe away any excess conditioner with a clean, dry microfiber cloth.
3.7. Step 7: Final Inspection And Maintenance
Purpose: Ensure the repair is seamless and protect the leather from future damage.
- Inspect: Carefully inspect the repaired area to ensure that the color, texture, and finish match the surrounding leather.
- Touch-Up: If necessary, touch up any imperfections with additional dye or finish.
- Maintain: Regularly clean and condition the leather car seats to prevent future cracking and damage.
4. Advanced Repair Techniques For Severe Damage
For more severe damage, such as large tears or significant material loss, advanced repair techniques may be necessary. These techniques often require specialized tools and materials.
4.1. Using Leather Patches
When dealing with tears or holes, a leather patch can provide structural support and a seamless repair.
- Cut Patch: Cut a leather patch slightly larger than the damaged area.
- Thin Edges: Thin the edges of the patch using a leather skiving tool to create a smooth transition.
- Apply Adhesive: Apply leather glue to both the patch and the edges of the damaged area.
- Insert Patch: Carefully insert the patch into the damaged area, aligning it with the surrounding leather.
- Press: Press the patch firmly into place and allow the glue to dry completely.
- Fill Gaps: Fill any gaps around the edges of the patch with leather filler.
- Sand: Sand the filled area smooth and blend it with the surrounding leather.
- Dye and Finish: Apply leather dye and finish to match the original color and sheen.
4.2. Replacing Sections Of Leather
In cases of extensive damage, it may be necessary to replace an entire section of leather.
- Remove Damaged Section: Carefully remove the damaged section of leather using a utility knife or seam ripper.
- Create Pattern: Use the removed section as a pattern to cut a new piece of leather.
- Sew or Glue: Sew or glue the new section of leather into place, matching the original seams and stitching.
- Blend: Blend the edges of the new section with the surrounding leather using leather filler and sandpaper.
- Dye and Finish: Apply leather dye and finish to match the original color and sheen.
4.3. Dealing With Deep Cracks
Deep cracks can compromise the structural integrity of the leather. These require careful attention to ensure a long-lasting repair.
- Widen Crack: Gently widen the crack to allow for thorough cleaning and filling.
- Clean Thoroughly: Clean the crack thoroughly with a leather cleaner and a small brush.
- Apply Filler: Apply leather filler deep into the crack, making sure to fill it completely.
- Reinforce: For added strength, insert a piece of linen or fabric into the crack before applying the filler.
- Sand: Sand the filled area smooth and blend it with the surrounding leather.
- Dye and Finish: Apply leather dye and finish to match the original color and sheen.
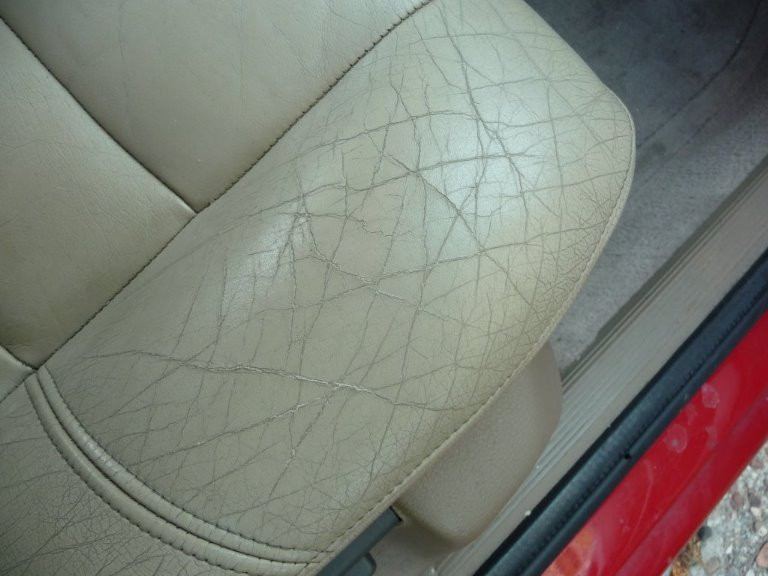
Cracked Leather Car Seat Before Repair
5. Preventing Leather Cracks: Proactive Maintenance
Prevention is always better than cure. Regular maintenance can significantly extend the life of your leather car seats and prevent cracking.
5.1. Regular Cleaning
- Frequency: Clean your leather car seats every 1-3 months, depending on usage and environmental conditions.
- Products: Use a pH-balanced leather cleaner and a soft microfiber cloth.
- Technique: Gently wipe the leather surface in a circular motion, paying attention to areas that come into contact with skin and clothing.
5.2. Conditioning
- Frequency: Condition your leather car seats every 3-6 months to keep them supple and prevent drying.
- Products: Use a high-quality leather conditioner that contains natural oils and moisturizers.
- Technique: Apply a small amount of conditioner to a microfiber cloth and massage it into the leather surface. Allow it to absorb for 15-20 minutes, then wipe away any excess.
5.3. Protecting From Sun
- Parking: Park your car in the shade or use a car cover to protect the leather from direct sunlight.
- Window Tinting: Install window tinting to block UV rays and reduce heat buildup in the car.
- UV Protectant: Apply a leather protectant with UV inhibitors to shield the leather from sun damage.
5.4. Controlling Humidity
- Ventilation: Ensure proper ventilation in the car to prevent moisture buildup.
- Dehumidifier: Use a dehumidifier in the car during humid months to keep the leather dry.
- Avoid Spills: Clean up spills immediately to prevent staining and moisture damage.
5.5. Choosing The Right Products
- Leather Cleaners: Select pH-balanced cleaners specifically designed for automotive leather.
- Conditioners: Opt for conditioners that contain natural oils, such as lanolin or neatsfoot oil.
- Protectants: Choose protectants with UV inhibitors to shield the leather from sun damage.
- Avoid Harsh Chemicals: Avoid using harsh chemicals, such as bleach or ammonia, which can dry out and damage the leather.
6. Choosing The Right Leather Repair Products
Selecting the right products is crucial for achieving a professional and long-lasting repair. CARDIAGTECH.NET offers a wide range of high-quality leather repair products to meet your specific needs.
6.1. Leather Cleaners
- pH-Balanced Formula: Look for cleaners with a pH-balanced formula to prevent damage to the leather’s natural oils.
- Gentle Yet Effective: Choose cleaners that are gentle enough for regular use but effective at removing dirt and grime.
- Residue-Free: Opt for cleaners that leave no residue behind, ensuring a clean and smooth surface for repair.
6.2. Leather Fillers
- Flexible: Select fillers that remain flexible after drying to prevent cracking and peeling.
- Sandable: Choose fillers that are easy to sand, allowing you to create a smooth and even surface.
- Color-Matchable: Opt for fillers that can be tinted or mixed to match the original color of the leather.
6.3. Leather Dyes And Colorants
- Color Accuracy: Look for dyes and colorants that provide accurate color matching to the original leather.
- Fade-Resistant: Choose dyes and colorants that are fade-resistant to prevent color loss over time.
- Easy Application: Opt for dyes and colorants that are easy to apply with a brush or sponge.
6.4. Leather Finishes And Sealers
- Protective: Select finishes and sealers that provide a protective barrier against wear, UV rays, and moisture.
- Flexible: Choose finishes and sealers that remain flexible to prevent cracking and peeling.
- Sheen Control: Opt for finishes and sealers that allow you to control the level of sheen, from matte to glossy.
6.5. Leather Conditioners
- Natural Oils: Look for conditioners that contain natural oils, such as lanolin or neatsfoot oil, to replenish the leather’s natural moisture.
- Penetrating: Choose conditioners that penetrate deep into the leather to nourish and protect it from within.
- Non-Greasy: Opt for conditioners that are non-greasy and leave no residue behind.
 Leather Repair Kit
7. Cost Analysis: DIY vs Professional Repair
Deciding whether to repair your cracked leather car seats yourself or hire a professional depends on the extent of the damage, your skill level, and your budget.
7.1. DIY Repair Costs
| Item | Estimated Cost |
|---|---|
| Leather Cleaner | $10 – $20 |
| Leather Conditioner | $15 – $25 |
| Leather Filler | $20 – $30 |
| Leather Dye/Colorant | $25 – $40 |
| Leather Finish/Sealer | $20 – $30 |
| Application Tools | $10 – $20 |
| Total DIY Cost | $100 – $165 |
7.2. Professional Repair Costs
| Type of Repair | Estimated Cost |
|---|---|
| Surface Crack Repair | $50 – $100 |
| Deep Crack Repair | $100 – $200 |
| Patching | $150 – $300 |
| Section Replacement | $300 – $500+ |
7.3. Pros and Cons
DIY Repair
- Pros:
- Lower cost
- Flexibility to work on your own schedule
- Satisfaction of completing the repair yourself
- Cons:
- Requires time and effort
- May not achieve professional-level results
- Potential for mistakes that could worsen the damage
Professional Repair
- Pros:
- Professional-quality results
- Convenience and time-saving
- Expertise and experience in leather repair
- Cons:
- Higher cost
- Requires scheduling and coordination
- Potential for miscommunication or dissatisfaction with the results
8. Troubleshooting Common Issues
Even with careful preparation and execution, some issues may arise during the leather repair process. Here are some common problems and how to address them.
8.1. Filler Cracking After Drying
- Cause: Applying too much filler at once or not allowing it to dry completely between coats.
- Solution: Remove the cracked filler and reapply in thin layers, allowing each layer to dry completely before applying the next.
8.2. Color Mismatch
- Cause: Using a dye or colorant that does not accurately match the original leather color.
- Solution: Try a different dye or colorant, or mix multiple colors to achieve a closer match. CARDIAGTECH.NET offers color-matching services to help you find the perfect shade.
8.3. Uneven Texture
- Cause: Not sanding the filled area smooth enough or applying the finish unevenly.
- Solution: Sand the filled area with fine-grit sandpaper to create a smooth surface, and apply the finish in thin, even coats.
8.4. Peeling Finish
- Cause: Not properly cleaning the leather before applying the finish or using a finish that is not compatible with the dye or colorant.
- Solution: Thoroughly clean the leather before applying the finish, and use a finish that is specifically designed for use with leather dyes and colorants.
8.5. Sticky Residue
- Cause: Using too much conditioner or not wiping away the excess.
- Solution: Wipe away the excess conditioner with a clean, dry microfiber cloth. If the residue persists, try cleaning the leather with a mild leather cleaner.
9. Reader Engagement And Call To Action
Now that you’re equipped with the knowledge to fix those unsightly cracks, it’s time to take action. CARDIAGTECH.NET is here to support you every step of the way.
9.1. Connect With Us
- WhatsApp: Have questions or need personalized advice? Contact our experts via WhatsApp at +1 (641) 206-8880 for immediate assistance.
- Website: Explore our full range of leather repair products and resources at CARDIAGTECH.NET.
- Address: Visit our store at 276 Reock St, City of Orange, NJ 07050, United States, for hands-on demonstrations and product selection.
9.2. Why Choose CARDIAGTECH.NET?
- Expert Guidance: Our team of experienced technicians can provide tailored solutions to your specific needs.
- Premium Quality Products: We offer only the highest quality leather repair products, ensuring professional and long-lasting results.
- Color-Matching Services: Our color-matching services guarantee a perfect match to your car’s interior, restoring its original beauty.
- Comprehensive Support: From step-by-step guides to personalized consultations, we’re committed to helping you achieve the best possible outcome.
9.3. Special Offer
For a limited time, contact us via WhatsApp at +1 (641) 206-8880 to receive a special discount on your first order of leather repair products. Don’t miss this opportunity to restore your car’s interior and save money.
9.4. Call to Action
Ready to transform your cracked leather car seats? Contact CARDIAGTECH.NET today for expert advice, premium products, and unparalleled support. Let us help you restore your car’s interior to its former glory.
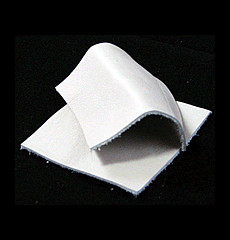
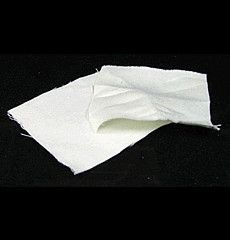 Linen Subpatch Material
10. Real-World Examples Of Successful Leather Repair
Seeing is believing. Here are a few real-world examples of how CARDIAGTECH.NET products have helped customers successfully repair their cracked leather car seats.
10.1. Case Study 1: Restoring A Vintage Sports Car
Challenge: A classic sports car with severely cracked and faded leather seats.
Solution: Using CARDIAGTECH.NET’s leather cleaner, filler, dye, and conditioner, the owner meticulously restored the seats to their original condition.
Result: The car’s interior was revitalized, increasing its value and enhancing the driving experience.
10.2. Case Study 2: Repairing Daily Wear And Tear
Challenge: A family sedan with surface cracks and stains on the driver’s seat.
Solution: Applying CARDIAGTECH.NET’s leather cleaner, filler, and protectant, the owner was able to repair the damage and protect the seats from future wear.
Result: The seats looked as good as new, and the car’s interior was refreshed.
10.3. Case Study 3: Addressing Sun Damage
Challenge: A convertible with significant sun damage to the leather seats.
Solution: Utilizing CARDIAGTECH.NET’s leather cleaner, conditioner, and UV protectant, the owner was able to repair the damage and prevent further deterioration.
Result: The seats were protected from harmful UV rays, and the car’s interior was preserved.
11. Expert Tips For Achieving Professional Results
Follow these expert tips to achieve professional-quality results when repairing your cracked leather car seats.
11.1. Patience Is Key
Take your time and avoid rushing the repair process. Allow each product to dry completely before proceeding to the next step.
11.2. Test Products First
Always test products in an inconspicuous area before applying them to the entire surface.
11.3. Apply Thin Coats
Apply products in thin, even coats to prevent buildup and ensure proper drying.
11.4. Blend Carefully
Blend the edges of the repaired area carefully with the surrounding leather to create a seamless transition.
11.5. Use The Right Tools
Use the right tools for the job, such as palette knives, small brushes, and fine-grit sandpaper.
11.6. Follow Instructions
Follow the manufacturer’s instructions for each product carefully.
11.7. Seek Professional Advice
If you’re unsure about any aspect of the repair process, seek professional advice from CARDIAGTECH.NET’s experts.
 Leather Insert Filler
12. Maintaining The Repair: Long-Term Care Tips
Maintaining the repair is just as important as the repair itself. Follow these long-term care tips to keep your leather car seats looking their best.
12.1. Regular Cleaning
Clean your leather car seats regularly to remove dirt, grime, and contaminants.
12.2. Conditioning
Condition your leather car seats every 3-6 months to keep them supple and prevent drying.
12.3. Sun Protection
Protect your leather car seats from direct sunlight by parking in the shade or using a car cover.
12.4. Avoid Sharp Objects
Avoid placing sharp objects on the leather seats, as they can cause scratches and tears.
12.5. Promptly Clean Spills
Clean up spills immediately to prevent staining and moisture damage.
12.6. Professional Inspection
Have your leather car seats professionally inspected every year to identify and address any potential issues.
13. Alternative Solutions For Minor Cracks
For minor cracks, there are alternative solutions that may be sufficient to restore the leather’s appearance.
13.1. Leather Creams
Leather creams can help to moisturize and soften the leather, reducing the appearance of minor cracks.
13.2. Leather Oils
Leather oils can penetrate deep into the leather, replenishing its natural oils and restoring its suppleness.
13.3. Color Restorers
Color restorers can help to restore the color to faded areas, making minor cracks less noticeable.
13.4. DIY Solutions
Some DIY solutions, such as mixing olive oil and vinegar, can help to moisturize and clean the leather. However, use caution when using DIY solutions, as they may not be suitable for all types of leather.
14. The Science Behind Leather Repair
Understanding the science behind leather repair can help you make informed decisions about the products and techniques you use.
14.1. Leather Composition
Leather is made up of collagen fibers, which provide strength and flexibility. Over time, these fibers can break down due to wear, UV exposure, and lack of moisture.
14.2. Leather Repair Products
Leather repair products work by filling in the cracks and imperfections, restoring the leather’s surface and protecting it from further damage.
14.3. Chemical Reactions
Some leather repair products, such as dyes and sealers, involve chemical reactions that can alter the color and properties of the leather. It’s important to use products that are specifically designed for leather and to follow the manufacturer’s instructions carefully.
15. Environmental Considerations In Leather Repair
Consider the environmental impact of the products and techniques you use when repairing your leather car seats.
15.1. Eco-Friendly Products
Choose eco-friendly leather repair products that are made from natural and sustainable materials.
15.2. Reducing Waste
Reduce waste by using only the amount of product you need and disposing of waste materials properly.
15.3. Recycling
Recycle any packaging materials or containers used during the repair process.
16. Future Trends In Leather Care Technology
The field of leather care technology is constantly evolving. Here are some future trends to watch out for.
16.1. Nanotechnology
Nanotechnology is being used to develop leather repair products that can penetrate deeper into the leather and provide longer-lasting protection.
16.2. Self-Healing Leather
Researchers are working on developing self-healing leather that can automatically repair minor cracks and scratches.
16.3. AI-Powered Color Matching
AI-powered color matching systems can accurately identify and match the color of leather, making it easier to find the right dye or colorant.
17. Safety Precautions During Leather Repair
Safety should always be a top priority when repairing leather car seats.
17.1. Ventilation
Work in a well-ventilated area to avoid inhaling harmful vapors.
17.2. Protective Gear
Wear gloves and a mask to protect your skin and lungs from chemicals and dyes.
17.3. Eye Protection
Wear safety glasses to protect your eyes from splashes and debris.
17.4. Safe Storage
Store leather repair products in a safe place, away from children and pets.
18. How To Identify Different Types Of Leather
Identifying the type of leather in your car seats is essential for choosing the right repair products and techniques.
18.1. Aniline Leather
Aniline leather is a natural, full-grain leather that has been dyed but not coated with a protective layer. It is soft and supple but also more susceptible to staining and damage.
18.2. Semi-Aniline Leather
Semi-aniline leather is similar to aniline leather but has a thin protective coating that makes it more resistant to staining and wear.
18.3. Pigmented Leather
Pigmented leather is a corrected-grain leather that has been coated with a pigmented layer. It is durable and easy to clean but does not have the same natural feel as aniline leather.
18.4. Faux Leather
Faux leather, also known as synthetic leather or pleather, is a man-made material that is designed to look and feel like leather. It is durable and easy to clean but does not have the same breathability and longevity as genuine leather.
19. Understanding Leather Grain And Its Impact On Repair
Understanding leather grain is important for achieving a seamless repair.
19.1. Full-Grain Leather
Full-grain leather is the highest quality leather, made from the entire thickness of the hide. It retains the natural grain and markings of the animal, making each piece unique.
19.2. Top-Grain Leather
Top-grain leather is made from the top layer of the hide, but the surface has been sanded and buffed to remove imperfections. It is more uniform in appearance than full-grain leather but also less durable.
19.3. Corrected-Grain Leather
Corrected-grain leather is made from lower-quality hides that have been heavily sanded and buffed to remove imperfections. It is then embossed with an artificial grain pattern to give it a more uniform appearance.
20. FAQ: Frequently Asked Questions About Leather Repair
20.1. Can I use household cleaners on leather car seats?
No, household cleaners can damage the leather and cause it to dry out and crack. Use a pH-balanced leather cleaner specifically designed for automotive leather.
20.2. How often should I condition my leather car seats?
Condition your leather car seats every 3-6 months to keep them supple and prevent drying.
20.3. Can I repair a tear in leather car seats?
Yes, you can repair a tear in leather car seats using a leather patch and adhesive.
20.4. How do I match the color of my leather car seats?
CARDIAGTECH.NET offers color-matching services to help you find the perfect shade for your leather car seats.
20.5. Can I repair cracked leather myself?
Yes, you can repair cracked leather yourself using the right products and techniques.
20.6. How much does it cost to repair cracked leather car seats?
The cost to repair cracked leather car seats depends on the extent of the damage and whether you choose to do it yourself or hire a professional. DIY repairs typically cost between $100 and $165, while professional repairs can range from $50 to $500 or more.
20.7. What is leather filler?
Leather filler is a flexible compound used to fill cracks and imperfections in leather.
20.8. How do I apply leather filler?
Apply leather filler in thin layers, allowing each layer to dry completely before applying the next. Sand the filled area smooth with fine-grit sandpaper.
20.9. What is leather dye?
Leather dye is a colorant used to restore the color to faded or damaged leather.
20.10. How do I apply leather dye?
Apply leather dye with a small brush or sponge, blending the edges carefully with the surrounding leather.