How To Fix A Cracked Plastic Bumper On A Car
Fixing a cracked plastic bumper on a car doesn’t always mean you need a replacement. At CARDIAGTECH.NET, we’ll guide you through a step-by-step repair process, saving you time and money while ensuring a professional finish. Discover the best techniques for automotive plastic repair and achieve flawless bumper restoration.
1. Automotive Plastic Repairs: Repair or Replace?
The increasing use of plastics in automotive engineering makes automotive plastic repairs a common and viable option. It’s not always necessary to replace a cracked bumper. Body shops should consider repair as the first option when a customer brings in a vehicle with a cracked bumper. However, some manufacturers advise against repairs, necessitating a new bumper installation. A thorough assessment is crucial to determine the best course of action.
SMART repairs are suitable for minor cracks and dents. These localized repairs can be performed without removing the bumper, offering a cost-effective and efficient alternative to full bumper replacement. For more complex damage, a comprehensive repair process is required.
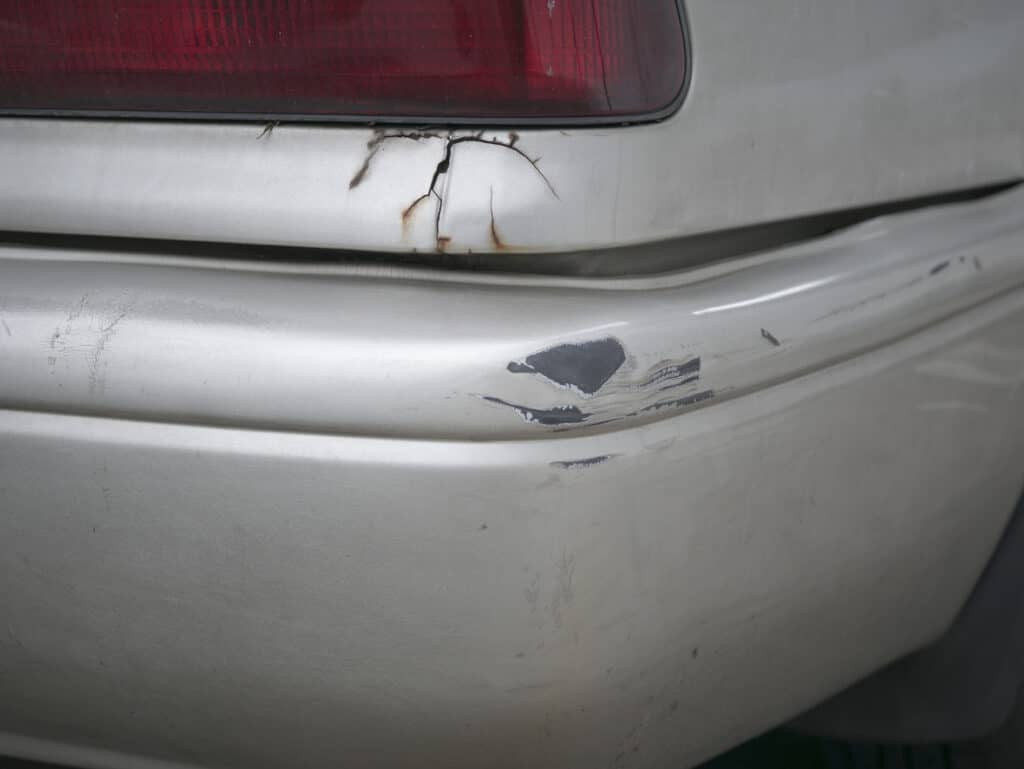
Zoomed in photo of a cracked bumper
Alt text: Close-up of a severely cracked car bumper showing significant damage requiring professional repair.
2. Bumper Assessment: Repairing vs. Replacing
Assessing the damage on a case-by-case basis is crucial to decide whether repairs are sufficient or a replacement is necessary. Consider these questions to guide your decision:
2.1. Is Repair Possible?
Examine the extent of the damage. Check the manufacturer’s guide to confirm if bumper repairs are permitted for the vehicle model. The size and depth of the crack are critical factors as they impact the bumper’s structural integrity. A small, superficial crack is far more amenable to repair than a large, deep one.
2.2. Is Repair Safe?
Safety is paramount. Ensure the repaired bumper maintains its structural integrity. Compromised integrity could endanger drivers and passengers in future incidents. Always adhere to manufacturer’s guidelines regarding replacements. Replacement is essential if the underlying structure is damaged or if repairs might affect the vehicle’s safety systems and sensors.
2.3. Is Repair Efficient?
Minor cracks or isolated damage often make repair the more efficient option. However, extensive cracks may require more time to repair than a full replacement. A Vehicle Damage Assessor (VDA) estimates the repair time, which is then compared to the cost and delivery time of a new bumper. This comparison helps determine the most cost-effective and efficient solution.
2.4. Is Repair Best for the Customer?
Prioritize the customer’s best interests. If a repair offers only a temporary fix, advise the customer accordingly. SMART bumper repairs are suitable for minimal damage requiring a quick solution. Larger cracks, dents, or scratches might necessitate a full repair or replacement. Communicate transparently with the customer about their options, considering their timeline and budget.
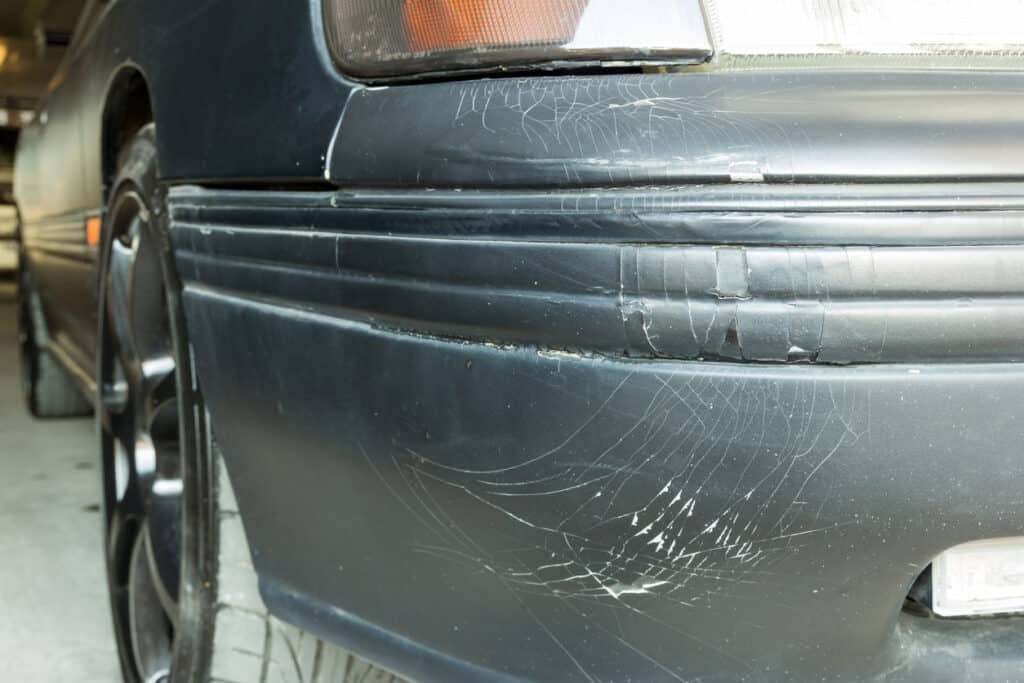 Zoomed in photo of a front bumper
Alt text: Front car bumper showcasing minor scratches that can be easily repaired using automotive repair techniques.
3. Step-By-Step Guide: Cracked Bumper Repair
Once you decide to repair a cracked bumper, follow these steps for a perfect finish:
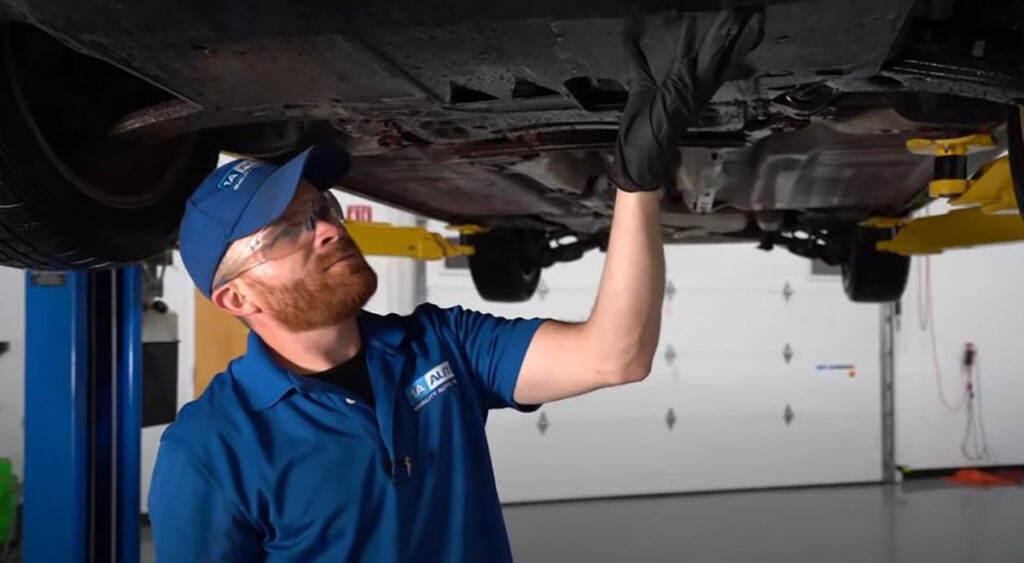
3.1. Damage Assessment
Begin by thoroughly assessing the damage. Removing the bumper allows you to see the full extent of the crack and any hidden damage. This assessment helps you finalize whether repair or replacement is the best option.
3.2. Masking
Protect adjacent panels from drilling, sanding, and painting if the bumper is not removed. Apply JTAPE Premium Cloth Protection Tape around the edges of the bumper. This double-strength automotive cloth protection tape prevents unwanted damage and overspray, ensuring a clean and high-quality finish.
3.3. Drilling
Drill two 6mm holes, one at each end of the damaged area. These holes act as a barrier to prevent the crack from spreading further.
3.4. Carving and Grinding
Create a larger bonding surface by carving a V-shaped groove into the front-facing edges of the repair area. Use a grinder and a sharp knife to remove excess plastic residue, following a V pattern.
3.5. Sanding
Sand the damaged area on both the front and back using a medium grit sandpaper. Sanding removes damage and creates micro-abrasions that enhance the adhesion of plastic adhesion promoter and paint.
3.6. Plastic Adhesion Promoter
Apply a plastic adhesion promoter to the front and back of the damaged area. This ensures the epoxy and filler adhere properly, resulting in a smooth finish.
3.7. Epoxy Application
Apply epoxy to both sides of the bumper and allow it to dry. Start with the back, smoothing the application with a spreader. Then, move to the more visible front. This strengthens the area before applying body filler.
3.8. Surface Preparation
After the epoxy hardens, sand the area again to create a smooth base for the body filler. Feather the edges of the repair area and create a slight dip where the crack was.
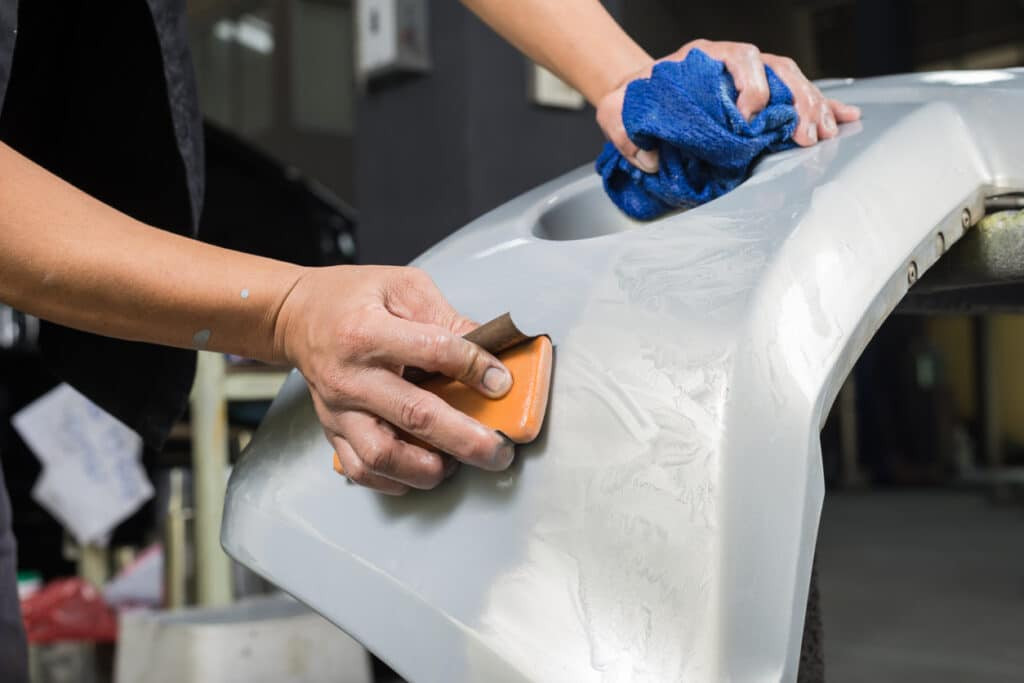 zoomed in photo of hands cleaning a bumper
Alt text: Close-up of hands carefully cleaning a car bumper surface, ensuring proper preparation for the next steps in the repair process.
3.9. Body Filler Application
Apply pre-mixed automotive body filler evenly to the repair area. Carefully follow the curves and corners of the bumper, smoothing the filler with a spreader to ensure a professional finish. Once dry, lightly sand the area to prepare it for painting.
3.10. Painting
Paint the plastic bumper to restore its original appearance. Use JTAPE Foam Masking Tapes to mask off surrounding panels, creating a soft-edge finish for seamless blending. Apply an even coat of primer, allow it to dry, and then apply several coats of the base color, allowing each layer to dry. Finish with clear coat layers. After the paint cures, remove the foam masking tape to reveal a high-quality finish.
 Engineer fixing a silver bumper
Alt text: Automotive technician expertly repairing a silver car bumper in a professional garage setting, ensuring structural integrity and aesthetic appeal.
3.11 Bumper Removal (If Necessary)
For minor damage, removing the bumper might not be necessary. However, larger damage areas or suspected defects on the back require removal. Lift the car with a jack and locate the pins, latches, and screws holding the bumper in place, typically found in the wheel arches. Remove these fasteners and any electrical connections.
3.12 When to Replace
If the crack extends to the end of the bumper, replacement is the best practice due to weakened structural integrity.
The decision to repair or replace ultimately rests with the body shop team, prioritizing the customer’s best interests and efficient job completion.
4. Tools and Materials for Bumper Repair
To effectively repair a cracked plastic bumper, you’ll need a range of tools and materials. Here’s a comprehensive list:
| Tool/Material | Description | Approximate Cost |
|---|---|---|
| Safety Glasses | Protects eyes from debris during sanding and grinding. | $10 – $20 |
| Gloves | Protects hands from chemicals and sharp edges. | $5 – $15 (per pair) |
| Masking Tape | Protects surrounding areas from paint and sanding. | $5 – $10 (per roll) |
| JTAPE Premium Cloth Protection Tape | High-quality tape for masking off adjacent panels. | $15 – $25 (per roll) |
| Drill | Used to drill holes at the ends of the crack to prevent spreading. | $50 – $150 |
| Drill Bits | 6mm drill bits for creating barrier holes. | $5 – $10 (per bit) |
| Grinder | Used to create a V-shaped groove for bonding. | $40 – $100 |
| Sandpaper (Various Grits) | Medium grit for initial sanding, fine grit for finishing. | $10 – $20 (per pack) |
| Plastic Adhesion Promoter | Ensures proper adhesion of epoxy and filler. | $15 – $30 (per can) |
| Epoxy | Used to bond the crack together. | $20 – $40 (per kit) |
| Automotive Body Filler | Fills in the crack and creates a smooth surface. | $20 – $35 (per can) |
| Spreaders | Used to apply epoxy and body filler smoothly. | $5 – $10 (per set) |
| Primer | Prepares the surface for paint. | $15 – $25 (per can) |
| Base Color Paint | Matches the vehicle’s original color. | $20 – $40 (per can) |
| Clear Coat | Provides a protective and glossy finish. | $20 – $35 (per can) |
| JTAPE Foam Masking Tapes | Creates a soft-edge finish for seamless blending. | $20 – $30 (per roll) |
| Sanding Block | Provides a flat surface for sanding. | $10 – $20 |
| Tack Cloth | Removes dust and debris before painting. | $5 – $10 (per pack) |
| Automotive Jack | Used to lift the vehicle for bumper removal. | $50 – $150 |
| Socket Set | Used to remove bolts and fasteners during bumper removal. | $30 – $80 |
Note: Prices are approximate and may vary based on brand and location.
5. Cost Analysis: Repair vs. Replace
Understanding the cost implications of repairing versus replacing a cracked plastic bumper is crucial for both body shops and customers. Here’s a detailed breakdown of the potential costs involved:
5.1. Repair Costs
The cost of repairing a cracked plastic bumper can vary widely depending on the severity of the damage, the type of vehicle, and the labor rates in your area. Here’s a general estimate:
- Materials: $50 – $150 (including sandpaper, plastic adhesion promoter, epoxy, body filler, primer, paint, and clear coat)
- Labor: $200 – $600 (depending on the complexity of the repair and the hourly rate of the technician)
Total Repair Cost: $250 – $750
5.2. Replacement Costs
Replacing a bumper typically involves higher costs due to the price of the new bumper and the additional labor required for removal and installation.
- New Bumper: $300 – $1,200 (depending on the vehicle make and model, and whether it’s an OEM or aftermarket part)
- Labor: $150 – $400 (for removal of the old bumper, installation of the new bumper, and any necessary adjustments)
- Painting (if the new bumper isn’t pre-painted): $100 – $300
Total Replacement Cost: $550 – $1,900
5.3. Factors Affecting Costs
- Severity of Damage: Minor cracks and scratches are cheaper to repair than extensive damage.
- Vehicle Type: Luxury vehicles and those with complex bumper designs tend to have higher repair and replacement costs.
- OEM vs. Aftermarket Parts: OEM (Original Equipment Manufacturer) parts are generally more expensive than aftermarket parts.
- Labor Rates: Labor rates vary by region and shop.
- Additional Damage: Hidden damage discovered during the repair process can increase costs.
5.4. Cost Comparison Scenario
Let’s consider a scenario with a mid-size sedan and a moderately cracked bumper:
- Repair Estimate:
- Materials: $100
- Labor: $300
- Total Repair Cost: $400
- Replacement Estimate:
- New Bumper (Aftermarket): $500
- Labor: $200
- Painting: $150
- Total Replacement Cost: $850
In this scenario, repairing the bumper is the more cost-effective option. However, if the damage is more extensive or the vehicle requires an OEM bumper, replacement might be the better choice.
5.5. Insurance Considerations
If the bumper damage is the result of an accident, insurance coverage may apply. Contact your insurance provider to understand your policy’s terms and whether repair or replacement is the recommended course of action.
5.6. Long-Term Value
Consider the long-term value of the repair or replacement. A properly repaired bumper can restore the vehicle’s appearance and structural integrity. A new bumper, especially an OEM part, can enhance the vehicle’s resale value.
By carefully evaluating these cost factors, you can make an informed decision about whether to repair or replace a cracked plastic bumper.
6. Maximizing Success: Tips and Best Practices
To achieve optimal results when repairing a cracked plastic bumper, consider these tips and best practices:
6.1. Thorough Cleaning
Before beginning any repair work, thoroughly clean the bumper. Use soap and water to remove dirt, grease, and debris. Follow with a wax and grease remover to ensure a clean surface for adhesion.
6.2. Proper Sanding Techniques
Use the correct sanding techniques to prepare the surface. Start with a coarser grit sandpaper to remove imperfections and then move to finer grits for a smooth finish. Sand in a consistent pattern to avoid creating swirl marks.
6.3. Accurate Color Matching
Ensure accurate color matching for a seamless finish. Use the vehicle’s paint code to select the correct paint. Test the paint in an inconspicuous area to verify the match before applying it to the entire bumper.
6.4. Controlled Application
Apply materials such as epoxy, body filler, primer, and paint in thin, even layers. This prevents runs, drips, and other imperfections. Allow each layer to dry completely before applying the next.
6.5. Temperature and Humidity Considerations
Be mindful of temperature and humidity conditions during the repair process. Extreme temperatures and high humidity can affect the drying time and adhesion of materials. Work in a well-ventilated area to ensure proper drying and curing.
6.6. Use of Quality Products
Invest in high-quality repair products. Using reputable brands for sandpaper, adhesion promoters, epoxy, body filler, primer, and paint can significantly improve the outcome of the repair.
6.7. Safety Precautions
Prioritize safety throughout the repair process. Wear safety glasses, gloves, and a respirator to protect yourself from chemicals and debris. Work in a well-ventilated area to avoid inhaling harmful fumes.
6.8. Patience and Attention to Detail
Take your time and pay attention to detail. Rushing the repair process can lead to mistakes and a less-than-perfect finish. Double-check your work at each step to ensure accuracy.
6.9. Professional Consultation
If you are unsure about any aspect of the repair process, consult with a professional. A qualified auto body technician can provide guidance and assistance to ensure a successful outcome.
6.10. Post-Repair Inspection
After completing the repair, thoroughly inspect the bumper to ensure that all imperfections have been addressed. Check for color match, smoothness, and overall appearance. Make any necessary touch-ups to achieve a flawless finish.
By following these tips and best practices, you can maximize your chances of successfully repairing a cracked plastic bumper and restoring it to its original condition.
7. The Science of Plastic Repair
Understanding the science behind plastic repair is essential for achieving durable and aesthetically pleasing results. Here are some key scientific principles to consider:
7.1. Polymer Chemistry
Plastic bumpers are typically made from polymers such as polypropylene (PP), acrylonitrile butadiene styrene (ABS), or polycarbonate (PC). Each polymer has unique properties that affect its repair characteristics. Understanding the chemical structure and properties of the specific polymer is crucial for selecting the appropriate repair materials and techniques.
7.2. Adhesion Theory
Adhesion is the process by which two surfaces are held together by interfacial forces. In plastic repair, adhesion is critical for bonding the repair materials to the bumper substrate. Factors that affect adhesion include surface energy, surface roughness, and the presence of contaminants. Plastic adhesion promoters enhance adhesion by increasing the surface energy of the plastic and creating a chemical bond between the plastic and the repair material.
7.3. Stress Distribution
When a plastic bumper is cracked, stress is concentrated at the crack tip. Repairing the crack involves redistributing the stress to prevent further crack propagation. Techniques such as V-grooving and epoxy application help to distribute the stress over a larger area, reducing the likelihood of future cracking.
7.4. Thermal Expansion
Plastics expand and contract with temperature changes. Repair materials must have similar thermal expansion properties to the bumper substrate to prevent stress cracking and delamination. Selecting repair materials with compatible thermal expansion coefficients is essential for long-term durability.
7.5. UV Resistance
Exposure to ultraviolet (UV) radiation can degrade plastics over time, causing them to become brittle and discolored. Repair materials must be UV resistant to maintain their integrity and appearance. Clear coats with UV inhibitors protect the underlying paint and repair materials from UV damage.
7.6. Chemical Compatibility
Repair materials must be chemically compatible with the bumper substrate and any existing coatings. Incompatible materials can react with each other, causing blistering, peeling, or other defects. Always check the compatibility of repair materials before application.
7.7. Curing Mechanisms
Repair materials such as epoxy and body filler undergo curing processes to harden and develop their final properties. Understanding the curing mechanisms and following the manufacturer’s instructions are essential for achieving optimal results. Factors such as temperature, humidity, and mixing ratios can affect the curing process.
7.8. Surface Energy
Surface energy is a measure of the excess energy at the surface of a material. High surface energy promotes adhesion by allowing liquids to wet the surface and form strong bonds. Plastic adhesion promoters increase the surface energy of plastics, improving the adhesion of repair materials.
7.9. Viscoelasticity
Plastics exhibit viscoelastic behavior, meaning they have both viscous and elastic properties. Understanding the viscoelastic properties of plastics is important for predicting how they will respond to stress and strain. Repair materials must be able to accommodate the viscoelastic behavior of the bumper substrate to prevent cracking and delamination.
7.10. Fracture Mechanics
Fracture mechanics is the study of how cracks propagate in materials. Understanding fracture mechanics principles can help to prevent crack propagation in repaired bumpers. Techniques such as drilling holes at the ends of cracks and applying reinforcing materials can increase the fracture resistance of the repair.
By understanding these scientific principles, technicians can make informed decisions about repair materials and techniques, leading to more durable and aesthetically pleasing results.
8. Common Mistakes to Avoid When Repairing a Bumper
Repairing a cracked plastic bumper can be a rewarding task, but it’s essential to avoid common mistakes that can compromise the quality and longevity of the repair. Here are some pitfalls to watch out for:
8.1. Inadequate Surface Preparation
Failing to properly clean and prepare the surface before applying repair materials is a common mistake. Dirt, grease, and contaminants can interfere with adhesion, leading to premature failure of the repair. Always thoroughly clean and degrease the bumper before proceeding.
8.2. Using the Wrong Materials
Using the wrong type of epoxy, body filler, or paint can result in a weak or incompatible repair. Ensure that the materials you use are specifically designed for plastic repair and are compatible with the type of plastic your bumper is made from.
8.3. Improper Mixing of Materials
Incorrectly mixing epoxy or body filler can affect its curing properties and strength. Always follow the manufacturer’s instructions carefully when mixing these materials, paying close attention to the recommended ratios.
8.4. Applying Materials Too Thickly
Applying epoxy, body filler, or paint in thick layers can lead to uneven curing, cracking, and sagging. Apply materials in thin, even layers, allowing each layer to dry completely before applying the next.
8.5. Rushing the Drying Process
Attempting to speed up the drying process with heat or other methods can result in uneven curing and blistering. Allow materials to dry naturally in a well-ventilated area, following the manufacturer’s recommended drying times.
8.6. Neglecting Safety Precautions
Failing to wear safety glasses, gloves, and a respirator can expose you to harmful chemicals and debris. Always wear appropriate safety gear when working with repair materials.
8.7. Poor Color Matching
Using a paint color that doesn’t match the original bumper color can result in a noticeable and unsightly repair. Use the vehicle’s paint code to select the correct color and test the paint in an inconspicuous area before applying it to the entire bumper.
8.8. Improper Sanding Techniques
Using the wrong grit sandpaper or sanding too aggressively can damage the bumper surface. Start with a coarser grit to remove imperfections and then move to finer grits for a smooth finish, using light pressure.
8.9. Ignoring Weather Conditions
Attempting to repair a bumper in extreme temperatures or high humidity can affect the drying time and adhesion of materials. Work in a controlled environment with moderate temperature and humidity levels.
8.10. Lack of Patience
Rushing the repair process can lead to mistakes and a less-than-perfect finish. Take your time and pay attention to detail, allowing each step to be completed properly.
By avoiding these common mistakes, you can increase your chances of successfully repairing a cracked plastic bumper and achieving a durable and aesthetically pleasing result.
9. Conclusion: Professional Bumper Repairs with CARDIAGTECH.NET
Repairing a cracked plastic bumper is a cost-effective and environmentally friendly alternative to replacement. By following the steps outlined in this guide, you can achieve professional-quality results and restore your vehicle’s appearance. Remember to prioritize safety, use high-quality materials, and take your time to ensure a durable and aesthetically pleasing repair.
For all your automotive repair needs, trust CARDIAGTECH.NET to provide the tools and expertise you need to get the job done right. From masking tapes to body fillers, we offer a comprehensive range of products to help you achieve a flawless finish. Contact us today to learn more about our products and services. Let CARDIAGTECH.NET be your partner in automotive excellence.
Ready to get started? Contact CARDIAGTECH.NET today for expert advice and the best tools for your bumper repair needs. We’ll help you save time, increase accuracy, and boost your shop’s profitability. Contact us at:
- Address: 276 Reock St, City of Orange, NJ 07050, United States
- WhatsApp: +1 (641) 206-8880
- Website: CARDIAGTECH.NET
10. Frequently Asked Questions (FAQ)
1. Can I repair a cracked bumper myself, or do I need a professional?
While minor cracks can be repaired at home with the right tools and materials, severe damage is best left to professionals who have the expertise and equipment to ensure a safe and lasting repair.
2. How much does it cost to repair a cracked bumper?
Repair costs vary depending on the damage’s severity, vehicle type, and labor rates. Generally, repairs can range from $250 to $750.
3. Is it cheaper to repair or replace a cracked bumper?
In most cases, repairing a bumper is more cost-effective than replacing it, especially for minor damage. However, extensive damage may necessitate replacement.
4. Will repairing a cracked bumper affect my car’s safety?
If the repair is done correctly and the bumper’s structural integrity is maintained, it should not affect your car’s safety. However, if the damage is severe or the repair is not done properly, it could compromise safety.
5. What tools and materials do I need to repair a cracked bumper?
Essential tools and materials include sandpaper, plastic adhesion promoter, epoxy, body filler, primer, paint, masking tape, and safety glasses.
6. How long does it take to repair a cracked bumper?
The repair time varies depending on the damage’s severity. Minor repairs can be completed in a few hours, while more extensive repairs may take a day or two.
7. Can I paint a plastic bumper myself?
Yes, you can paint a plastic bumper yourself, but it requires careful preparation and the right materials. Ensure you use a paint specifically designed for plastic and follow proper painting techniques for best results.
8. What is the best way to prepare a plastic bumper for painting?
Proper preparation includes cleaning the surface thoroughly, sanding it to create a smooth finish, and applying a plastic adhesion promoter to ensure the paint adheres properly.
9. How can I prevent further damage to my repaired bumper?
Avoid impacts and collisions that could cause new cracks. Regularly inspect the bumper for any signs of damage and address them promptly to prevent further issues.
10. Where can I buy high-quality bumper repair tools and materials?
CARDIAGTECH.NET offers a wide range of high-quality bumper repair tools and materials. Contact us today to find the right products for your needs.