How To Fix A Deep Scratch On My Car Like A Pro
Deep scratches on your car are frustrating, but don’t worry. This guide from CARDIAGTECH.NET provides a step-by-step approach to repair that scratch and restore your car’s flawless paint job. Learn effective techniques for deep scratch removal, paint correction methods, and professional auto detailing tips to achieve a showroom finish.
1. Understanding the Anatomy of a Car Scratch
Before diving into the repair process, it’s crucial to understand the layers of your car’s paint and how deep the scratch penetrates. This knowledge will help you choose the right tools and techniques for effective repair.
- Clear Coat: The outermost layer, providing gloss and protection against UV rays and environmental elements.
- Base Coat (Color Coat): This layer provides the car’s color.
- Primer: This layer bonds the base coat to the metal body and provides corrosion protection.
- Metal Body: The actual metal structure of the vehicle.
A “deep scratch” typically means the damage has penetrated through the clear coat and base coat, reaching the primer or even the metal. Understanding this helps determine the necessary repair steps.
2. Identifying the Depth of the Scratch: A Crucial First Step
Accurately assessing the scratch depth is critical for selecting the appropriate repair method. Here’s how to determine how deep the scratch goes:
- Visual Inspection: Clean the area around the scratch thoroughly. Use a bright light and examine the scratch at different angles.
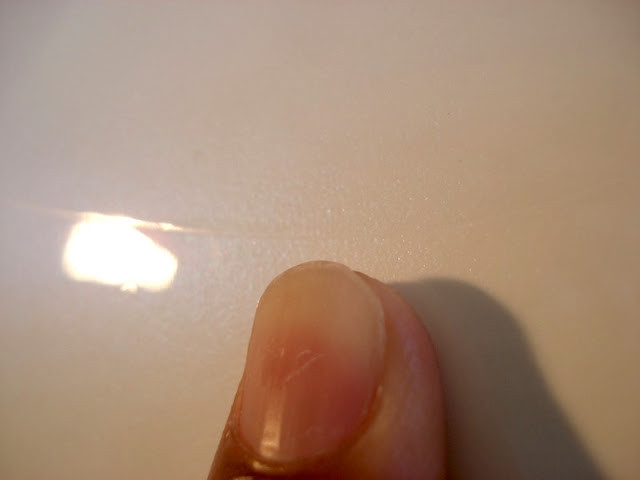
- Fingernail Test: Gently run your fingernail across the scratch. If your nail catches, the scratch is likely deep and has penetrated the clear coat.
- Microfiber Cloth Test: Use a clean, damp microfiber cloth to wipe the scratched area. If the scratch disappears when wet but reappears when dry, it’s likely only in the clear coat.
- Clear Coat Scratches: These are the easiest to fix and often can be removed with polishing compounds.
- Base Coat Scratches: These require more aggressive methods, such as wet sanding and touch-up paint.
- Primer or Metal Scratches: These are the most severe and require filling, priming, and painting.
3. Essential Tools and Materials for Deep Scratch Repair
Having the right tools and materials is essential for achieving professional-quality results. Here’s a comprehensive list:
| Tool/Material | Description | Purpose |
|---|---|---|
| Automotive Touch-Up Paint | Exact color match to your car’s paint code. | Filling deep scratches and restoring color. |
| Clear Coat | Provides a protective and glossy finish. | Protecting the touch-up paint and blending with the original clear coat. |
| Fine-Tip Applicator Brush | For precise application of touch-up paint. | Applying paint in thin, even layers. |
| Sandpaper (Various Grits) | 800, 1200, 1500, 2000, 3000 grit. | Leveling the touch-up paint and smoothing the surface. |
| Sanding Block | Provides a flat surface for even sanding. | Ensuring consistent pressure and preventing uneven sanding. |
| Rubbing Compound | Aggressive compound for removing paint imperfections. | Leveling the sanded area and removing deeper scratches. |
| Polishing Compound | Finer compound for refining the finish after rubbing compound. | Removing swirl marks and preparing the surface for polishing. |
| Polishing Pads | Soft pads for applying rubbing and polishing compounds. | Buffing the paint to a high gloss. |
| Microfiber Cloths | For cleaning and buffing surfaces. | Removing residue and polishing the paint. |
| Masking Tape | Protects surrounding areas from sanding and polishing. | Preventing damage to the adjacent paint. |
| Clay Bar | Removes contaminants from the paint surface. | Ensuring a clean surface for paint adhesion. |
| Detail Spray | Lubricates the surface during clay bar treatment. | Preventing scratches during clay bar application. |
| Paint Thickness Gauge | Measures the thickness of the paint layers. | Ensuring you don’t sand too much of the clear coat. |
| Rotary or Dual-Action Polisher | Power tool for compounding and polishing. | Saving time and effort while achieving a professional finish. |
| Safety Glasses & Gloves | Protects eyes and hands from chemicals and abrasives. | Ensuring personal safety during the repair process. |
| Tack Cloth | Removes dust and debris before painting. | Ensuring a clean surface for paint adhesion. |
Consider CARDIAGTECH.NET for all your auto repair tool needs. Contact us via Whatsapp at +1 (641) 206-8880 or visit our location at 276 Reock St, City of Orange, NJ 07050, United States, or our website at CARDIAGTECH.NET.
4. Step-by-Step Guide: Fixing a Deep Car Scratch
Follow these detailed steps to effectively repair a deep scratch on your car.
4.1. Preparation: Cleaning and Assessing the Damage
- Wash the Area: Thoroughly wash the area around the scratch with soap and water. Remove any dirt, wax, or contaminants that could interfere with the repair process.
- Dry the Surface: Use a clean microfiber cloth to dry the area completely.
- Clay Bar Treatment (Optional): If there are embedded contaminants, use a clay bar and detail spray to clean the surface. This ensures better adhesion of the touch-up paint.
- Masking: Use masking tape to protect the surrounding paint. This prevents accidental damage during sanding and polishing.
4.2. Applying Touch-Up Paint: The First Layer of Defense
- Shake the Paint: Shake the touch-up paint bottle thoroughly for several minutes to ensure the color is properly mixed.
- Apply Thin Coats: Using a fine-tip applicator brush, apply the touch-up paint to the scratch in thin, even layers. Avoid applying too much paint at once, as this can lead to drips and uneven coverage.
- Allow Drying Time: Allow each coat of paint to dry completely before applying the next. Refer to the paint manufacturer’s instructions for drying times, typically around 30 minutes to 1 hour between coats.
- Multiple Coats: Apply multiple coats of touch-up paint until the scratch is slightly overfilled. This allows for sanding down the excess paint to match the surrounding surface.
Applying Automotive Touch Up Paint
Alt: Applying automotive touch up paint to a car scratch with a fine brush for effective scratch repair
4.3. Wet Sanding: Leveling the Surface
- Prepare Sandpaper: Soak a piece of 2000-grit sandpaper in water for several minutes. This helps prevent the sandpaper from clogging and reduces the risk of scratching the paint.
- Use a Sanding Block: Wrap the sandpaper around a sanding block to ensure even pressure and prevent uneven sanding.
- Sand Gently: Gently sand the area with light, even strokes. Keep the sandpaper and surface wet throughout the process.
- Check Progress: Periodically check your progress by wiping the area with a clean microfiber cloth. The goal is to level the touch-up paint with the surrounding surface.
- Step Down Grits (Optional): If needed, use progressively finer grits of sandpaper (2500, 3000) to further refine the surface.
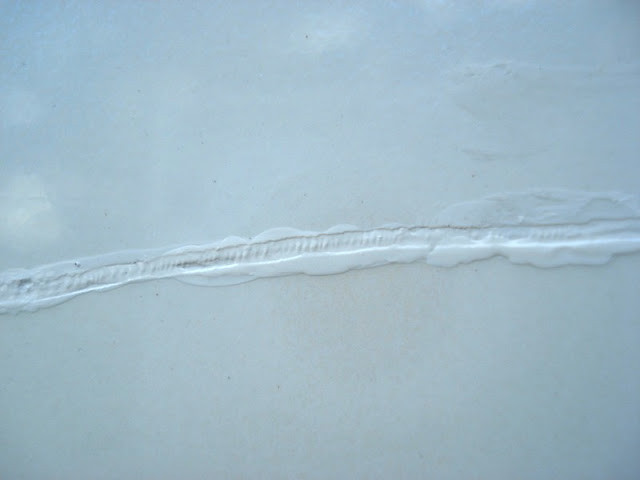
 Wet Sanding Car Scratch
Alt: Wet sanding a car scratch with fine-grit sandpaper to level the surface and prepare for polishing
4.4. Compounding: Removing Sanding Marks
- Apply Compound: Apply a small amount of rubbing compound to a polishing pad.
- Buff the Area: Using a rotary or dual-action polisher, buff the sanded area with moderate pressure. Use overlapping strokes to ensure even coverage.
- Check Progress: Periodically check your progress by wiping the area with a clean microfiber cloth. The goal is to remove the sanding marks and restore some gloss to the paint.
4.5. Polishing: Restoring Gloss and Clarity
- Apply Polish: Apply a small amount of polishing compound to a clean polishing pad.
- Buff the Area: Using the polisher, buff the area with light pressure. Use overlapping strokes to further refine the finish.
- Check Progress: Periodically check your progress by wiping the area with a clean microfiber cloth. The goal is to restore the gloss and clarity of the paint.
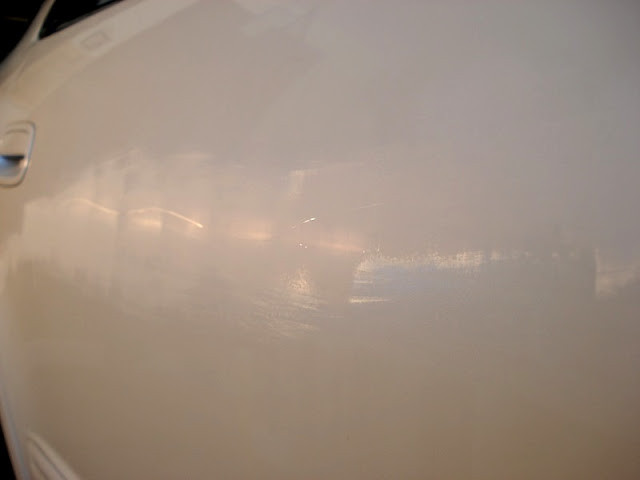
 Polishing Car Scratch
Alt: Polishing a car scratch to restore the paint’s gloss and clarity after compounding
4.6. Applying Clear Coat (If Necessary): Protecting the Repair
- Clean the Area: Ensure the area is clean and free of any polishing residue.
- Apply Clear Coat: Apply a thin, even layer of clear coat over the repaired area.
- Allow Drying Time: Allow the clear coat to dry completely according to the manufacturer’s instructions.
- Wet Sand (Optional): If necessary, wet sand the clear coat with 2000-grit sandpaper to remove any imperfections.
- Polish: Polish the clear coat to restore its gloss and clarity.
4.7. Final Touches: Waxing and Sealing
- Apply Wax: Apply a coat of high-quality car wax to the repaired area. This protects the paint and enhances its gloss.
- Buff the Wax: Buff the wax with a clean microfiber cloth to reveal a deep, glossy shine.
5. Advanced Techniques for Stubborn Deep Scratches
Sometimes, deep scratches require more advanced techniques to achieve a flawless finish. Here are some tips:
- Heat Gun: Use a heat gun to gently warm the touch-up paint after application. This helps the paint flow and level more easily.
- Razor Blade Leveling: Carefully use a razor blade to level the touch-up paint before sanding. This can reduce the amount of sanding required.
- Professional Color Matching: If you’re having trouble finding an exact paint match, consult with a professional auto paint supplier. They can custom-mix paint to match your car’s color perfectly.
6. The Role of Professional Tools in Scratch Repair
Investing in professional-grade tools can significantly improve the quality and efficiency of your scratch repair efforts. Here’s a look at some key tools:
- Paint Thickness Gauge: Ensures you don’t sand too much of the clear coat.
- Rotary or Dual-Action Polisher: Saves time and effort while achieving a professional finish.
- Professional Lighting: Helps you identify imperfections and ensure even coverage.
- Spray Gun: For applying touch-up paint and clear coat in a consistent, even layer.
CARDIAGTECH.NET offers a wide range of professional tools to help you achieve the best possible results. Contact us via Whatsapp at +1 (641) 206-8880, visit us at 276 Reock St, City of Orange, NJ 07050, United States, or check out CARDIAGTECH.NET.
7. Maintaining Your Car’s Paint to Prevent Future Scratches
Prevention is always better than cure. Here are some tips for maintaining your car’s paint and preventing future scratches:
- Regular Washing: Wash your car regularly to remove dirt and contaminants that can scratch the paint.
- Waxing: Apply a coat of wax every few months to protect the paint and enhance its gloss.
- Avoid Automatic Car Washes: These can cause swirl marks and scratches due to the abrasive brushes.
- Park Carefully: Park in safe locations away from potential hazards, such as shopping carts and other vehicles.
- Use Car Covers: Protect your car’s paint from the elements with a car cover.
- Paint Protection Film (PPF): Consider applying PPF to high-impact areas, such as the hood and fenders.
8. Understanding Car Paint Codes and How to Find Yours
Finding the correct paint code for your car is essential for achieving a seamless repair. Here’s how to locate it:
- Check the Owner’s Manual: The paint code is often listed in the owner’s manual.
- Look for a Sticker: Check for a sticker on the driver’s side door jamb, in the glove compartment, or under the hood.
- Online Resources: Use online resources, such as paint code locators, to find the paint code based on your car’s make, model, and year.
- Contact the Dealer: Contact your local car dealer and provide them with your VIN (Vehicle Identification Number). They can provide you with the correct paint code.
Once you have the paint code, you can order touch-up paint from CARDIAGTECH.NET to ensure an exact match.
9. The Financial Benefits of DIY Scratch Repair
Repairing deep scratches yourself can save you a significant amount of money compared to taking your car to a professional auto body shop. Here’s a breakdown of the potential cost savings:
| Repair Type | DIY Cost | Professional Cost | Potential Savings |
|---|---|---|---|
| Clear Coat Scratch | $20 – $50 | $100 – $300 | $80 – $250 |
| Base Coat Scratch | $50 – $100 | $300 – $600 | $250 – $500 |
| Primer/Metal Scratch | $100 – $200 | $600 – $1200 | $500 – $1000 |
| Full Car Detailing | $100 – $300 | $500 – $1000 | $400 – $700 |
| Paint Correction | $50 – $150 | $400 – $800 | $350 – $650 |
These figures are estimates and can vary depending on the severity of the scratch and the specific products and services used. However, DIY scratch repair can offer substantial savings for budget-conscious car owners.
10. Why Choose CARDIAGTECH.NET for Your Auto Repair Needs?
CARDIAGTECH.NET is your trusted partner for all your auto repair needs. We offer a wide range of high-quality products, expert advice, and exceptional customer service.
- Quality Products: We offer only the best tools and materials from trusted brands.
- Expert Advice: Our team of experienced professionals can provide you with expert advice and guidance.
- Competitive Prices: We offer competitive prices to help you save money.
- Convenient Shopping: Shop online or visit our store at 276 Reock St, City of Orange, NJ 07050, United States.
- Excellent Customer Service: We are committed to providing you with exceptional customer service and support.
Don’t let deep scratches ruin the appearance of your car. Contact CARDIAGTECH.NET today via Whatsapp at +1 (641) 206-8880 and let us help you restore your car’s beauty.
 Car Scratch Before After
Alt: Before and after comparison of car scratch repair, showcasing the effectiveness of proper scratch removal techniques
FAQ: Deep Scratch Repair on Cars
1. How do I know if a scratch is too deep to fix myself?
If your fingernail catches on the scratch, it’s likely too deep for simple polishing and may require touch-up paint.
2. What’s the best sandpaper grit for wet sanding touch-up paint?
Start with 2000-grit sandpaper and progressively use finer grits like 2500 or 3000 for a smoother finish.
3. Can I use a household cleaner to clean the scratched area before repair?
No, use automotive-specific cleaners to avoid damaging the paint.
4. How many coats of touch-up paint should I apply?
Apply multiple thin coats until the scratch is slightly overfilled, allowing for sanding down to match the surrounding surface.
5. Is it necessary to use a clear coat after applying touch-up paint?
Yes, clear coat protects the touch-up paint and blends it with the original clear coat for a seamless finish.
6. What’s the difference between rubbing compound and polishing compound?
Rubbing compound is more aggressive and removes sanding marks, while polishing compound refines the finish and restores gloss.
7. How often should I wax my car to prevent scratches?
Wax your car every few months to protect the paint and enhance its gloss, reducing the likelihood of scratches.
8. Can I use a heat gun to speed up the drying process of touch-up paint?
Yes, but use it carefully and keep it moving to avoid damaging the paint.
9. Where can I find the paint code for my car?
Check the owner’s manual, door jamb, glove compartment, or contact your car dealer with your VIN.
10. What tools do I need to fix a deep scratch on my car?
You’ll need touch-up paint, sandpaper, a sanding block, rubbing and polishing compounds, polishing pads, microfiber cloths, and masking tape.
Ready to tackle that deep scratch? Trust CARDIAGTECH.NET for all the tools and expert advice you need. Contact us today via Whatsapp at +1 (641) 206-8880, visit our store at 276 Reock St, City of Orange, NJ 07050, United States, or explore our wide selection at CARDIAGTECH.NET. Let’s restore your car’s flawless finish together.