How To Fix A Fuel Leak In A Car: A Comprehensive Guide
Fuel leaks in your car are not only a nuisance but also a significant safety hazard. A fuel leak can lead to fires, decreased fuel efficiency, and damage to your vehicle’s components. CARDIAGTECH.NET is here to provide a comprehensive guide on how to identify and repair fuel leaks, ensuring your safety and your car’s optimal performance. Learn essential maintenance tips and discover top-quality tools to address fuel leaks effectively.
1. Understanding the Basics of Fuel Leaks
1.1. What is a Fuel Leak?
A fuel leak occurs when gasoline or diesel escapes from the fuel system of your vehicle. The fuel system includes the fuel tank, fuel lines, fuel pump, fuel injectors, and other related components. A leak can happen due to corrosion, damage, or loose connections in any of these parts. Understanding the basics is the first step in learning How To Fix A Fuel Leak In A Car.
1.2. Common Causes of Fuel Leaks
Several factors can cause fuel leaks:
- Corrosion: Rust and corrosion can weaken metal fuel lines and tanks, leading to leaks.
- Damage from Road Debris: Rocks and other debris can puncture or damage fuel lines or the fuel tank.
- Loose Connections: Over time, fittings and connections can loosen due to vibration and temperature changes.
- Worn-Out Components: Rubber hoses, fuel pumps, and fuel injectors can deteriorate and crack over time.
- Improper Maintenance: Incorrectly installed parts after maintenance or repair work can also cause leaks.
1.3. Fuel Leak Symptoms
Recognizing the signs of a fuel leak early can prevent more significant problems. Common symptoms include:
- Smell of Gasoline: A strong gasoline odor, especially after parking the car, is a telltale sign.
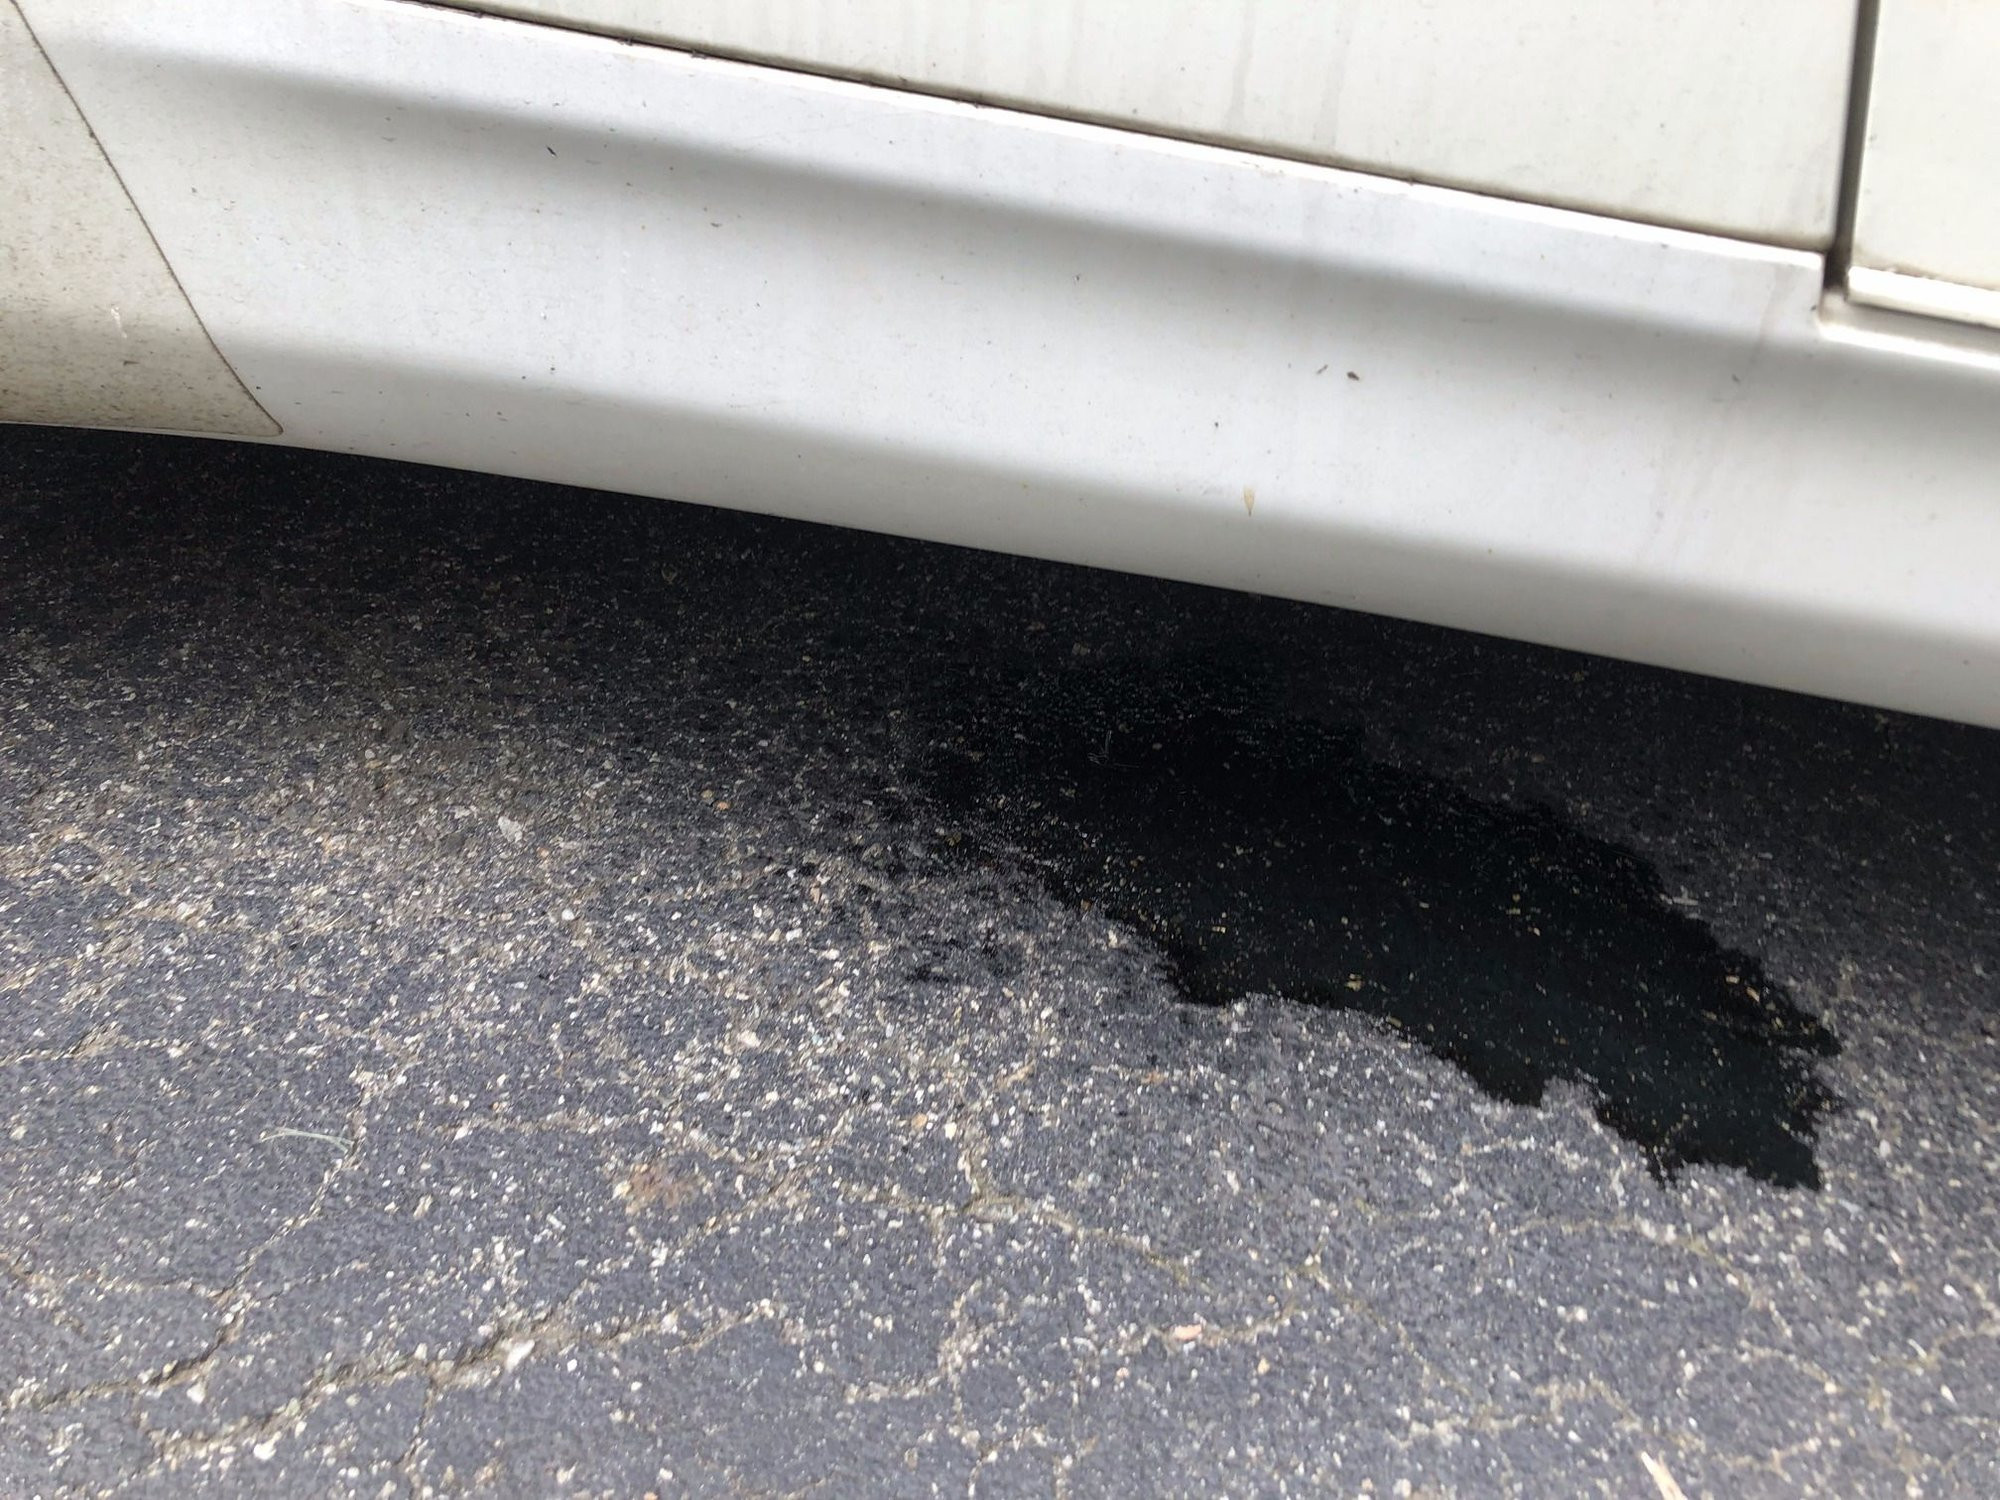
- Visible Fuel: Puddles of fuel under the car, particularly near the fuel tank or engine.
- Decreased Fuel Efficiency: Noticeably lower gas mileage.
- Engine Problems: Difficulty starting the engine or rough idling.
- Fuel Gauge Issues: Erratic readings or a fuel gauge that drops faster than usual.
2. Safety Precautions
Before attempting to fix a fuel leak, safety should be your top priority. Fuel is highly flammable, and any spark can cause a fire. Follow these safety measures:
2.1. Work in a Well-Ventilated Area
Ensure you are working outdoors or in a garage with open doors and windows. Adequate ventilation prevents the buildup of flammable vapors.
2.2. Disconnect the Battery
Disconnect the negative terminal of the car battery to prevent electrical sparks.
2.3. No Smoking or Open Flames
Absolutely no smoking, open flames, or heat sources should be present in the work area.
2.4. Use Protective Gear
Wear safety glasses, gloves, and a respirator to protect yourself from fuel and fumes.
2.5. Have a Fire Extinguisher Nearby
Keep a fire extinguisher rated for gasoline fires within easy reach. Ensure you know how to use it.
3. Tools and Materials You’ll Need
Having the right tools and materials is essential for effectively addressing How To Fix A Fuel Leak In A Car. Here’s a comprehensive list:
3.1. Essential Tools
- Wrenches and Sockets: A set of standard and metric wrenches and sockets.
- Screwdrivers: Both flathead and Phillips screwdrivers.
- Pliers: Regular and fuel line pliers.
- Jack and Jack Stands: To safely lift and support the vehicle.
- Safety Glasses and Gloves: To protect your eyes and hands.
- Respirator: To avoid inhaling harmful fuel vapors.
- Drain Pan: To catch any leaking fuel.
- Flashlight or Work Light: To illuminate the work area.
- OBD-II Scanner: To check for any related diagnostic trouble codes (DTCs).
3.2. Necessary Materials
- Replacement Fuel Lines or Hoses: Ensure they are compatible with your vehicle’s fuel type.
- Fuel Line Fittings: New fittings for any connections you disconnect.
- Fuel Tank Repair Kit: If the tank has a small leak.
- Fuel Pump O-Ring or Gasket: If the leak is near the fuel pump.
- Thread Sealant: For sealing threaded connections.
- Rags or Shop Towels: For cleaning up spills.
- Penetrating Oil: To loosen rusted bolts and fittings.
3.3. Advanced Tools (Optional)
- Fuel Pressure Tester: To check fuel pressure.
- Smoke Machine: To detect hard-to-find leaks.
- Multimeter: To test electrical components.
3.4. CARDIAGTECH.NET Recommended Tools
At CARDIAGTECH.NET, we offer a wide range of high-quality tools perfect for diagnosing and repairing fuel leaks. Here are some of our top recommendations:
| Tool | Description | Benefits |
|---|---|---|
| Fuel Pressure Tester | Measures fuel pressure to identify fuel delivery issues. | Accurately diagnoses fuel pump and regulator problems, ensuring precise repairs. |
| Smoke Machine | Detects leaks in fuel and vacuum systems. | Quickly locates even the smallest leaks, saving time and preventing unnecessary parts replacements. |
| OBD-II Scanner | Reads diagnostic trouble codes to pinpoint fuel system issues. | Provides valuable insights into the source of the leak, streamlining the diagnostic process. |
| Fuel Line Disconnect Set | Safely disconnects fuel lines without damage. | Prevents fuel spillage and damage to fuel lines, ensuring a clean and safe repair. |
| Socket and Wrench Set | Comprehensive set for various vehicle repairs. | Ensures you have the right tool for every job, improving efficiency and accuracy. |
| Jack and Jack Stands | Provides safe lifting and support for vehicle maintenance. | Offers a stable and secure platform for working under the vehicle, enhancing safety and peace of mind. |
| Protective Gear Set | Includes safety glasses, gloves, and respirator. | Protects you from harmful chemicals and fumes, ensuring a safe working environment. |
Investing in quality tools from CARDIAGTECH.NET will not only make the job easier but also ensure the repair is done correctly, preventing future problems.
4. Step-by-Step Guide to Finding a Fuel Leak
Before you can fix a fuel leak, you need to find it. Here’s a systematic approach to locating the leak:
4.1. Visual Inspection
Start by visually inspecting the fuel system. Look for:
- Fuel Puddles: Check under the car, especially near the fuel tank and engine.
- Wet Spots: Look for damp areas on fuel lines, hoses, and fittings.
- Corrosion: Examine metal fuel lines and the fuel tank for rust and corrosion.
- Cracks and Damage: Inspect rubber hoses for cracks, splits, or other damage.
Fuel Line Corrosion
4.2. Smell Test
Use your sense of smell to help locate the leak. A strong gasoline odor can indicate the general area of the leak. Be careful not to inhale too much of the fumes.
4.3. Check Fuel Lines and Fittings
Carefully inspect all fuel lines and fittings. Use a flashlight to get a better view. Pay close attention to:
- Connections: Check where fuel lines connect to the fuel tank, fuel pump, fuel filter, and fuel injectors.
- Hoses: Look for cracks or swelling in the rubber hoses.
- Fittings: Ensure fittings are tight and not corroded.
4.4. Inspect the Fuel Tank
The fuel tank can leak due to rust, corrosion, or physical damage. Here’s how to check it:
- Visual Inspection: Look for signs of rust, dents, or punctures.
- Listen for Leaks: With the engine off, listen for the sound of fuel dripping.
- Use a Mirror: Use a small mirror to inspect the top of the fuel tank, which can be hard to see.
4.5. Check the Fuel Pump
The fuel pump is often located inside the fuel tank or mounted near it. To check the fuel pump:
- Access: Access the fuel pump by removing the access panel (usually under the rear seat).
- Inspect: Look for fuel leaks around the pump and its connections.
- Smell: Sniff for fuel odors in the area.
4.6. Fuel Pressure Test
A fuel pressure test can help identify leaks in the fuel system. Here’s how to perform one:
- Connect the Tester: Connect a fuel pressure tester to the fuel rail test port.
- Start the Engine: Start the engine and observe the pressure reading.
- Check for Pressure Drop: Turn off the engine and watch for a rapid drop in pressure, which indicates a leak.
- Compare to Specifications: Compare the pressure reading to the manufacturer’s specifications.
4.7. Using a Smoke Machine
A smoke machine can be used to find hard-to-detect leaks. Here’s how:
- Connect the Machine: Connect the smoke machine to the fuel system through a vacuum line or fuel filler neck.
- Introduce Smoke: Introduce smoke into the system and look for smoke escaping from any leaks.
- Inspect Closely: Use a flashlight to inspect areas where leaks are suspected.
5. Step-by-Step Guide to Fixing a Fuel Leak
Once you’ve located the fuel leak, it’s time to fix it. Here are detailed instructions for common fuel leak repairs:
5.1. Replacing Fuel Lines or Hoses
Replacing damaged fuel lines or hoses is a common repair. Here’s how to do it:
- Gather Supplies: Collect the necessary tools and replacement fuel lines or hoses.
- Depressurize the Fuel System: Relieve fuel pressure by disconnecting the fuel pump relay and starting the engine until it stalls.
- Disconnect the Old Line: Use fuel line disconnect pliers to safely disconnect the old fuel line.
- Install the New Line: Connect the new fuel line, ensuring it is securely fastened.
- Secure Connections: Use new fittings if necessary, and tighten all connections.
- Test for Leaks: Start the engine and check for any leaks.
5.2. Repairing a Fuel Tank Leak
Small leaks in the fuel tank can sometimes be repaired using a fuel tank repair kit. Here’s the process:
- Drain the Tank: Empty the fuel tank completely.
- Clean the Area: Clean the area around the leak with a wire brush and solvent.
- Apply Repair Compound: Apply the repair compound from the kit according to the manufacturer’s instructions.
- Allow to Cure: Allow the compound to cure completely before refilling the tank.
- Test for Leaks: Refill the tank and check for any leaks.
5.3. Replacing a Fuel Pump O-Ring or Gasket
If the leak is around the fuel pump, replacing the O-ring or gasket can solve the problem:
- Access the Fuel Pump: Access the fuel pump by removing the access panel.
- Disconnect the Pump: Disconnect the fuel lines and electrical connections to the fuel pump.
- Remove the Pump: Carefully remove the fuel pump from the tank.
- Replace the O-Ring/Gasket: Replace the old O-ring or gasket with a new one.
- Reinstall the Pump: Reinstall the fuel pump, ensuring it is properly seated and the connections are secure.
- Test for Leaks: Start the engine and check for any leaks.
5.4. Tightening Loose Connections
Sometimes, a fuel leak can be as simple as a loose connection. Here’s how to address it:
- Locate the Loose Connection: Identify the loose connection causing the leak.
- Tighten the Fitting: Use the appropriate wrench to tighten the fitting.
- Avoid Overtightening: Be careful not to overtighten, as this can damage the fitting.
- Test for Leaks: Start the engine and check for any leaks.
5.5. CARDIAGTECH.NET Solutions for Fuel Leak Repairs
CARDIAGTECH.NET provides top-of-the-line products to facilitate your fuel leak repairs. Here are some tailored solutions:
- High-Quality Replacement Hoses: Durable, fuel-resistant hoses that meet or exceed OEM standards, ensuring a long-lasting repair.
- Fuel Tank Repair Kits: Comprehensive kits that include everything you need to repair small fuel tank leaks quickly and effectively.
- O-Ring and Gasket Sets: Precision-engineered O-rings and gaskets that provide a perfect seal, preventing future leaks.
- Fuel Line Disconnect Tools: Specialized tools designed to safely and easily disconnect fuel lines, reducing the risk of damage and fuel spillage.
By choosing CARDIAGTECH.NET, you are investing in reliability and performance, making your fuel leak repairs both effective and durable.
6. Advanced Diagnostic Techniques
For more complex fuel leak issues, advanced diagnostic techniques may be necessary.
6.1. Fuel Injector Testing
Faulty fuel injectors can cause fuel leaks. Here’s how to test them:
- Visual Inspection: Check for leaks around the injectors.
- Ohmmeter Test: Use an ohmmeter to check the resistance of the injector coil.
- Noid Light Test: Use a noid light to check for proper electrical signals to the injector.
- Professional Cleaning and Testing: Consider having the injectors professionally cleaned and tested.
6.2. Evaporative Emission Control System (EVAP) Testing
The EVAP system can also be a source of fuel leaks. Here’s how to test it:
- Visual Inspection: Check for damaged or disconnected hoses and components.
- Smoke Test: Use a smoke machine to check for leaks in the EVAP system.
- Scan Tool Diagnostics: Use a scan tool to check for EVAP system codes and monitor sensor data.
6.3. Using a Multimeter
A multimeter can be used to test electrical components related to the fuel system, such as the fuel pump relay and fuel injectors.
7. Preventing Future Fuel Leaks
Prevention is always better than cure. Here are some tips to help prevent future fuel leaks:
7.1. Regular Inspections
Regularly inspect your fuel system for signs of wear, corrosion, or damage. Catching problems early can prevent them from turning into major leaks.
7.2. Proper Maintenance
Follow the manufacturer’s recommended maintenance schedule for your vehicle. This includes replacing fuel filters, checking fuel lines, and inspecting the fuel tank.
7.3. Use Quality Fuel
Use high-quality fuel from reputable gas stations. Poor-quality fuel can contain contaminants that can damage your fuel system.
7.4. Avoid Driving on Empty
Avoid driving with a nearly empty fuel tank. This can cause the fuel pump to overheat and draw in debris from the bottom of the tank.
7.5. Protect Your Fuel Tank
If you frequently drive on gravel roads or in areas with road debris, consider installing a fuel tank skid plate to protect the tank from damage.
7.6. Leveraging CARDIAGTECH.NET for Preventative Maintenance
CARDIAGTECH.NET offers a variety of products and services to help you maintain your fuel system and prevent leaks:
- Fuel System Cleaners: High-quality fuel additives that clean fuel injectors and remove deposits from the fuel system.
- Protective Coatings: Corrosion-resistant coatings for fuel tanks and lines to prevent rust and deterioration.
- Diagnostic Services: Access to expert technicians who can diagnose potential fuel system issues before they lead to leaks.
- Maintenance Kits: Comprehensive kits that include all the necessary components for routine fuel system maintenance.
By utilizing CARDIAGTECH.NET, you can ensure your fuel system remains in top condition, reducing the risk of leaks and extending the life of your vehicle.
8. What to Do After the Repair
After you’ve fixed the fuel leak, there are a few important steps to take:
8.1. Double-Check Your Work
Carefully inspect all connections and repaired areas to ensure everything is properly tightened and secured.
8.2. Monitor Fuel Efficiency
Keep an eye on your fuel efficiency. If it doesn’t improve after the repair, there may still be an issue.
8.3. Check for Lingering Odors
Monitor for any lingering fuel odors. If you still smell fuel, there may be a small leak that you missed.
8.4. Reset the Check Engine Light
If the fuel leak triggered the check engine light, use an OBD-II scanner to clear the code.
9. When to Seek Professional Help
While many fuel leak repairs can be done at home, some situations require professional help. Consider seeking a mechanic if:
- You’re Not Comfortable: If you’re not comfortable working on your car’s fuel system.
- The Leak is Severe: If the leak is severe and you can’t locate the source.
- You Lack the Necessary Tools: If you don’t have the tools needed to perform the repair.
- You’re Not Sure What to Do: If you’re not sure how to proceed with the repair.
10. The Importance of Professional Tools and Expertise
Attempting to fix a fuel leak in your car can be a daunting task, particularly without the right tools and expertise. While DIY repairs can save money, they can also lead to further complications if not done correctly. This is where professional tools and expert guidance become invaluable.
10.1. Access to Specialized Tools
Professional mechanics have access to specialized tools designed for diagnosing and repairing fuel leaks efficiently. These tools include:
- Fuel Pressure Testers: Precisely measure fuel pressure to identify fuel delivery issues.
- Smoke Machines: Detect even the smallest leaks in fuel and vacuum systems.
- OBD-II Scanners: Read diagnostic trouble codes to pinpoint fuel system issues.
- Fuel Injector Cleaning and Testing Equipment: Ensure fuel injectors are functioning correctly and efficiently.
10.2. Expert Knowledge and Experience
Professional mechanics possess the knowledge and experience to accurately diagnose and repair fuel leaks. They understand the complexities of fuel systems and can identify issues that may not be apparent to a novice.
10.3. Safety Assurance
Working with fuel can be dangerous, and professionals are trained to handle fuel safely. They take precautions to prevent fires, explosions, and exposure to harmful fumes.
10.4. Quality Parts and Warranty
Professional mechanics use high-quality replacement parts and offer warranties on their work. This provides peace of mind and ensures that the repair is done correctly and will last.
10.5. CARDIAGTECH.NET: Bridging the Gap Between DIY and Professional Repair
CARDIAGTECH.NET understands the importance of having the right tools and knowledge, whether you’re a professional mechanic or a DIY enthusiast. We offer a comprehensive range of products and services to support your fuel leak repairs:
- Professional-Grade Tools: High-quality tools that meet the demands of professional mechanics, ensuring precision and durability.
- Educational Resources: Informative articles, videos, and guides that provide expert advice and step-by-step instructions for diagnosing and repairing fuel leaks.
- Expert Support: Access to experienced technicians who can answer your questions and provide guidance on your repair project.
- Community Forum: A platform for connecting with other DIYers and professionals, sharing tips and experiences, and getting help with your repair.
By leveraging CARDIAGTECH.NET, you can bridge the gap between DIY and professional repair, gaining access to the tools, knowledge, and support you need to fix fuel leaks safely and effectively.
11. Cost Considerations
The cost of fixing a fuel leak can vary widely depending on the cause and severity of the leak, as well as whether you choose to repair it yourself or hire a professional. Here’s a breakdown of potential costs:
11.1. DIY Repair Costs
- Parts: The cost of replacement parts, such as fuel lines, hoses, fittings, and O-rings, can range from $20 to $100 or more, depending on the vehicle and the quality of the parts.
- Tools: If you don’t already have the necessary tools, you may need to invest in items like wrenches, sockets, fuel line disconnect pliers, and a fuel pressure tester. These can cost anywhere from $50 to $500 or more.
- Repair Kits: Fuel tank repair kits typically cost between $20 and $50.
11.2. Professional Repair Costs
- Labor: Labor costs for fuel leak repairs can vary widely depending on the mechanic’s hourly rate and the complexity of the job. Expect to pay anywhere from $75 to $200 per hour.
- Parts: Mechanics typically charge a markup on replacement parts, so you may pay more for parts than if you purchased them yourself.
- Diagnostic Fees: Some mechanics charge a diagnostic fee to identify the source of the leak, which can range from $50 to $150.
11.3. Cost Examples
Here are some examples of potential costs for common fuel leak repairs:
- Replacing a Fuel Line: DIY: $30-$75 (parts) + $0-$100 (tools). Professional: $150-$400 (parts and labor).
- Repairing a Fuel Tank Leak: DIY: $20-$50 (repair kit). Professional: $300-$800 (including tank removal and cleaning).
- Replacing a Fuel Pump O-Ring: DIY: $5-$20 (O-ring). Professional: $100-$300 (parts and labor).
11.4. CARDIAGTECH.NET: Cost-Effective Solutions
CARDIAGTECH.NET provides cost-effective solutions for fuel leak repairs, helping you save money without compromising quality:
- Competitive Pricing: We offer competitive pricing on all our products, ensuring you get the best value for your money.
- High-Quality Parts: Our replacement parts are sourced from reputable manufacturers and meet or exceed OEM standards, providing long-lasting performance.
- Tool Rentals: Rent specialized tools from CARDIAGTECH.NET, saving you the expense of purchasing them outright.
- DIY Guides and Tutorials: Access free DIY guides and tutorials that provide step-by-step instructions for performing fuel leak repairs, helping you save on labor costs.
By choosing CARDIAGTECH.NET, you can reduce the cost of fuel leak repairs while ensuring the job is done correctly and efficiently.
12. Legal and Environmental Considerations
Fuel leaks not only pose a safety risk but also have legal and environmental implications. It’s essential to be aware of these considerations to ensure compliance and minimize your environmental impact.
12.1. Environmental Regulations
Many jurisdictions have environmental regulations in place to prevent fuel leaks and spills. These regulations may include:
- Reporting Requirements: Some areas require you to report fuel leaks or spills to the authorities.
- Cleanup Requirements: You may be responsible for cleaning up any fuel that spills onto the ground.
- Fines and Penalties: Failure to comply with environmental regulations can result in fines and penalties.
12.2. Vehicle Inspections
Some states and countries require vehicles to pass emissions inspections, which may include checks for fuel leaks. A fuel leak can cause your vehicle to fail inspection, preventing you from registering or operating it legally.
12.3. Insurance Implications
If a fuel leak causes a fire or explosion, your insurance company may deny coverage if you were aware of the leak and failed to take steps to repair it.
12.4. Responsible Disposal
When repairing a fuel leak, it’s essential to dispose of fuel and contaminated materials responsibly. This may include:
- Proper Storage: Store fuel in approved containers and away from heat sources.
- Recycling: Recycle used oil and fuel filters whenever possible.
- Disposal of Contaminated Materials: Dispose of contaminated rags and materials at a hazardous waste facility.
12.5. CARDIAGTECH.NET: Promoting Environmental Responsibility
CARDIAGTECH.NET is committed to promoting environmental responsibility in the automotive industry. We offer a variety of products and services to help you minimize your environmental impact:
- Eco-Friendly Products: We offer a range of eco-friendly products, such as biodegradable cleaners and recycled parts.
- Educational Resources: We provide educational resources on responsible waste disposal and environmental compliance.
- Recycling Programs: We partner with recycling facilities to offer convenient recycling programs for used oil, fuel filters, and other automotive materials.
- Sustainable Practices: We implement sustainable practices in our operations, such as reducing waste and conserving energy.
By choosing CARDIAGTECH.NET, you can support environmental responsibility and ensure you’re doing your part to protect the planet.
13. Frequently Asked Questions (FAQ)
Q1: What are the first steps I should take if I suspect a fuel leak?
If you suspect a fuel leak, immediately park the car in a well-ventilated area, away from any potential ignition sources. Turn off the engine, disconnect the battery, and visually inspect the fuel system for any signs of leakage. If the leak is significant or you’re uncomfortable proceeding, contact a professional mechanic.
Q2: Can I temporarily fix a fuel leak with duct tape or sealant?
While duct tape or sealant might seem like a quick fix, they are not reliable solutions for fuel leaks. Fuel can dissolve many types of adhesives, leading to a recurrence of the leak or even a more dangerous situation. It’s best to replace the damaged component or seek professional assistance.
Q3: How often should I inspect my car for fuel leaks?
It’s a good practice to inspect your car for fuel leaks at least every six months or during routine maintenance checks. Pay attention to any gasoline smells or unusual drops beneath the vehicle.
Q4: Is it safe to drive a car with a minor fuel leak?
Driving with any fuel leak is unsafe. Even a minor leak can escalate into a fire hazard or cause damage to the engine. It’s crucial to address the leak as soon as possible.
Q5: What tools do I need to diagnose a fuel leak effectively?
To diagnose a fuel leak effectively, you’ll need tools such as safety glasses, gloves, a flashlight, a fuel pressure tester, and possibly a smoke machine for detecting smaller leaks. An OBD-II scanner can also help identify related diagnostic trouble codes. CARDIAGTECH.NET offers all these tools to facilitate your diagnostic process.
Q6: What should I do if I spill fuel while repairing a leak?
If you spill fuel, immediately clean it up using absorbent materials like rags or paper towels. Dispose of these materials properly in a sealed metal container, and ensure the area is well-ventilated to prevent the accumulation of flammable vapors.
Q7: Can a fuel leak affect my car’s performance?
Yes, a fuel leak can significantly affect your car’s performance. It can lead to decreased fuel efficiency, engine misfires, difficulty starting the engine, and rough idling.
Q8: Are there specific regulations regarding fuel leaks that I should be aware of?
Yes, many jurisdictions have environmental regulations concerning fuel leaks. These regulations may require you to report and clean up fuel spills to prevent environmental contamination. Check your local and state regulations for compliance.
Q9: How can CARDIAGTECH.NET help me in fixing a fuel leak?
CARDIAGTECH.NET offers a wide range of high-quality tools, replacement parts, and diagnostic equipment to help you fix fuel leaks efficiently and safely. Our products are designed to meet the needs of both professional mechanics and DIY enthusiasts. Plus, our expert support team can provide guidance and answer any questions you may have during the repair process. Contact us via WhatsApp at +1 (641) 206-8880 or visit our website at CARDIAGTECH.NET for more information. Our address is 276 Reock St, City of Orange, NJ 07050, United States.
Q10: What are some preventative measures I can take to avoid fuel leaks in the future?
To prevent future fuel leaks, regularly inspect your car’s fuel lines and components for wear and tear. Replace fuel filters as recommended by the manufacturer, use high-quality fuel, and avoid driving with a nearly empty tank.
Conclusion
Fixing a fuel leak in your car requires a systematic approach, starting with identifying the leak, taking necessary safety precautions, and using the right tools and techniques to perform the repair. Whether you choose to tackle the job yourself or seek professional help, understanding the basics of fuel systems and the potential risks involved is crucial. By following the steps outlined in this guide and utilizing the resources available at CARDIAGTECH.NET, you can ensure the job is done safely and effectively.
Remember, if you’re facing challenging or complex fuel leak issues, don’t hesitate to reach out to the experts at CARDIAGTECH.NET. Our team is ready to provide tailored solutions and guidance to meet your specific needs. Contact us today via WhatsApp at +1 (641) 206-8880 or visit our website at CARDIAGTECH.NET for all your automotive diagnostic and repair needs. Our address is 276 Reock St, City of Orange, NJ 07050, United States. Take control of your vehicle’s maintenance and ensure a safe and efficient driving experience!
Is your car giving you trouble with fuel leaks? Don’t wait until it becomes a fire hazard or an expensive repair. Contact CARDIAGTECH.NET today! Our expert team is ready to provide you with the best tools and guidance to fix your fuel leak efficiently and safely. Whether you’re a seasoned mechanic or a DIY enthusiast, we have the perfect solutions for you. Call us now at +1 (641) 206-8880 for a free consultation and let us help you get back on the road with confidence!