How To Fix A Fuse In A Car: A Comprehensive Guide

Fixing a fuse in a car is a crucial skill for any car owner. A blown fuse can disable essential electrical components, but with the right knowledge, you can diagnose and resolve the issue efficiently. CARDIAGTECH.NET offers a wide array of tools that can help you in this process. Understanding auto fuse replacement, circuit protection, and electrical troubleshooting can save you time and money.
1. Identifying a Blown Fuse: Common Signs and Symptoms
Recognizing the telltale signs of a blown fuse is the first step in addressing electrical issues in your vehicle. Early detection can prevent further damage and ensure your car’s electrical system remains in optimal condition. Here are the common indicators of a blown fuse:
- Non-Functional Electrical Components: One of the most obvious signs is when a specific electrical component suddenly stops working. This could include anything from the car’s radio and power windows to headlights and interior lights.
- Dim or Flickering Lights: If you notice that your car’s lights are dimmer than usual or are flickering intermittently, it could be a sign of an overloaded circuit leading to a blown fuse. This is particularly noticeable with headlights and dashboard lights.
- Accessories Not Responding: If accessories like the cigarette lighter, GPS, phone charger, or any other device powered through the car’s electrical system fail to respond, a blown fuse is a likely cause.
- Visual Inspection of the Fuse: A direct way to identify a blown fuse is by visually inspecting it. Remove the fuse from its slot in the fuse box and hold it up to the light. A blown fuse typically has a broken wire or a burnt appearance inside the clear plastic casing.
- Unusual Odors: Sometimes, a blown fuse can emit a burning smell, especially if it was caused by a significant electrical overload or short circuit. This is a clear indication that a fuse has failed and needs immediate attention.
- Check Engine Light: In some cases, a blown fuse can trigger the check engine light. This is because certain sensors and systems are monitored by the car’s computer, and a loss of power due to a blown fuse can set off a warning.
Knowing these signs can help you quickly diagnose and address the issue, preventing further inconvenience and potential damage to your vehicle’s electrical system. CARDIAGTECH.NET provides the tools and resources you need for effective electrical troubleshooting.
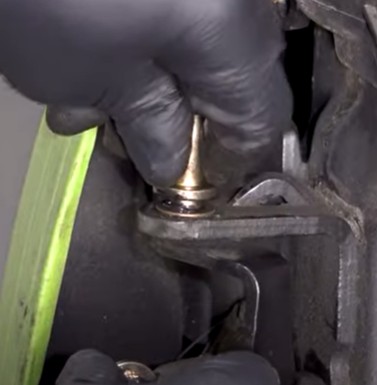
Inspecting a blown car fuse for damage, highlighting the broken filament indicating failure
2. Understanding Why Car Fuses Blow: Common Causes
Fuses blow to protect your car’s electrical system from damage, and understanding why they blow can help you prevent future occurrences. Here are the primary reasons behind blown car fuses:
- Overloaded Circuit: An overloaded circuit is one of the most common reasons for a blown fuse. This happens when too many electrical devices are connected to a single circuit, drawing more current than the circuit is designed to handle.
- Example: Plugging multiple high-power devices, such as a phone charger, GPS, and portable DVD player, into the cigarette lighter outlet simultaneously can overload the circuit.
- Short Circuits: A short circuit occurs when there is an unintended connection between two points in an electrical circuit that have different voltages. This bypasses the normal circuit path and allows a large amount of current to flow.
- Causes: Damaged or frayed wires, loose connections, or faulty electrical components can create short circuits.
- Aging or Corroded Fuses: Like any component, fuses can degrade over time. Corrosion and general wear can weaken the fuse, making it more susceptible to blowing even under normal load conditions.
- Signs: Check for visible corrosion or discoloration on the fuse.
- Incorrect Fuse Rating: Using a fuse with an incorrect amperage rating is a common mistake that can lead to frequent fuse blowing.
- Explanation: If the fuse has a lower amperage rating than required for the circuit, it will blow prematurely. Conversely, if the fuse has a higher amperage rating, it may not protect the circuit adequately, potentially causing damage to the electrical components.
- Voltage Spikes: Sudden spikes in voltage can also cause fuses to blow. These spikes can come from various sources, such as a faulty alternator or issues with the car’s voltage regulator.
- Environmental Factors: Extreme temperatures and humidity can also contribute to fuse degradation and failure.
Understanding these causes can help you take preventive measures and ensure your car’s electrical system remains protected. Regular inspection and maintenance are key to avoiding unexpected fuse failures.
3. Essential Tools and Equipment for Fuse Replacement
Having the right tools and equipment on hand makes the process of replacing a blown fuse much easier and safer. Here are the essential items you should have:
- Fuse Puller: A fuse puller is a small plastic tool specifically designed to remove fuses from the fuse box. It provides a secure grip and prevents damage to the fuse or the fuse box.
- Availability: Many fuse boxes come with a fuse puller attached to the inside of the cover. If you don’t have one, they are inexpensive and widely available at auto parts stores and online retailers like CARDIAGTECH.NET.
- Spare Fuses: It’s always a good idea to keep a selection of spare fuses in your car. Make sure they match the amperage ratings of the fuses in your vehicle’s electrical system.
- Fuse Assortment Kits: Consider purchasing a fuse assortment kit that includes a variety of fuse sizes to cover different circuits in your car.
- Multimeter: A multimeter is a versatile tool that can be used to test the continuity of a fuse and check for voltage in the circuit. This can help you diagnose whether a fuse is actually blown and identify any underlying electrical issues.
- Features: Look for a multimeter that can measure voltage, current, and resistance.
- Owner’s Manual: Your car’s owner’s manual contains valuable information about the location of the fuse boxes, the function of each fuse, and the correct amperage ratings.
- Importance: Always refer to the owner’s manual before replacing a fuse to ensure you are using the correct type and rating.
- Flashlight or Headlamp: Good lighting is essential when working in the fuse box, especially in dimly lit areas. A flashlight or headlamp will help you see the fuses and identify the correct one.
- Safety Gloves: Wearing safety gloves can protect your hands from sharp edges and electrical shock.
- Eye Protection: Safety glasses or goggles can protect your eyes from debris or sparks while working on the electrical system.
Having these tools and equipment readily available will not only make fuse replacement easier but also help you diagnose and address any underlying electrical issues more effectively.
4. Step-by-Step Guide: How to Replace a Blown Fuse
Replacing a blown fuse is a straightforward process that most car owners can handle. Here’s a detailed, step-by-step guide:
- Locate the Fuse Box: The first step is to find the fuse box in your vehicle. Most cars have at least two fuse boxes: one located under the dashboard and another in the engine compartment.
- Dashboard Fuse Box: Typically found on the driver’s side, often behind a small panel or under the steering wheel.
- Engine Compartment Fuse Box: Usually located near the battery or on the fender wall.
- Reference: Consult your car’s owner’s manual for the exact location of the fuse boxes.
- Turn Off the Vehicle: Before you begin, make sure the car is turned off and the ignition is in the “off” position. This will prevent any accidental electrical shorts or shocks during the fuse replacement process.
- Open the Fuse Box Cover: Carefully open the fuse box cover. It may be held in place by clips or screws.
- Consult the Fuse Diagram: Inside the fuse box cover, you’ll find a fuse diagram that identifies the function of each fuse. This diagram is crucial for locating the fuse associated with the malfunctioning component.
- Example: If your car’s radio isn’t working, look for the fuse labeled “Radio” or “Audio System” on the diagram.
- Identify the Blown Fuse: Once you’ve located the correct fuse, visually inspect it to confirm that it’s blown. Look for a broken wire or a burnt appearance inside the clear plastic casing.
- Remove the Blown Fuse: Use a fuse puller or a pair of tweezers to carefully remove the blown fuse from its slot. Be gentle to avoid damaging the fuse box.
- Check the Fuse Rating: Before installing a new fuse, make sure it has the same amperage rating as the blown fuse. The amperage rating is usually printed on the fuse itself.
- Importance: Using a fuse with the wrong amperage rating can lead to further electrical problems.
- Install the New Fuse: Insert the new fuse into the empty slot, making sure it fits snugly and is properly seated.
- Test the Component: Turn on the vehicle and test the malfunctioning component to ensure that it’s now working correctly. If the component still doesn’t work, there may be an underlying electrical issue that requires professional attention.
- Replace the Fuse Box Cover: Once you’ve confirmed that the new fuse is working, replace the fuse box cover to protect the fuses from dirt, moisture, and damage.
By following these steps, you can safely and effectively replace a blown fuse and restore functionality to your car’s electrical system.
5. Preventing Fuses From Blowing: Best Practices
Preventing fuses from blowing involves understanding the common causes and taking proactive steps to protect your car’s electrical system. Here are some best practices to help you avoid frequent fuse failures:
- Avoid Overloading Circuits: One of the most effective ways to prevent fuses from blowing is to avoid overloading electrical circuits. Be mindful of the number of devices you plug into a single circuit, and avoid using multiple high-power devices simultaneously.
- Example: Instead of plugging multiple chargers and accessories into the cigarette lighter outlet, consider using a multi-port USB adapter that distributes power more efficiently.
- Use the Correct Fuse Rating: Always replace a blown fuse with a new fuse that has the same amperage rating. Using a fuse with the wrong amperage rating can either cause it to blow prematurely or fail to protect the circuit adequately.
- Reference: Consult your car’s owner’s manual to determine the correct fuse rating for each circuit.
- Regularly Inspect Wires and Connections: Inspect the wiring and electrical connections in your car for any signs of damage, wear, or corrosion. Damaged wires can create short circuits that cause fuses to blow.
- Action: Replace any damaged wires or connectors promptly.
- Check for Loose Connections: Loose connections can also lead to electrical problems. Make sure that all electrical connections are secure and properly tightened.
- Protect Against Moisture: Moisture can cause corrosion and electrical shorts. Keep your car’s electrical components dry and protected from the elements.
- Tips: Use dielectric grease on electrical connections to prevent corrosion.
- Regularly Check and Replace Aging Fuses: Like any component, fuses can degrade over time. Regularly inspect your car’s fuses for signs of wear or corrosion, and replace them as needed.
- Professional Inspections: Consider having your car’s electrical system inspected by a professional mechanic periodically. They can identify potential issues and address them before they lead to fuse failures.
- Upgrade Electrical Components: If you frequently use high-power devices in your car, consider upgrading the electrical components, such as the alternator and battery, to handle the increased load.
By following these best practices, you can significantly reduce the likelihood of fuses blowing and keep your car’s electrical system running smoothly.
6. Diagnosing Complex Electrical Issues: When to Seek Professional Help
While replacing a blown fuse is often a simple fix, there are situations where the problem may be more complex and require professional attention. Recognizing when to seek help from a qualified mechanic can prevent further damage and ensure your safety. Here are some signs that indicate you should consult a professional:
- Frequent Fuse Blowing: If a fuse blows repeatedly shortly after being replaced, it suggests an underlying electrical issue. This could be due to a short circuit, an overloaded circuit, or a faulty component.
- Burning Smell or Smoke: A burning smell or visible smoke coming from the fuse box or any electrical component is a serious warning sign. It indicates a severe electrical problem that could lead to a fire.
- Multiple Electrical Failures: If several electrical components fail simultaneously, it could indicate a larger issue within the vehicle’s electrical system. This could be due to a faulty ground connection, a malfunctioning control module, or a problem with the car’s wiring harness.
- Unexplained Battery Drain: If your car battery keeps draining even when the car is turned off, it could be due to a parasitic drain caused by a faulty electrical component or wiring issue.
- Complex Electrical Modifications: If you’ve made significant modifications to your car’s electrical system, such as installing aftermarket accessories or performance upgrades, it’s essential to have a professional ensure that the modifications are done correctly and safely.
- Check Engine Light Remains On: If replacing a fuse resolves the immediate issue, but the check engine light remains on, it indicates that there may be other underlying problems that need to be diagnosed and addressed.
- Lack of Experience: If you’re not comfortable working with electrical systems or lack the necessary tools and knowledge, it’s always best to seek professional help.
Attempting to diagnose and repair complex electrical issues without the proper training and equipment can be dangerous and could potentially cause further damage to your vehicle. When in doubt, consult a qualified mechanic who can accurately diagnose and resolve the problem.
7. Common Mistakes to Avoid When Replacing Fuses
Replacing a fuse might seem straightforward, but avoiding common mistakes can save you time, prevent further damage, and ensure your safety. Here are some pitfalls to watch out for:
- Using the Wrong Amperage Fuse: One of the most common and potentially dangerous mistakes is using a fuse with the wrong amperage rating.
- Risk: A fuse with a lower amperage rating will blow prematurely, while a fuse with a higher amperage rating may not protect the circuit, leading to overheating and potential fire hazards.
- Solution: Always use a fuse with the exact amperage rating specified in your car’s owner’s manual or on the fuse box diagram.
- Ignoring the Root Cause: Replacing a blown fuse without addressing the underlying cause is a temporary solution that will likely lead to repeated fuse failures.
- Risk: Ignoring the root cause can result in more significant electrical damage and potential safety hazards.
- Solution: Diagnose and repair the underlying issue, such as a short circuit or overloaded circuit, before replacing the fuse.
- Using Metal Objects to Remove Fuses: Using metal objects like screwdrivers or pliers to remove fuses can damage the fuse box and create a short circuit.
- Risk: This can damage the fuse box terminals and potentially cause an electrical shock.
- Solution: Use a fuse puller, which is a small plastic tool designed specifically for removing fuses safely.
- Forgetting to Disconnect the Battery: Working on the electrical system without disconnecting the battery can be dangerous.
- Risk: You could accidentally create a short circuit or receive an electrical shock.
- Solution: Disconnect the negative terminal of the battery before working on any electrical components.
- Overlooking Corrosion: Corrosion on the fuse terminals or in the fuse box can cause electrical problems and lead to fuse failures.
- Risk: Corrosion can create resistance in the circuit, causing the fuse to overheat and blow.
- Solution: Clean the fuse terminals and fuse box with a wire brush or electrical contact cleaner to remove any corrosion.
- Improperly Seating the Fuse: Failing to properly seat the fuse in its slot can prevent it from making a good connection.
- Risk: This can cause the circuit to malfunction or the fuse to overheat.
- Solution: Ensure that the fuse is fully inserted into its slot and that it makes a secure connection.
- Neglecting the Owner’s Manual: The owner’s manual contains valuable information about your car’s electrical system, including the location of the fuse boxes, the function of each fuse, and the correct amperage ratings.
- Risk: Neglecting the owner’s manual can lead to mistakes and potential damage.
- Solution: Always consult the owner’s manual before replacing a fuse.
By avoiding these common mistakes, you can safely and effectively replace fuses and maintain your car’s electrical system.
8. Understanding Fuse Types and Ratings
Understanding the different types of fuses and their ratings is essential for ensuring the proper protection of your car’s electrical circuits. Here’s an overview of the common fuse types and how to interpret their ratings:
Fuse Types
- Blade Fuses (ATO/ATC): These are the most common type of fuse found in modern vehicles. They have a flat blade design and come in various sizes and amperage ratings.
- ATO (Automotive Technology Organization): Original blade fuse design.
- ATC (Automotive Technology Council): An improved version of the ATO fuse with better performance.
- Mini Blade Fuses: These are smaller versions of the standard blade fuses and are used in newer vehicles to save space.
- Maxi Fuses: These are larger blade fuses with higher amperage ratings, typically used for high-current circuits like the main power supply or ABS system.
- Glass Tube Fuses: These are older style fuses that were commonly used in older vehicles. They have a glass tube design with a visible filament.
- SFE Fuses (SAE Fuse Element): These are small cylindrical fuses with pointed ends.
- PAL Fuses (Plug-In Automotive Link): These are bolt-down fuses used for high-current applications.
Fuse Ratings
- Amperage Rating: The amperage rating indicates the maximum amount of current that a fuse can handle before it blows. The amperage rating is usually printed on the fuse itself.
- Importance: Always use a fuse with the correct amperage rating for the circuit it is protecting.
- Voltage Rating: The voltage rating indicates the maximum voltage that the fuse can safely handle. In most automotive applications, the voltage rating is not as critical as the amperage rating, as the car’s electrical system operates at a relatively low voltage (typically 12 volts).
- Color Coding: Fuses are often color-coded to indicate their amperage rating. This makes it easier to identify the correct fuse for a particular circuit.
Here is a table summarizing common fuse colors and their corresponding amperage ratings:
| Fuse Color | Amperage Rating (Amps) |
|---|---|
| Tan | 5 |
| Brown | 7.5 |
| Red | 10 |
| Blue | 15 |
| Yellow | 20 |
| Clear | 25 |
| Green | 30 |
How to Choose the Right Fuse
- Consult the Owner’s Manual: Refer to your car’s owner’s manual or the fuse box diagram to determine the correct fuse type and amperage rating for the circuit you are protecting.
- Match the Amperage Rating: Always replace a blown fuse with a new fuse that has the same amperage rating.
- Consider the Application: Choose a fuse type that is appropriate for the application. For example, use a maxi fuse for high-current circuits and a mini blade fuse for low-current circuits.
- Check the Voltage Rating: Ensure that the fuse has a voltage rating that is equal to or greater than the voltage of the circuit it is protecting.
- Inspect the Fuse Holder: Make sure that the fuse holder is in good condition and that the fuse fits snugly.
Understanding fuse types and ratings will help you choose the right fuse for your car’s electrical system and ensure proper protection against overcurrent and short circuits.
9. Fuse Box Location and Diagrams
Locating the fuse box and understanding the fuse diagram are crucial steps in replacing a blown fuse. Here’s a comprehensive guide to help you find and interpret fuse box information in your vehicle:
Common Fuse Box Locations
Most vehicles have at least two fuse boxes, and sometimes more, depending on the complexity of the electrical system. Here are the most common locations:
- Under the Dashboard:
- Location: Typically found on the driver’s side, often behind a small panel or under the steering wheel.
- Purpose: This fuse box usually houses fuses for interior components like the radio, lights, power windows, and other accessories.
- In the Engine Compartment:
- Location: Usually located near the battery or on the fender wall.
- Purpose: This fuse box typically contains fuses for engine-related components like the engine control unit (ECU), fuel pump, ignition system, and other critical systems.
- In the Trunk:
- Location: Some vehicles, particularly larger sedans and SUVs, may have an additional fuse box in the trunk.
- Purpose: This fuse box may house fuses for rear accessories like the rear window defogger, trunk light, and other rear-mounted components.
How to Find the Fuse Box
- Consult the Owner’s Manual: The most reliable way to find the fuse box location is to consult your car’s owner’s manual. The manual will provide specific information about the location of each fuse box in your vehicle.
- Look for the Fuse Box Cover: Fuse boxes are typically covered by a plastic cover that is labeled with the word “Fuses” or a fuse symbol.
- Check Common Locations: If you can’t find the fuse box using the owner’s manual, check the common locations mentioned above (under the dashboard, in the engine compartment, and in the trunk).
Understanding Fuse Box Diagrams
The fuse box diagram is a crucial tool for identifying the function of each fuse in the fuse box. Here’s how to interpret it:
- Location of the Diagram: The fuse box diagram is usually located on the inside of the fuse box cover. It may be printed directly on the cover or on a separate piece of paper that is attached to the cover.
- Fuse Labels: The diagram will show the location of each fuse in the fuse box, along with a label that indicates the function of the fuse. The labels may be abbreviated, so it’s important to understand what they mean.
Here’s an example of common fuse labels and their meanings:
| Fuse Label | Meaning |
|---|---|
| Radio | Radio/Audio System |
| Head Lamp | Headlights |
| Tail Lamp | Taillights |
| P/Window | Power Windows |
| Cig Lighter | Cigarette Lighter/Power Outlet |
| ECU | Engine Control Unit |
| Fuel Pump | Fuel Pump |
| ABS | Anti-lock Braking System |
- Amperage Ratings: The diagram may also indicate the amperage rating of each fuse. This is important information to know when replacing a blown fuse.
- Color Coding: Some fuse box diagrams use color coding to indicate the amperage rating of each fuse. Refer to the color-coding chart mentioned earlier in this guide to understand the meaning of each color.
Tips for Using Fuse Box Diagrams
- Keep the Diagram Clean: Keep the fuse box diagram clean and legible. If it becomes damaged or faded, make a copy or print a new one from the internet.
- Use a Flashlight: Use a flashlight to illuminate the fuse box and diagram when working in a dimly lit area.
- Double-Check the Diagram: Always double-check the diagram before removing or replacing a fuse to ensure that you are working on the correct circuit.
By understanding the fuse box location and how to interpret the fuse diagram, you can quickly and easily identify and replace blown fuses in your vehicle.
10. Advanced Troubleshooting Techniques for Electrical Issues
While replacing a blown fuse can often resolve simple electrical problems, more complex issues may require advanced troubleshooting techniques. Here are some strategies for diagnosing and addressing more challenging electrical problems:
- Using a Multimeter: A multimeter is an essential tool for diagnosing electrical problems. It can be used to measure voltage, current, and resistance in a circuit.
- Voltage Testing: Use a multimeter to check the voltage at the fuse box and at the component that is not working. This can help you determine if there is a voltage drop or a break in the circuit.
- Continuity Testing: Use a multimeter to check the continuity of a fuse or a wire. This will tell you if the fuse is blown or if there is a break in the wire.
- Resistance Testing: Use a multimeter to measure the resistance of a component. This can help you determine if the component is faulty.
- Checking for Short Circuits: A short circuit occurs when there is an unintended connection between two points in an electrical circuit that have different voltages. This can cause a large amount of current to flow, which can blow a fuse.
- Visual Inspection: Look for damaged or frayed wires, loose connections, or signs of burning or melting.
- Continuity Testing: Disconnect the component from the circuit and use a multimeter to check for continuity between the power wire and the ground wire. If there is continuity, there is a short circuit.
- Testing Ground Connections: A poor ground connection can cause a variety of electrical problems, including blown fuses, dim lights, and malfunctioning components.
- Visual Inspection: Look for corroded or loose ground connections.
- Voltage Drop Test: Use a multimeter to measure the voltage drop between the ground connection and the vehicle’s chassis. A voltage drop of more than 0.2 volts indicates a poor ground connection.
- Using a Wiring Diagram: A wiring diagram is a detailed map of the electrical circuits in your vehicle. It can be invaluable for troubleshooting complex electrical problems.
- Obtaining a Wiring Diagram: You can usually obtain a wiring diagram from your car’s manufacturer or from a reputable auto repair manual.
- Following the Circuit: Use the wiring diagram to trace the circuit from the power source to the component that is not working. This can help you identify any breaks or shorts in the circuit.
- Checking Control Modules: Modern vehicles have complex control modules that manage various electrical systems. If you suspect that a control module is faulty, you may need to have it tested by a professional mechanic using specialized diagnostic equipment.
- Scanning for Diagnostic Trouble Codes (DTCs): Use an OBD-II scanner to check for any diagnostic trouble codes (DTCs) that may be stored in the vehicle’s computer. These codes can provide valuable clues about the nature of the electrical problem.
By using these advanced troubleshooting techniques, you can diagnose and address more complex electrical issues in your vehicle. However, if you are not comfortable working with electrical systems, it is always best to seek professional help.
Replacing a fuse in your car is a relatively simple task, but knowing when to seek professional help is crucial. If you’re dealing with frequent fuse blowing, burning smells, or multiple electrical failures, it’s time to consult an expert. CARDIAGTECH.NET offers a range of diagnostic tools and equipment to help professionals quickly identify and resolve electrical issues. Don’t hesitate to contact us at +1 (641) 206-8880 or visit our website at CARDIAGTECH.NET for more information. Our address is 276 Reock St, City of Orange, NJ 07050, United States.
Frequently Asked Questions (FAQs) About Car Fuses
-
What is a car fuse and what does it do?
A car fuse is a safety device designed to protect your vehicle’s electrical circuits from overcurrent or short circuits. It contains a thin wire that melts and breaks the circuit if the current exceeds a certain level, preventing damage to electrical components.
-
Where is the fuse box located in my car?
The fuse box is typically located under the dashboard, in the engine compartment, or sometimes in the trunk. Consult your car’s owner’s manual for the exact location.
-
How do I know if a fuse is blown?
A blown fuse usually has a broken wire or a burnt appearance inside the clear plastic casing. You can also use a multimeter to check for continuity.
-
Can I replace a blown fuse with one that has a higher amperage rating?
No, always replace a blown fuse with one that has the same amperage rating. Using a fuse with a higher rating can damage the circuit and potentially cause a fire.
-
What is a fuse puller and why should I use it?
A fuse puller is a small plastic tool designed to safely remove fuses from the fuse box. It prevents damage to the fuse box and reduces the risk of electrical shock.
-
Why does my car fuse keep blowing after I replace it?
If a fuse keeps blowing, it indicates an underlying electrical issue such as a short circuit or an overloaded circuit. It’s essential to diagnose and repair the root cause before replacing the fuse again.
-
What does the fuse box diagram tell me?
The fuse box diagram identifies the function of each fuse in the fuse box, helping you locate the fuse associated with a malfunctioning component. It may also indicate the amperage rating of each fuse.
-
Can I drive my car with a blown fuse?
It depends on which fuse is blown. If it’s a fuse for a non-essential component like the radio, you can likely drive the car. However, if it’s a fuse for a critical system like the headlights or fuel pump, it’s not safe to drive the car until the fuse is replaced.
-
How often should I check my car’s fuses?
You should check your car’s fuses periodically, especially if you notice any electrical malfunctions. Regular inspection can help prevent unexpected fuse failures.
-
When should I seek professional help for electrical issues in my car?
Seek professional help if you’re dealing with frequent fuse blowing, burning smells, multiple electrical failures, or if you’re not comfortable working with electrical systems.
Is your car giving you electrical headaches? Don’t let a blown fuse ruin your day! At CARDIAGTECH.NET, we understand the frustrations of dealing with electrical issues in your vehicle. Our team of experts is here to help you diagnose and resolve any electrical problems quickly and efficiently. Whether you need assistance with fuse replacement, circuit testing, or advanced electrical diagnostics, we have the tools and expertise to get the job done right.
Contact CARDIAGTECH.NET today for reliable solutions and professional support. Call us at +1 (641) 206-8880 or visit our website at CARDIAGTECH.NET to explore our range of services and products. Let us help you keep your car running smoothly and safely! Our address is 276 Reock St, City of Orange, NJ 07050, United States.