How To Fix A Gas Leak On Car Safely

Fixing a gas leak on a car requires immediate attention due to the potential fire hazard; CARDIAGTECH.NET offers the tools and expertise to address these leaks safely and effectively, ensuring your vehicle’s integrity and your peace of mind. Detecting fuel spills promptly and utilizing appropriate repair methods can mitigate risks and restore your vehicle to optimal condition, using products from CARDIAGTECH.NET. Remember, preventing future leaks through regular inspections and maintenance is crucial for vehicle longevity and safety.
1. Identifying a Gas Leak: Key Indicators
Recognizing a gas leak early is essential for preventing potential hazards and costly repairs. There are several key indicators that can help you identify a leak promptly. By being vigilant and aware of these signs, you can take immediate action to address the issue and ensure your safety.
- Visual Inspection: Look for puddles under your car. Check near the fuel tank and fuel lines for any wet spots. Gasoline will have a distinctive rainbow sheen on water. This can signify a leak, especially if the liquid has a yellowish hue and a strong odor.
- Smell Test: Gasoline has a very distinct and pungent odor. If you smell gas around your car, especially in an enclosed space like a garage, it’s a strong indicator of a leak. This smell should not be ignored, as it signifies the presence of hazardous vapors.
- Auditory Clues: Listen for a hissing or whistling sound coming from the fuel tank area, particularly after driving. This sound can indicate that gas is escaping under pressure. Any unusual sounds should be investigated immediately to prevent further issues.
Addressing a gas leak promptly not only ensures your safety but also prevents potential damage to your vehicle and the environment. Regular inspections and awareness of these key indicators are vital for maintaining your car’s health.
2. Immediate Safety Measures: What to Do First
When you suspect a gas leak, acting quickly and safely is crucial to prevent accidents. Here are the immediate steps you should take to ensure your safety and minimize potential risks:
- Prioritize Safety: Your safety is the top priority. Do not smoke, light matches, or use anything that could create a spark. Gasoline vapors are highly flammable, and any ignition source can lead to a fire or explosion.
- Avoid Starting the Car: Starting your car can create a spark that ignites the gasoline vapors. The safest course of action is to keep the car turned off and the keys out of the ignition. This reduces the risk of a fire or explosion.
- Evacuate the Area: Ensure that everyone moves to a safe distance away from the vehicle. Gasoline vapors can travel and ignite, so it’s crucial to minimize the risk of ignition by keeping a safe perimeter.
- Contact Professionals: Call roadside assistance or a qualified mechanic immediately. Explain the situation and follow their instructions. Professionals have the expertise and equipment to handle gas leaks safely.
Following these immediate steps can significantly reduce the risk of a dangerous situation and protect you and those around you. Acting promptly and cautiously is the best way to handle a suspected gas leak.
3. Assessing the Severity: A Step-by-Step Guide
After taking immediate safety measures, assessing the severity of the gas leak is essential to determine the appropriate course of action. Here’s a step-by-step guide to help you gauge the seriousness of the situation:
- Visual Inspection: Look under your car for any puddles or wet spots. Pay close attention to the area around the fuel tank and fuel lines. The size and frequency of the puddles can indicate the severity of the leak.
- Detailed Examination: Carefully inspect the fuel tank and fuel lines for visible signs of damage such as cracks, holes, or corrosion. Use a flashlight for better visibility. The presence of physical damage can signify a more severe leak.
- Odor Intensity: Take note of the strength of the gasoline odor. A strong, pervasive smell indicates a significant leak that requires immediate attention. A faint odor might suggest a smaller leak, but it should still be addressed promptly.
- Fuel Level Monitoring: Monitor your fuel gauge to see how quickly the fuel level is dropping. A rapid decrease in fuel level indicates a major leak. Keep a log of the fuel level over a short period to assess the rate of loss.
- Professional Consultation: Contact a professional mechanic to describe your observations. Provide as much detail as possible about the visual signs, odor intensity, and fuel level changes. A mechanic can offer further guidance and schedule a thorough inspection.
By following these steps, you can effectively assess the severity of the gas leak and take the necessary actions to ensure your safety and prevent further damage to your vehicle.
4. Identifying the Source: Pinpointing the Leak
Pinpointing the exact source of a gas leak is essential for effective repair. Here are the key areas to inspect and how to identify the leak’s origin:
- Fuel Tank: Inspect the fuel tank for any signs of damage, such as rust, cracks, or punctures. Pay close attention to the seams and connections. Use a flashlight to examine the entire surface of the tank for any irregularities.
- Fuel Lines: Examine the fuel lines running from the tank to the engine. Look for cracks, corrosion, or loose connections. Feel along the lines for any damp spots indicating a leak. Fuel lines are often made of rubber or metal, and both can deteriorate over time.
- Fuel Injectors: Check the fuel injectors for leaks around the seals and connections. Fuel injectors deliver fuel directly into the engine, and leaks in this area can affect performance. Look for wet spots or fuel stains around the injectors.
- Fuel Filter: Inspect the fuel filter for any signs of damage or leaks. The fuel filter is typically located along the fuel line and can become clogged or damaged over time. Check the connections and the filter body for any irregularities.
- Fuel Pump: Listen for unusual noises from the fuel pump, which is usually located inside the fuel tank. A failing fuel pump can sometimes cause leaks. Pay attention to any changes in the pump’s sound, such as whining or sputtering.
Identifying the specific source of the leak will help you determine the appropriate repair strategy. Once you’ve located the source, you can proceed with the necessary steps to fix the leak and restore your vehicle to safe operating condition.
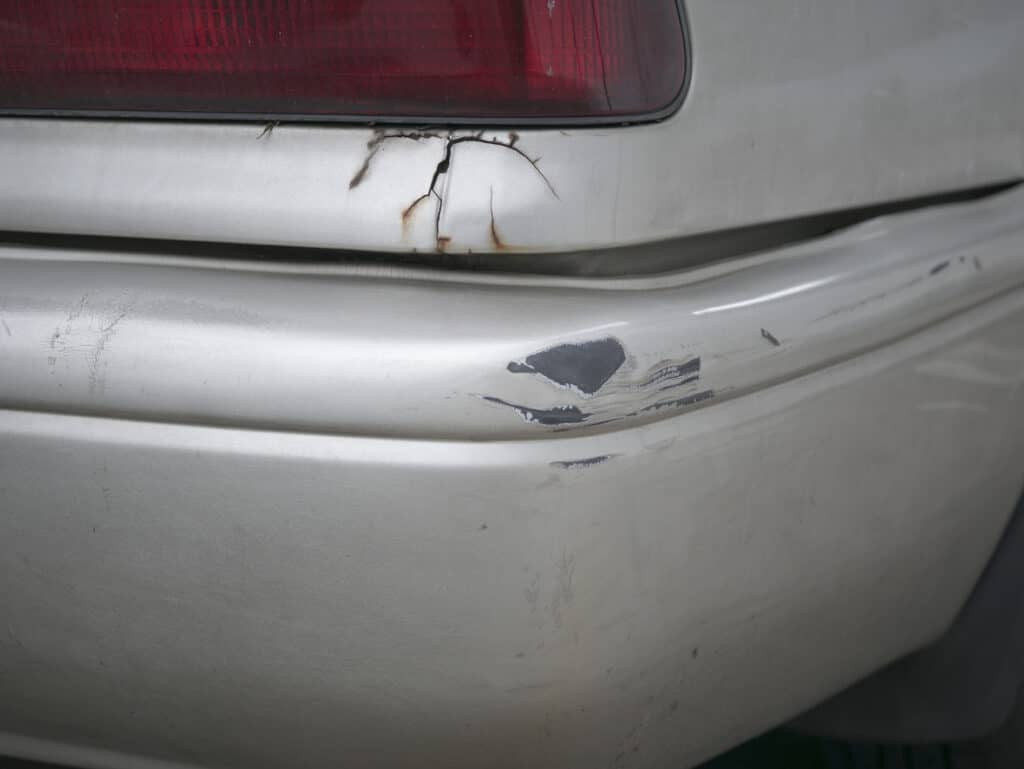
Gas leak on a car fuel line indicating damage and potential hazards
5. Tools and Equipment: What You’ll Need
Having the right tools and equipment is crucial for safely and effectively fixing a gas leak on your car. Here’s a list of essential items you’ll need:
- Safety Glasses: Protect your eyes from fuel splashes and debris. Safety glasses are a fundamental piece of safety equipment when working on any automotive repair. Ensure they fit snugly and provide full coverage.
- Gloves: Use chemical-resistant gloves to protect your skin from gasoline. Gasoline can cause skin irritation and other health issues. Nitrile gloves are a good choice because they are resistant to many chemicals.
- Wrench Set: A set of wrenches is essential for tightening and loosening fuel line connections. Make sure you have a variety of sizes to fit different connections. Flare nut wrenches are particularly useful for fuel lines to prevent damage.
- Screwdrivers: Both flathead and Phillips head screwdrivers may be needed to remove covers or access fuel lines. A set with different sizes and lengths will be helpful.
- Jack and Jack Stands: If you need to access the fuel tank or lines underneath the car, a jack and jack stands are necessary for lifting the vehicle safely. Always use jack stands to support the car; never rely solely on the jack.
- Drain Pan: Use a drain pan to catch any fuel that leaks during the repair process. This will help prevent spills and keep your work area clean.
- Fire Extinguisher: Keep a fire extinguisher nearby in case of a fire. Make sure the extinguisher is rated for gasoline fires (Class B). Familiarize yourself with its operation before starting the repair.
- Fuel Line Disconnect Tool: This tool is specifically designed to disconnect fuel lines without damaging them. It comes in various sizes to fit different fuel line connections.
- Flashlight: A flashlight will help you see clearly in dark areas, such as under the car or inside the engine compartment. An LED flashlight is a good choice because it provides bright light and long battery life.
Having these tools and equipment on hand will help you perform the repair safely and efficiently. Always prioritize safety and follow proper procedures when working with gasoline. CARDIAGTECH.NET provides all of these tools and more to help you handle any automotive repair with confidence. Contact us at +1 (641) 206-8880 for expert advice.
6. Step-by-Step Repair Guide: Fixing the Leak
Here’s a comprehensive step-by-step guide to fixing a gas leak, focusing on fuel line and fuel tank repairs:
6.1. Fuel Line Repair
- Safety First: Ensure the car is cool, the area is well-ventilated, and you have safety glasses and gloves on. Disconnect the negative battery cable to prevent sparks.
- Locate the Leak: Identify the exact point of the leak on the fuel line. Clean the area around the leak with a clean rag to better assess the damage.
- Relieve Fuel Pressure: Consult your car’s repair manual to locate the fuel pressure relief valve. Use the valve to safely release any remaining pressure in the fuel line.
- Disconnect the Fuel Line: Use a fuel line disconnect tool to separate the fuel line at the connection points near the leak. Place a drain pan underneath to catch any fuel that spills.
- Replace the Damaged Section: Cut out the damaged section of the fuel line using a fuel line cutter. Measure the length of the removed section and cut a new piece of fuel line to the same size.
- Connect the New Section: Use fuel line clamps to securely attach the new section of fuel line to the existing line. Ensure the clamps are tightened properly to prevent leaks.
- Inspect the Repair: Double-check all connections to ensure they are secure. Clean any spilled fuel and allow the area to dry.
- Reconnect the Battery: Reconnect the negative battery cable.
- Test for Leaks: Start the car and inspect the repaired area for any signs of leakage. If no leaks are present, the repair is successful.
6.2. Fuel Tank Repair
- Safety First: Ensure the car is cool, the area is well-ventilated, and you have safety glasses and gloves on. Disconnect the negative battery cable to prevent sparks.
- Drain the Fuel Tank: Use a siphon or a fuel pump to remove all gasoline from the fuel tank into approved containers. Dispose of the gasoline properly according to local regulations.
- Remove the Fuel Tank: Disconnect any hoses, wires, and straps holding the fuel tank in place. Use a jack to support the tank as you remove the last straps. Carefully lower the tank to the ground.
- Clean the Tank: Thoroughly clean the outside of the fuel tank to remove any dirt or debris. Inspect the tank for any signs of damage, such as rust, cracks, or punctures.
- Repair the Tank: Depending on the damage, you may be able to use a fuel tank repair kit. Follow the instructions in the kit to patch any small holes or cracks. For larger damage, consider having the tank professionally repaired or replaced.
- Reinstall the Tank: Carefully lift the fuel tank back into position using a jack. Reconnect all hoses, wires, and straps. Ensure the tank is securely in place.
- Refill the Tank: Add a small amount of gasoline to the tank to test for leaks. If no leaks are present, fill the tank completely.
- Reconnect the Battery: Reconnect the negative battery cable.
- Test for Leaks: Start the car and inspect the repaired area for any signs of leakage. If no leaks are present, the repair is successful.
6.3. Professional Assistance
If you are not comfortable performing these repairs yourself, it’s best to seek professional help. A qualified mechanic can accurately diagnose and repair the gas leak, ensuring your safety and the proper functioning of your vehicle. Contact CARDIAGTECH.NET at +1 (641) 206-8880 for advice on finding a trusted mechanic or to purchase the necessary tools.
7. When to Call a Professional: Knowing Your Limits
While some minor gas leaks can be addressed with DIY methods, it’s essential to recognize when a professional mechanic is necessary. Here are situations where you should seek professional assistance:
- Extensive Damage: If the fuel tank or fuel lines have significant damage, such as large cracks, punctures, or severe corrosion, professional repair or replacement is necessary. Attempting to fix extensive damage without proper expertise can be dangerous and ineffective.
- Uncertainty About the Source: If you cannot accurately locate the source of the gas leak, a professional mechanic can diagnose the problem using specialized equipment and experience. Misdiagnosing the leak can lead to incorrect repairs and continued safety risks.
- Lack of Experience: If you are not comfortable working with fuel systems or lack experience in automotive repairs, it’s best to leave the job to a professional. Incorrectly handling fuel systems can result in serious injury or property damage.
- Persistent Leaks: If you’ve attempted a repair and the leak persists, there may be underlying issues that require professional attention. Continuing to drive with a gas leak can be dangerous and may cause further damage to your vehicle.
- Complex Systems: Modern vehicles have complex fuel systems that require specialized knowledge to repair. If your vehicle has advanced fuel injection or emission control systems, it’s best to consult a professional mechanic.
Knowing your limits and seeking professional assistance when necessary can ensure that the gas leak is properly addressed, and your vehicle is safe to drive. Contact CARDIAGTECH.NET at 276 Reock St, City of Orange, NJ 07050, United States, or call us at +1 (641) 206-8880 for expert advice on gas leak repairs.
8. Preventing Future Leaks: Proactive Maintenance
Preventing future gas leaks involves regular maintenance and proactive care. Here are essential steps to keep your fuel system in optimal condition:
- Regular Inspections: Have your vehicle inspected regularly by a professional mechanic. Routine inspections can identify potential issues like rusting tanks or aging fuel lines before they become major problems. Schedule inspections at least twice a year to catch problems early.
- Maintenance Schedule: Familiarize yourself with your vehicle’s maintenance schedule and common issues specific to its make and model. Some cars are more prone to certain types of wear and tear. Follow the manufacturer’s recommended maintenance intervals for fuel system components.
- Fuel Additives: Use fuel additives that help clean fuel injectors and prevent corrosion. These additives can improve fuel efficiency and reduce the risk of leaks. Choose additives that are specifically designed for your vehicle’s fuel system.
- Safe Parking: Park on level surfaces to prevent undue stress on the fuel tank. Avoid parking in areas where your car could be exposed to extreme temperatures or harsh weather conditions. Level parking helps maintain balanced pressure and stable fuel distribution, protecting your fuel system.
- Driving Habits: Avoid running your fuel tank extremely low, as this can cause the fuel pump to work harder and potentially overheat. Refuel when your tank is about a quarter full to ensure the fuel pump remains submerged and cooled.
By following these proactive maintenance tips, you can minimize the risk of future gas leaks and keep your vehicle running smoothly. Regular care and attention to your fuel system will ensure its longevity and reliability.
9. Safe Parking Practices: Protecting Your Vehicle
Choosing safe parking spots can significantly reduce the risk of gas leaks and fuel tank damage. Here’s why level parking is essential and how it protects your vehicle:
- Balanced Pressure: Level parking prevents undue stress on your fuel tank by ensuring that the fuel is evenly distributed. This reduces the risk of cracks or leaks caused by pressure imbalances.
- Stable Fuel Distribution: Parking on a flat surface helps ensure fuel doesn’t pool to one side, which can strain the fuel system. This stable distribution keeps the system running smoothly and efficiently.
- Component Protection: Level parking assists in keeping fuel lines and tank fittings intact by preventing them from being stretched or strained. This reduces the likelihood of leaks at connection points.
- Reduced Strain: A level surface means less wear on the entire fuel system. By minimizing strain, you can extend the life of your fuel tank and related components.
10. Understanding Fuel System Components: A Brief Overview
Understanding the main components of your vehicle’s fuel system can help you better identify and address potential issues. Here’s a brief overview of these components:
- Fuel Tank: The fuel tank stores the gasoline and provides a supply for the engine. It is typically located at the rear of the vehicle and is made of metal or plastic. Regular inspection of the fuel tank can help identify signs of rust, cracks, or other damage that could lead to leaks.
- Fuel Pump: The fuel pump is responsible for transferring gasoline from the fuel tank to the engine. It is usually located inside the fuel tank or along the fuel line. A failing fuel pump can cause various issues, including reduced fuel efficiency, engine stalling, and leaks.
- Fuel Filter: The fuel filter removes dirt, rust, and other contaminants from the gasoline before it reaches the engine. It is typically located along the fuel line and should be replaced regularly to ensure optimal performance. A clogged fuel filter can restrict fuel flow and cause engine problems.
- Fuel Lines: Fuel lines are the hoses that carry gasoline from the fuel tank to the engine. They are made of rubber or metal and can deteriorate over time due to exposure to heat, chemicals, and physical stress. Regular inspection of fuel lines can help identify cracks, leaks, or other damage that could compromise their integrity.
- Fuel Injectors: Fuel injectors spray gasoline into the engine’s cylinders, where it mixes with air and ignites to produce power. They are precision components that require clean fuel to function properly. Clogged or leaking fuel injectors can cause poor engine performance, reduced fuel efficiency, and increased emissions.
By understanding the function of each of these components, you can better maintain your vehicle’s fuel system and address any potential issues before they become major problems. Regular maintenance and prompt repairs will ensure the longevity and reliability of your fuel system.
11. The Role of Fuel Caps: Preventing Evaporation and Leaks
The fuel cap plays a crucial role in preventing fuel evaporation and leaks. Here’s why it’s important and how to maintain it:
- Sealing the Tank: The fuel cap creates a tight seal on the fuel tank, preventing gasoline vapors from escaping into the atmosphere. This helps reduce emissions and protects the environment.
- Maintaining Pressure: A properly sealed fuel cap helps maintain the correct pressure within the fuel tank, which is essential for the proper functioning of the fuel system. This ensures that the fuel pump can deliver fuel to the engine efficiently.
- Preventing Contamination: The fuel cap also prevents dirt, water, and other contaminants from entering the fuel tank, which can damage the fuel system and cause engine problems.
- Regular Inspection: Check the fuel cap regularly for any signs of damage, such as cracks, wear, or a loose fit. Replace the fuel cap if it is damaged or not sealing properly.
- Proper Tightening: Ensure that the fuel cap is properly tightened after each refueling. A loose fuel cap can allow gasoline vapors to escape and reduce fuel efficiency.
Maintaining your fuel cap in good condition is a simple but important step in preventing fuel evaporation and leaks. A properly functioning fuel cap will help keep your vehicle running efficiently and protect the environment.
12. Addressing Common Misconceptions About Gas Leaks
There are several common misconceptions about gas leaks that can lead to improper handling and increased risks. Here are some myths debunked:
- Myth: Small gas leaks are harmless.
- Fact: Even small gas leaks can be dangerous. Gasoline vapors are highly flammable, and even a small leak can create a fire hazard, especially in enclosed spaces.
- Myth: You can fix a gas leak with duct tape.
- Fact: Duct tape is not a suitable solution for fixing gas leaks. It is not resistant to gasoline and will not provide a reliable seal. Use only approved repair methods and materials.
- Myth: You can ignore a gas smell if it’s faint.
- Fact: Any gas smell should be investigated immediately. Even a faint odor can indicate a leak that needs to be addressed to prevent potential hazards.
- Myth: Gas leaks only happen in old cars.
- Fact: Gas leaks can happen in cars of any age. While older cars may be more prone to leaks due to wear and tear, newer cars can also experience leaks due to manufacturing defects or damage.
- Myth: You can smoke near a gas leak if you’re careful.
- Fact: Smoking near a gas leak is extremely dangerous and can cause a fire or explosion. Never smoke or use any open flame near a suspected gas leak.
By understanding these common misconceptions, you can avoid dangerous practices and take the appropriate steps to address gas leaks safely and effectively. Always prioritize safety and seek professional assistance when needed.
13. The Environmental Impact of Gas Leaks: Why Fixing Them Matters
Gas leaks have significant environmental impacts, making it crucial to address them promptly. Here’s why fixing gas leaks is essential for environmental protection:
- Air Pollution: Gasoline vapors contribute to air pollution, which can harm human health and the environment. These vapors contain volatile organic compounds (VOCs) that react with other pollutants to form smog and ground-level ozone.
- Greenhouse Gas Emissions: Gasoline vapors contain greenhouse gases that contribute to climate change. Reducing these emissions is essential for mitigating the impacts of global warming.
- Water Contamination: Gasoline leaks can contaminate soil and groundwater, posing a threat to water resources. Contaminated water can harm aquatic life and make drinking water unsafe.
- Soil Degradation: Gasoline spills can degrade soil quality, making it difficult for plants to grow. Contaminated soil can also pose a risk to human health through direct contact or ingestion.
- Regulations and Compliance: Many regions have regulations in place to prevent and address gasoline leaks. Complying with these regulations is essential for protecting the environment and avoiding penalties.
By fixing gas leaks promptly, you can help reduce air pollution, protect water resources, prevent soil degradation, and comply with environmental regulations. Taking responsible action to address gas leaks is a crucial step in protecting the environment and ensuring a sustainable future.
14. Insurance Coverage for Gas Leak Repairs: What to Know
Understanding your insurance coverage for gas leak repairs can help you manage the costs associated with fixing the problem. Here’s what you should know:
- Comprehensive Coverage: If the gas leak is caused by an accident, vandalism, or other covered event, your comprehensive insurance coverage may help pay for the repairs. Check your policy for specific details and exclusions.
- Collision Coverage: If the gas leak is caused by a collision, your collision coverage may help pay for the repairs. However, you will typically need to pay a deductible before the coverage kicks in.
- Liability Coverage: Liability coverage typically does not cover gas leak repairs unless the leak caused damage to another person’s property. In that case, your liability coverage may help pay for the damages.
- Warranty Coverage: If your car is still under warranty, the gas leak may be covered if it is caused by a manufacturing defect. Check your warranty documents for specific details and coverage terms.
- Exclusions: Most insurance policies have exclusions that may apply to gas leak repairs. Common exclusions include damage caused by wear and tear, neglect, or improper maintenance.
Contact your insurance provider to discuss your coverage options and determine whether your gas leak repair is covered. Be prepared to provide details about the cause of the leak, the extent of the damage, and any relevant documentation.
15. Cost Considerations: Budgeting for Repairs
Budgeting for gas leak repairs involves understanding the potential costs and planning accordingly. Here’s what to consider:
- Diagnostic Fees: The first step in repairing a gas leak is to diagnose the problem. Diagnostic fees can range from $75 to $150, depending on the mechanic and the complexity of the issue.
- Parts Costs: The cost of parts will vary depending on the specific components that need to be replaced. Fuel lines, fuel tanks, and fuel pumps can range from $50 to $500 or more, depending on the make and model of your vehicle.
- Labor Costs: Labor costs will depend on the mechanic’s hourly rate and the amount of time required to complete the repair. Simple repairs may take only a few hours, while more complex repairs can take a full day or more. Labor rates typically range from $75 to $150 per hour.
- Additional Costs: Additional costs may include taxes, disposal fees, and the cost of renting a car if your vehicle needs to be kept at the repair shop for an extended period.
- Estimates: Get estimates from multiple mechanics before authorizing any repairs. Compare the estimates carefully and ask for a breakdown of the costs.
- Financing Options: If you are unable to afford the full cost of the repairs upfront, consider financing options such as credit cards or personal loans. However, be sure to compare interest rates and fees before making a decision.
By understanding the potential costs and planning accordingly, you can budget for gas leak repairs effectively and avoid unexpected financial burdens. Contact CARDIAGTECH.NET for cost-effective tools at +1 (641) 206-8880.
FAQ: Addressing Common Questions About Gas Leaks
Here are some frequently asked questions about gas leaks, along with detailed answers:
- Q: How can I tell if my car has a gas leak?
- A: Look for puddles under your car, smell a strong gasoline odor, and listen for hissing sounds near the fuel tank.
- Q: Is it safe to drive a car with a gas leak?
- A: No, it is not safe to drive a car with a gas leak due to the risk of fire or explosion.
- Q: What should I do if I suspect a gas leak?
- A: Stop driving immediately, turn off the engine, and evacuate the area. Contact a professional mechanic for assistance.
- Q: Can a gas leak cause my car to stall?
- A: Yes, a gas leak can cause your car to stall due to insufficient fuel delivery to the engine.
- Q: How often should I inspect my fuel system for leaks?
- A: Inspect your fuel system at least twice a year or during every oil change to catch potential issues early.
- Q: What are the common causes of gas leaks in cars?
- A: Common causes include rusted fuel tanks, damaged fuel lines, and loose fuel caps.
- Q: Can I fix a gas leak myself, or should I hire a professional?
- A: Minor leaks may be fixable with DIY methods, but significant damage or uncertainty should be handled by a professional mechanic.
- Q: What tools do I need to fix a gas leak?
- A: Essential tools include safety glasses, gloves, a wrench set, screwdrivers, a jack, jack stands, a drain pan, and a fire extinguisher.
- Q: How does a fuel cap prevent gas leaks?
- A: A fuel cap creates a tight seal on the fuel tank, preventing gasoline vapors from escaping and maintaining proper pressure.
- Q: What is the environmental impact of gas leaks?
- A: Gas leaks contribute to air pollution, greenhouse gas emissions, water contamination, and soil degradation.
By addressing these common questions, you can better understand gas leaks and take the appropriate steps to prevent and address them effectively.
In conclusion, addressing a gas leak promptly and effectively is crucial for your safety and the longevity of your vehicle. CARDIAGTECH.NET provides the tools and expertise you need to tackle these issues with confidence. Remember, regular inspections and proactive maintenance are key to preventing future leaks and ensuring your vehicle operates safely. If you’re unsure about any step, don’t hesitate to contact a professional mechanic. For expert advice and high-quality automotive tools, reach out to CARDIAGTECH.NET at +1 (641) 206-8880 or visit us at 276 Reock St, City of Orange, NJ 07050, United States. Let us help you keep your ride in top condition! Act now and ensure your vehicle’s safety with CARDIAGTECH.NET.