How To Fix A Head Gasket On A Car: A Complete Guide
How to fix a head gasket on a car is a crucial skill for any car enthusiast or mechanic. At CARDIAGTECH.NET, we provide a comprehensive guide on head gasket replacement, covering everything from identifying symptoms to step-by-step repair processes, ensuring your vehicle’s engine remains in top condition. Learn about engine repair, cylinder head maintenance, and head gasket replacement cost to keep your car running smoothly.
1. Identifying When to Replace the Head Gasket
Knowing when to replace a head gasket is essential to prevent severe engine damage. Recognizing the early signs of a failing head gasket can save you from costly repairs and keep your vehicle running smoothly. Here are the key indicators that suggest you may need to replace your head gasket:
- Overheating Engine: A common symptom is an engine that overheats quickly. According to a study by the National Institute for Automotive Service Excellence (ASE), overheating is one of the most frequent indicators of a failing head gasket. The head gasket is crucial for maintaining proper coolant flow through the engine, and any compromise in its integrity can lead to rapid overheating.
- White Smoke from Exhaust: If you notice white smoke emitting from the exhaust, especially in large amounts, it could indicate coolant leaking into the combustion chamber. This coolant burns off as steam, producing the white smoke. As the Environmental Protection Agency (EPA) notes, excessive white smoke is a clear sign of internal coolant leaks, often due to a damaged head gasket.
- Oil Contamination: Often referred to as “milkshake,” oil contamination occurs when coolant mixes with the engine oil. This mixture creates a milky, light-colored residue that can be observed under the oil cap or on the dipstick. The American Automobile Association (AAA) emphasizes that this contamination can severely damage the engine if not addressed promptly.
- Loss of Coolant: If you find that your coolant level drops frequently without any visible external leaks, it may be leaking internally due to a compromised head gasket. Internal leaks can be challenging to detect, making it crucial to monitor coolant levels regularly. According to a report by the Car Care Council, unexplained coolant loss is a significant indicator of potential head gasket issues.
- Poor Engine Performance: A blown head gasket can lead to compression loss, significantly reducing engine power and efficiency. The engine may feel sluggish, and you might notice a decrease in fuel economy. A study by SAE International highlights that compression loss due to head gasket failure can reduce engine output by as much as 20%.
- Bubbles in the Radiator or Coolant Reservoir: The presence of bubbles or excessive frothing in the radiator or coolant overflow tank is a sign of combustion gases leaking into the cooling system. These gases displace coolant and can cause overheating and other performance issues. Mechanics.org notes that bubbles in the cooling system are a definitive sign of combustion gas leakage.
These symptoms should prompt immediate attention to prevent further damage to your engine. Replacing a head gasket is a critical repair that restores the engine’s integrity and performance. At CARDIAGTECH.NET, we offer a range of tools and equipment to help you diagnose and repair head gasket issues efficiently.
2. Essential Tools for Head Gasket Replacement
Having the right tools is crucial for a successful head gasket replacement. At CARDIAGTECH.NET, we understand the importance of quality equipment and offer a wide range of tools to suit both professional mechanics and DIY enthusiasts. Here’s a comprehensive list of the tools you’ll need, along with their specific uses:
2.1. Torque Wrench
The torque wrench is arguably the most critical tool for this job. It ensures that you apply the precise amount of torque to the head bolts, which is vital for creating an even and secure seal on the new head gasket. An improperly torqued head gasket can lead to engine failure.
- Why it’s important: The torque wrench prevents over-tightening or under-tightening the head bolts, both of which can cause leaks or engine damage.
- Features to look for: Digital display for accurate readings, durable construction, and a wide torque range to accommodate different vehicle specifications.
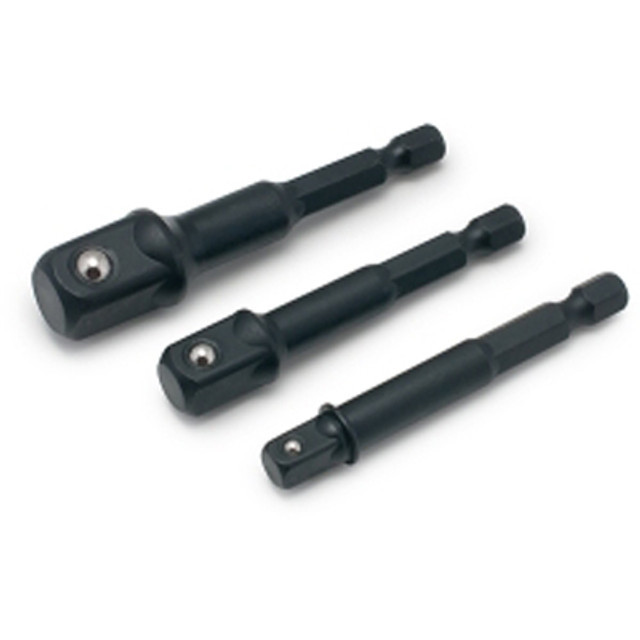
2.2. Socket Set
Comprehensive Socket Set for Head Gasket Replacement
A comprehensive and versatile socket set is essential for handling various sizes of nuts and bolts during the disassembly and reassembly of engine components. This set should include both standard and deep sockets to reach bolts of different lengths and locations.
- Why it’s important: A good socket set allows you to efficiently remove and install engine components without damaging them.
- Features to look for: A wide range of sizes, high-quality steel construction, and a durable case for storage and organization.
2.3. Wrench Set
A wrench set is necessary for tackling bolts and nuts that are inaccessible with a socket. A set of combination wrenches, including both open-ended and box-ended wrenches, is essential for working in tight spaces and ensuring all connections are secure.
- Why it’s important: Wrenches provide the leverage and grip needed to manage fasteners in hard-to-reach areas.
- Features to look for: Chrome vanadium steel construction for durability, a variety of sizes, and a comfortable grip.
2.4. Gasket Scraper
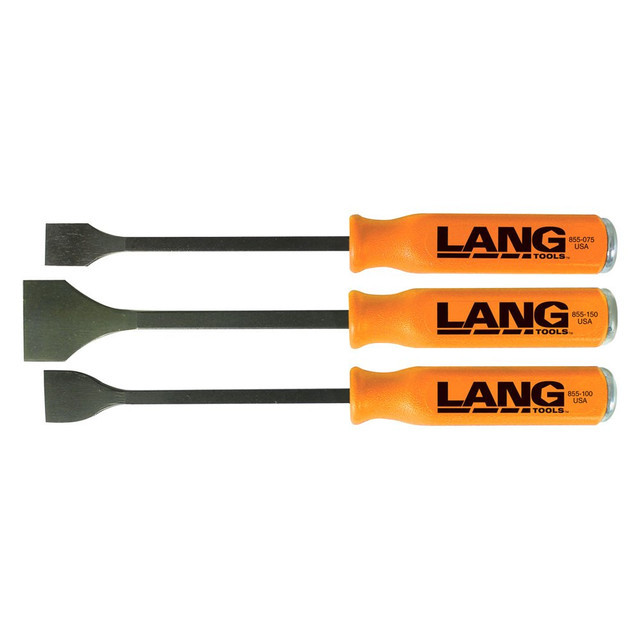 Gasket Scraper Set for Cleaning Engine Surfaces
This tool is used to clean the engine block and cylinder head surfaces after removing the old gasket. A clean and smooth surface is crucial for preventing leaks and ensuring the new head gasket adheres properly.
- Why it’s important: Removing all remnants of the old gasket ensures a tight seal with the new gasket.
- Features to look for: Sharp, durable blades, comfortable handle, and different blade shapes for various surfaces.
2.5. Coolant Drain Pan
When replacing a head gasket, draining the engine coolant is a necessary first step. A coolant drain pan collects the fluid efficiently, allowing for safe and environmentally friendly disposal or reuse.
- Why it’s important: A drain pan prevents spills and helps you manage the coolant responsibly.
- Features to look for: Large capacity, durable plastic construction, and a spout for easy pouring.
2.6. Other Essential Tools
In addition to the above, consider these tools for a smoother head gasket replacement:
- Pliers: For removing hoses and small parts.
- Screwdrivers: Both flathead and Phillips head for various fasteners.
- Timing Light: To ensure proper engine timing after reassembly.
- Compression Tester: To check cylinder compression before and after the repair.
- Cylinder Leakage Tester: To identify leaks in the cylinders.
- Markers and Labels: To mark and organize parts during disassembly.
- Cleaning Supplies: Including solvent, brushes, and rags for cleaning engine surfaces.
Having these tools on hand will make the head gasket replacement process more efficient and help ensure a successful outcome. At CARDIAGTECH.NET, we provide high-quality tools that meet the demands of any repair job, helping you get back on the road with confidence. Contact us at +1 (641) 206-8880 for expert advice and assistance in selecting the right tools for your needs.
3. Step-by-Step Guide to Replacing the Head Gasket
This detailed, step-by-step guide will help you confidently replace a blown head gasket, ensuring your vehicle’s engine remains in top condition. Follow each step closely to prevent any issues and to successfully repair the head gasket leak.
Step 1: Drain Fluids
The first step is to drain all fluids that could interfere with the repair, specifically the engine oil and coolant. Place a suitable container under the vehicle to catch the fluid, ensuring no environmental contamination occurs. Properly close and safely store the used fluids until they can be disposed of according to your local environmental regulations.
- Engine Oil: Locate the oil drain plug beneath the engine. Unscrew the plug and allow the oil to drain completely into the container.
- Coolant: Locate the coolant drain valve on the radiator or engine block. Open the valve and allow the coolant to drain into a separate container.
This preventative step is essential to avoid spills during the engine teardown, ensuring a clean workspace, which is crucial when you are about to replace a head gasket.
Step 2: Remove Engine Components
To access the head gasket, you must remove several components from the engine. This generally includes the intake and exhaust manifolds, valve cover, and possibly the timing cover and associated belts or chains. Each part should be carefully removed and labeled, if necessary, to ensure correct reassembly.
- Intake Manifold: Disconnect any sensors or vacuum lines attached to the intake manifold. Remove the bolts securing the manifold to the cylinder head and carefully detach it.
- Exhaust Manifold: Disconnect any oxygen sensors or related components. Remove the bolts securing the exhaust manifold to the cylinder head and carefully detach it.
- Valve Cover: Remove any hoses or wiring attached to the valve cover. Remove the bolts securing the valve cover and carefully lift it off.
- Timing Cover and Belts/Chains: If necessary, remove the timing cover to access the timing belt or chain. Mark the position of the timing components to ensure correct reinstallation.
Organize these components and their fasteners in a way that will make it easy to put everything back together. This organization is vital, as it prevents confusion during reassembly after you replace the head gasket.
Step 3: Detach the Cylinder Head
With the preliminary components removed, you can now proceed to unbolt the cylinder head. Follow the vehicle manufacturer’s specified pattern for loosening the head bolts, which is typically done in a sequence to prevent warping or cracking. These specifications are crucial for maintaining the integrity of the engine block and head.
- Loosening Sequence: Consult the vehicle’s repair manual for the specific loosening sequence. Generally, this involves loosening the bolts in a circular or crisscross pattern, starting from the outer bolts and working inward.
- Bolt Removal: Use a socket and ratchet or breaker bar to loosen each bolt gradually. Avoid removing any bolt completely until all bolts are loosened.
After the bolts are removed, carefully lift off the cylinder head to reveal the old head gasket. This step must be handled with care to avoid any damage to the engine block and the head surfaces.
Step 4: Remove the Old Head Gasket
The old head gasket can now be removed. This should be done gently to avoid any debris contaminating the engine interior. Inspect the old gasket to identify any breach points or signs of wear that could indicate additional underlying engine issues.
- Gasket Removal: Carefully peel off the old head gasket from the engine block. Use a plastic scraper to gently lift the gasket if it is stuck.
- Inspection: Examine the gasket for any signs of damage, such as cracks, burns, or deformation. Note the location of any damage, as it may indicate specific issues with the engine.
Clean the area where the old gasket was seated. It’s important to remove all remnants of the old gasket to ensure a clean and smooth surface for the new gasket to seal against. Any residue or debris can impair the seal and the engine’s performance.
Step 5: Clean and Inspect the Surfaces
It’s critical to thoroughly clean the mating surfaces of both the cylinder head and the engine block. Use a scraper designed for this purpose and be meticulous to avoid gouging the metal. These surfaces should be free of old gasket material, oil, and coolant. Inspect both surfaces for cracks or warping, which could compromise the effectiveness of the new head gasket.
- Cleaning: Use a gasket scraper to remove any remaining gasket material. Follow up with a solvent or cleaner to remove any oil or residue.
- Inspection: Use a straightedge to check for warping on both the cylinder head and engine block surfaces. If warping exceeds the manufacturer’s specifications, the components may need to be machined or replaced.
If either is found, they must be professionally machined or replaced before continuing. A flat and smooth surface is crucial to ensure the new head gasket seals properly and functions as intended.
Step 6: Install the New Head Gasket
Position the new head gasket on the cleaned surface of the engine block, aligning it with all bolt holes and oil or coolant passages. It’s imperative to position the gasket correctly to avoid misalignment, which could lead to leaks or poor engine performance.
- Alignment: Ensure that the gasket is properly aligned with all the holes and passages on the engine block.
- No Sealant (Unless Specified): Avoid using any sealant on the gasket unless it is explicitly specified by the gasket manufacturer or vehicle manufacturer.
Improper use of sealant can compromise the gasket’s ability to seal and may lead to engine damage.
Step 7: Reattach the Cylinder Head
Carefully lower the cylinder head onto the block over the new head gasket, ensuring proper alignment. If required, apply new head bolts, as they are crucial for maintaining the specified torque and pressure on the gasket.
- Alignment: Align the cylinder head with the dowel pins or bolt holes on the engine block.
- Head Bolts: Use new head bolts if recommended by the manufacturer. New bolts ensure proper torque and clamping force.
Tighten the bolts in the specified order and to the correct torque as per the manufacturer’s guidelines. This is critical to prevent uneven pressure distribution or warping, which could compromise the head gasket seal.
- Torquing Sequence: Consult the vehicle’s repair manual for the specific torquing sequence and torque specifications. Generally, this involves tightening the bolts in multiple passes, gradually increasing the torque each time.
- Torque Wrench: Use a torque wrench to ensure that each bolt is tightened to the specified torque.
Step 8: Reassemble the Engine
Begin reattaching all previously removed components. Reconnect the intake and exhaust manifolds, valve cover, and any other parts that were removed during the head gasket replacement process. Double-check each connection and fastener to ensure everything is secure and correctly positioned.
- Intake and Exhaust Manifolds: Reattach the intake and exhaust manifolds, ensuring that all gaskets are properly seated and bolts are tightened to the specified torque.
- Valve Cover: Reattach the valve cover, ensuring that the gasket is properly seated and bolts are tightened to the specified torque.
- Timing Components: If the timing cover and belts/chains were removed, reinstall them according to the manufacturer’s instructions. Verify that the engine timing is correct.
This detailed reassembly ensures that the engine will run smoothly and maintains structural integrity, preventing issues that can arise from incorrect assembly after you replace head gasket.
Step 9: Refill Fluids
Refill the engine with fresh engine oil and coolant. It’s important to use the types and quantities specified by the vehicle manufacturer to ensure optimal engine performance and protection. After refilling, start the engine in a well-ventilated area and allow it to reach normal operating temperature.
- Engine Oil: Refill the engine with the specified type and quantity of engine oil. Check the oil level with the dipstick and add more if necessary.
- Coolant: Refill the cooling system with the specified type and quantity of coolant. Bleed the cooling system to remove any air pockets.
Check for any signs of leaks or unusual noises, which could indicate an issue with the reassembly or the newly replaced head gasket.
Step 10: Check for Leaks
After the engine has reached operating temperature, shut it off and inspect for any leaks around the head gasket and other critical areas. Additionally, monitor the engine temperature and oil pressure over the next few days to ensure everything is operating as expected.
- Leak Inspection: Check around the head gasket, intake and exhaust manifolds, and other connections for any signs of leaks.
- Monitoring: Monitor the engine temperature and oil pressure gauges to ensure that they are within normal ranges.
This thorough final check is essential to ensure that the head gasket replacement was successful and that your vehicle will continue to operate reliably.
By following these steps carefully, you can successfully replace a head gasket and ensure your engine’s optimal performance. At CARDIAGTECH.NET, we offer expert advice and high-quality tools to support your repair efforts. Contact us at 276 Reock St, City of Orange, NJ 07050, United States or call +1 (641) 206-8880 for any assistance you may need.
4. Cost Considerations for Head Gasket Replacement
The cost to replace a blown head gasket can vary significantly depending on several factors, including the vehicle’s make and model, the complexity of the engine, and regional labor rates. Understanding these factors can help you budget effectively for this essential repair.
4.1. Parts Costs
Typically, the parts themselves are not excessively expensive, ranging from $20 to $200. The cost of the head gasket itself is relatively low compared to the overall repair expenses. However, it’s crucial to use a high-quality gasket to ensure a reliable seal and prevent future issues.
- Head Gasket: $20 – $200
- Head Bolts: $30 – $100 (if new bolts are recommended)
- Coolant and Oil: $30 – $50
- Other Gaskets and Seals: $20 – $50 (for intake manifold, exhaust manifold, valve cover, etc.)
4.2. Labor Costs
Labor costs can be substantial due to the intensive nature of the repair, often requiring between 10 to 20 hours of work at rates that can vary from $50 to $150 per hour. The complexity of the engine and the accessibility of the head gasket significantly influence the labor time required.
- Labor Time: 10 – 20 hours
- Hourly Rate: $50 – $150 per hour
- Total Labor Cost: $500 – $3000
4.3. Additional Costs
Additional costs may accrue if there are other related issues to address, such as repair head gasket leak that has led to engine damage. When a head gasket fails, it can sometimes cause warping or cracking of the cylinder head, which might necessitate machining or replacement.
- Cylinder Head Machining: $100 – $500 (to resurface the head)
- Cylinder Head Replacement: $500 – $2000 (if the head is beyond repair)
- Related Repairs: Costs can increase significantly if the engine has suffered additional damage due to overheating or coolant contamination.
4.4. Overall Cost Estimate
Overall, you can expect the total expense to generally fall between $1,000 and $2,500, with higher costs possible for luxury or performance vehicles. This range includes parts, labor, and potential additional repairs.
| Cost Component | Estimated Cost Range |
|---|---|
| Parts | $100 – $400 |
| Labor | $500 – $3000 |
| Additional Repairs | $0 – $2000 |
| Total Estimated Cost | $1,000 – $2,500 |
4.5. Tips for Managing Costs
- Get Multiple Quotes: Obtain estimates from several reputable mechanics to compare prices and services.
- Ask About Additional Costs: Inquire about potential additional costs, such as cylinder head machining or replacement, before authorizing the repair.
- Consider DIY: If you have the skills and tools, you can save on labor costs by performing the repair yourself. However, ensure you have a thorough understanding of the process and access to accurate repair information.
- Use High-Quality Parts: While it may be tempting to save money on parts, using high-quality components ensures a more reliable repair and can prevent future issues.
Understanding the cost factors involved in head gasket replacement can help you make informed decisions and manage your budget effectively. At CARDIAGTECH.NET, we offer a range of high-quality tools and equipment at competitive prices to assist with your repair needs. Visit our website at CARDIAGTECH.NET or contact us at +1 (641) 206-8880 for more information.
5. Frequently Asked Questions (FAQs)
Here are some frequently asked questions about head gasket replacement to help you better understand the process and potential issues:
5.1. Can You Replace Head Gasket Without Removing Engine?
Yes, you can replace a blown head gasket without removing the entire engine in many cases. The process involves disassembling the top portion of the engine to access the gasket. This method is less invasive and can reduce repair time and cost. However, engine removal may be necessary if there is significant damage or if the engine bay is too cramped to work in effectively.
5.2. How Often to Replace Head Gasket?
Typically, you don’t need to replace a blown head gasket unless there are clear signs of failure. Unlike other vehicle components, there is no regular schedule for replacing them; it depends entirely on the vehicle’s condition and usage. Addressing overheating issues and maintaining the cooling system can help prevent failure. Regular maintenance and monitoring can extend the life of your head gasket.
5.3. What is Average Cost to Replace Head Gasket?
The average cost to replace a blown head gasket can range from $1,000 to $2,500, depending on the vehicle make and model. This price includes both labor, which is extensive, and the parts needed for the repair. Additional engine damage can increase these costs significantly. Getting multiple quotes can help you find the best price in your area.
5.4. What are the Symptoms of a Blown Head Gasket?
Common symptoms of a blown head gasket include:
- Overheating engine
- White smoke from the exhaust
- Oil contamination (milky residue)
- Loss of coolant without external leaks
- Poor engine performance
- Bubbles in the radiator or coolant reservoir
5.5. Can I Drive with a Blown Head Gasket?
Driving with a blown head gasket is not recommended. It can lead to severe engine damage, such as overheating, cylinder head warping, and piston damage. Continuing to drive can significantly increase the cost of repairs and potentially ruin the engine.
5.6. What Causes a Head Gasket to Fail?
Head gaskets can fail due to several reasons, including:
- Overheating: Excessive heat can cause the head gasket to weaken and crack.
- Detonation: Abnormal combustion can create excessive pressure, damaging the gasket.
- Corrosion: Coolant can corrode the gasket material over time.
- Improper Installation: Incorrect torque on the head bolts can lead to gasket failure.
5.7. How Long Does it Take to Replace a Head Gasket?
The time required to replace a head gasket typically ranges from 10 to 20 hours, depending on the vehicle’s make and model and the mechanic’s experience. Complex engines may require more time. DIY replacements can take longer, especially for those with limited experience.
5.8. Can a Blown Head Gasket Cause Other Problems?
Yes, a blown head gasket can cause several other problems, including:
- Engine overheating
- Cylinder head warping
- Coolant contamination
- Reduced engine performance
- Damage to other engine components
5.9. Is it Worth Replacing a Head Gasket on an Old Car?
Whether it’s worth replacing a head gasket on an old car depends on the car’s overall condition, value, and your budget. If the car is in good condition and has sentimental value, it may be worth the investment. However, if the car has other significant issues, it may be more cost-effective to replace it.
5.10. How Can I Prevent Head Gasket Failure?
You can prevent head gasket failure by:
- Maintaining the cooling system: Regularly check and maintain the cooling system to prevent overheating.
- Using the correct coolant: Use the type of coolant specified by the vehicle manufacturer.
- Avoiding overheating: Address any overheating issues promptly.
- Following proper maintenance schedules: Adhere to the recommended maintenance schedules for your vehicle.
These FAQs provide valuable insights into head gasket replacement and can help you make informed decisions about your vehicle’s maintenance and repair needs. At CARDIAGTECH.NET, we are dedicated to providing you with the knowledge and tools necessary for successful automotive repairs. Contact us at +1 (641) 206-8880 for expert assistance and advice.
6. Why Choose CARDIAGTECH.NET for Your Automotive Tool Needs
When it comes to automotive repairs, having the right tools can make all the difference. At CARDIAGTECH.NET, we offer a wide range of high-quality tools designed to meet the needs of both professional mechanics and DIY enthusiasts. Here are several reasons why you should choose CARDIAGTECH.NET for your automotive tool needs:
- High-Quality Tools: We offer a diverse selection of high-quality tools specifically suited for tasks such as replacing a blown head gasket. From precise torque wrenches to comprehensive socket sets, our tools provide the reliability you need to get the job done right. Our tools are sourced from trusted manufacturers, ensuring durability and performance.
- Competitive Pricing: At CARDIAGTECH.NET, affordability meets quality, ensuring you can tackle your head gasket replacement or repair head gasket leaks effectively without breaking the bank. We understand the importance of cost-effectiveness, and we strive to offer competitive prices on all our products.
- Wide Selection: Whether you’re a seasoned mechanic or tackling this repair for the first time, find everything you need in one place. Our extensive catalog includes tools for various automotive repairs, from engine diagnostics to bodywork. We offer a comprehensive selection to meet all your automotive needs.
- Expert Advice: Our team of experienced professionals is available to provide expert advice and assistance. If you have questions about which tools are right for your specific repair, don’t hesitate to contact us. We’re here to help you make informed decisions and ensure you have the tools you need for a successful repair. Contact us at +1 (641) 206-8880 for personalized assistance.
- Convenient Shopping Experience: Shop with us and save on essential tools for a successful repair. Our user-friendly website makes it easy to browse our selection, place orders, and track your shipments. We also offer fast and reliable shipping to get your tools to you quickly.
- Customer Satisfaction: We are committed to providing excellent customer service and ensuring your satisfaction with your purchase. If you’re not completely satisfied with your tools, we offer a hassle-free return policy. Your satisfaction is our top priority.
- Comprehensive Support: We provide comprehensive support to help you with your automotive repairs. Our website features detailed product descriptions, how-to guides, and troubleshooting tips. We also offer technical support via phone and email to assist you with any questions or issues you may encounter.
- Trusted Brand: CARDIAGTECH.NET is a trusted brand in the automotive industry, known for our commitment to quality, reliability, and customer satisfaction. We have a proven track record of providing top-notch tools and services to our customers.
- One-Stop Shop: We offer a wide range of tools and equipment beyond head gasket replacement, making us your one-stop shop for all your automotive repair needs. Whether you’re working on brakes, suspension, or electrical systems, we have the tools you need to get the job done right.
By choosing CARDIAGTECH.NET, you can be confident that you’re getting the best tools, prices, and support for your automotive repair needs. Visit our website at CARDIAGTECH.NET or contact us at 276 Reock St, City of Orange, NJ 07050, United States or call +1 (641) 206-8880 to learn more.
Don’t let a blown head gasket keep you off the road. Contact CARDIAGTECH.NET today to find the tools and support you need to get your car running smoothly again. We offer expert advice and high-quality tools at competitive prices. Reach out to us at +1 (641) 206-8880 to get started.