How to Fix a Hole in a Leather Car Seat Like a Pro

Is that unsightly hole in your leather car seat bringing down the look of your ride? Don’t worry, CARDIAGTECH.NET is here to guide you through a step-by-step process on how to repair that damage and restore your car seat to its former glory. With the right tools and techniques, you can achieve professional-quality results right in your own garage. Discover the best leather repair solutions, learn about leather conditioning techniques, and explore options for automotive upholstery repair.
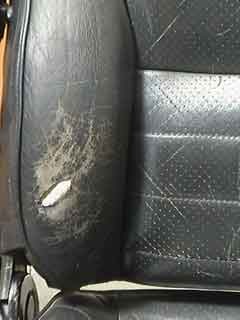
1. Understanding the Damage to Your Leather Car Seat
Before diving into the repair process, it’s crucial to assess the extent of the damage. Is it a small puncture, a tear, or a larger hole? Understanding the type of damage will determine the best approach and materials needed for the repair.
- Small Punctures: These are typically caused by sharp objects and are the easiest to fix.
- Tears: Tears can range from small rips to larger gashes, depending on the cause of the damage.
- Holes: Holes are the most significant type of damage and require more extensive repair techniques.
- Wear and Tear: Over time, leather can degrade due to friction, sunlight, and temperature changes.
Assessing the damage correctly will help you choose the right repair kit and techniques for a seamless finish. CARDIAGTECH.NET offers a range of high-quality leather repair tools to ensure you get the job done right.
2. Essential Tools and Materials for Leather Car Seat Repair
Having the right tools and materials on hand is essential for a successful leather car seat repair. Here’s a comprehensive list of what you’ll need:
| Tool/Material | Description | Why You Need It |
|---|---|---|
| Leather Repair Kit | A comprehensive kit that includes leather filler, colorant, adhesive, and other essential items. | Provides everything you need for a complete repair. |
| Leather Cleaner | Specialized cleaner designed to remove dirt, oil, and grime from leather surfaces without causing damage. | Ensures a clean surface for proper adhesion of repair materials. |
| Leather Prep | Prepares the leather surface by removing the manufactured finish and any loose fibers. | Improves the adhesion of colorant and other repair products. |
| Alcohol Cleaner | Removes any remaining dirt or dust after prepping the leather. | Ensures a clean, dust-free surface for the repair. |
| Leather Glue | Strong adhesive specifically designed for bonding leather. | Secures the backing patch and edges of the hole. |
| Heavy Filler | Used to fill the hole in thin layers, providing a solid base for the repair. | Creates a smooth, even surface that blends with the surrounding leather. |
| Leather Colorant | Dye matched to the color of your car seat, used to blend the repair with the surrounding leather. | Ensures a seamless, invisible repair. |
| Leather Finish | Seals the colorant and protects the leather from wear and tear. | Prolongs the life of the repair and protects the leather. |
| Backing Patch | Provides a firm foundation for the filler material. | Supports the repair and prevents the filler from sinking. |
| Palette Knife | Used to apply and smooth the filler material. | Allows for precise application and a smooth finish. |
| Sponges | For applying the initial coat of colorant. | Helps the colorant penetrate the leather for better adhesion. |
| Airbrush | Used to spray thin coats of colorant for a seamless blend. | Provides an even, professional-quality finish. |
| Abrasive Pad | Gently rubs the surface of the leather to remove grease and oils. | Prepares the leather for repair by removing contaminants and creating a better surface for adhesion. |
| Scalpel or Scissors | Used to trim away any protruding leather around the hole. | Ensures a clean, even surface for the repair. |
| Tweezers | Helps to insert the backing patch under the leather. | Provides precision and control when positioning the patch. |
| Sandpaper (Fine Grit) | For smoothing the filler after it has dried. | Creates a smooth, even surface for the final colorant application. |
| Heat Gun or Hair Dryer | Speeds up the drying process for the filler and colorant. | Reduces the waiting time between layers. |
Investing in high-quality tools and materials from CARDIAGTECH.NET ensures a durable and professional-looking repair.
3. Step-by-Step Guide to Fixing a Hole in a Leather Car Seat
Follow these detailed steps to repair a hole in your leather car seat:
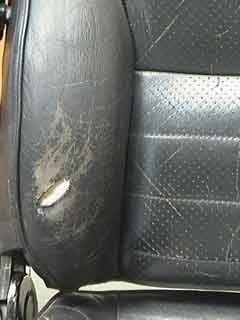
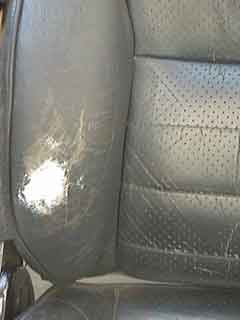
3.1. Preparing the Leather Car Seat
Leather car seat preparation
The first step is to prepare the leather for repair. Use Leather Prep and an abrasive pad to gently rub the surface of the leather. This removes grease, oils, and any loose fibers. This step also removes the manufactured finish, allowing the colorant to adhere properly. After prepping, wipe the leather down with Alcohol Cleaner to remove any remaining dirt or dust.
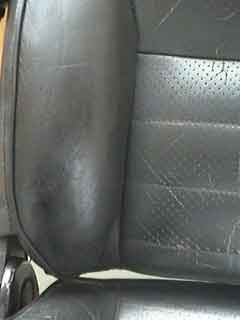
3.2. Tidying the Damaged Area
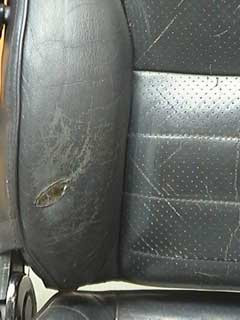 Tidying the damaged area
Examine the hole and remove any protruding leather. Use a scalpel or scissors to carefully trim the edges, ensuring a clean and even surface. This step is crucial for a seamless repair.
3.3. Applying the Backing Patch
 Applying the backing patch
Cut the backing patch to size, ensuring it covers the hole with an extra 1cm of material around the edges. Use tweezers to insert the patch under the leather, ensuring it lies flat. Apply Leather Glue to the underside of the leather surrounding the hole and press firmly to bond the leather to the patch. Allow it to dry completely.
3.4. Filling the Hole with Heavy Filler
 Filling the hole with heavy filler
Using the palette knife, apply a thin layer of Heavy Filler into the hole, covering the backing patch. Allow 20 minutes for it to dry. Use a heat gun or hair dryer to speed up the process. Apply multiple thin layers, typically 5-6, until the filler level is just below the top of the hole. Smooth the area with the palette knife after each layer.
3.5. Adding More Layers of Filler
 Adding more layers of filler
Continue applying thin layers of filler until the hole is nearly filled. Ensure each layer is dry before applying the next to prevent shrinking and improper curing.
3.6. Applying the Final Layer of Filler
 Applying the final layer of filler
Apply the final layer of filler, completely filling the hole so it is level with the surrounding leather. Ensure this layer cures properly, adding more filler if necessary. Clean the area with Alcohol Cleaner to remove any unwanted filler or dust.
3.7. Applying an Initial Coat of Colorant
Adding more layers of filler
Apply a small amount of colorant to a sponge and rub it thoroughly into the repair area. This allows the colorant to penetrate the leather’s creases and grain, providing a better overall finish.
3.8. Finishing the Job with Colorant and Finish
 Finishing the job with colorant and finish
Using an airbrush, spray thin coats of colorant over the leather car seat to blend in the repair. Apply 10-15 thin coats, allowing each coat to cure before applying the next. Once the repair is concealed and the colorant is cured, apply 4-5 thin coats of the finish to seal the colorant and protect the leather. Allow 24 hours before using the seat.
4. Advanced Techniques for Leather Car Seat Restoration
For more complex damage or extensive restoration projects, consider these advanced techniques:
4.1. Using Leather Patches for Large Holes
For larger holes, using a leather patch can provide a more durable and seamless repair.
- Cutting the Patch: Cut a patch slightly larger than the hole from a piece of matching leather.
- Tapering the Edges: Taper the edges of the patch to create a smooth transition between the patch and the original leather.
- Gluing the Patch: Apply leather glue to the back of the patch and carefully position it over the hole. Press firmly and allow it to dry completely.
- Filling and Finishing: Fill any remaining gaps with heavy filler, sand smooth, and apply colorant and finish as described above.
4.2. Matching Leather Grain and Texture
Matching the grain and texture of the repair to the original leather is essential for a seamless finish.
- Using Grain Matching Pads: Use grain matching pads to imprint the texture of the surrounding leather onto the filler while it is still wet.
- Custom Color Matching: If the colorant in your kit doesn’t perfectly match your car seat, consider custom color matching services offered by CARDIAGTECH.NET.
4.3. Professional Leather Dyeing
For extensive discoloration or fading, professional leather dyeing can restore the original color and vibrancy of your car seats.
- Preparation: Thoroughly clean and prep the leather surface.
- Dye Application: Apply the dye evenly using a spray gun or sponge.
- Sealing: Seal the dye with a leather finish to protect it from wear and fading.
5. Preventing Future Damage to Your Leather Car Seats
Prevention is always better than cure. Follow these tips to protect your leather car seats from future damage:
- Regular Cleaning: Clean your leather car seats regularly with a specialized leather cleaner to remove dirt, oil, and grime.
- Conditioning: Apply a leather conditioner every 3-6 months to keep the leather supple and prevent cracking.
- Sun Protection: Park your car in the shade or use a sunshade to protect the leather from UV damage.
- Avoid Sharp Objects: Be careful when placing sharp objects on the seats to avoid punctures and tears.
- Prompt Repairs: Address any minor damage promptly to prevent it from worsening.
Regular maintenance and care will prolong the life of your leather car seats and keep them looking their best.
6. Why Choose CARDIAGTECH.NET for Your Leather Car Seat Repair Needs?
CARDIAGTECH.NET offers a wide range of high-quality leather repair products and tools to help you achieve professional results. Here are some of the benefits of choosing CARDIAGTECH.NET:
- Comprehensive Product Selection: We offer everything you need for leather car seat repair, from repair kits to specialized cleaners and conditioners.
- Expert Advice: Our team of experts can provide guidance and support to help you choose the right products and techniques for your specific needs.
- High-Quality Products: We only offer products from trusted brands that are known for their quality and durability.
- Competitive Prices: We offer competitive prices on all of our products, so you can get the best value for your money.
- Excellent Customer Service: We are committed to providing excellent customer service and ensuring your satisfaction.
7. Real-World Examples of Successful Leather Car Seat Repairs
Here are a few real-world examples of how CARDIAGTECH.NET products have helped customers successfully repair their leather car seats:
- Case Study 1: Restoring a Vintage Car Seat: A customer with a vintage car used our leather repair kit to restore a torn and faded car seat to its original glory. The customer was impressed with the quality of the products and the ease of use.
- Case Study 2: Repairing a Cat-Scratched Seat: A pet owner used our leather filler and colorant to repair a car seat that had been scratched by a cat. The customer was amazed at how well the repair blended with the surrounding leather.
- Case Study 3: Fixing a Sun-Damaged Seat: A customer with a car parked in direct sunlight used our leather conditioner and finish to restore a sun-damaged car seat. The customer was pleased with the improved appearance and feel of the leather.
These examples demonstrate the effectiveness of CARDIAGTECH.NET products in addressing a variety of leather car seat repair issues.
8. Common Mistakes to Avoid When Repairing Leather Car Seats
Avoid these common mistakes to ensure a successful leather car seat repair:
- Not Preparing the Surface Properly: Failing to clean and prep the leather surface can prevent proper adhesion of repair materials.
- Applying Filler Too Thickly: Applying filler in thick layers can cause it to shrink and crack as it dries.
- Not Matching the Color Properly: Using a colorant that doesn’t match the original leather can result in a noticeable repair.
- Rushing the Drying Process: Rushing the drying process can prevent the filler and colorant from curing properly.
- Using the Wrong Products: Using generic repair products instead of specialized leather repair products can damage the leather.
By avoiding these mistakes, you can ensure a professional-looking and durable repair.
9. The Science Behind Leather Repair
Understanding the science behind leather repair can help you appreciate the importance of using the right products and techniques.
- Leather Structure: Leather is a complex material composed of collagen fibers. These fibers provide strength and flexibility.
- Causes of Damage: Damage to leather can be caused by a variety of factors, including abrasion, UV exposure, and chemical damage.
- Repair Materials: Leather repair materials are designed to bond with the leather fibers and restore the leather’s original strength and appearance.
- Adhesion: Proper adhesion is essential for a durable repair. This requires thorough cleaning and surface preparation.
- Flexibility: The repair materials must be flexible enough to move with the leather without cracking or peeling.
10. Maintaining Your Repaired Leather Car Seat
Once you’ve repaired your leather car seat, it’s important to maintain it properly to prolong the life of the repair.
- Regular Cleaning: Clean the repaired area regularly with a specialized leather cleaner.
- Conditioning: Apply a leather conditioner every 3-6 months to keep the leather supple.
- Protection: Protect the repaired area from sharp objects and UV exposure.
- Inspection: Inspect the repaired area regularly for any signs of wear or damage.
- Reapplication: Reapply the leather finish as needed to protect the colorant.
11. Economic Benefits of DIY Leather Repair
Repairing your leather car seats yourself can save you a significant amount of money compared to hiring a professional.
- Cost Comparison: Professional leather repair services can cost hundreds of dollars, while a DIY repair kit from CARDIAGTECH.NET costs a fraction of that.
- Long-Term Savings: By maintaining your leather car seats properly, you can prevent more extensive damage and avoid costly repairs in the future.
- Increased Resale Value: Well-maintained leather car seats can increase the resale value of your car.
12. Environmental Impact of Leather Repair
Repairing your leather car seats is also an environmentally responsible choice.
- Reducing Waste: By repairing your leather car seats, you can avoid throwing them away and contributing to landfill waste.
- Conserving Resources: Manufacturing new car seats requires significant resources, including leather, chemicals, and energy. Repairing your existing seats conserves these resources.
- Promoting Sustainability: Choosing to repair instead of replace promotes a more sustainable approach to car ownership.
13. Innovations in Leather Repair Technology
The field of leather repair is constantly evolving, with new technologies and products being developed all the time.
- Self-Healing Leather: Some manufacturers are developing self-healing leather that can repair minor scratches and abrasions on its own.
- Advanced Fillers: New fillers are being developed that are more flexible, durable, and easier to apply.
- Color Matching Technology: Advanced color matching technology can create custom colorants that perfectly match any leather color.
- Sustainable Materials: Researchers are exploring the use of sustainable materials in leather repair products, such as plant-based fillers and dyes.
14. Finding the Right Leather Repair Kit for Your Needs
Choosing the right leather repair kit is essential for a successful repair. Consider these factors when selecting a kit:
- Type of Damage: Choose a kit that is designed for the type of damage you need to repair.
- Color Matching: Ensure the kit includes a colorant that matches your car seat’s leather.
- Quality of Materials: Choose a kit that includes high-quality materials from trusted brands.
- Ease of Use: Select a kit that is easy to use, especially if you are a beginner.
- Customer Reviews: Read customer reviews to get an idea of the kit’s performance.
CARDIAGTECH.NET offers a variety of leather repair kits to suit different needs and budgets.
15. Step-by-Step Video Tutorials for Leather Car Seat Repair
For visual learners, video tutorials can be a great resource for learning how to repair leather car seats.
- CARDIAGTECH.NET’s YouTube Channel: CARDIAGTECH.NET offers a variety of video tutorials on leather car seat repair.
- Online Courses: Consider taking an online course on leather repair to learn advanced techniques.
- DIY Blogs: Many DIY blogs and websites offer step-by-step video tutorials on leather car seat repair.
16. Safety Precautions When Working with Leather Repair Products
When working with leather repair products, it’s important to take certain safety precautions to protect yourself and others.
- Wear Gloves: Wear gloves to protect your skin from chemicals.
- Ventilation: Work in a well-ventilated area to avoid inhaling fumes.
- Eye Protection: Wear eye protection to prevent chemicals from getting into your eyes.
- Read Instructions: Read and follow the manufacturer’s instructions carefully.
- Keep Out of Reach of Children: Keep leather repair products out of reach of children and pets.
17. How to Handle Different Types of Leather
Different types of leather require different repair techniques. Here’s a guide to handling different types of leather:
- Aniline Leather: Aniline leather is a type of leather that is dyed with soluble dyes without covering the surface with a topcoat of polymer.
- Semi-Aniline Leather: Semi-aniline leather is more resistant to staining than aniline leather and can be used to produce more consistent color.
- Protected Leather: Protected leather has a polymer surface coating, making it more resistant to wear and tear.
- Nubuck Leather: Nubuck leather is top-grain cattle leather that has been sanded or buffed on the grain side, or outside, to give a slight nap of short protein fibers, producing a velvet-like surface.
- Suede Leather: Suede leather is made from the inner split of the hide and has a napped finish.
18. The Future of Car Interior Restoration
The future of car interior restoration is bright, with new technologies and techniques being developed all the time.
- 3D Printing: 3D printing is being used to create custom car interior parts.
- Artificial Intelligence: Artificial intelligence is being used to diagnose and repair car interior damage.
- Virtual Reality: Virtual reality is being used to train car interior restoration technicians.
19. Resources for Further Learning
Here are some resources for further learning about leather car seat repair:
- CARDIAGTECH.NET’s Blog: CARDIAGTECH.NET’s blog offers a variety of articles on leather car seat repair and maintenance.
- Leather Care Associations: Leather care associations offer training and certification programs for leather care professionals.
- DIY Forums: DIY forums are great places to ask questions and get advice from other DIY enthusiasts.
- Local Libraries: Local libraries offer a variety of books and resources on leather care and repair.
20. Conclusion: Restore Your Leather Car Seats Today
Don’t let that hole in your leather car seat ruin the look of your ride. With the right tools, techniques, and guidance from CARDIAGTECH.NET, you can restore your car seats to their former glory.
Remember, the key to a successful leather car seat repair is to:
- Assess the damage accurately.
- Use high-quality tools and materials.
- Follow the step-by-step instructions carefully.
- Take your time and be patient.
- Maintain your repaired seats properly.
By following these tips, you can achieve professional-quality results and enjoy your restored leather car seats for years to come. Contact CARDIAGTECH.NET today at Address: 276 Reock St, City of Orange, NJ 07050, United States. Whatsapp: +1 (641) 206-8880 or visit our website CARDIAGTECH.NET for expert advice and the best tools for your car care needs. Transform your vehicle and take pride in a well-maintained interior.
FAQ: How to Fix a Hole in a Leather Car Seat
Here are some frequently asked questions about fixing a hole in a leather car seat:
Q1: Can I really fix a hole in my leather car seat myself?
Yes, with the right tools, materials, and guidance, you can definitely fix a hole in your leather car seat yourself. CARDIAGTECH.NET provides comprehensive kits and step-by-step instructions to help you achieve professional-quality results.
Q2: What tools do I need to fix a hole in a leather car seat?
You’ll need a leather repair kit, leather cleaner, leather prep, alcohol cleaner, leather glue, heavy filler, leather colorant, leather finish, backing patch, palette knife, sponges, airbrush, abrasive pad, scalpel or scissors, tweezers, sandpaper, and a heat gun or hair dryer.
Q3: How long does it take to fix a hole in a leather car seat?
The time it takes to fix a hole in a leather car seat depends on the size and complexity of the damage. A small puncture may take only an hour or two, while a larger hole may take several hours or even a full day.
Q4: How much does it cost to fix a hole in a leather car seat?
The cost to fix a hole in a leather car seat depends on whether you hire a professional or do it yourself. Professional leather repair services can cost hundreds of dollars, while a DIY repair kit from CARDIAGTECH.NET costs a fraction of that.
Q5: Will the repair be noticeable?
If done properly, the repair should be barely noticeable. Matching the color and texture of the repair to the original leather is essential for a seamless finish.
Q6: How can I prevent future damage to my leather car seats?
Prevent future damage by cleaning your leather car seats regularly, conditioning them every 3-6 months, protecting them from sunlight, avoiding sharp objects, and addressing any minor damage promptly.
Q7: Where can I buy high-quality leather repair products?
You can buy high-quality leather repair products from CARDIAGTECH.NET. We offer a wide range of products from trusted brands, as well as expert advice and excellent customer service.
Q8: What if I can’t find a colorant that matches my car seat’s leather?
If you can’t find a colorant that matches your car seat’s leather, consider custom color matching services offered by CARDIAGTECH.NET.
Q9: Is it better to repair or replace a damaged leather car seat?
In most cases, it’s better to repair a damaged leather car seat than to replace it. Repairing is more cost-effective, environmentally friendly, and can restore the original look and feel of your car seats.
Q10: How do I know if I need professional help with my leather car seat repair?
If the damage is extensive or you’re not comfortable doing the repair yourself, it’s best to seek professional help. CARDIAGTECH.NET can recommend qualified leather repair technicians in your area.
Now that you’re armed with the knowledge and resources to fix a hole in your leather car seat, don’t hesitate to take action. Contact CARDIAGTECH.NET today and start restoring your car’s interior to its former glory Address: 276 Reock St, City of Orange, NJ 07050, United States. Whatsapp: +1 (641) 206-8880 or visit our website CARDIAGTECH.NET.