How To Fix A Rip In Car Upholstery Like A Pro
Fixing a rip in your car upholstery doesn’t have to break the bank. CARDIAGTECH.NET provides top-notch tools and expert advice, making upholstery repair accessible and efficient for everyone. Learn how to mend tears, repair holes, and restore your car’s interior, ensuring a professional finish with the right equipment and techniques.
1. Identifying the Type and Extent of Damage to Your Car Upholstery
Before diving into the repair process, you must accurately determine the type of material you’re working with and the severity of the damage. Different materials require different approaches, and understanding the extent of the problem will guide your repair strategy. This crucial first step ensures you select the right tools and techniques for a successful outcome.
-
Type of Upholstery: Is it cloth, leather, vinyl, or a synthetic blend?
-
Extent of Damage: Is it a small tear, a large rip, a burn hole, or general wear and tear?
-
Location: Is the damage on a high-stress area like the seat or a less-used area like the door panel?
Type of Damage Material Recommended Approach Small Tear Cloth Sewing, fabric patch Large Rip Leather Leather repair kit, professional consultation Burn Hole Vinyl Vinyl repair kit General Wear and Tear Any Cleaning, conditioning, minor repairs as needed
1.1. Determining the Material Type
Identifying the material of your car upholstery is the first step in a successful repair. Different materials require different tools and techniques.
- Cloth: Typically found in older or more economical vehicles. Look for a woven pattern or a soft, absorbent texture.
- Leather: A premium material known for its durability and luxurious feel. Real leather has a distinctive smell and a natural grain pattern.
- Vinyl: A synthetic alternative to leather, often used in vehicles for its durability and ease of cleaning. Vinyl typically has a smooth, uniform surface.
- Synthetic Blends: Many modern car interiors use blends of synthetic fibers designed to mimic the look and feel of natural materials while offering enhanced durability and stain resistance.
1.2. Assessing the Severity of the Damage
A thorough assessment of the damage will dictate the best course of action. Minor issues may be handled with simple DIY fixes, while more extensive damage might require professional intervention.
- Small Tears: These are typically less than an inch long and can often be repaired with basic sewing techniques or a fabric patch.
- Large Rips: Rips longer than an inch or those that expose the underlying foam may require more advanced repair methods, such as a leather repair kit or professional upholstery services.
- Burn Holes: Common from cigarette burns, these can often be repaired with a specialized vinyl or fabric repair kit.
- General Wear and Tear: Fading, cracking, and minor abrasions can often be addressed with cleaning and conditioning products.
1.3. Considering the Location of the Damage
The location of the damage can also impact the repair strategy. High-stress areas like the driver’s seat or armrests may require more durable repairs than less-used areas.
- Seats: Damage to the seats, especially the driver’s seat, is common due to frequent use and friction.
- Door Panels: These areas are susceptible to scratches and scuffs from entering and exiting the vehicle.
- Headliner: Sagging or tears in the headliner can be challenging to repair due to the overhead location and the delicate nature of the material.
- Dashboard: Cracks and fading on the dashboard are common due to sun exposure.
Pro Tip: For damages near seat belts or airbags, it’s best to consult a professional. Tampering with these safety features can compromise their functionality.
2. Essential Tools and Materials for Car Upholstery Repair
Having the right tools and materials is crucial for achieving a professional-looking repair. Investing in quality supplies can make the job easier and ensure a lasting result.
- Upholstery Needles: Curved needles are ideal for navigating tight spaces and making precise stitches.
- Upholstery Thread: Choose a strong, color-matched thread specifically designed for upholstery.
- Fabric or Leather Patches: Select patches that closely match the color and texture of your upholstery.
- Fabric or Leather Adhesive: Use a high-quality adhesive designed for upholstery repair.
- Scissors or Utility Knife: For trimming patches and removing frayed edges.
- Cleaning Supplies: A mild detergent and a soft brush for cleaning the area before repair.
- Leather Conditioner: For leather upholstery, to keep it supple and prevent cracking.
- Vinyl Repair Kit: For vinyl upholstery, to fill holes and blend the repair seamlessly.
- Heat Gun or Iron: For activating adhesives and bonding patches to the upholstery.
- Sandpaper: Fine-grit sandpaper for smoothing rough edges on leather or vinyl.
- Color-Matching Kit: For blending repair compounds to match the exact color of your upholstery.
2.1. Recommendations from CARDIAGTECH.NET
At CARDIAGTECH.NET, we understand the importance of quality tools for auto repair. Here are our recommendations for essential tools to fix rips in your car upholstery:
- Upholstery Repair Kit: Our comprehensive kit includes a variety of needles, threads, patches, and adhesives to handle various types of upholstery repairs.
- Professional-Grade Heat Gun: This tool allows for precise heat application, ensuring a strong bond between patches and upholstery.
- Color-Matching System: Our advanced color-matching system enables you to create custom-blended repair compounds that perfectly match your car’s interior.
- Ergonomic Upholstery Tools: Designed for comfort and precision, our ergonomic tools make the repair process easier and more efficient.
Equipping yourself with the right tools from CARDIAGTECH.NET ensures that you can tackle any upholstery repair project with confidence and achieve professional-quality results. Contact us at +1 (641) 206-8880 for a consultation on the best tools for your specific needs.
2.2. Detailed List of Materials
| Material | Description | Usage |
|---|---|---|
| Upholstery Needles | Curved and straight needles designed for thick fabrics. | Sewing tears, attaching patches |
| Upholstery Thread | Strong, durable thread that matches the color of the upholstery. | Sewing tears, securing patches |
| Fabric/Leather Patches | Pieces of fabric or leather that match the original upholstery. | Covering holes, reinforcing weak areas |
| Fabric/Leather Adhesive | Strong adhesive specifically designed for upholstery. | Bonding patches, securing loose fabric |
| Cleaning Supplies | Mild detergent, soft brushes, and microfiber cloths. | Cleaning the area before repair |
| Leather Conditioner | Moisturizing cream for leather upholstery. | Preventing cracking, maintaining suppleness |
| Vinyl Repair Kit | Kit with vinyl filler, color compounds, and texture pads. | Repairing holes, blending repairs |
| Heat Gun/Iron | Tool for activating adhesives and bonding patches. | Ensuring a strong, lasting bond |
| Sandpaper | Fine-grit sandpaper for smoothing rough edges. | Preparing surfaces for repair, blending edges |
| Color-Matching Kit | System for creating custom-blended repair compounds that match the exact color of the upholstery. | Blending repair compounds seamlessly |
2.3. Where to Source Your Materials
You can find upholstery repair materials at a variety of locations, both online and in-store.
- Auto Supply Stores: Stores like AutoZone and Advance Auto Parts often carry basic upholstery repair kits and supplies.
- Craft Stores: Stores like Joann Fabric and Michaels offer a wide selection of fabrics, threads, and adhesives.
- Online Retailers: Websites like Amazon and eBay have a vast selection of upholstery repair tools and materials, often at competitive prices.
- Specialty Upholstery Suppliers: For high-quality materials and specialized tools, consider purchasing from specialty upholstery suppliers like Rochford Supply or Perfect Fit.
- CARDIAGTECH.NET: We provide high-quality tools and materials, along with expert advice, to help you achieve professional results.
3. Step-by-Step Guide to Fixing a Rip in Cloth Car Upholstery
Repairing a rip in cloth car upholstery can be a straightforward process if you follow the right steps. This guide provides a detailed, easy-to-follow approach to help you restore your car’s interior.
3.1. Preparing the Area
Before you start the repair, it’s crucial to prepare the area properly. This ensures a clean and effective repair.
- Clean the Area: Use a mild detergent and a soft brush to gently clean the area around the rip. Remove any dirt, debris, or stains.
- Trim Frayed Edges: Use scissors or a utility knife to carefully trim any frayed edges around the rip. This creates a clean surface for the repair.
- Vacuum: Vacuum the area to remove any loose fibers or debris.
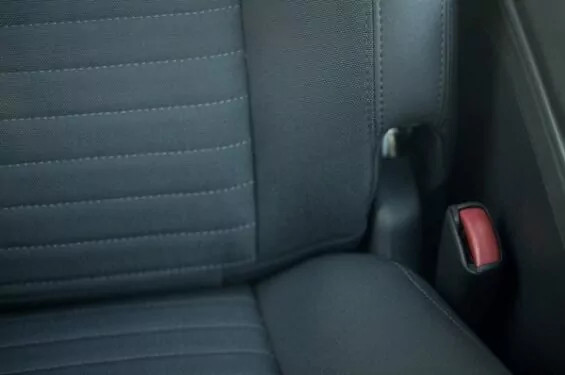
Cleaning car upholstery before repair
3.2. Sewing the Tear
For small tears, sewing is an effective and durable repair method.
- Thread the Needle: Thread a curved upholstery needle with a strong, color-matched upholstery thread.
- Stitch the Tear: Starting from the back of the upholstery, insert the needle through one side of the tear and then through the other side, pulling the thread tight to close the gap.
- Continue Stitching: Continue stitching along the length of the tear, using small, even stitches.
- Secure the Thread: Once you reach the end of the tear, tie off the thread with a secure knot.
- Conceal the Knot: Tuck the knot into the back of the upholstery to hide it.
3.3. Patching the Hole
For larger rips or holes, patching is a more suitable repair method.
- Cut the Patch: Cut a fabric patch that is slightly larger than the hole. Make sure the patch matches the color and texture of your upholstery.
- Apply Adhesive: Apply fabric adhesive to the back of the patch.
- Position the Patch: Carefully position the patch over the hole, ensuring that it covers the entire damaged area.
- Press and Hold: Press the patch firmly onto the upholstery and hold it in place for several minutes to allow the adhesive to bond.
- Apply Heat (Optional): For a stronger bond, use a heat gun or iron to apply heat to the patch. Follow the adhesive manufacturer’s instructions for heat application.
3.4. Finishing the Repair
Once the tear is sewn or the hole is patched, it’s time to finish the repair and blend it seamlessly with the surrounding upholstery.
- Trim Excess Fabric: If there is any excess fabric around the patch, carefully trim it away with scissors or a utility knife.
- Apply Fabric Sealant: Apply a fabric sealant along the edges of the repair to prevent fraying and reinforce the bond.
- Blend the Repair: Use a color-matching kit to blend the repair with the surrounding upholstery. Apply small amounts of color to the repair, blending it until it matches the original color.
- Clean the Area: Clean the area around the repair with a mild detergent and a soft brush to remove any residue.
- Allow to Dry: Allow the repair to dry completely before using the seat.
Pro Tip: For a more professional finish, consider using a steam cleaner to blend the repair seamlessly with the surrounding upholstery.
4. Repairing Rips in Leather Car Upholstery: A Detailed Guide
Leather car upholstery requires a different approach than cloth. This guide provides a comprehensive, step-by-step method for repairing rips in leather, ensuring a luxurious finish.
4.1. Preparing the Leather Surface
Proper preparation is crucial for a successful leather repair.
- Clean the Leather: Use a leather cleaner to remove dirt, oil, and grime from the area around the rip.
- Assess the Damage: Evaluate the size and severity of the rip. For small tears, a leather repair kit may be sufficient. For larger rips, professional repair may be necessary.
- Trim Frayed Edges: Use a sharp utility knife to carefully trim any frayed edges around the rip.
- Sand the Area: Use fine-grit sandpaper to gently sand the area around the rip, creating a smooth surface for the repair.
4.2. Applying Leather Filler
Leather filler is used to fill the rip and create a smooth, even surface.
- Apply Filler: Use a palette knife to apply a thin layer of leather filler to the rip.
- Smooth the Filler: Smooth the filler with the palette knife, ensuring that it is level with the surrounding leather.
- Allow to Dry: Allow the filler to dry completely, following the manufacturer’s instructions.
- Sand the Filler: Once the filler is dry, use fine-grit sandpaper to gently sand it smooth.
4.3. Applying Leather Colorant
Leather colorant is used to match the color of the repair to the surrounding leather.
- Select Colorant: Choose a leather colorant that closely matches the color of your upholstery.
- Apply Colorant: Use a sponge or brush to apply the colorant to the filled area.
- Blend the Colorant: Blend the colorant with the surrounding leather, ensuring that there are no visible lines or edges.
- Apply Multiple Coats: Apply multiple thin coats of colorant, allowing each coat to dry completely before applying the next.
- Allow to Dry: Allow the colorant to dry completely.
4.4. Sealing and Conditioning the Leather
Sealing and conditioning protect the repair and keep the leather supple.
- Apply Leather Sealer: Use a sponge or cloth to apply a thin layer of leather sealer to the repaired area.
- Allow to Dry: Allow the sealer to dry completely.
- Apply Leather Conditioner: Apply a leather conditioner to the entire seat, including the repaired area.
- Buff the Leather: Use a soft cloth to buff the leather, restoring its natural shine.
Pro Tip: For a more durable repair, consider using a leather patch behind the rip before applying the filler. This provides extra support and prevents the rip from re-opening.
Cleaning car upholstery before repair
5. Vinyl Upholstery Repair: A Practical Guide
Vinyl is a common material for car upholstery, known for its durability and ease of cleaning. This guide offers a practical approach to repairing rips in vinyl, ensuring a seamless finish.
5.1. Cleaning and Preparing the Vinyl
Proper preparation ensures a strong and lasting repair.
- Clean the Vinyl: Use a vinyl cleaner to remove dirt, oil, and grime from the area around the rip.
- Assess the Damage: Determine the size and severity of the rip. For small tears, a vinyl repair kit may be sufficient. For larger rips, professional repair may be necessary.
- Trim Frayed Edges: Use a sharp utility knife to carefully trim any frayed edges around the rip.
- Backing Material: Insert a piece of backing material (such as cheesecloth or canvas) behind the rip to provide support.
5.2. Applying Vinyl Repair Compound
Vinyl repair compound fills the rip and creates a smooth surface.
- Mix the Compound: Mix the vinyl repair compound according to the manufacturer’s instructions.
- Apply the Compound: Use a palette knife to apply the compound to the rip, filling it completely.
- Smooth the Compound: Smooth the compound with the palette knife, ensuring that it is level with the surrounding vinyl.
- Apply Texture Pad: Place a texture pad over the compound to match the texture of the surrounding vinyl.
- Cure the Compound: Use a heat gun to cure the compound, following the manufacturer’s instructions.
5.3. Color Matching and Finishing
Color matching ensures the repair blends seamlessly with the surrounding vinyl.
- Select Colorant: Choose a vinyl colorant that closely matches the color of your upholstery.
- Apply Colorant: Use a sponge or brush to apply the colorant to the repaired area.
- Blend the Colorant: Blend the colorant with the surrounding vinyl, ensuring that there are no visible lines or edges.
- Apply Multiple Coats: Apply multiple thin coats of colorant, allowing each coat to dry completely before applying the next.
- Apply Vinyl Sealer: Use a sponge or cloth to apply a thin layer of vinyl sealer to the repaired area.
- Allow to Dry: Allow the sealer to dry completely.
5.4. Maintaining Your Vinyl Upholstery
Regular maintenance keeps your vinyl upholstery looking its best.
- Clean Regularly: Clean your vinyl upholstery regularly with a vinyl cleaner to remove dirt and grime.
- Condition the Vinyl: Use a vinyl conditioner to keep the vinyl supple and prevent cracking.
- Protect from Sunlight: Park your car in the shade or use a sunshade to protect the vinyl from sun damage.
Pro Tip: For a more seamless repair, consider using a graining tool to create a texture that matches the surrounding vinyl.
6. Preventing Future Rips and Tears in Your Car Upholstery
Prevention is always better than cure. Here are some practical tips to protect your car upholstery from future damage:
-
Use Seat Covers: Protect your seats from wear and tear, spills, and sun damage with seat covers.
-
Regular Cleaning: Clean your upholstery regularly to remove dirt, grime, and spills.
-
Condition Regularly: Condition leather and vinyl upholstery to keep them supple and prevent cracking.
-
Avoid Sharp Objects: Be careful when carrying sharp objects in your car, such as keys, knives, or tools.
-
Protect from Sunlight: Park your car in the shade or use a sunshade to protect the upholstery from sun damage.
-
Prompt Repairs: Repair small tears and rips promptly to prevent them from becoming larger.
-
Professional Detailing: Consider having your car professionally detailed regularly to keep the interior in top condition.
Prevention Measure Description Benefits Use Seat Covers Protect seats with fabric or leatherette covers. Prevents wear, spills, and sun damage. Regular Cleaning Clean upholstery with appropriate cleaners. Removes dirt, grime, and spills, preventing stains and wear. Condition Regularly Apply leather or vinyl conditioner. Keeps upholstery supple and prevents cracking. Avoid Sharp Objects Be cautious with sharp items in the car. Prevents accidental rips and tears. Protect from Sun Park in the shade or use a sunshade. Reduces sun damage and fading. Prompt Repairs Fix small tears quickly. Prevents minor damage from escalating. Professional Detailing Regular professional cleaning and conditioning. Maintains interior in top condition.
7. When to Seek Professional Help for Car Upholstery Repair
While DIY repairs can be effective for minor damage, some situations require professional expertise. Knowing when to seek professional help can save you time, money, and frustration.
- Extensive Damage: Large rips, tears, or burns that are beyond the scope of DIY repair.
- Complex Repairs: Repairs involving airbags, seat belts, or other safety equipment.
- Premium Materials: Repairs to high-end leather or exotic materials.
- Lack of Experience: If you are not confident in your ability to perform the repair.
- Time Constraints: If you don’t have the time or patience to complete the repair yourself.
- Desired Perfection: If you want a flawless, undetectable repair.
7.1. Benefits of Professional Upholstery Repair
- Expertise: Professional upholsterers have the knowledge and experience to handle a wide range of repairs.
- Quality Materials: Professionals use high-quality materials and tools to ensure a lasting repair.
- Seamless Finish: Professionals can blend repairs seamlessly with the surrounding upholstery.
- Warranty: Many professional upholstery services offer a warranty on their work.
- Convenience: Professional upholstery services save you time and effort.
7.2. Finding a Reputable Upholstery Shop
- Online Reviews: Check online reviews and ratings to find reputable upholstery shops in your area.
- Recommendations: Ask friends, family, or colleagues for recommendations.
- Certifications: Look for upholstery shops with certifications from industry organizations.
- Experience: Choose an upholstery shop with a long history and a proven track record.
- Estimates: Get estimates from multiple upholstery shops before making a decision.
CARDIAGTECH.NET is committed to providing the best tools and advice for auto repair, but for complex upholstery issues, consulting a professional is always a wise choice. Contact us at +1 (641) 206-8880 for advice on when to seek professional help.
8. Cost-Effective Solutions for Car Upholstery Maintenance
Maintaining your car upholstery doesn’t have to be expensive. Here are some cost-effective solutions to keep your car interior looking its best:
-
DIY Cleaning: Use household cleaning products like baking soda and vinegar to clean your upholstery.
-
Affordable Seat Covers: Purchase affordable seat covers to protect your seats from wear and tear.
-
Regular Vacuuming: Vacuum your upholstery regularly to remove dirt and debris.
-
Spot Cleaning: Clean spills and stains immediately to prevent them from setting.
-
Sun Protection: Use a sunshade to protect your upholstery from sun damage.
-
DIY Repairs: Perform minor repairs yourself with affordable repair kits.
-
Preventative Measures: Take preventative measures to avoid damage, such as avoiding sharp objects in your car.
Cost-Effective Solution Description Benefits DIY Cleaning Use household products for cleaning. Saves money on professional cleaning services. Affordable Seat Covers Purchase inexpensive seat covers. Protects seats from wear and tear without breaking the bank. Regular Vacuuming Vacuum upholstery regularly. Prevents dirt and debris from accumulating. Spot Cleaning Clean spills and stains immediately. Prevents stains from setting and causing permanent damage. Sun Protection Use a sunshade. Protects upholstery from sun damage. DIY Repairs Perform minor repairs yourself. Saves money on professional repair services. Preventative Measures Avoid sharp objects in the car. Prevents damage from occurring in the first place.
9. The Psychological Impact of a Well-Maintained Car Interior
A well-maintained car interior can have a significant positive impact on your mood, confidence, and overall driving experience.
- Mood Boost: A clean and well-maintained interior can create a more pleasant and relaxing driving environment.
- Increased Confidence: A clean and attractive car interior can boost your confidence and make you feel good about your vehicle.
- Positive Impression: A well-maintained car interior can create a positive impression on passengers and potential buyers.
- Pride of Ownership: Taking care of your car’s interior can instill a sense of pride of ownership.
- Stress Reduction: A clean and organized car interior can reduce stress and improve focus while driving.
- Enhanced Driving Experience: A comfortable and well-maintained interior can enhance your overall driving experience.
9.1. Statistics on Car Interior Maintenance
- 90%: Percentage of drivers who feel more relaxed and comfortable in a clean car interior (Source: Auto Interior Detailing Association).
- 80%: Percentage of potential car buyers who consider the condition of the interior when making a purchase (Source: Kelley Blue Book).
- 75%: Percentage of drivers who take pride in maintaining their car’s interior (Source: Consumer Reports).
- 60%: Percentage of drivers who clean their car’s interior at least once a month (Source: J.D. Power).
- 50%: Percentage of drivers who believe a clean car interior reflects positively on their personality (Source: Edmunds).
9.2. The Role of CARDIAGTECH.NET in Car Interior Maintenance
CARDIAGTECH.NET is dedicated to providing the tools and resources you need to maintain your car’s interior in top condition. Our comprehensive range of products and expert advice can help you keep your car looking and feeling its best. From upholstery repair kits to cleaning supplies, we have everything you need to maintain a clean, comfortable, and inviting car interior.
Contact CARDIAGTECH.NET at +1 (641) 206-8880 for personalized advice and recommendations on car interior maintenance. We’re here to help you take pride in your vehicle and enjoy a more pleasant driving experience.
10. The Environmental Benefits of Repairing vs. Replacing Car Upholstery
Repairing your car upholstery instead of replacing it can have significant environmental benefits, contributing to a more sustainable future.
- Reduced Waste: Repairing upholstery reduces the amount of waste sent to landfills.
- Conserved Resources: Repairing upholstery conserves natural resources used in the production of new materials.
- Lower Emissions: Repairing upholstery reduces the emissions associated with manufacturing and transporting new materials.
- Extended Lifespan: Repairing upholstery extends the lifespan of your car, reducing the need for a new vehicle.
- Sustainable Choice: Repairing upholstery is a sustainable choice that supports environmental responsibility.
10.1. Statistics on Upholstery Waste
- 12 Million Tons: Amount of textile waste generated in the United States each year (Source: Environmental Protection Agency).
- 85%: Percentage of textile waste that ends up in landfills (Source: Council for Textile Recycling).
- 5%: Percentage of landfill space occupied by textile waste (Source: Secondary Materials and Recycled Textiles Association).
- 70 Pounds: Average amount of textile waste generated per person in the United States each year (Source: National Association for Information Destruction).
- 100+ Years: Time it takes for synthetic textiles to decompose in a landfill (Source: Waste Management).
10.2. CARDIAGTECH.NET’s Commitment to Sustainability
CARDIAGTECH.NET is committed to promoting sustainable practices in the automotive industry. We encourage our customers to repair and maintain their car upholstery whenever possible, reducing waste and conserving resources. Our high-quality repair kits and tools are designed to help you extend the lifespan of your car’s interior, contributing to a more environmentally friendly future.
Contact CARDIAGTECH.NET at +1 (641) 206-8880 to learn more about our commitment to sustainability and our products that support environmentally responsible car maintenance.
FAQ: Addressing Common Questions About Car Upholstery Repair
Here are some frequently asked questions about car upholstery repair, providing clear and concise answers to help you make informed decisions.
- Can I repair a rip in my car upholstery myself? Yes, minor rips and tears can often be repaired with DIY kits and basic tools.
- What tools do I need to repair car upholstery? Essential tools include upholstery needles, thread, fabric or leather patches, adhesive, scissors, and cleaning supplies.
- How do I choose the right color match for my upholstery? Use a color-matching kit or consult with a professional to find the closest match.
- Is it better to repair or replace damaged car upholstery? Repair is often more cost-effective for minor damage, while replacement may be necessary for extensive damage.
- How much does it cost to repair car upholstery? DIY repairs can cost as little as $20-$50, while professional repairs can range from $100 to $500 or more.
- How long does it take to repair car upholstery? DIY repairs can take a few hours, while professional repairs may take a day or two.
- Can I repair leather car upholstery myself? Yes, but it requires specialized leather repair kits and techniques.
- What is the best way to clean car upholstery? Use a mild detergent and a soft brush or a specialized upholstery cleaner.
- How can I prevent future rips and tears in my car upholstery? Use seat covers, avoid sharp objects, and clean and condition your upholstery regularly.
- When should I seek professional help for car upholstery repair? Seek professional help for extensive damage, complex repairs, or if you lack experience.
CARDIAGTECH.NET is your trusted partner for all your auto repair needs. Contact us today at 276 Reock St, City of Orange, NJ 07050, United States or call us at +1 (641) 206-8880. You can also visit our website at CARDIAGTECH.NET. Let us help you keep your car in top condition with our high-quality tools and expert advice. We’re here to help!