How To Fix A Scrape On A White Car Easily
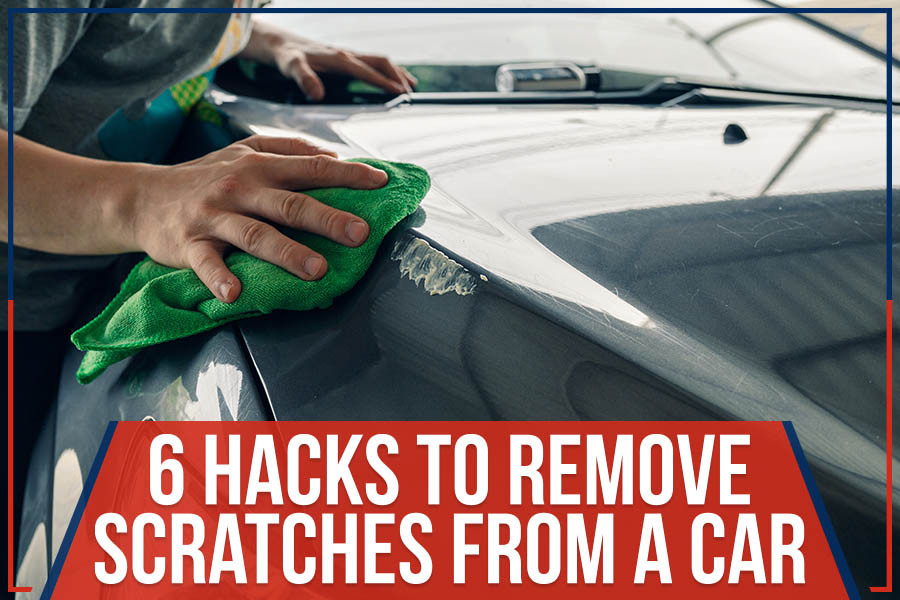
Fixing a scrape on a white car can be a daunting task, but with the right techniques, the damage can be reversed. CARDIAGTECH.NET provides the equipment and knowledge to make auto body repairs accessible. This article explores effective methods for addressing these imperfections and restoring your car’s pristine appearance, including paint correction, scratch removers, and DIY techniques for automotive paint repair.
1. Understanding the Nature of Scratches on White Cars
Understanding the types of scratches is essential for choosing the correct repair method. Scratches can range from minor surface abrasions to deeper gouges that penetrate the clear coat and base coat of the paint. Identifying the depth and severity of the scrape will guide the repair process, ensuring effective and lasting results.
- Clear Coat Scratches: These are light scratches that only affect the top layer of the car’s paint. They often appear as hazy or swirl marks and can usually be fixed with simple polishing techniques.
- Base Coat Scratches: These scratches go through the clear coat and reach the colored base coat. They are more visible and require more intensive repair methods, such as touch-up paint application.
- Primer Scratches: These are deep scratches that penetrate both the clear coat and the base coat, exposing the primer layer underneath. Repairing these scratches often involves filling the scratch with primer before applying the base coat and clear coat.
close up of car scratch repair
2. Essential Tools and Materials for Scratch Repair
Before starting any scratch repair, gathering the necessary tools and materials is critical. Having the right supplies on hand ensures a smooth and effective repair process. Here is a comprehensive list of essential items:
-
Cleaning Supplies:
- Car Wash Soap: Use a pH-neutral car wash soap to clean the area around the scratch. This removes dirt and contaminants that could interfere with the repair.
- Microfiber Towels: These soft towels are essential for washing, drying, and polishing the car’s surface without causing further scratches.
- Detailing Clay Bar: A clay bar helps remove embedded contaminants from the paint surface, providing a clean base for repairs.
- Rubbing Alcohol or Automotive Degreaser: Use these to clean the area immediately before applying any repair products to ensure proper adhesion.
-
Repair Materials:
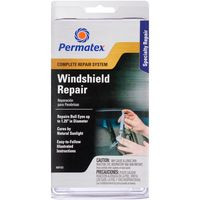
- Touch-Up Paint: Purchase touch-up paint that matches your car’s specific color code. This is essential for filling in deeper scratches that have penetrated the base coat.
- Clear Coat: A clear coat protects the base coat and provides a glossy finish. Ensure it is compatible with your car’s paint system.
- Primer: For deep scratches that expose the metal or plastic underneath, a primer is necessary to create a bonding layer for the paint.
-
Application and Polishing Tools:
- Fine-Tip Applicators: Small brushes or paint pens are useful for applying touch-up paint precisely into the scratch.
- Wet/Dry Sandpaper: Different grits of sandpaper (e.g., 2000, 3000, 5000 grit) are needed for leveling the touch-up paint and smoothing the repair area.
- Sanding Block: Using a sanding block ensures even pressure and prevents creating uneven surfaces while sanding.
- Polishing Compound: A polishing compound helps remove fine scratches and swirl marks, restoring the paint’s gloss.
- Buffing Pad: Use a foam buffing pad with a polishing machine or by hand to apply the polishing compound.
- Polishing Machine (Optional): A dual-action polisher can make the polishing process faster and more effective.
- Microfiber Polishing Cloths: Clean, soft cloths are used to remove polishing compound residue and buff the paint to a shine.
-
Protection and Safety:
- Painter’s Tape: Use painter’s tape to mask off the area around the scratch, protecting the surrounding paint from accidental damage during sanding and polishing.
- Gloves: Wear gloves to protect your hands from chemicals and paint.
- Safety Glasses: Protect your eyes from dust and debris when sanding and polishing.
3. Step-by-Step Guide to Fixing Minor Scratches on White Cars
Minor scratches, often called clear coat scratches, are surface-level imperfections that don’t penetrate the base coat. These can typically be fixed with simple polishing techniques. Here’s a step-by-step guide to repairing minor scratches:
-
Step 1: Clean the Area
- Wash the area around the scratch with car wash soap and water to remove dirt and debris.
- Dry the area thoroughly with a clean microfiber towel.
- Use a detailing clay bar to remove any embedded contaminants from the paint surface.
- Clean the area with rubbing alcohol or automotive degreaser to ensure a clean surface for polishing.
-
Step 2: Apply Polishing Compound
- Apply a small amount of polishing compound to a foam buffing pad.
- If using a polishing machine, set it to a low speed.
- If polishing by hand, apply moderate pressure in a circular motion.
- Work the polishing compound into the scratch and surrounding area for several minutes.
-
Step 3: Buff the Area
- Use a clean microfiber polishing cloth to remove the polishing compound residue.
- Buff the area in a circular motion until the paint appears glossy and the scratch is no longer visible.
-
Step 4: Inspect and Repeat
- Inspect the area to ensure the scratch is gone.
- If the scratch is still visible, repeat steps 2 and 3.
-
Step 5: Apply Wax or Sealant
- Apply a coat of wax or sealant to protect the repaired area and enhance the shine.
- Buff the wax or sealant with a clean microfiber cloth.
4. Repairing Deeper Scratches on White Cars: A Comprehensive Approach
Deeper scratches that penetrate the clear coat and reach the base coat require a more involved repair process. This method involves using touch-up paint to fill the scratch and restore the paint’s color.
-
Step 1: Prepare the Area
- Clean the area around the scratch with car wash soap and water.
- Dry the area thoroughly with a clean microfiber towel.
- Use a detailing clay bar to remove any embedded contaminants.
- Clean the area with rubbing alcohol or automotive degreaser.
- Mask off the area around the scratch with painter’s tape to protect the surrounding paint.
-
Step 2: Apply Primer (If Necessary)
- If the scratch exposes the metal or plastic underneath, apply a thin layer of automotive primer to the scratch.
- Allow the primer to dry completely according to the manufacturer’s instructions.
- Lightly sand the primed area with fine-grit sandpaper (e.g., 3000 grit) to create a smooth surface.
- Clean the sanded area with rubbing alcohol.
-
Step 3: Apply Touch-Up Paint
- Shake the touch-up paint bottle thoroughly.
- Using a fine-tip applicator, carefully apply thin layers of touch-up paint to the scratch, allowing each layer to dry before applying the next.
- Apply enough layers to slightly overfill the scratch, creating a small mound of paint.
- Allow the touch-up paint to dry completely for at least 24 hours.
-
Step 4: Level the Touch-Up Paint
- Wrap a sanding block with fine-grit sandpaper (e.g., 3000 grit).
- Wet the sandpaper with water and lightly sand the touch-up paint, using a back-and-forth motion.
- Continue sanding until the touch-up paint is level with the surrounding paint.
- Be careful not to sand through the surrounding clear coat.
-
Step 5: Polish the Area
- Apply a small amount of polishing compound to a foam buffing pad.
- If using a polishing machine, set it to a low speed.
- If polishing by hand, apply moderate pressure in a circular motion.
- Work the polishing compound into the sanded area for several minutes to remove sanding marks and restore the paint’s gloss.
-
Step 6: Buff the Area
- Use a clean microfiber polishing cloth to remove the polishing compound residue.
- Buff the area in a circular motion until the paint appears glossy and the repair is seamless.
-
Step 7: Apply Clear Coat (If Necessary)
- If the touch-up paint does not have a clear coat mixed in, apply a thin layer of clear coat to the repaired area.
- Allow the clear coat to dry completely according to the manufacturer’s instructions.
- Lightly sand the clear-coated area with ultra-fine grit sandpaper (e.g., 5000 grit) to remove any imperfections.
- Polish and buff the area to restore the shine.
-
Step 8: Apply Wax or Sealant
- Apply a coat of wax or sealant to protect the repaired area and enhance the shine.
- Buff the wax or sealant with a clean microfiber cloth.
5. Advanced Techniques for Severe Scratches
For severe scratches that expose bare metal or plastic, more advanced techniques may be necessary. These scratches often require professional attention, but skilled DIYers can attempt the repairs with the right tools and knowledge.
- Metal Scratches:
- Sanding and Grinding: Use progressively finer grits of sandpaper to remove rust and smooth the metal surface.
- Body Filler: Apply body filler to fill in deep gouges and restore the original shape of the panel.
- Priming: Apply multiple layers of primer to ensure proper adhesion of the paint.
- Painting: Use a professional-grade paint system to match the car’s color and apply multiple coats of base coat and clear coat.
- Plastic Scratches:
- Plastic Repair Kits: Use a plastic repair kit to mend cracks and fill in scratches.
- Sanding: Sand the repaired area to create a smooth surface.
- Priming and Painting: Apply primer and paint specifically designed for plastic surfaces.
6. DIY Scratch Removal Hacks: Myths vs. Reality
Several DIY scratch removal hacks circulate online, but their effectiveness varies. Here’s a look at some common myths and the reality behind them:
- Toothpaste:
- Myth: Toothpaste can remove scratches due to its abrasive properties.
- Reality: Toothpaste may temporarily reduce the appearance of very light scratches by smoothing the edges. However, it is not a long-term solution and can potentially damage the clear coat if used improperly.
- Baking Soda:
- Myth: A paste of baking soda and water can buff out scratches.
- Reality: Baking soda is a mild abrasive and may help with very light scratches. However, it is not as effective as dedicated polishing compounds and can leave a hazy finish if not used carefully.
- Nail Polish:
- Myth: Clear nail polish can fill in deep scratches.
- Reality: Clear nail polish can provide a temporary barrier against rust and corrosion in deep scratches. However, it does not bond well with the car’s paint and can chip or peel over time. Additionally, it does not level with the surrounding paint, resulting in an uneven surface.
- Banana Peel:
- Myth: Rubbing the inside of a banana peel on a scratch can make it disappear.
- Reality: This is a popular myth with little scientific basis. The potassium in banana peels is claimed to react with the paint, but it is unlikely to have any significant effect on scratches.
While these DIY hacks may offer temporary or minimal improvements, they are generally not recommended for serious scratch repair. Using dedicated automotive products and following proper techniques will yield far better and longer-lasting results.
7. Maintaining Your White Car’s Paint to Prevent Scratches
Preventing scratches is always better than trying to fix them. Here are some tips to maintain your white car’s paint and minimize the risk of scratches:
- Regular Washing: Wash your car regularly with pH-neutral car wash soap and a microfiber wash mitt. This removes dirt and contaminants that can cause scratches.
- Proper Drying: Dry your car with clean microfiber towels to avoid water spots and swirl marks.
- Waxing and Sealing: Apply a coat of wax or sealant every few months to protect the paint from UV rays, oxidation, and minor abrasions.
- Avoid Automatic Car Washes: Automatic car washes can cause scratches due to the abrasive brushes and harsh chemicals. Opt for touchless car washes or hand washing.
- Park Smart: Park in covered areas or away from other cars to minimize the risk of scratches and dings.
- Use a Car Cover: If you park your car outside, use a car cover to protect it from the elements and potential scratches.
- Promptly Remove Contaminants: Remove bird droppings, tree sap, and bug splatters as soon as possible to prevent them from etching into the paint.
8. When to Seek Professional Help
While many scratches can be repaired at home, some damage is best left to professionals. Consider seeking professional help in the following situations:
- Deep Scratches: Scratches that expose bare metal or plastic require specialized tools and techniques to repair properly.
- Large Areas of Damage: Extensive scratches or damage to multiple panels may be too challenging to repair at home.
- Color Matching Issues: Matching the exact color of your car’s paint can be difficult, especially with metallic or pearlescent finishes. Professionals have the expertise and equipment to ensure a perfect color match.
- Lack of Experience: If you are unsure about any step of the repair process, it’s best to consult a professional to avoid causing further damage.
9. Cost-Effective Solutions for Scratch Repair from CARDIAGTECH.NET
CARDIAGTECH.NET offers a range of cost-effective solutions for scratch repair, catering to both DIY enthusiasts and professional technicians. Our selection includes:
- Polishing Machines: Dual-action polishers that make paint correction easier and more efficient.
- Polishing Compounds and Pads: High-quality compounds and pads for removing scratches and restoring paint gloss.
- Touch-Up Paint Kits: Complete kits with touch-up paint, clear coat, and applicators for seamless scratch repair.
- Detailing Tools: A variety of brushes, applicators, and microfiber cloths for thorough cleaning and detailing.
10. Real-World Examples and Case Studies
To illustrate the effectiveness of these scratch repair techniques, here are a few real-world examples and case studies:
- Case Study 1: Clear Coat Scratch Repair:
- Problem: A white car had numerous swirl marks and light scratches on the clear coat due to improper washing techniques.
- Solution: The owner used a dual-action polisher with a polishing compound to remove the scratches. After polishing, they applied a coat of wax to protect the paint.
- Result: The swirl marks and scratches were completely removed, restoring the paint’s gloss and shine.
- Case Study 2: Deep Scratch Repair with Touch-Up Paint:
- Problem: A white car had a deep scratch on the door that exposed the base coat.
- Solution: The owner cleaned the area, applied touch-up paint in thin layers, and allowed it to dry completely. They then sanded the touch-up paint to level it with the surrounding paint, polished the area, and applied a clear coat.
- Result: The scratch was filled and blended seamlessly with the surrounding paint, making it virtually invisible.
- Case Study 3: Severe Scratch Repair by a Professional:
- Problem: A white car had a deep scratch on the fender that exposed bare metal and caused rust.
- Solution: A professional body shop sanded the area, applied body filler to restore the shape of the fender, primed and painted the area with a color-matched paint system, and applied a clear coat.
- Result: The fender was completely restored to its original condition, with no signs of the scratch or rust.
11. Optimizing Your Car’s Appearance with CARDIAGTECH.NET Products
CARDIAGTECH.NET is committed to providing high-quality products that help you maintain and optimize your car’s appearance. Our range of detailing tools, paint correction products, and protective coatings are designed to deliver professional-level results at home. Whether you’re dealing with minor scratches or more significant paint damage, CARDIAGTECH.NET has the solutions you need to keep your car looking its best.
Don’t let scratches diminish the beauty of your white car. With the right tools, techniques, and products from CARDIAGTECH.NET, you can effectively repair scratches and maintain a flawless finish.
12. Why Choose CARDIAGTECH.NET for Your Auto Repair Needs?
Choosing the right supplier for your auto repair tools and equipment is crucial for achieving professional results. CARDIAGTECH.NET stands out for several reasons:
- Wide Selection: We offer a comprehensive range of products, from basic detailing tools to advanced paint correction systems.
- Quality Products: We source our products from trusted manufacturers, ensuring durability and performance.
- Expert Advice: Our team of experienced technicians can provide expert advice and support to help you choose the right products and techniques for your specific needs.
- Competitive Pricing: We offer competitive pricing on all our products, making professional-quality auto repair accessible to everyone.
- Customer Satisfaction: We are committed to customer satisfaction and offer a hassle-free return policy.
13. Understanding Paint Codes for White Cars
White cars, while seemingly straightforward, come in various shades and finishes. To ensure a perfect match when applying touch-up paint, it’s crucial to know your car’s specific paint code. Here’s how to find it:
- Check the Owner’s Manual: The paint code is often listed in the owner’s manual, usually in the section on vehicle specifications.
- Look for the Sticker: The paint code is typically printed on a sticker located in one of the following places:
- Door Jamb: Check the driver’s side door jamb.
- Glove Compartment: Look inside the glove compartment.
- Engine Compartment: Check under the hood, often on the firewall or strut tower.
- Contact Your Dealer: If you can’t find the paint code, contact your car’s manufacturer or a local dealer. They can usually provide the paint code based on your car’s VIN (Vehicle Identification Number).
Once you have the paint code, you can purchase touch-up paint that matches your car’s exact color. This will ensure a seamless repair and a professional-looking finish.
14. Addressing Common Mistakes in Scratch Repair
Even with careful preparation and the right tools, mistakes can happen during scratch repair. Here are some common pitfalls and how to avoid them:
- Using the Wrong Products:
- Mistake: Using household cleaners or abrasive materials that can damage the paint.
- Solution: Always use automotive-specific products designed for paint repair.
- Applying Too Much Touch-Up Paint:
- Mistake: Applying thick layers of touch-up paint that create an uneven surface.
- Solution: Apply thin layers of touch-up paint, allowing each layer to dry before applying the next.
- Sanding Too Aggressively:
- Mistake: Using coarse-grit sandpaper or applying too much pressure, which can damage the surrounding paint.
- Solution: Use fine-grit sandpaper and a sanding block, and apply light, even pressure.
- Skipping the Polishing Step:
- Mistake: Failing to polish the repaired area, resulting in a dull or uneven finish.
- Solution: Always polish the repaired area with a polishing compound and a buffing pad to restore the paint’s gloss.
- Ignoring Weather Conditions:
- Mistake: Performing scratch repair in direct sunlight or extreme temperatures.
- Solution: Work in a shaded area or a temperature-controlled garage to ensure proper drying and adhesion of the paint.
By avoiding these common mistakes, you can achieve a professional-looking scratch repair and maintain the appearance of your white car.
15. Legal and Safety Considerations for Auto Body Repair
When performing auto body repairs, it’s essential to be aware of legal and safety considerations. Here are some key points to keep in mind:
- Local Regulations: Check local regulations regarding auto body repairs, especially if you plan to perform extensive work. Some areas may require permits or licenses for certain types of repairs.
- Safety Equipment: Always wear safety glasses, gloves, and a respirator when sanding, painting, or working with chemicals.
- Proper Ventilation: Ensure proper ventilation when working with paints, solvents, and other chemicals.
- Disposal of Waste: Dispose of waste materials, such as used sandpaper, paint cans, and rags, according to local regulations.
- Insurance Coverage: Understand your insurance coverage for auto body repairs. Some policies may cover the cost of repairs, while others may require you to pay out of pocket.
16. The Future of Car Scratch Repair Technology
The field of car scratch repair is constantly evolving, with new technologies and techniques emerging all the time. Some of the most promising developments include:
- Self-Healing Paints: These innovative paints can repair minor scratches automatically when exposed to heat or sunlight.
- Nanotechnology Coatings: Nanotechnology coatings provide a durable and scratch-resistant barrier that protects the paint from damage.
- Laser Scratch Removal: Laser technology can precisely remove scratches without damaging the surrounding paint.
- Advanced Polishing Compounds: New polishing compounds are formulated with advanced abrasives that can remove scratches more effectively and efficiently.
As these technologies become more widely available, they will revolutionize the way we repair and maintain car paint, making it easier and more affordable to keep our vehicles looking their best.
17. How to Choose the Right Scratch Repair Kit
Selecting the appropriate scratch repair kit is crucial for achieving effective results. Here’s a guide to help you make the right choice:
- Identify the Type of Scratch: Determine whether the scratch is a clear coat scratch, base coat scratch, or primer scratch. This will help you choose a kit that contains the necessary materials for the repair.
- Consider the Color of Your Car: Ensure that the kit includes touch-up paint that matches your car’s exact color.
- Check the Contents of the Kit: Look for a kit that includes all the essential tools and materials, such as polishing compound, sandpaper, applicators, and microfiber cloths.
- Read Customer Reviews: Check online reviews to see what other customers have to say about the kit’s effectiveness and ease of use.
- Consider Your Skill Level: Choose a kit that matches your skill level. If you’re a beginner, opt for a simple kit with clear instructions.
18. Environmental Considerations for Car Care
Taking care of your car doesn’t have to come at the expense of the environment. Here are some eco-friendly car care tips:
- Use Biodegradable Car Wash Soap: Choose car wash soap that is biodegradable and free of harsh chemicals.
- Conserve Water: Use a water-saving nozzle when washing your car, or opt for a waterless car wash product.
- Dispose of Waste Properly: Recycle used oil, antifreeze, and other fluids at designated collection centers.
- Choose Eco-Friendly Products: Look for waxes, sealants, and other car care products that are made with natural or sustainable ingredients.
19. The Importance of Regular Car Detailing
Regular car detailing is essential for maintaining the appearance and value of your vehicle. Detailing involves a thorough cleaning, polishing, and protection of both the interior and exterior of the car. Here are some benefits of regular car detailing:
- Protects the Paint: Detailing helps protect the paint from UV rays, oxidation, and other environmental factors.
- Removes Contaminants: Detailing removes dirt, grime, and other contaminants that can damage the paint and interior surfaces.
- Restores the Shine: Detailing can restore the paint’s gloss and shine, making your car look like new.
- Maintains the Value: Regular detailing can help maintain the value of your car, making it easier to sell or trade in.
20. Connect with CARDIAGTECH.NET for Expert Assistance
At CARDIAGTECH.NET, we’re dedicated to providing top-notch tools and support for all your auto repair needs. Whether you’re tackling minor scratches or undertaking major bodywork, our extensive selection and expert advice are here to help.
Ready to take the next step in perfecting your car’s appearance?
- Visit our website: CARDIAGTECH.NET to explore our full range of products.
- Contact us on WhatsApp: +1 (641) 206-8880 for personalized advice and support.
- Visit our store: 276 Reock St, City of Orange, NJ 07050, United States, and speak with our knowledgeable staff.
Let CARDIAGTECH.NET be your partner in achieving a flawless finish and maintaining the beauty of your vehicle. Contact us today and experience the difference that quality tools and expert support can make.
FAQ: How to Fix a Scrape on a White Car
-
Q1: Can I use toothpaste to remove scratches from my white car?
- A: Toothpaste may help with very light clear coat scratches by smoothing the edges, but it’s not a long-term solution and can potentially damage the paint if used improperly.
-
Q2: What’s the best way to prepare the area before fixing a scratch?
- A: Clean the area with car wash soap and water, dry it thoroughly, use a detailing clay bar to remove contaminants, and then clean with rubbing alcohol or automotive degreaser.
-
Q3: How do I apply touch-up paint to a deep scratch?
- A: Apply thin layers of touch-up paint using a fine-tip applicator, allowing each layer to dry before applying the next. Overfill the scratch slightly to create a small mound of paint.
-
Q4: What grit sandpaper should I use for leveling touch-up paint?
- A: Use fine-grit sandpaper (e.g., 3000 grit) wrapped around a sanding block to lightly sand the touch-up paint until it’s level with the surrounding paint.
-
Q5: Why is polishing important after sanding a scratch repair?
- A: Polishing removes sanding marks and restores the paint’s gloss, creating a seamless repair.
-
Q6: How often should I wax my white car to prevent scratches?
- A: Apply a coat of wax or sealant every few months to protect the paint from UV rays, oxidation, and minor abrasions.
-
Q7: Is it better to hand wash or use an automatic car wash for my white car?
- A: Hand washing is preferable as automatic car washes can cause scratches due to abrasive brushes and harsh chemicals.
-
Q8: What should I do if the scratch exposes bare metal?
- A: Apply a thin layer of automotive primer to the scratch and allow it to dry completely before applying touch-up paint.
-
Q9: How can I find my car’s paint code?
- A: Check the owner’s manual, look for a sticker on the door jamb, glove compartment, or engine compartment, or contact your car’s manufacturer or local dealer.
-
Q10: When should I seek professional help for scratch repair?
- A: If the scratch is deep, covers a large area, or if you’re unsure about any step of the repair process, it’s best to consult a professional.
Don’t let auto repair challenges slow you down. Contact CARDIAGTECH.NET at +1 (641) 206-8880 for expert advice and the best tools to get the job done right.