How to Fix a Scratch in Leather Car Seat
Finding a scratch on your leather car seat can be frustrating. CARDIAGTECH.NET offers solutions to repair and protect your car’s interior, preserving its value and appearance. Discover expert tips and preventative measures for leather care to maintain your vehicle’s pristine condition. This guide will cover leather conditioning, repair kits, and professional services.
1. Understanding Leather Damage in Car Seats
Leather car seats enhance the luxury and comfort of your vehicle, but they are susceptible to damage. Understanding the common causes and types of scratches is essential for proper care and maintenance.
1.1. Common Causes of Leather Scratches
Several factors can lead to scratches on leather car seats:
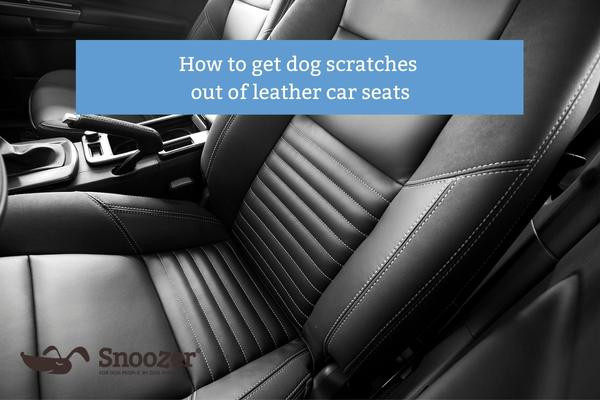
- Pets: Dogs and cats can unintentionally scratch leather with their claws, especially during travel.
- Sharp Objects: Keys, buckles, and other sharp items can cause scratches when rubbed against the leather.
- Accidental Scuffs: Everyday wear and tear, such as sliding in and out of the car, can lead to scuffs and scratches.
- Improper Cleaning: Using harsh chemicals or abrasive cleaners can damage the leather’s surface, making it more prone to scratches.
1.2. Types of Leather Used in Car Seats
The type of leather used in your car seats affects how easily it scratches and how it can be repaired:
- Pigmented Leather (Protected Leather): This is the most common type of leather used in cars. It has a protective coating that makes it durable and resistant to scratches and stains.
- Aniline Leather (Unprotected Leather): This type of leather is more luxurious but also more delicate. It lacks a protective coating, making it more susceptible to scratches and damage.
- Semi-Aniline Leather: This leather has a light protective coating, offering a balance between the natural look of aniline leather and the durability of pigmented leather.
- Nappa Leather: Known for its softness and smoothness, Nappa leather is a full-grain, unsplit leather made from lamb, kid, or deer skin. It is often used in luxury vehicles.
1.3. Identifying the Severity of the Scratch
Before attempting any repairs, assess the depth and severity of the scratch:
- Light Scratches: These are superficial marks that only affect the surface of the leather. They can often be buffed out with leather conditioner.
- Medium Scratches: These scratches penetrate the leather’s surface but do not cause significant damage. They may require a leather repair kit.
- Deep Scratches: These are significant cuts or tears in the leather that require professional repair.
Dog scratches on a leather car seat
2. Essential Tools and Materials for Leather Scratch Repair
Having the right tools and materials is crucial for effectively repairing scratches in leather car seats. CARDIAGTECH.NET provides a range of high-quality tools and products to help you achieve professional results.
2.1. Cleaning Supplies
- Leather Cleaner: Use a pH-balanced leather cleaner to remove dirt and grime without damaging the leather.
- Microfiber Cloths: Soft, lint-free microfiber cloths are essential for cleaning and buffing leather surfaces.
- Soft Brush: A soft-bristled brush can help to gently remove dirt from textured leather.
- Isopropyl Alcohol: Use isopropyl alcohol to clean the scratched area before applying any repair products.
2.2. Leather Conditioning Products
- Leather Conditioner: A high-quality leather conditioner will moisturize the leather and help to restore its flexibility.
- Leather Oil: Leather oil can be used to nourish and protect the leather, especially in dry climates.
- Leather Balm: Leather balm provides a protective layer and helps to prevent future scratches and damage.
2.3. Repair Tools
- Leather Repair Kit: A comprehensive leather repair kit should include leather filler, colorants, and applicators.
- Leather Glue: Specialized leather glue is needed for repairing deeper scratches and tears.
- Sanding Block: Use a fine-grit sanding block to smooth out the repaired area.
- Palette Knife: A palette knife is useful for applying leather filler evenly.
- Heat Gun or Hair Dryer: A heat gun or hair dryer can help to speed up the drying process of leather filler and colorants.
2.4. Safety Gear
- Gloves: Wear gloves to protect your hands from chemicals and dyes.
- Mask: Use a mask to avoid inhaling fumes from cleaning and repair products.
- Eye Protection: Wear safety glasses to protect your eyes from splashes and debris.
3. Step-by-Step Guide to Fixing Minor Scratches
Minor scratches can often be repaired with simple cleaning and conditioning. Follow these steps to restore your leather car seats.
3.1. Cleaning the Affected Area
- Prepare the Area: Park your car in a shaded area to prevent the leather from drying out too quickly.
- Vacuum the Seat: Use a vacuum cleaner with a soft brush attachment to remove any loose dirt and debris from the seat.
- Apply Leather Cleaner: Spray a small amount of leather cleaner onto a microfiber cloth.
- Wipe the Area: Gently wipe the scratched area in a circular motion. Avoid applying too much pressure.
- Remove Excess Cleaner: Use a clean, dry microfiber cloth to remove any excess cleaner from the leather.
- Allow to Dry: Let the area air dry for at least 30 minutes.
3.2. Conditioning the Leather
- Apply Leather Conditioner: Apply a small amount of leather conditioner to a clean microfiber cloth.
- Buff the Leather: Gently buff the scratched area in a circular motion.
- Allow to Absorb: Let the conditioner absorb into the leather for at least 2 hours.
- Remove Excess Conditioner: Use a clean, dry microfiber cloth to remove any excess conditioner from the leather.
- Reapply if Necessary: If the scratch is still visible, reapply the conditioner and repeat the buffing process.
3.3. Homemade Leather Conditioner Recipes
If you prefer a DIY approach, you can use household products to condition your leather:
- White Vinegar and Linseed Oil: Mix one part white vinegar with two parts linseed oil. Apply to the leather with a microfiber cloth, buff, and let dry.
- Warm Water, Mild Soap, and White Vinegar: Mix warm water with a small amount of mild liquid soap and a few drops of white vinegar. Apply to the leather with a microfiber cloth, wipe, and let dry.
- Olive Oil: Apply a small amount of olive oil to a microfiber cloth and buff the leather. Be cautious, as olive oil can darken the leather.
Always test any homemade conditioner on an inconspicuous area first to ensure it does not damage or discolor the leather.
4. Repairing Deeper Scratches with a Leather Repair Kit
Deeper scratches require more extensive repair using a leather repair kit. CARDIAGTECH.NET offers a variety of kits that include everything you need to restore your leather car seats.
4.1. Preparing the Damaged Area
- Clean the Area: Use leather cleaner to remove any dirt and grime from the scratched area.
- Sand the Area: Use a fine-grit sanding block to gently smooth out the edges of the scratch.
- Clean Again: Wipe the area with isopropyl alcohol to remove any sanding residue.
4.2. Applying Leather Filler
- Apply Leather Filler: Use a palette knife to apply a small amount of leather filler to the scratch.
- Smooth the Filler: Smooth the filler evenly across the scratch, making sure to fill it completely.
- Remove Excess Filler: Use the palette knife to remove any excess filler from the surrounding area.
- Allow to Dry: Let the filler dry completely according to the manufacturer’s instructions. This may take several hours.
4.3. Sanding and Smoothing the Repaired Area
- Sand the Filler: Use a fine-grit sanding block to gently sand the dried filler until it is smooth and even with the surrounding leather.
- Clean the Area: Wipe the area with isopropyl alcohol to remove any sanding residue.
4.4. Matching the Color
- Mix Colorants: Use the colorants included in the leather repair kit to mix a color that matches your car’s leather.
- Test the Color: Apply a small amount of the mixed color to an inconspicuous area to ensure it matches.
- Adjust if Necessary: Adjust the color by adding more colorants until you achieve a perfect match.
4.5. Applying Colorant
- Apply Colorant: Use a small brush or sponge to apply the colorant to the repaired area.
- Blend the Color: Blend the colorant into the surrounding leather to create a seamless finish.
- Apply Multiple Coats: Apply multiple thin coats of colorant, allowing each coat to dry completely before applying the next.
- Dry the Colorant: Use a heat gun or hair dryer to speed up the drying process.
4.6. Applying Leather Conditioner
- Apply Conditioner: Apply a small amount of leather conditioner to a clean microfiber cloth.
- Buff the Area: Gently buff the repaired area in a circular motion.
- Allow to Absorb: Let the conditioner absorb into the leather for at least 2 hours.
- Remove Excess Conditioner: Use a clean, dry microfiber cloth to remove any excess conditioner from the leather.
5. Using Leather Glue for Significant Tears
For deeper tears, leather glue can provide a strong and lasting repair. CARDIAGTECH.NET offers specialized leather glues that are designed to bond leather effectively.
5.1. Preparing the Tear
- Clean the Area: Use leather cleaner to remove any dirt and grime from the torn area.
- Align the Edges: Carefully align the edges of the tear.
- Secure the Edges: Use masking tape to hold the edges of the tear in place.
5.2. Applying Leather Glue
- Apply Leather Glue: Apply a small amount of leather glue to both edges of the tear.
- Press the Edges Together: Press the edges of the tear together firmly.
- Remove Excess Glue: Use a clean, damp cloth to remove any excess glue from the surface of the leather.
- Allow to Dry: Let the glue dry completely according to the manufacturer’s instructions. This may take several hours.
5.3. Applying Leather Filler (If Necessary)
- Apply Leather Filler: If there is still a gap in the tear, apply a small amount of leather filler to fill it.
- Smooth the Filler: Smooth the filler evenly across the tear.
- Remove Excess Filler: Use a palette knife to remove any excess filler from the surrounding area.
- Allow to Dry: Let the filler dry completely according to the manufacturer’s instructions.
5.4. Sanding and Smoothing the Repaired Area
- Sand the Filler: Use a fine-grit sanding block to gently sand the dried filler until it is smooth and even with the surrounding leather.
- Clean the Area: Wipe the area with isopropyl alcohol to remove any sanding residue.
5.5. Matching the Color and Applying Colorant
- Mix Colorants: Use the colorants included in the leather repair kit to mix a color that matches your car’s leather.
- Test the Color: Apply a small amount of the mixed color to an inconspicuous area to ensure it matches.
- Adjust if Necessary: Adjust the color by adding more colorants until you achieve a perfect match.
- Apply Colorant: Use a small brush or sponge to apply the colorant to the repaired area.
- Blend the Color: Blend the colorant into the surrounding leather to create a seamless finish.
- Apply Multiple Coats: Apply multiple thin coats of colorant, allowing each coat to dry completely before applying the next.
- Dry the Colorant: Use a heat gun or hair dryer to speed up the drying process.
5.6. Applying Leather Conditioner
- Apply Conditioner: Apply a small amount of leather conditioner to a clean microfiber cloth.
- Buff the Area: Gently buff the repaired area in a circular motion.
- Allow to Absorb: Let the conditioner absorb into the leather for at least 2 hours.
- Remove Excess Conditioner: Use a clean, dry microfiber cloth to remove any excess conditioner from the leather.
6. When to Seek Professional Help
While many scratches can be repaired at home, some damage requires professional attention. CARDIAGTECH.NET can connect you with trusted mechanics and service centers for expert leather repair.
6.1. Severe Damage
If the leather is deeply torn or extensively damaged, professional repair is necessary. Attempting to repair severe damage yourself can worsen the problem and lead to costly replacements.
6.2. Luxury Leather
Luxury cars often use high-end leather, such as Nappa leather, which requires specialized care. DIY methods can damage these delicate materials. Consult a professional for repairs to ensure the leather’s integrity is maintained.
6.3. Lack of Confidence
If you are not confident in your ability to repair the scratch, it is best to seek professional help. A professional can assess the damage and perform the necessary repairs without causing further harm.
6.4. Cost Analysis
Before attempting a DIY repair, consider the cost of materials and the potential for mistakes. Professional repair may be more cost-effective in the long run, especially for significant damage.
7. Protecting Your Leather Car Seats
Prevention is key to maintaining the condition of your leather car seats. CARDIAGTECH.NET offers a range of protective products to keep your leather looking its best.
7.1. Regular Cleaning and Conditioning
- Clean Regularly: Clean your leather car seats every few weeks to remove dirt and grime.
- Condition Regularly: Condition your leather car seats every few months to keep them moisturized and flexible.
7.2. Using Seat Covers
Seat covers provide a protective barrier against scratches, spills, and UV damage.
- Choose Quality Covers: Select seat covers made from durable, breathable materials.
- Ensure Proper Fit: Make sure the seat covers fit snugly to prevent them from slipping and causing further damage.
7.3. Avoiding Sharp Objects
Be mindful of sharp objects that can scratch the leather.
- Remove Sharp Items: Remove keys, buckles, and other sharp items from your pockets before sitting down.
- Use Protective Cases: Use protective cases for electronic devices and other items that could scratch the leather.
7.4. Protecting from Pets
If you travel with pets, take steps to protect your leather car seats from their claws.
- Trim Nails: Keep your pet’s nails trimmed to minimize the risk of scratching.
- Use Pet Seat Covers: Use pet seat covers or car seat hammocks to create a barrier between your pet and the leather seats.
- Consider a Dog Car Seat: For smaller dogs, a dog car seat can keep them safe and comfortable while protecting your car’s interior.
7.5. Parking in the Shade
Parking in the shade can prevent UV damage to your leather car seats.
- Use a Sunshade: Use a sunshade to block sunlight from entering your car.
- Park in Garages: Park in garages or covered parking areas whenever possible.
8. Advanced Leather Care Techniques
For those looking to take their leather care to the next level, advanced techniques can provide even greater protection and restoration.
8.1. Leather Dying
If the color of your leather has faded or become uneven, leather dying can restore its original appearance.
- Professional Dying: Consider professional leather dying for best results.
- DIY Dying Kits: If you choose to dye the leather yourself, use a high-quality leather dye kit and follow the instructions carefully.
8.2. Leather Restoration
Leather restoration involves a comprehensive process of cleaning, repairing, and conditioning the leather.
- Professional Restoration: Professional leather restoration can restore heavily damaged leather to its original condition.
- DIY Restoration Kits: DIY restoration kits can be used for minor damage, but they require careful attention to detail.
8.3. Ceramic Coating for Leather
Ceramic coating provides a protective layer that repels water, dirt, and UV rays.
- Professional Application: Professional ceramic coating application ensures even coverage and long-lasting protection.
- DIY Ceramic Coating Kits: DIY ceramic coating kits can be used for leather, but they require careful preparation and application.
9. Maintaining Leather Car Seats in Different Climates
Different climates can affect leather in various ways. Understanding these effects and adapting your maintenance routine accordingly is essential for long-term care.
9.1. Hot and Dry Climates
In hot and dry climates, leather can dry out and crack.
- Condition Regularly: Condition your leather car seats more frequently to keep them moisturized.
- Use Leather Oil: Use leather oil to nourish and protect the leather from drying out.
- Park in the Shade: Park in the shade to prevent the leather from overheating.
9.2. Cold and Humid Climates
In cold and humid climates, leather can become stiff and moldy.
- Clean Regularly: Clean your leather car seats regularly to prevent mold growth.
- Use a Dehumidifier: Use a dehumidifier in your car to reduce moisture levels.
- Condition Regularly: Condition your leather car seats to keep them flexible and prevent cracking.
9.3. Coastal Climates
In coastal climates, salt air can damage leather.
- Clean Regularly: Clean your leather car seats regularly to remove salt residue.
- Use a Protective Balm: Use a leather balm to provide a protective layer against salt damage.
- Park Indoors: Park indoors to protect the leather from salt air.
10. The Science Behind Leather Care
Understanding the science behind leather care can help you make informed decisions about the products and techniques you use.
10.1. Leather Structure
Leather is made up of collagen fibers that provide strength and flexibility. Proper care helps maintain these fibers.
- Collagen Fibers: Collagen fibers are the building blocks of leather.
- Tanning Process: The tanning process preserves the collagen fibers and makes the leather durable.
10.2. pH Balance
Maintaining the proper pH balance is essential for preventing damage to the leather.
- pH-Balanced Cleaners: Use pH-balanced cleaners to avoid damaging the leather’s surface.
- Acidic and Alkaline Damage: Avoid using acidic or alkaline products that can break down the collagen fibers.
10.3. Moisture Levels
Maintaining the proper moisture levels is crucial for preventing cracking and drying.
- Conditioning Agents: Conditioning agents help to replenish moisture and keep the leather flexible.
- Environmental Factors: Environmental factors such as humidity and temperature can affect the moisture levels in leather.
CARDIAGTECH.NET understands the challenges you face in maintaining your vehicle. Our tools and equipment are designed to make your work more efficient, accurate, and safe. Contact us at +1 (641) 206-8880 or visit CARDIAGTECH.NET at 276 Reock St, City of Orange, NJ 07050, United States, for expert advice and immediate assistance.
FAQ: Leather Car Seat Scratch Repair
1. Can I use regular household cleaners on my leather car seats?
No, regular household cleaners can damage leather. Use a pH-balanced leather cleaner specifically designed for car seats.
2. How often should I condition my leather car seats?
Condition your leather car seats every 3-6 months, or more frequently in hot and dry climates.
3. What is the best way to prevent scratches from pets?
Keep your pet’s nails trimmed and use pet seat covers or car seat hammocks.
4. Can I repair a tear in my leather car seat myself?
Small tears can be repaired with leather glue and filler. Larger tears may require professional repair.
5. How do I match the color of my leather for repairs?
Use a leather repair kit with colorants to mix a color that matches your car’s leather. Test the color on an inconspicuous area before applying it to the damaged area.
6. What is Nappa leather, and how do I care for it?
Nappa leather is a full-grain, unsplit leather made from lamb, kid, or deer skin. It requires specialized care and should be cleaned and conditioned with products specifically designed for delicate leather.
7. Can UV rays damage my leather car seats?
Yes, UV rays can cause fading and cracking. Use a sunshade and park in the shade to protect your leather car seats.
8. What is the best type of leather conditioner to use?
The best type of leather conditioner depends on the type of leather in your car. Look for conditioners that are specifically designed for automotive leather and that contain moisturizing agents.
9. How do I clean and condition perforated leather car seats?
Use a soft brush to gently clean the perforated areas. Apply leather conditioner sparingly and wipe off any excess to prevent clogging the perforations.
10. Is it worth it to hire a professional for leather repair?
Hiring a professional is often worth it for severe damage or if you are not confident in your ability to repair the leather yourself. Professional repair can ensure the damage is fixed correctly and prevent further harm.