How To Fix A Thermostat In Car: Expert Guide
Fixing a thermostat in your car is essential for maintaining optimal engine performance and preventing costly damage. A malfunctioning thermostat can lead to overheating, poor fuel efficiency, and other issues. CARDIAGTECH.NET provides the tools and knowledge to diagnose and resolve thermostat problems efficiently. Learn how to identify signs of a bad thermostat, perform necessary repairs, and ensure your vehicle runs smoothly with proper coolant flow.
1. Understanding the Thermostat’s Role
The thermostat is a critical component in your car’s cooling system. Its primary function is to regulate the engine’s temperature by controlling the flow of coolant. When the engine is cold, the thermostat remains closed, allowing the engine to warm up quickly. Once the engine reaches its optimal operating temperature (typically between 195-220°F or 90-104°C), the thermostat opens, allowing coolant to circulate through the radiator to prevent overheating. A properly functioning thermostat ensures efficient engine operation, reduces wear and tear, and optimizes fuel economy.
1.1. Why Thermostat Function Matters
The thermostat plays a crucial role in maintaining the balance between rapid warm-up and preventing overheating. If the thermostat fails to open, the engine can overheat, leading to severe damage such as blown head gaskets, cracked cylinder heads, or even a seized engine. Conversely, if the thermostat stays open, the engine may never reach its optimal operating temperature, resulting in reduced fuel efficiency and increased emissions. Regular thermostat maintenance and timely replacement are essential for vehicle longevity and performance. CARDIAGTECH.NET offers a range of tools to help you diagnose and address thermostat issues effectively.
1.2. The Science of Thermostat Operation
Thermostats typically contain a wax pellet that expands when heated. This expansion pushes a valve open, allowing coolant to flow to the radiator. The wax is specifically calibrated to melt at the engine’s ideal operating temperature. This mechanical operation ensures that the engine warms up quickly and maintains a consistent temperature. Over time, the wax can degrade, or the valve can become stuck due to corrosion or debris. Understanding this basic principle helps in diagnosing thermostat failures. Accurate diagnostics are easily performed with the diagnostic tools available at CARDIAGTECH.NET.
2. Common Signs of a Faulty Thermostat
Recognizing the symptoms of a failing thermostat early can prevent significant engine damage. Common signs include temperature fluctuations, engine overheating, poor fuel efficiency, heater issues, and low coolant levels. Identifying these issues promptly allows for timely repairs and can save you money in the long run. CARDIAGTECH.NET offers diagnostic equipment to help you accurately identify thermostat problems.
2.1. Temperature Fluctuations
Erratic temperature gauge readings are a common symptom of a failing thermostat. If you notice the temperature gauge moving rapidly between hot and cold or fluctuating unexpectedly, it could indicate a problem with the thermostat’s ability to regulate coolant flow. Such fluctuations can lead to inefficient engine operation and potential overheating.
2.2. Engine Overheating
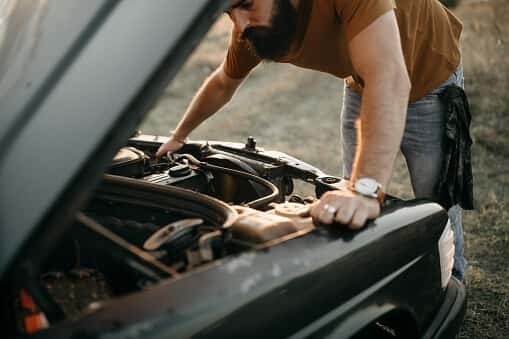
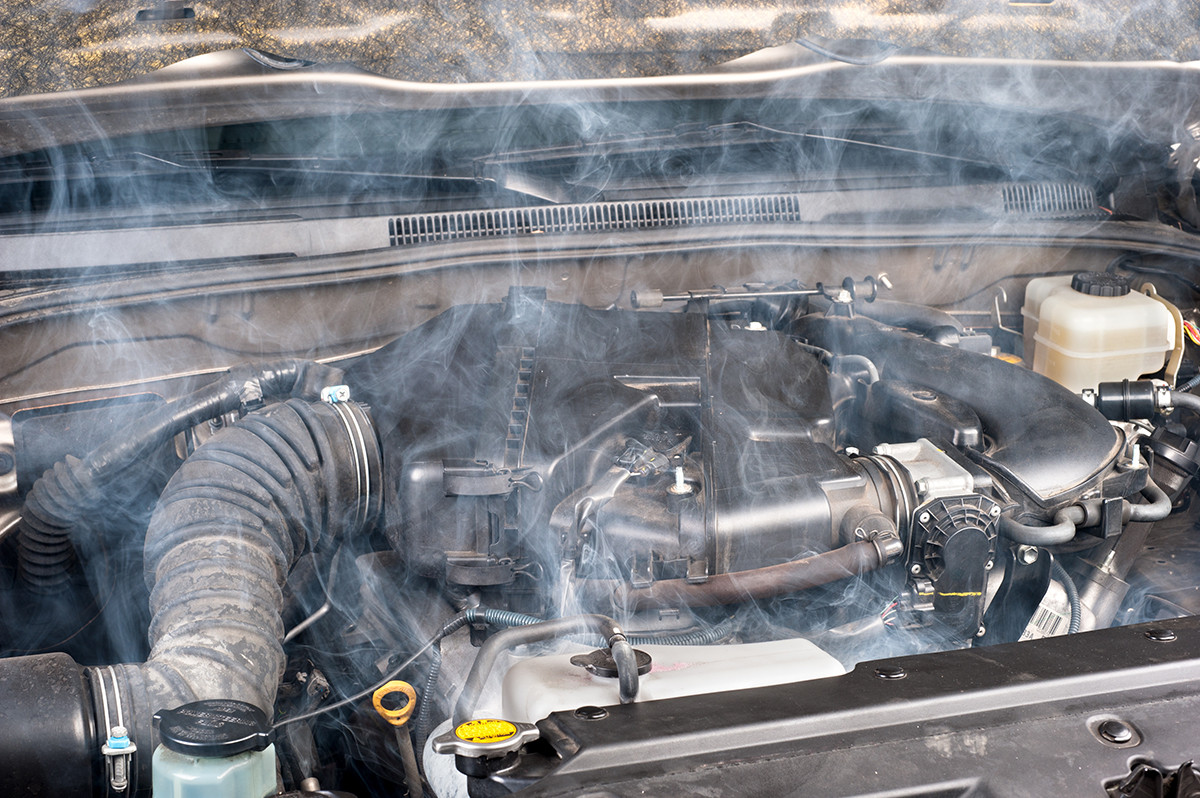
One of the most critical signs of a bad thermostat is engine overheating. This occurs when the thermostat is stuck closed, preventing coolant from circulating through the radiator. If your temperature gauge consistently shows a high reading or if you notice steam coming from under the hood, your engine is likely overheating. Overheating can cause severe damage, so it’s essential to address the issue immediately.
Engine overheating with steam emanating from under the hood, indicating a malfunctioning thermostat and potential engine damage.
2.3. Poor Fuel Efficiency
A malfunctioning thermostat can lead to poor fuel efficiency. If the thermostat remains open, the engine will take longer to reach its optimal operating temperature. This causes the engine control unit (ECU) to run the engine in a “cold start” mode for an extended period, which consumes more fuel. If you notice a significant drop in your car’s fuel economy, a faulty thermostat could be the cause.
2.4. Heater Issues
A failing thermostat can also affect your vehicle’s heating system. If the thermostat is stuck closed, it can restrict coolant flow to the heater core, resulting in weak or no heat in the cabin. Conversely, if the thermostat is stuck open, the engine may never reach its optimal temperature, leading to inadequate heat output.
2.5. Low Coolant Levels
Consistently low coolant levels can indicate a thermostat issue. When the thermostat malfunctions, it can cause coolant to get trapped in the engine, leading to a drop in coolant levels in the radiator. If you frequently need to add coolant to your system, it’s a sign that something is wrong.
3. Tools and Materials Needed
Before you begin the process of fixing or replacing your car’s thermostat, gather all the necessary tools and materials. Having everything on hand will make the job smoother and more efficient. CARDIAGTECH.NET provides a comprehensive range of automotive tools to ensure you have what you need for any repair.
3.1. Essential Tools
- Socket Set: A set of sockets and wrenches is essential for removing and installing the thermostat housing.
- Pliers: Pliers can be useful for disconnecting hoses and clamps.
- Screwdrivers: Both flathead and Phillips screwdrivers may be needed depending on your vehicle.
- Torque Wrench: A torque wrench is necessary to tighten bolts to the manufacturer’s specified torque.
- Drain Pan: A drain pan will catch coolant when you drain the system.
- Scan Tool: A scan tool helps diagnose the issue and clear any error codes.
3.2. Necessary Materials
- New Thermostat: Ensure you have the correct thermostat for your vehicle’s make and model.
- Coolant: Use the type of coolant recommended by your vehicle manufacturer.
- Thermostat Gasket or O-Ring: Replace the gasket or O-ring when you replace the thermostat to ensure a good seal.
- Distilled Water: Use distilled water to mix with the coolant.
- Shop Rags: Have plenty of shop rags on hand to clean up spills.
- Gloves and Eye Protection: Protect your hands and eyes when working with coolant and tools.
3.3. Advanced Diagnostic Tools from CARDIAGTECH.NET
CARDIAGTECH.NET offers advanced diagnostic tools that can help you pinpoint thermostat issues quickly and accurately. These tools include:
- OBD-II Scanners: Read and clear diagnostic trouble codes (DTCs) related to the cooling system.
- Infrared Thermometers: Measure the temperature of the thermostat housing and coolant hoses to identify temperature discrepancies.
- Pressure Testers: Check the cooling system for leaks.
4. Step-by-Step Guide to Fixing a Thermostat
Replacing a thermostat is a straightforward process that can be completed with basic tools and mechanical knowledge. However, it’s crucial to follow each step carefully to ensure the job is done correctly. This guide provides a detailed, step-by-step process for replacing your car’s thermostat.
4.1. Safety Precautions
Before starting any work on your vehicle, take necessary safety precautions:
- Allow the Engine to Cool: Never work on an engine while it’s hot. Wait for the engine to cool down completely to avoid burns.
- Disconnect the Battery: Disconnect the negative terminal of the battery to prevent electrical shorts.
- Wear Protective Gear: Wear gloves and eye protection to protect yourself from coolant and sharp objects.
- Work in a Well-Ventilated Area: Coolant can release harmful fumes, so work in a well-ventilated area.
4.2. Locating the Thermostat Housing
The thermostat housing is typically located where the upper radiator hose connects to the engine. It is usually a metal or plastic housing held in place by bolts. Refer to your vehicle’s repair manual for the exact location of the thermostat housing.
4.3. Draining the Coolant
Before removing the thermostat housing, you need to drain some of the coolant. Place a drain pan under the radiator drain valve (usually located at the bottom of the radiator). Open the drain valve to allow the coolant to flow into the pan. Only drain enough coolant to lower the level below the thermostat housing.
4.4. Removing the Thermostat Housing
Once the coolant is drained, you can remove the thermostat housing:
- Disconnect Hoses: Disconnect the radiator hose and any other hoses connected to the thermostat housing. Use pliers to loosen hose clamps if necessary.
- Remove Bolts: Use a socket set to remove the bolts holding the thermostat housing in place. Keep the bolts organized, as they may be different sizes.
- Remove Housing: Gently remove the thermostat housing. Be careful not to damage the mating surfaces.
4.5. Removing the Old Thermostat
With the thermostat housing removed, you can access the old thermostat:
- Inspect the Housing: Check the inside of the housing for corrosion or damage. Clean the mating surfaces with a scraper or wire brush.
- Remove the Thermostat: Carefully remove the old thermostat. Take note of its orientation, as the new thermostat must be installed in the same way.
4.6. Installing the New Thermostat
Install the new thermostat in the reverse order of removal:
- Install the Thermostat: Place the new thermostat into the housing, ensuring it is oriented correctly.
- Install New Gasket or O-Ring: Install a new gasket or O-ring to ensure a tight seal.
- Reassemble Housing: Reattach the thermostat housing to the engine, tightening the bolts to the manufacturer’s specified torque.
- Reconnect Hoses: Reconnect the radiator hose and any other hoses that were disconnected.
4.7. Refilling the Coolant
After installing the new thermostat, you need to refill the cooling system:
- Close Drain Valve: Close the radiator drain valve.
- Mix Coolant: Mix the coolant with distilled water according to the manufacturer’s recommendations (usually a 50/50 mix).
- Fill Coolant: Slowly fill the cooling system with the coolant mixture.
- Bleed Air: Bleed any air from the system by opening the bleeder valves (if equipped) or by squeezing the radiator hoses.
4.8. Testing the System
After refilling the coolant, start the engine and let it run for a few minutes. Monitor the temperature gauge to ensure the engine reaches its normal operating temperature and does not overheat. Check for leaks around the thermostat housing and hoses.
5. Advanced Diagnostics with CARDIAGTECH.NET Tools
CARDIAGTECH.NET provides advanced diagnostic tools to help you confirm that the thermostat replacement was successful and to identify any other potential issues in the cooling system.
5.1. Using an OBD-II Scanner
An OBD-II scanner can read and clear diagnostic trouble codes (DTCs) related to the cooling system. After replacing the thermostat, use the scanner to check for any new codes. If any codes are present, research them to identify the underlying issue.
5.2. Infrared Thermometer Checks
An infrared thermometer can be used to measure the temperature of the thermostat housing and coolant hoses. This can help you verify that the thermostat is opening and closing properly. Measure the temperature of the upper and lower radiator hoses after the engine has reached its operating temperature. The temperatures should be relatively consistent, indicating proper coolant flow.
5.3. Pressure Testing the Cooling System
A pressure tester can help you identify leaks in the cooling system. Attach the pressure tester to the radiator filler neck and pressurize the system to the manufacturer’s specified pressure. Check for leaks around the thermostat housing, hoses, and radiator.
6. Common Mistakes to Avoid
When replacing a thermostat, it’s essential to avoid common mistakes that can lead to further problems. Being aware of these pitfalls can help ensure a successful repair.
6.1. Using the Wrong Thermostat
Using the wrong thermostat for your vehicle can lead to inaccurate temperature regulation. Always check your vehicle’s repair manual or parts catalog to ensure you are using the correct thermostat for your make and model.
6.2. Neglecting to Replace the Gasket
Failing to replace the thermostat gasket or O-ring can result in coolant leaks. Always install a new gasket or O-ring when you replace the thermostat to ensure a tight seal.
6.3. Overtightening Bolts
Overtightening the bolts on the thermostat housing can damage the housing or strip the threads. Use a torque wrench to tighten the bolts to the manufacturer’s specified torque.
6.4. Improper Coolant Mixture
Using the wrong coolant mixture can lead to corrosion and overheating. Always mix the coolant with distilled water according to the manufacturer’s recommendations (usually a 50/50 mix).
6.5. Failing to Bleed Air from the System
Failing to bleed air from the cooling system can lead to air pockets that cause overheating. Bleed any air from the system by opening the bleeder valves (if equipped) or by squeezing the radiator hoses.
7. Maintaining Your Cooling System
Regular maintenance of your cooling system is essential for preventing thermostat issues and ensuring your engine runs smoothly. Here are some tips for maintaining your cooling system:
7.1. Regular Coolant Flushes
Perform regular coolant flushes according to your vehicle’s maintenance schedule. This helps remove any debris or contaminants that may have accumulated in the system.
7.2. Inspecting Hoses and Clamps
Regularly inspect the hoses and clamps for cracks, leaks, or damage. Replace any damaged hoses or clamps immediately.
7.3. Checking Coolant Levels
Regularly check the coolant levels in the radiator and overflow tank. Add coolant as needed to maintain the proper level.
7.4. Monitoring Temperature Gauge
Pay attention to the temperature gauge while driving. If you notice any unusual temperature fluctuations, address the issue immediately.
7.5. Professional Inspections
Have your cooling system professionally inspected at least once a year. A professional can identify potential problems before they lead to major damage.
8. The Benefits of Using CARDIAGTECH.NET Tools
CARDIAGTECH.NET offers a wide range of automotive tools and equipment designed to make thermostat repairs and cooling system maintenance easier and more efficient. Using CARDIAGTECH.NET tools can save you time and money while ensuring the job is done correctly.
8.1. High-Quality Tools
CARDIAGTECH.NET offers high-quality tools that are durable and reliable. Our tools are designed to withstand the rigors of automotive repair and provide accurate results.
8.2. Comprehensive Selection
CARDIAGTECH.NET offers a comprehensive selection of tools, including socket sets, pliers, screwdrivers, torque wrenches, scan tools, infrared thermometers, and pressure testers. We have everything you need for thermostat repairs and cooling system maintenance.
8.3. Expert Support
CARDIAGTECH.NET provides expert support to help you choose the right tools for your needs. Our knowledgeable staff can answer your questions and provide guidance on how to use our tools effectively.
8.4. Competitive Prices
CARDIAGTECH.NET offers competitive prices on all of our tools and equipment. We believe that everyone should have access to high-quality tools at an affordable price.
8.5. Convenience
CARDIAGTECH.NET makes it easy to purchase tools online. Our website is user-friendly and offers a secure shopping experience. We also offer fast shipping to get you the tools you need quickly.
9. Real-World Examples and Case Studies
To illustrate the importance of proper thermostat maintenance and repair, here are a few real-world examples and case studies.
9.1. Case Study 1: Overheating Engine
A vehicle owner noticed their engine was overheating frequently. They initially ignored the issue, assuming it was just a minor problem. However, the overheating continued, eventually leading to a blown head gasket. The repair cost was significant, including the cost of replacing the head gasket and machining the cylinder head. Had the owner addressed the thermostat issue earlier, they could have avoided the costly repair.
9.2. Case Study 2: Poor Fuel Economy
A driver experienced a significant drop in their car’s fuel economy. They tried various solutions, such as changing the air filter and using fuel additives, but none of them improved the fuel economy. Eventually, they had a mechanic check the thermostat, which was found to be stuck open. After replacing the thermostat, the car’s fuel economy returned to normal.
9.3. Real-World Example: Heater Malfunction
A vehicle’s heater stopped working during the winter. The owner assumed the problem was with the heater core or blower motor. However, after inspecting the thermostat, it was found to be stuck closed, preventing coolant from flowing to the heater core. Replacing the thermostat restored the heater function.
These examples highlight the importance of recognizing the signs of a faulty thermostat and taking prompt action to address the issue.
10. Thermostat Replacement: A Cost-Effective Solution
Replacing a faulty thermostat is a cost-effective solution that can prevent more significant engine damage and improve your vehicle’s performance. The cost of a new thermostat is relatively low, and the replacement process is straightforward.
10.1. Cost of a New Thermostat
The cost of a new thermostat typically ranges from $20 to $100, depending on the make and model of your vehicle.
10.2. Labor Costs
If you choose to have a professional mechanic replace the thermostat, labor costs can range from $50 to $200, depending on the shop’s hourly rate and the complexity of the job.
10.3. Total Cost
The total cost of replacing a thermostat can range from $70 to $300, depending on whether you do the job yourself or hire a professional.
10.4. Long-Term Savings
While the initial cost of replacing a thermostat may seem significant, it can save you money in the long run by preventing more extensive engine damage and improving your vehicle’s fuel economy.
11. Maintaining Optimal Engine Temperature: The Key to Longevity
Maintaining optimal engine temperature is crucial for the longevity and performance of your vehicle. A properly functioning thermostat plays a vital role in regulating engine temperature and preventing overheating.
11.1. Reducing Wear and Tear
Maintaining optimal engine temperature reduces wear and tear on engine components, extending the life of your engine.
11.2. Improving Fuel Efficiency
A properly functioning thermostat ensures that the engine operates at its optimal temperature, improving fuel efficiency.
11.3. Reducing Emissions
Maintaining optimal engine temperature helps reduce emissions, making your vehicle more environmentally friendly.
11.4. Preventing Damage
A properly functioning thermostat prevents engine overheating, which can cause severe damage to engine components.
12. The Future of Thermostat Technology
Thermostat technology is continuously evolving, with new advancements aimed at improving engine efficiency and performance.
12.1. Electronic Thermostats
Electronic thermostats use sensors and electronic controls to regulate coolant flow more precisely. These thermostats can adjust the engine’s temperature based on driving conditions and engine load, optimizing performance and efficiency.
12.2. Variable Flow Thermostats
Variable flow thermostats can adjust the amount of coolant flowing through the radiator, allowing for more precise temperature control. These thermostats can improve fuel efficiency and reduce emissions.
12.3. Smart Thermostats
Smart thermostats use advanced algorithms and data analysis to optimize engine temperature. These thermostats can learn your driving habits and adjust the engine’s temperature accordingly, maximizing performance and efficiency.
13. Ensuring Accurate Diagnosis
Before replacing the thermostat, it’s crucial to ensure that it is indeed the source of the problem. Accurate diagnosis can prevent unnecessary repairs and save you time and money.
13.1. Professional Diagnostic Check
A professional diagnostic check, often involving a scan tool, can help pinpoint the problem. This step is crucial to avoid unnecessary repairs.
13.2. Visual Inspection
Inspect the thermostat housing and hoses for leaks or damage. Check the coolant level and condition.
13.3. Temperature Readings
Use an infrared thermometer to measure the temperature of the thermostat housing and coolant hoses. Compare the readings to the manufacturer’s specifications.
13.4. Scan Tool Codes
Use a scan tool to check for diagnostic trouble codes (DTCs) related to the cooling system. Research the codes to identify the underlying issue.
14. Choosing the Right Coolant
Using the correct coolant is essential for protecting your engine from corrosion and overheating. Always use the type of coolant recommended by your vehicle manufacturer.
14.1. Types of Coolant
There are several types of coolant available, including:
- Green Coolant: Traditional green coolant is suitable for older vehicles.
- OAT Coolant: Organic Acid Technology (OAT) coolant is designed for newer vehicles.
- HOAT Coolant: Hybrid Organic Acid Technology (HOAT) coolant is a blend of OAT and traditional coolant.
- Universal Coolant: Universal coolant is designed to be compatible with all types of vehicles.
14.2. Manufacturer Recommendations
Refer to your vehicle’s owner’s manual or repair manual to determine the correct type of coolant for your vehicle.
14.3. Mixing Coolant
Always mix the coolant with distilled water according to the manufacturer’s recommendations (usually a 50/50 mix).
15. Environmental Considerations
When working with coolant, it’s essential to consider the environmental impact. Coolant is toxic and can harm the environment if not disposed of properly.
15.1. Proper Disposal
Never pour coolant down the drain or into the ground. Collect used coolant in a sealed container and take it to a recycling center or auto parts store for proper disposal.
15.2. Spill Cleanup
Clean up any coolant spills immediately with shop rags. Dispose of the rags properly.
15.3. Eco-Friendly Coolant
Consider using eco-friendly coolant, which is less toxic and more biodegradable.
16. Thermostat Inspection Checklist
To ensure your thermostat is functioning properly, follow this inspection checklist:
| Item | Action |
|---|---|
| Temperature Gauge | Monitor for erratic readings or overheating. |
| Coolant Level | Check regularly and maintain proper levels. |
| Hoses and Clamps | Inspect for leaks, cracks, or damage. |
| Thermostat Housing | Check for corrosion or leaks. |
| Coolant Condition | Look for signs of rust or contaminants. |
| Heater Performance | Ensure adequate heat output. |
| OBD-II Scan | Use a scan tool to check for diagnostic trouble codes. |
| Infrared Thermometer | Measure temperature at the thermostat housing and hoses. |
| Professional Inspection | Have the cooling system inspected annually. |
17. Finding the Right Parts at CARDIAGTECH.NET
CARDIAGTECH.NET makes it easy to find the right parts for your thermostat repair. Our website offers a comprehensive parts catalog and a user-friendly search function.
17.1. Parts Catalog
Our parts catalog includes a wide range of thermostats, gaskets, hoses, clamps, and other cooling system components.
17.2. Search Function
Use our search function to find the right parts for your vehicle’s make and model.
17.3. Expert Assistance
Contact our expert staff for assistance in finding the right parts for your needs.
18. Contact CARDIAGTECH.NET for Expert Advice
If you have any questions about thermostat repairs or cooling system maintenance, contact CARDIAGTECH.NET for expert advice.
- Address: 276 Reock St, City of Orange, NJ 07050, United States
- WhatsApp: +1 (641) 206-8880
- Website: CARDIAGTECH.NET
Our knowledgeable staff can answer your questions and provide guidance on how to maintain your cooling system effectively. Don’t let a faulty thermostat lead to costly engine damage. Contact CARDIAGTECH.NET today for the tools and expertise you need to keep your vehicle running smoothly. Our team can provide you with the right tools for efficient diagnostics and repairs, ensuring your vehicle’s cooling system is in top condition. Act now and enhance your repair capabilities with CARDIAGTECH.NET.
19. The Importance of Regular Checks and Maintenance
Regular checks and maintenance are crucial to the longevity of your vehicle’s engine. Neglecting these simple tasks can lead to significant and expensive repairs down the line. By routinely inspecting your thermostat and cooling system components, you can catch potential problems early and address them before they escalate. This proactive approach not only saves you money but also ensures that your vehicle operates at peak performance and efficiency.
20. What Customers Say About CARDIAGTECH.NET
Customers consistently praise CARDIAGTECH.NET for providing high-quality tools and exceptional service. Many have noted the durability and reliability of the tools, which have significantly improved their repair processes. The expert support offered by CARDIAGTECH.NET has also been a highlight, with customers appreciating the knowledgeable staff who provide guidance and answer questions effectively. These positive testimonials underscore CARDIAGTECH.NET’s commitment to excellence and customer satisfaction, making it a trusted resource for automotive repair professionals and enthusiasts alike.
Frequently Asked Questions (FAQ)
FAQ 1: What does a car thermostat do?
A car thermostat regulates the engine’s temperature by controlling coolant flow, ensuring optimal performance and preventing overheating.
FAQ 2: How do I know if my car thermostat is bad?
Common signs include temperature fluctuations, engine overheating, poor fuel efficiency, heater issues, and low coolant levels.
FAQ 3: Can I drive with a bad thermostat?
Driving with a bad thermostat can lead to engine damage, so it’s best to address the issue as soon as possible.
FAQ 4: How much does it cost to replace a thermostat?
The cost can range from $70 to $300, depending on whether you do it yourself or hire a professional.
FAQ 5: What tools do I need to replace a thermostat?
Essential tools include a socket set, pliers, screwdrivers, torque wrench, drain pan, and a scan tool.
FAQ 6: How often should I replace my car’s thermostat?
It’s generally recommended to replace the thermostat every two to three years or as part of your vehicle’s maintenance schedule.
FAQ 7: Can a bad thermostat cause poor gas mileage?
Yes, a thermostat stuck open can cause the engine to run cooler, reducing fuel efficiency.
FAQ 8: What type of coolant should I use?
Use the type of coolant recommended by your vehicle manufacturer, as different coolants have different properties.
FAQ 9: How do I dispose of used coolant?
Collect used coolant in a sealed container and take it to a recycling center or auto parts store for proper disposal.
FAQ 10: Where can I buy high-quality automotive tools?
CARDIAGTECH.NET offers a wide range of high-quality automotive tools and equipment.
Call to Action
Is your car showing signs of a faulty thermostat? Don’t wait until it leads to costly engine damage. Contact CARDIAGTECH.NET today for expert advice and the tools you need to fix the problem quickly and efficiently. Our knowledgeable staff can help you choose the right tools and provide guidance on how to maintain your cooling system effectively. With CARDIAGTECH.NET, you can ensure your vehicle runs smoothly and reliably for years to come. Reach out now and let us assist you in keeping your car in top condition. Contact us at +1 (641) 206-8880 or visit our website at CARDIAGTECH.NET.