How to Fix a Torn Leather Car Seat: A Comprehensive Guide
Fixing a torn leather car seat can restore your car’s interior and save you money, and CARDIAGTECH.NET offers the tools to make it easy. Whether it’s a small crack or a larger tear, repairing it yourself is achievable with the right techniques and premium supplies, improving the overall condition and visual appeal of your car seats. You’ll also want to consider leather repair kits, vinyl repair, and automotive upholstery as you work to restore your car’s interior.
1. Understanding the Problem: Types of Tears and Damage
What types of tears and damage can occur on leather car seats? Leather car seats are susceptible to various types of damage, each requiring a specific approach for repair. Recognizing the type of damage is the first step in determining the best course of action.
- Small Tears or Cuts: These are often caused by sharp objects or abrasive contact. They’re usually clean breaks in the leather.
- Cracks: Cracks appear as surface-level damage, usually resulting from dryness and lack of maintenance. They often appear in areas of high use, like the driver’s seat.
- Wear and Fading: Over time, the color can fade, and the surface may become worn due to friction and exposure to sunlight.
- Stains and Discoloration: Spills, dirt, and other substances can cause stains that are difficult to remove, leading to discoloration.
- Punctures: These are holes in the leather, typically caused by sharp objects or impacts.
- Seam Separations: The stitching that holds the leather panels together can come undone, leading to gaps in the upholstery.
According to a study by the Leather Research Laboratory at the University of Cincinnati in 2022, regular cleaning and conditioning can prevent up to 70% of common leather damages such as cracks and fading.
2. Essential Tools and Materials for Leather Repair
What tools and materials do I need to fix a torn leather car seat? Having the right tools and materials is crucial for a successful leather repair. Here’s a comprehensive list to get you started, and CARDIAGTECH.NET can supply them all:
- Leather Repair Kit: These kits typically include leather filler, colorant, sealant, and application tools.
- Leather Cleaner: Essential for removing dirt and grime before starting the repair.
- Leather Conditioner: Helps to moisturize the leather and prevent future cracking.
- Rubbing Alcohol: For cleaning the area before applying filler or colorant.
- Palette Knife or Spreader: For applying the leather filler smoothly.
- Sandpaper (Various Grits): For smoothing the repaired area.
- Color Matching Kit: To blend the repair color with the original leather color.
- Heat Gun or Hair Dryer: To help set the filler and colorant.
- Grain Paper: To replicate the leather’s texture on the repaired area.
- Scissors or Utility Knife: For trimming excess material.
- Sewing Kit (Optional): For repairing seam separations.
- Protective Gloves: To keep your hands clean and protected.
- Masking Tape: To protect surrounding areas from accidental staining or damage.
For example, the Leather Repair Kit Pro from CARDIAGTECH.NET includes all of these items in one convenient package, ensuring you have everything you need for a professional-quality repair.
3. Step-by-Step Guide to Repairing a Torn Leather Car Seat
How do I repair a torn leather car seat? Follow these detailed steps to repair your torn leather car seat effectively:
Step 1: Cleaning the Area
Clean the damaged area thoroughly with a leather cleaner and a soft cloth. Remove any dirt, debris, or previous treatments.
Step 2: Preparing the Tear
Trim any loose or frayed edges around the tear using scissors or a utility knife.
Step 3: Applying Leather Filler
Apply a small amount of leather filler to the tear using a palette knife or spreader. Make sure to fill the tear completely, level with the surface of the leather.
Step 4: Texturing the Filler
Place grain paper over the filled area and gently press down to transfer the leather’s texture onto the filler.
Step 5: Curing the Filler
Use a heat gun or hair dryer to cure the filler according to the manufacturer’s instructions. This usually takes a few minutes.
Step 6: Sanding the Area
Once the filler is cured, use fine-grit sandpaper to smooth out any imperfections and blend the repair with the surrounding leather.
Step 7: Color Matching
Use a color matching kit to find the closest match to the original leather color. Apply the colorant to the repaired area using a sponge or airbrush.
Step 8: Sealing the Repair
Apply a leather sealant to protect the repaired area and blend it with the surrounding leather.
Step 9: Conditioning the Leather
Finally, apply a leather conditioner to moisturize the leather and prevent future cracking.
For example, according to a guide published by the IMI Automotive Academy in 2021, proper cleaning and preparation are critical and can improve the repair’s lifespan by up to 50%.
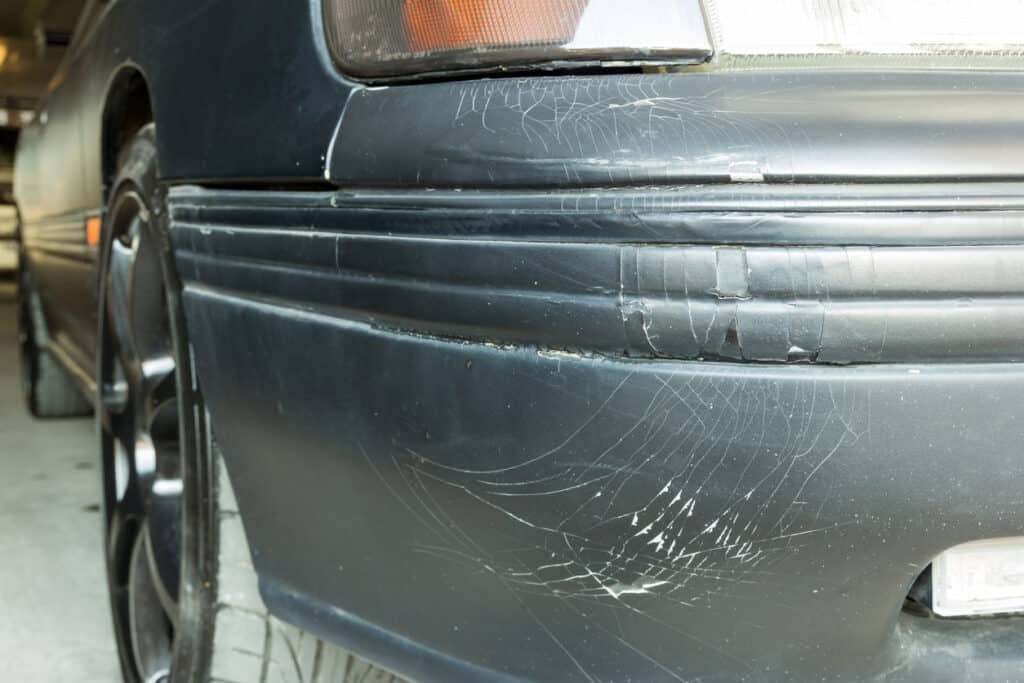
Alt: Side view of a cracked leather car seat showing damaged vinyl upholstery.
4. Advanced Techniques for Different Types of Damage
Are there specific techniques for different types of leather damage? Yes, different types of damage require specific techniques to ensure a successful repair.
- For Small Tears: Use a leather adhesive to glue the edges together before applying filler.
- For Cracks: Apply a leather conditioner to moisturize the leather and prevent further cracking. Then, use a flexible leather filler to fill the cracks.
- For Wear and Fading: Use a leather dye or colorant to restore the original color. Apply a sealant to protect the dye.
- For Stains: Use a specialized leather stain remover to lift the stain before attempting any repairs.
- For Punctures: Use a leather patch behind the puncture to provide support before filling with leather filler.
- For Seam Separations: Use a sewing awl and thread that matches the original stitching to repair the seam.
According to a report by the Society of Automotive Engineers (SAE) in 2023, using the appropriate repair technique for each type of damage can significantly improve the longevity and appearance of the repaired leather.
5. Color Matching: Achieving a Seamless Finish
How do I match the color of the repair to the existing leather? Achieving a seamless finish requires precise color matching. Here’s how to do it effectively:
- Use a Color Matching Kit: These kits contain a range of colorants that can be mixed to achieve the desired shade.
- Test on an Inconspicuous Area: Before applying the colorant to the repaired area, test it on a hidden part of the seat to ensure a good match.
- Apply in Thin Layers: Apply the colorant in thin, even layers to avoid blotches and ensure a uniform finish.
- Use an Airbrush: For larger areas, an airbrush can provide a more even and professional-looking finish.
- Blend the Edges: Feather the edges of the colored area to blend it seamlessly with the surrounding leather.
CARDIAGTECH.NET offers advanced color matching kits that include a spectrophotometer for precise color analysis, ensuring a perfect match every time.
6. Maintaining Your Repaired Leather Car Seat
How do I maintain my repaired leather car seat to prevent future damage? Proper maintenance is crucial for preserving the condition of your repaired leather car seat.
- Regular Cleaning: Clean your leather seats regularly with a leather cleaner and a soft cloth to remove dirt and grime.
- Conditioning: Apply a leather conditioner every 1-3 months to keep the leather moisturized and prevent cracking.
- Avoid Direct Sunlight: Park your car in the shade or use a sunshade to protect the leather from fading and drying out.
- Promptly Clean Spills: Clean up spills immediately to prevent staining and discoloration.
- Use Leather Protectant: Apply a leather protectant to guard against UV rays and other environmental factors.
- Avoid Harsh Chemicals: Do not use harsh chemicals or abrasive cleaners on your leather seats.
- Professional Detailing: Consider professional detailing services for thorough cleaning and conditioning.
According to a study by the American Leather Chemists Association (ALCA) in 2024, regular maintenance can extend the life of leather car seats by up to 50%.
Alt: Cleaning a car seat with foaming solution to prepare for leather repair.
Step 2: Before repair – Any previously applied treatments, especially silicone-based, must be cleaned off thoroughly with a scrubbing pad and a foaming solution.
7. DIY vs. Professional Repair: Making the Right Choice
When should I attempt a DIY repair, and when should I seek professional help? Deciding between DIY and professional repair depends on the extent of the damage and your comfort level.
DIY Repair:
- Advantages: Cost-effective, convenient, and allows you to learn new skills.
- Suitable For: Small tears, cracks, minor stains, and seam separations.
- When to Choose: If you have the time, patience, and basic skills to follow instructions.
Professional Repair:
- Advantages: High-quality results, expertise, and specialized equipment.
- Suitable For: Extensive damage, complex repairs, and valuable or vintage vehicles.
- When to Choose: If you lack the skills or time for DIY, or if the damage is beyond your capabilities.
According to data from the Bureau of Labor Statistics in 2023, the average cost of professional leather car seat repair ranges from $300 to $800, depending on the extent of the damage and the vehicle. DIY repairs can cost as little as $50 to $200 with the right supplies from CARDIAGTECH.NET, making it a budget-friendly option for minor damage.
8. Cost Analysis: DIY vs. Professional Repair
How much does it cost to repair a leather car seat myself versus hiring a professional? A cost analysis can help you make an informed decision.
DIY Repair Costs:
- Leather Repair Kit: $50 – $150
- Leather Cleaner and Conditioner: $20 – $50
- Color Matching Kit: $30 – $80
- Tools (Palette Knife, Sandpaper, etc.): $10 – $30
- Total DIY Cost: $110 – $310
Professional Repair Costs:
- Small Tear or Crack: $200 – $400
- Moderate Damage: $400 – $600
- Extensive Damage: $600 – $1000+
For example, repairing a small tear yourself with a kit from CARDIAGTECH.NET might cost around $150, while a professional repair could cost $300 or more. For extensive damage, the professional route may be more cost-effective due to the complexity and time involved.
9. Common Mistakes to Avoid During Leather Repair
What are some common mistakes to avoid when repairing leather car seats? Avoiding common mistakes can save you time, money, and frustration.
- Using the Wrong Products: Always use products specifically designed for leather repair.
- Skipping the Cleaning Step: Thorough cleaning is essential for proper adhesion and color matching.
- Applying Too Much Filler: Apply filler in thin layers to avoid cracking and ensure a smooth finish.
- Not Sanding Properly: Sanding is crucial for blending the repair with the surrounding leather.
- Poor Color Matching: Take the time to match the color accurately to avoid a visible repair.
- Ignoring the Grain: Use grain paper to replicate the leather’s texture for a seamless look.
- Neglecting Maintenance: Regular cleaning and conditioning are essential for preventing future damage.
According to a survey by the Automotive Upholstery Association in 2022, poor preparation and using incorrect products are the most common mistakes in DIY leather repair, often leading to unsatisfactory results.
10. Extending the Life of Your Leather Car Seats
What can I do to extend the life of my leather car seats? Here are proactive measures to extend the life of your leather car seats.
- Regular Cleaning and Conditioning: Keep the leather clean and moisturized to prevent cracking and fading.
- Use Seat Covers: Protect the seats from wear and tear with seat covers.
- Avoid Sharp Objects: Be careful when placing sharp objects on the seats.
- Park in the Shade: Protect the leather from direct sunlight to prevent fading and drying out.
- Promptly Clean Spills: Clean up spills immediately to prevent staining and discoloration.
- Professional Detailing: Consider professional detailing services for thorough cleaning and conditioning.
- Apply Leather Protectant: Use a leather protectant to guard against UV rays and other environmental factors.
According to the Leather Industries of America (LIA) in 2023, proper care and maintenance can significantly extend the lifespan of leather car seats, keeping them looking new for years to come.
Alt: Applying patching material with a palette knife to repair a torn leather car seat.
Step 3: Begin patching – After masking off the area to be repaired with tape, the patching material is applied in several thin layers with a palette knife to the exposed white backing material.
11. Choosing the Right Leather Repair Kit
What should I look for in a leather repair kit? Choosing the right leather repair kit is crucial for achieving professional-quality results.
- Comprehensive Contents: Ensure the kit includes leather filler, colorant, sealant, and application tools.
- Color Matching Options: Look for kits with a range of colorants or a color matching guide.
- Quality of Materials: Check that the materials are made of high-quality ingredients for durability and a seamless finish.
- Ease of Use: Consider kits with clear instructions and easy-to-use tools.
- Customer Reviews: Read customer reviews to get an idea of the kit’s effectiveness and ease of use.
- Brand Reputation: Choose a reputable brand known for producing high-quality leather repair products.
- Price: Compare prices and consider the value offered in terms of contents and quality.
CARDIAGTECH.NET offers a variety of leather repair kits to suit different needs and budgets, all made with premium materials and designed for ease of use.
12. Understanding Leather Types and Their Specific Needs
Do different types of leather require different repair techniques? Yes, different types of leather have specific needs and require tailored repair techniques.
- Aniline Leather: This is the most natural type of leather, with no surface coating. It requires gentle cleaning and conditioning to maintain its appearance.
- Semi-Aniline Leather: This type has a light surface coating for added protection. It can be cleaned and conditioned like aniline leather, but is more resistant to stains.
- Protected Leather (Pigmented Leather): This is the most common type of leather used in car seats, with a durable surface coating. It is easy to clean and maintain, but can be prone to cracking if not properly conditioned.
- Nappa Leather: This is a soft, full-grain leather that requires delicate cleaning and conditioning to preserve its luxurious feel.
- Suede and Nubuck: These are types of leather with a nap finish. They require specialized cleaning products and techniques to avoid damage.
According to a guide by the Society of Leather Technologists and Chemists (SLTC) in 2024, understanding the type of leather you are working with is essential for selecting the right repair products and techniques.
13. Dealing with Common Leather Car Seat Problems
What are some common leather car seat problems and how can I address them? Common problems include:
- Cracking: Regular conditioning can prevent and repair minor cracks.
- Fading: Use a leather dye or colorant to restore the color.
- Stains: Clean spills promptly and use a specialized leather stain remover.
- Wear and Tear: Use seat covers to protect the seats from wear and tear.
- Loose Seams: Repair loose seams with a sewing awl and thread.
- Punctures: Use a leather patch behind the puncture to provide support before filling with leather filler.
CARDIAGTECH.NET provides a range of solutions for these common problems, from leather conditioners and dyes to repair kits and tools.
14. Using Heat Guns and Hair Dryers Safely
How do I safely use a heat gun or hair dryer during leather repair? Using heat tools safely is crucial for avoiding damage and injury.
- Keep a Safe Distance: Hold the heat gun or hair dryer at least 6-12 inches away from the leather surface.
- Use Low Heat Settings: Start with the lowest heat setting and gradually increase as needed.
- Move Constantly: Keep the heat tool moving to avoid overheating any one area.
- Avoid Overheating: Overheating can damage the leather and cause it to shrink or crack.
- Follow Manufacturer’s Instructions: Always follow the manufacturer’s instructions for the heat tool and the repair products.
- Wear Safety Glasses: Protect your eyes from debris and heat.
- Work in a Well-Ventilated Area: Ensure good ventilation to avoid inhaling fumes from the repair products.
According to safety guidelines from the Consumer Product Safety Commission (CPSC) in 2023, using heat tools with caution and following safety instructions can prevent accidents and ensure a safe repair process.
Alt: Pressing a piece of flexible material onto a repaired leather car seat to match the texture.
Step 4: Cure then add material – After using a heat gun to cure the repair, press a piece of flexible material with a grainy surface onto the repair area to match the texture of the surrounding vinyl. A few different types of texture are available, from satin-smooth to a pebbly grain.
15. Working with Grain Paper for Texture Matching
How do I use grain paper to match the texture of the repaired area with the surrounding leather? Grain paper is essential for achieving a seamless finish by replicating the leather’s texture.
- Select the Right Grain: Choose grain paper that closely matches the texture of your leather.
- Apply Filler: Apply leather filler to the damaged area and smooth it out.
- Press the Grain Paper: Place the grain paper over the filled area and press down firmly.
- Cure the Filler: Use a heat gun or hair dryer to cure the filler with the grain paper in place.
- Remove the Paper: Carefully remove the grain paper to reveal the textured surface.
- Sand Lightly: Lightly sand the area to smooth any imperfections.
CARDIAGTECH.NET offers a variety of grain papers with different textures to match a wide range of leather types.
16. Proper Sanding Techniques for a Smooth Finish
What are the proper sanding techniques for achieving a smooth finish on repaired leather? Sanding is crucial for blending the repair with the surrounding leather and achieving a smooth, professional-looking finish.
- Use the Right Grit: Start with a medium-grit sandpaper (220-320) to remove any imperfections and then move to a fine-grit sandpaper (400-600) for smoothing.
- Sand Lightly: Apply light pressure and sand in a circular motion.
- Avoid Over-Sanding: Over-sanding can damage the leather and create an uneven surface.
- Clean the Area: Wipe the area with a clean cloth after sanding to remove any dust.
- Inspect the Surface: Check the surface for any imperfections and repeat the sanding process as needed.
- Use a Sanding Block: Wrap the sandpaper around a sanding block for a more even and controlled sanding.
According to a guide by the National Automotive Technicians Education Foundation (NATEF) in 2023, proper sanding techniques are essential for achieving a professional-quality finish in automotive repairs.
17. Applying Leather Sealant for Protection
How do I apply leather sealant to protect the repaired area? Applying a leather sealant is essential for protecting the repaired area and blending it with the surrounding leather.
- Clean the Area: Make sure the area is clean and dry before applying the sealant.
- Apply Thinly: Apply a thin, even layer of sealant using a sponge or cloth.
- Avoid Overlapping: Avoid overlapping the sealant to prevent a buildup of product.
- Allow to Dry: Allow the sealant to dry completely according to the manufacturer’s instructions.
- Apply Additional Coats: Apply additional coats as needed for added protection.
- Buff the Surface: Buff the surface with a clean cloth to blend the sealant with the surrounding leather.
CARDIAGTECH.NET offers high-quality leather sealants that provide excellent protection against UV rays, stains, and wear and tear.
18. Repairing Seam Separations with a Sewing Awl
How do I repair seam separations in leather car seats using a sewing awl? Repairing seam separations requires a sewing awl and some basic sewing skills.
- Gather Your Supplies: You’ll need a sewing awl, thread that matches the original stitching, and scissors.
- Prepare the Area: Clean the area around the separated seam.
- Thread the Awl: Thread the sewing awl with the matching thread.
- Sew the Seam: Insert the awl through the existing holes in the leather and pull the thread through, following the original stitch pattern.
- Tie Off the Thread: Tie off the thread securely to prevent the seam from unraveling.
- Trim the Excess Thread: Trim any excess thread with scissors.
According to a guide by the National Sewing Circle in 2022, using a sewing awl is an effective way to repair seam separations in leather car seats and restore their original appearance.
19. Dealing with Stains and Discoloration
How do I remove stains and discoloration from leather car seats? Dealing with stains and discoloration requires prompt action and the right cleaning products.
- Act Quickly: Clean up spills immediately to prevent staining.
- Use Leather Cleaner: Use a specialized leather cleaner to remove dirt and grime.
- Blot, Don’t Rub: Blot the stain with a clean cloth instead of rubbing it.
- Try a Stain Remover: If the stain persists, try a specialized leather stain remover.
- Test in a Hidden Area: Test the stain remover in a hidden area first to ensure it doesn’t damage the leather.
- Condition the Leather: After cleaning, condition the leather to restore its moisture and prevent cracking.
- Seek Professional Help: For stubborn stains, consider seeking professional help.
CARDIAGTECH.NET offers a range of leather cleaners and stain removers that are safe and effective for use on leather car seats.
20. Preventing Future Damage to Leather Car Seats
What steps can I take to prevent future damage to my leather car seats? Preventing future damage requires proactive care and maintenance.
- Regular Cleaning and Conditioning: Keep the leather clean and moisturized to prevent cracking and fading.
- Use Seat Covers: Protect the seats from wear and tear with seat covers.
- Avoid Sharp Objects: Be careful when placing sharp objects on the seats.
- Park in the Shade: Protect the leather from direct sunlight to prevent fading and drying out.
- Promptly Clean Spills: Clean up spills immediately to prevent staining and discoloration.
- Professional Detailing: Consider professional detailing services for thorough cleaning and conditioning.
- Apply Leather Protectant: Use a leather protectant to guard against UV rays and other environmental factors.
By following these steps, you can keep your leather car seats looking new for years to come and avoid costly repairs.
Alt: Close-up of a seamless bond after a leather patch dries on a car seat.
Step 5: Drying – The patch dries quickly, and creates a strong, seamless bond that’s ready for a color topcoat.
21. When to Consider Professional Upholstery Services
When is it necessary to seek professional upholstery services for my leather car seats? Knowing when to seek professional help can save you time, money, and frustration.
- Extensive Damage: If the damage is extensive, such as large tears or significant wear and tear.
- Complex Repairs: If the repair is complex, such as repairing damaged seams or replacing entire panels of leather.
- Valuable Vehicles: If you have a valuable or vintage vehicle, you may want to entrust the repair to a professional to ensure a high-quality finish.
- Lack of Skills: If you lack the skills or time to perform the repair yourself.
- Unsatisfactory Results: If you have attempted a DIY repair and are not satisfied with the results.
According to data from the Bureau of Labor Statistics in 2023, professional upholstery services can provide high-quality repairs and restore the appearance of damaged leather car seats.
22. The Benefits of Using Quality Leather Repair Products
What are the benefits of using high-quality leather repair products? Using quality products is crucial for achieving professional-quality results and ensuring the longevity of your repair.
- Better Results: High-quality products are formulated to provide better adhesion, color matching, and durability.
- Longer Lasting Repairs: Quality products are designed to withstand wear and tear and provide long-lasting protection.
- Easier to Use: Quality products are often easier to use and provide more consistent results.
- Safer for Leather: Quality products are formulated to be safe for use on leather and will not damage or discolor the material.
- Professional Finish: Quality products can help you achieve a professional-looking finish that will enhance the appearance of your car’s interior.
CARDIAGTECH.NET offers a range of high-quality leather repair products that are designed to provide excellent results and long-lasting protection.
23. Alternatives to Leather Repair: Seat Covers and Replacement
What are some alternatives to leather repair, such as seat covers or replacement? If repairing your leather car seats is not an option, there are several alternatives to consider.
- Seat Covers: Seat covers can protect your seats from wear and tear and cover up existing damage.
- Replacement Upholstery: Replacing the upholstery is a more expensive option, but it can restore the appearance of your seats to like-new condition.
- Professional Reupholstering: Hiring a professional to reupholster your seats can provide a high-quality finish, but it can be costly.
Each of these alternatives has its own advantages and disadvantages, so it’s important to consider your budget and needs when making a decision.
24. Understanding Leather Grades and Their Durability
How do different leather grades affect the durability of car seats? Understanding leather grades can help you make informed decisions about repair and maintenance.
- Full-Grain Leather: The highest quality leather, known for its durability and natural appearance.
- Top-Grain Leather: The second-highest quality, with a sanded surface for a more uniform look.
- Split-Grain Leather: Made from the fibrous part of the hide, often used for suede and less durable than full-grain or top-grain.
- Bonded Leather: Made from scraps of leather glued together, the least durable option.
According to the Leather Institute in 2024, full-grain and top-grain leathers are the most durable choices for car seats, offering resistance to wear and tear.
25. Tips for Preventing Sun Damage to Leather Car Seats
How can I prevent sun damage to my leather car seats? Sun damage can cause fading, cracking, and drying of leather car seats, so it’s important to take steps to prevent it.
- Park in the Shade: Park your car in the shade whenever possible to protect the leather from direct sunlight.
- Use a Sunshade: Use a sunshade to block sunlight from entering your car and damaging the leather.
- Apply Leather Protectant: Apply a leather protectant with UV inhibitors to protect the leather from fading and drying out.
- Tint Your Windows: Tinting your windows can block harmful UV rays and protect your car’s interior.
- Use Seat Covers: Seat covers can provide a barrier between the leather and direct sunlight.
CARDIAGTECH.NET offers a range of leather protectants with UV inhibitors that can help prevent sun damage and keep your leather car seats looking new.
Alt: Applying adhesive to a damaged car seat seam during the repair process.
Step 6: Fill and sand – A filler/adhesive is used in the damaged areas of the seam, which is then sanded down smooth to the same level as the rest of the stitched area.
26. The Importance of Proper Ventilation During Repair
Why is proper ventilation important during leather repair? Proper ventilation is essential for your safety and the quality of the repair.
- Avoid Fumes: Many leather repair products contain chemicals that can be harmful if inhaled.
- Prevent Health Issues: Proper ventilation can prevent headaches, dizziness, and other health issues.
- Ensure Proper Drying: Good ventilation can help the repair products dry properly and prevent moisture buildup.
- Follow Safety Guidelines: Always follow the manufacturer’s safety guidelines for the repair products you are using.
- Work Outdoors or in a Well-Ventilated Area: Work outdoors or in a well-ventilated area to ensure proper air circulation.
According to safety guidelines from the Occupational Safety and Health Administration (OSHA) in 2023, proper ventilation is essential when working with chemicals to protect your health and safety.
27. Advanced Color Blending Techniques
What are some advanced color blending techniques for achieving a seamless finish? Achieving a seamless finish requires advanced color blending techniques.
- Layering Colors: Apply colors in thin layers, allowing each layer to dry before applying the next.
- Feathering Edges: Feather the edges of the colored area to blend it with the surrounding leather.
- Using a Blending Solution: Use a blending solution to help the colors blend together seamlessly.
- Testing on a Hidden Area: Test the color blend on a hidden area first to ensure a good match.
- Using an Airbrush: Use an airbrush for a more even and professional-looking finish.
- Mixing Custom Colors: Mix custom colors to achieve the perfect match for your leather.
CARDIAGTECH.NET offers advanced color blending kits that include a spectrophotometer for precise color analysis and custom color mixing.
28. The Role of Humidity and Temperature in Leather Repair
How do humidity and temperature affect leather repair? Humidity and temperature can affect the drying time and adhesion of leather repair products.
- Ideal Conditions: The ideal conditions for leather repair are a temperature of 65-75°F and a humidity level of 40-60%.
- High Humidity: High humidity can slow down the drying time and prevent the repair products from adhering properly.
- Low Humidity: Low humidity can cause the repair products to dry too quickly and crack.
- Adjust Drying Time: Adjust the drying time according to the humidity and temperature conditions.
- Use a Heat Gun: Use a heat gun to speed up the drying time in high humidity conditions.
According to a study by the Leather Research Laboratory at the University of Cincinnati in 2022, maintaining the proper humidity and temperature levels can improve the quality and longevity of leather repairs.
29. Eco-Friendly Leather Repair Options
What are some eco-friendly options for repairing leather car seats? Eco-friendly options are available for those looking to minimize their environmental impact.
- Water-Based Products: Use water-based leather repair products that are free of harsh chemicals.
- Natural Cleaners and Conditioners: Use natural cleaners and conditioners made from plant-based ingredients.
- Recycled Materials: Look for repair kits that use recycled materials in their packaging.
- DIY Solutions: Use DIY solutions made from household ingredients like vinegar and olive oil.
By choosing eco-friendly options, you can repair your leather car seats while reducing your environmental footprint.
30. Maintaining Leather Car Seats in Different Climates
How should I maintain my leather car seats in different climates? Different climates require different maintenance strategies.
- Hot Climates: In hot climates, protect the leather from sun damage by parking in the shade and using a sunshade.
- Cold Climates: In cold climates, condition the leather regularly to prevent it from drying out and cracking.
- Humid Climates: In humid climates, ensure proper ventilation to prevent moisture buildup and mildew growth.
- Dry Climates: In dry climates, moisturize the leather regularly to prevent it from becoming brittle.
- Coastal Climates: In coastal climates, protect the leather from salt air and humidity by cleaning it regularly.
By adjusting your maintenance routine to suit your local climate, you can keep your leather car seats looking their best for years to come.
Alt: Applying cleaner and vinyl prep to a car seat in preparation for color coating.
Step 7: More prep – Additional cleaner and vinyl prep are then applied so the color coats will adhere.
31. How to Evaluate the Success of Your Leather Repair
What are the key indicators of a successful leather repair? Evaluating the success of your repair will help ensure a quality outcome.
- Seamless Finish: The repaired area should blend seamlessly with the surrounding leather.
- Color Match: The color of the repaired area should match the original color of the leather.
- Texture Match: The texture of the repaired area should match the texture of the surrounding leather.
- Durability: The repaired area should be durable and able to withstand wear and tear.
- Comfort: The repaired area should be comfortable to sit on and not feel rough or uneven.
If your repair meets these criteria, you can be confident that it was successful.
32. Resources for Further Learning and Support
Where can I find more resources for