How To Fix AC Leak In Car: A Comprehensive Guide
Fixing an AC leak in your car can restore cool comfort during hot days, and CARDIAGTECH.NET is here to guide you through the process. This comprehensive guide explores the diagnosis, repair, and prevention of AC leaks, ensuring your vehicle’s AC system operates efficiently. We also provide insights into essential tools and equipment for AC maintenance, helping you keep your car’s AC in top condition.
1. Identifying an AC Leak in Your Car
Recognizing the symptoms of an AC leak is crucial for timely repair and maintaining a comfortable driving environment. Here’s how to identify a potential AC leak:
1.1 Reduced Cooling Efficiency
A noticeable decrease in the cooling power of your car’s AC is a primary indicator of a refrigerant leak. Instead of the expected cold air, you might feel lukewarm or warm air blowing from the vents.
1.2 Unusual Noises
Hissing or gurgling sounds coming from the AC system while it’s running can indicate escaping refrigerant. These sounds often come from the evaporator or condenser areas.
1.3 Oily Residue
Refrigerant often contains oil, so an oily film around AC components like hoses, fittings, and the compressor can signal a leak. Check for this residue in the engine compartment and around the AC unit.
1.4 Unpleasant Odors
A musty or moldy smell inside the car, especially when the AC is turned on, can indicate a leak in the evaporator core. This is often accompanied by poor cooling performance.
1.5 Condensation Issues
While some condensation is normal, excessive moisture inside the car or a persistent fogging of the windows can point to an AC leak. This occurs when refrigerant escapes and mixes with moisture in the system.
1.6 Visual Inspection
Carefully examine the AC components for visible signs of damage, such as cracks, corrosion, or loose connections. Pay close attention to the condenser, compressor, and hoses.
1.7 Using a UV Leak Detector
For a more precise diagnosis, use a UV leak detector. Add a UV dye to the AC system, run the AC, and then use a UV light to locate the leak. The dye will glow at the site of the leak, making it easy to identify.
By recognizing these signs early, you can take prompt action to address the AC leak, preventing further damage and ensuring your AC system operates at its best. If you need professional tools for leak detection, consider exploring the range of options available at CARDIAGTECH.NET.
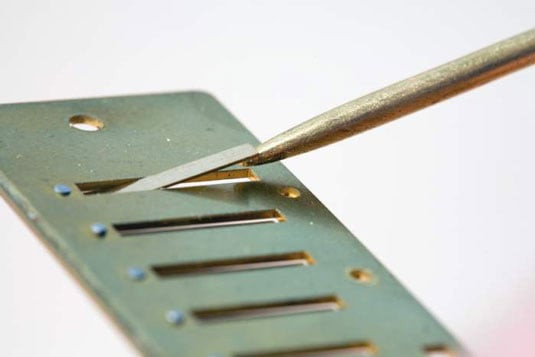
Visual inspection of AC components for oil stains and damage, indicative of refrigerant leaks
2. Essential Tools and Equipment for AC Leak Repair
Having the right tools and equipment is essential for effectively repairing AC leaks in your car. Here’s a list of necessary items to ensure a successful repair:
| Tool/Equipment | Description | Use |
|---|---|---|
| AC Manifold Gauge Set | Measures pressure in the AC system, helping diagnose leaks and monitor refrigerant levels. | Identifies pressure imbalances and confirms leak presence. |
| Vacuum Pump | Removes air and moisture from the AC system before recharging with refrigerant. | Ensures the system is free of contaminants that can affect performance. |
| UV Leak Detection Kit | Includes a UV light and dye to locate leaks that are not visible to the naked eye. | Adds dye to the system and uses UV light to pinpoint leak sources. |
| Refrigerant Recovery Machine | Safely removes and stores refrigerant from the AC system, complying with environmental regulations. | Prevents harmful release of refrigerant into the atmosphere. |
| Refrigerant Identifier | Verifies the type and purity of refrigerant in the system. | Ensures correct refrigerant type is used, avoiding damage to the AC system. |
| Leak Stop Sealant | Seals minor leaks in the AC system, providing a temporary fix. | Addresses small leaks in hoses, connections, and other components. |
| O-Ring Assortment Kit | Contains various sizes of O-rings to replace worn or damaged seals in AC components. | Ensures proper sealing of connections to prevent refrigerant leakage. |
| Wrench Set | Provides the necessary tools to tighten or loosen fittings and connections in the AC system. | Secures connections and replaces components effectively. |
| Safety Gear | Includes gloves, safety glasses, and a respirator to protect against refrigerant exposure. | Ensures personal safety during AC system maintenance and repair. |
| Torque Wrench | Ensures fittings are tightened to the manufacturer’s specified torque, preventing leaks due to over- or under-tightening. | Prevents damage to components and ensures a secure, leak-free connection. |
These tools and equipment are critical for diagnosing and repairing AC leaks effectively. CARDIAGTECH.NET offers a range of high-quality automotive tools to assist you in maintaining your vehicle’s AC system.
3. Step-by-Step Guide to Fixing an AC Leak in Your Car
Repairing an AC leak in your car involves several steps to ensure the system is functioning correctly and efficiently. Here’s a detailed guide to help you through the process:
3.1 Safety Precautions
Before starting any AC repair, ensure you wear safety glasses and gloves to protect yourself from refrigerant exposure. Work in a well-ventilated area to avoid inhaling refrigerant fumes.
3.2 Refrigerant Recovery
Use a refrigerant recovery machine to safely remove any remaining refrigerant from the AC system. This step is crucial for environmental safety and legal compliance.
3.3 Leak Detection
Inspect the AC system for leaks using a UV leak detection kit. Add UV dye to the system, run the AC for about 20 minutes, and then use a UV light to locate the source of the leak.
3.4 Component Inspection
Thoroughly inspect the AC components, including the compressor, condenser, evaporator, hoses, and connections, for signs of damage or wear. Replace any damaged components as needed.
3.5 O-Ring Replacement
Replace any worn or damaged O-rings at connection points. Use an O-ring assortment kit to ensure you have the correct sizes. Lubricate the new O-rings with AC oil before installation.
3.6 Hose Repair or Replacement
If you find leaks in the hoses, repair them with a hose repair kit or replace them entirely. Ensure the new hoses are compatible with your car’s AC system.
3.7 Evacuation
Use a vacuum pump to evacuate the AC system, removing air and moisture. This step is crucial for ensuring the system operates efficiently and prevents corrosion.
3.8 Recharge the System
Recharge the AC system with the correct type and amount of refrigerant, as specified by your car’s manufacturer. Use an AC manifold gauge set to monitor the pressure during the recharge process.
3.9 Leak Test
After recharging, perform another leak test to ensure all leaks have been sealed. Use a leak detector or soapy water solution to check for bubbles around connections and components.
3.10 System Performance Check
Start the car and turn on the AC to check its performance. Ensure the air blows cold and the compressor cycles correctly. Monitor the system for any unusual noises or performance issues.
Following these steps carefully will help you effectively repair AC leaks in your car. CARDIAGTECH.NET provides a wide range of tools and equipment to support your AC repair needs.
4. Common AC Leak Locations and How to Address Them
Understanding common AC leak locations can help you target your repair efforts more effectively. Here’s an overview of typical leak spots and how to address them:
| Leak Location | Symptoms | Repair Method |
|---|---|---|
| Compressor | Reduced cooling, oily residue, unusual noises | Replace the compressor; ensure proper lubrication and refrigerant type. |
| Condenser | Poor cooling, visible damage, leaks after impact | Replace the condenser; clean debris to prevent future damage. |
| Evaporator | Musty odors, poor cooling, moisture inside the car | Replace the evaporator; clean the evaporator case to prevent mold growth. |
| Hoses and Fittings | Oily residue, hissing sounds, reduced cooling | Replace damaged hoses; tighten or replace fittings and O-rings. |
| O-Rings and Seals | Leaks at connections, reduced cooling | Replace worn or damaged O-rings and seals; lubricate new seals. |
| Schrader Valves | Leaks around the valve stem, reduced refrigerant levels | Replace the Schrader valve core; ensure proper sealing. |
| Expansion Valve | Poor cooling, icing on the evaporator, inconsistent airflow | Replace the expansion valve; ensure proper refrigerant flow and pressure. |
By knowing these common leak locations and the appropriate repair methods, you can efficiently address AC leaks in your car. CARDIAGTECH.NET offers high-quality replacement parts and tools to help you with these repairs.
5. Tips for Preventing AC Leaks in Your Car
Preventing AC leaks can save you time and money on costly repairs. Here are some practical tips to keep your car’s AC system in good condition:
5.1 Regular AC System Checks
Schedule regular inspections of your AC system to identify potential issues early. Check for leaks, inspect components for damage, and monitor the system’s performance.
5.2 Use AC Regularly
Run your car’s AC system regularly, even during cooler months, to keep the components lubricated and prevent seals from drying out and cracking.
5.3 Proper Refrigerant Levels
Maintain the correct refrigerant levels in your AC system. Low refrigerant can cause the compressor to work harder, increasing the risk of leaks and damage.
5.4 Clean the Condenser
Keep the condenser clean and free of debris. A dirty condenser can restrict airflow, causing the system to overheat and potentially develop leaks.
5.5 Inspect Hoses and Fittings
Regularly inspect hoses and fittings for signs of wear or damage. Replace any worn or cracked hoses and tighten loose fittings to prevent leaks.
5.6 Replace O-Rings
Replace O-rings and seals as part of routine maintenance. Over time, these components can degrade and cause leaks.
5.7 Professional Servicing
Have your car’s AC system professionally serviced at recommended intervals. A qualified technician can identify and address potential issues before they lead to major repairs.
5.8 Use Quality Components
When replacing AC components, use high-quality parts that meet or exceed OEM specifications. This ensures long-lasting performance and reduces the risk of future leaks.
By following these preventive measures, you can minimize the likelihood of AC leaks and keep your car’s AC system running efficiently. CARDIAGTECH.NET offers a variety of high-quality AC components and tools to support your maintenance efforts.
6. Understanding Refrigerant Types and Their Impact
Choosing the correct type of refrigerant is essential for the optimal performance and longevity of your car’s AC system. Here’s an overview of common refrigerants and their impact:
| Refrigerant Type | Properties | Environmental Impact | Common Uses |
|---|---|---|---|
| R-12 | Excellent cooling properties, stable | High Ozone Depletion Potential (ODP), phased out due to environmental concerns | Older vehicles (pre-1994), now replaced with more environmentally friendly alternatives |
| R-134a | Good cooling efficiency, non-flammable | Moderate Global Warming Potential (GWP), being phased out in favor of refrigerants with lower GWP | Most vehicles manufactured between 1994 and 2017, widely used as a replacement for R-12 |
| HFO-1234yf | Similar cooling performance to R-134a, slightly flammable | Very low GWP, considered an environmentally friendly alternative | Newer vehicles (2017 onwards), designed to meet stricter environmental regulations |
| R-22 | Efficient cooling, versatile | High ODP and GWP, phased out in many countries due to environmental impact | Older residential and commercial AC systems, not used in automotive applications |
| CO2 (R-744) | Natural refrigerant, non-toxic | Negligible ODP and very low GWP, environmentally sustainable | Emerging technology in automotive AC systems, potential replacement for HFO-1234yf in the future |
Using the correct refrigerant is crucial for the efficiency and longevity of your AC system. CARDIAGTECH.NET provides tools and equipment to help you handle refrigerants safely and effectively.
7. Addressing Common AC Problems Beyond Leaks
While AC leaks are a common issue, other problems can affect your car’s AC system. Here’s how to address some of these issues:
7.1 Compressor Failure
Symptoms: No cold air, loud noises from the compressor, clutch not engaging.
Solution: Replace the compressor. Ensure proper lubrication and refrigerant type.
7.2 Clogged Condenser
Symptoms: Poor cooling, overheating, high AC pressure.
Solution: Clean the condenser or replace it if severely damaged.
7.3 Blocked Expansion Valve
Symptoms: Poor cooling, icing on the evaporator, inconsistent airflow.
Solution: Replace the expansion valve. Ensure proper refrigerant flow and pressure.
7.4 Electrical Issues
Symptoms: AC not turning on, intermittent operation, blown fuses.
Solution: Check the wiring, fuses, and relays. Replace any faulty components.
7.5 Evaporator Problems
Symptoms: Musty odors, poor cooling, moisture inside the car.
Solution: Clean the evaporator or replace it if necessary.
7.6 Refrigerant Overcharge
Symptoms: Poor cooling, high AC pressure, compressor cycling rapidly.
Solution: Evacuate excess refrigerant. Recharge the system to the correct level.
7.7 Vacuum Leaks
Symptoms: Poor airflow, inconsistent temperature, engine performance issues.
Solution: Inspect vacuum lines and connections. Repair or replace any leaks.
By addressing these common AC problems, you can keep your car’s AC system running smoothly. CARDIAGTECH.NET offers a variety of tools and components to help you maintain and repair your AC system.
8. The Role of AC Manifold Gauge Sets in Leak Diagnosis
An AC manifold gauge set is an indispensable tool for diagnosing AC leaks and assessing the overall health of your car’s AC system. Here’s how it helps:
8.1 Pressure Measurement
The gauge set measures the high and low-side pressures in the AC system. Abnormal pressure readings can indicate leaks, blockages, or compressor issues.
8.2 Leak Detection
By monitoring pressure changes over time, you can identify leaks. A drop in pressure indicates refrigerant is escaping from the system.
8.3 System Performance Evaluation
The gauge set allows you to evaluate the performance of the compressor, expansion valve, and other components. Abnormal readings can point to specific problems.
8.4 Refrigerant Charging
When recharging the AC system, the gauge set helps you add the correct amount of refrigerant. Monitoring the pressure ensures you don’t overcharge or undercharge the system.
8.5 Vacuum Testing
The gauge set can be used to perform vacuum tests, ensuring the system is free of air and moisture before recharging.
8.6 Common Issues Detected by AC Manifold Gauge Sets:
- Low Refrigerant: Low pressure readings on both the high and low sides.
- Overcharge: High pressure readings on both the high and low sides.
- Compressor Issues: Abnormal pressure differences between the high and low sides.
- Blockages: High pressure on the high side and low pressure on the low side.
- Leakage: Gradual drop in pressure over time when the system is off.
CARDIAGTECH.NET provides high-quality AC manifold gauge sets that are essential for accurate AC diagnostics and repairs.
9. Environmental and Legal Considerations for AC Repair
Repairing car AC systems involves environmental and legal considerations that must be taken into account:
9.1 Refrigerant Handling
Refrigerants like R-12 and R-134a are harmful to the environment and are regulated by law. It is illegal to vent these refrigerants into the atmosphere.
9.2 Certification
In many regions, technicians who handle refrigerants must be certified. Certification ensures they have the knowledge and skills to handle refrigerants safely and responsibly.
9.3 Refrigerant Recovery
When repairing AC systems, refrigerant must be recovered using certified recovery equipment. This prevents harmful emissions into the atmosphere.
9.4 Disposal of Components
Components like compressors and condensers may contain residual refrigerant and oil. These components must be disposed of properly to prevent environmental contamination.
9.5 Legal Compliance
Comply with all local, state, and federal regulations regarding AC repair and refrigerant handling. Failure to comply can result in fines and penalties.
9.6 Best Practices for Environmental Responsibility:
- Use certified refrigerant recovery equipment.
- Properly dispose of used refrigerant and components.
- Minimize refrigerant leaks during repair.
- Stay informed about current regulations and best practices.
By adhering to these environmental and legal considerations, you can ensure that AC repairs are performed safely and responsibly.
10. Why Choose CARDIAGTECH.NET for Your AC Repair Needs
When it comes to repairing and maintaining your car’s AC system, choosing the right supplier for tools and equipment is crucial. Here’s why CARDIAGTECH.NET is your best choice:
10.1 High-Quality Products
CARDIAGTECH.NET offers a wide range of high-quality AC repair tools and equipment from trusted brands. Our products are designed to meet the demands of professional technicians and DIY enthusiasts alike.
10.2 Expert Advice
Our team of experienced professionals can provide expert advice and guidance to help you choose the right tools and equipment for your specific needs.
10.3 Competitive Pricing
We offer competitive pricing on all our products, ensuring you get the best value for your money.
10.4 Wide Selection
From AC manifold gauge sets to refrigerant recovery machines, CARDIAGTECH.NET has everything you need to diagnose and repair AC problems effectively.
10.5 Convenient Online Shopping
Our user-friendly website makes it easy to browse our products, place orders, and track your shipments.
10.6 Customer Support
We are committed to providing excellent customer support. If you have any questions or concerns, our team is here to help.
10.7 Value-Added Services
We provide comprehensive information on product use and maintenance, ensuring you get the most out of your investment.
CARDIAGTECH.NET is dedicated to providing top-quality products, expert advice, and exceptional customer service. Trust us for all your AC repair needs.
FAQ: Addressing Common Questions About AC Leaks
Here are some frequently asked questions about AC leaks in cars:
- How often should I service my car’s AC system?
- It’s recommended to service your AC system every 1-2 years, or as specified in your car’s maintenance schedule.
- Can I use a refrigerant leak sealant to fix an AC leak?
- Leak sealants can be a temporary fix for small leaks, but it’s best to address the underlying issue with a proper repair.
- Is it safe to drive with an AC leak?
- Driving with an AC leak can cause further damage to the system and may release harmful refrigerants into the atmosphere.
- How can I tell if my AC compressor is failing?
- Symptoms of a failing compressor include no cold air, loud noises, and the clutch not engaging.
- What are the environmental impacts of refrigerant leaks?
- Refrigerant leaks can contribute to ozone depletion and global warming.
- How much does it cost to repair an AC leak?
- The cost of AC repair can vary depending on the location and severity of the leak, as well as the cost of replacement parts.
- Can I recharge my AC system myself?
- Recharging your AC system requires specialized equipment and knowledge. It’s best to have it done by a certified technician.
- What type of refrigerant does my car use?
- Check your car’s owner manual or the sticker under the hood to determine the correct refrigerant type.
- How do I know if my AC system is overcharged?
- Symptoms of an overcharged system include poor cooling and high AC pressure.
- Where can I find reliable AC repair services?
- CARDIAGTECH.NET can connect you with reputable AC repair services in your area.
Need immediate assistance with your AC repair? Contact CARDIAGTECH.NET now for expert guidance and top-quality tools:
- Address: 276 Reock St, City of Orange, NJ 07050, United States
- WhatsApp: +1 (641) 206-8880
- Website: CARDIAGTECH.NET
Don’t wait to restore your car’s AC to its peak performance. Reach out to CARDIAGTECH.NET today and experience the difference quality tools and expert support can make!

