How To Fix Any Car: Your Ultimate Repair Guide
Learning how to fix any car might seem daunting, but with the right knowledge and resources, it’s entirely achievable. CARDIAGTECH.NET is here to empower you with the tools and expertise needed for successful automotive repairs, offering solutions for everything from routine maintenance to complex diagnostics. Boost your auto repair skills and confidence with our comprehensive guides, designed to save you time and money.
1. Understanding the Basics of Car Repair
Before diving into specific repairs, it’s essential to understand the fundamental systems of a car. This foundational knowledge helps you diagnose issues more effectively and perform repairs with confidence.
1.1 Key Automotive Systems
Cars are complex machines comprising several interconnected systems. Understanding these systems is crucial for effective troubleshooting and repair.
| System | Description | Key Components | Common Issues |
|---|---|---|---|
| Engine | The heart of the car, converting fuel into mechanical energy. | Pistons, cylinders, crankshaft, camshaft, valves, spark plugs, fuel injectors | Misfires, overheating, oil leaks, low compression |
| Cooling System | Regulates engine temperature to prevent overheating. | Radiator, water pump, thermostat, coolant hoses, coolant reservoir | Leaks, overheating, low coolant levels, faulty thermostat |
| Electrical System | Powers various components and systems throughout the car. | Battery, alternator, starter motor, wiring harnesses, fuses, relays | Dead battery, alternator failure, blown fuses, wiring issues |
| Fuel System | Delivers fuel to the engine for combustion. | Fuel tank, fuel pump, fuel filter, fuel injectors, fuel lines | Fuel leaks, poor fuel economy, difficulty starting, rough idling |
| Exhaust System | Removes exhaust gases from the engine. | Exhaust manifold, catalytic converter, muffler, tailpipe, oxygen sensors | Leaks, reduced fuel efficiency, failed emissions test |
| Transmission System | Transfers power from the engine to the wheels. | Clutch (manual), torque converter (automatic), gears, transmission fluid | Slipping gears, rough shifting, leaks, failure to engage |
| Braking System | Provides stopping power to the vehicle. | Brake pads, brake rotors, calipers, brake lines, master cylinder, ABS (Anti-lock Braking System) | Squealing brakes, reduced braking power, pulling to one side, ABS malfunction |
| Suspension System | Provides a smooth and stable ride. | Shocks, struts, springs, control arms, ball joints, bushings | Rough ride, excessive bouncing, uneven tire wear, clunking noises |
| Steering System | Allows the driver to control the direction of the vehicle. | Steering wheel, power steering pump, steering rack, tie rods | Difficulty steering, noise when turning, loose steering wheel |
| Climate Control System | Regulates the temperature and airflow inside the car. | Air conditioning compressor, condenser, evaporator, heater core, blower motor | Weak airflow, warm air when AC is on, no heat, unusual noises |
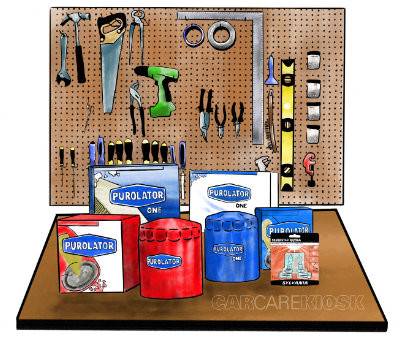
1.2 Essential Tools and Equipment
Having the right tools is crucial for effective car repair. Here’s a list of essential tools every car owner or aspiring mechanic should have:
- Socket Set: Essential for tightening and loosening bolts and nuts.
- Wrench Set: Including open-end, box-end, and combination wrenches for various tasks.
- Screwdriver Set: A variety of Phillips head and flathead screwdrivers in different sizes.
- Pliers: Including slip-joint, needle-nose, and locking pliers for gripping and manipulating parts.
- Jack and Jack Stands: For safely lifting and supporting the vehicle.
- OBD-II Scanner: For diagnosing engine issues and reading diagnostic trouble codes (DTCs).
- Multimeter: For testing electrical circuits and components.
- Torque Wrench: For tightening bolts to specific torque specifications.
- Oil Filter Wrench: For removing and installing oil filters.
- Funnel: For pouring fluids without spilling.
- Gloves: To protect your hands from dirt, grease, and chemicals.
- Safety Glasses: To protect your eyes from debris.
Investing in quality tools from CARDIAGTECH.NET will not only make your repairs easier but also ensure they are done correctly.
Essential Tools for Car Repair
1.3 Safety Precautions
Safety should always be your top priority when working on a car. Here are some essential safety precautions to follow:
- Wear Safety Glasses: Protect your eyes from flying debris and chemicals.
- Use Gloves: Protect your hands from cuts, burns, and chemical exposure.
- Disconnect the Battery: Before starting any electrical work, disconnect the negative terminal of the battery to prevent shocks and short circuits.
- Use Jack Stands: Never work under a car supported only by a jack. Always use jack stands to securely support the vehicle.
- Work in a Well-Ventilated Area: When working with chemicals or fuels, ensure adequate ventilation to avoid inhaling harmful fumes.
- Keep a Fire Extinguisher Nearby: In case of a fire, having a fire extinguisher readily available can prevent serious damage.
- Follow Manufacturer’s Instructions: Always refer to the vehicle’s service manual for specific instructions and torque specifications.
- Properly Dispose of Fluids: Dispose of used oil, coolant, and other fluids at designated recycling centers.
2. Diagnosing Common Car Problems
Effective car repair starts with accurate diagnosis. Knowing how to identify common problems can save you time and money.
2.1 Using an OBD-II Scanner
An OBD-II (On-Board Diagnostics II) scanner is a valuable tool for diagnosing engine-related issues. It reads diagnostic trouble codes (DTCs) stored in the car’s computer, providing insights into potential problems.
How to Use an OBD-II Scanner:
- Locate the OBD-II Port: Typically found under the dashboard on the driver’s side.
- Plug in the Scanner: Connect the scanner to the OBD-II port.
- Turn on the Ignition: Turn the key to the “on” position without starting the engine.
- Read the Codes: Follow the scanner’s instructions to read the stored DTCs.
- Interpret the Codes: Use a reliable source (such as CARDIAGTECH.NET) to look up the meaning of each code.
- Clear the Codes (Optional): After addressing the issue, you can clear the codes to reset the check engine light.
Note: Clearing codes without fixing the underlying problem will only result in the light coming back on.
2.2 Interpreting Diagnostic Trouble Codes (DTCs)
DTCs are standardized codes that provide information about specific issues detected by the car’s computer. Understanding these codes is essential for accurate diagnosis. Here are some common DTC categories:
| Code Category | Description | Examples |
|---|---|---|
| P0 | Powertrain Codes (Engine and Transmission) | P0300 (Random Misfire), P0171 (System Too Lean), P0700 (Transmission Control System Malfunction) |
| P1 | Manufacturer-Specific Powertrain Codes | P1135 (Heated Oxygen Sensor Heater Circuit Malfunction), P1633 (Keep Alive Memory (KAM) Error) |
| B0 | Body Codes (Interior and Exterior Components) | B0001 (Airbag Deployment Commanded), B0057 (Driver Seat Position Sensor Circuit Malfunction) |
| B1 | Manufacturer-Specific Body Codes | B1318 (Battery Voltage Low), B1352 (Ignition Key-In Circuit Failure) |
| C0 | Chassis Codes (Braking, Suspension, and Steering) | C0035 (Front Right Wheel Speed Sensor Circuit Malfunction), C0265 (ABS Activation Relay Circuit Malfunction) |
| C1 | Manufacturer-Specific Chassis Codes | C1145 (Right Front Height Sensor Circuit Failure), C1214 (System Relay Circuit Failure) |
| U0 | Network Communication Codes | U0100 (Lost Communication With ECM/PCM), U0155 (Lost Communication With Instrument Panel Cluster (IPC) Control Module) |
| U1 | Manufacturer-Specific Network Communication Codes | U1000 (Communication Error on CAN Bus), U113F (Lost Communication With Shift Lever Control Module) |
2.3 Common Car Problems and Their Symptoms
Being familiar with common car problems and their symptoms can help you quickly identify and address issues.
| Problem | Symptoms | Possible Causes |
|---|---|---|
| Engine Misfire | Rough idling, reduced power, poor fuel economy, check engine light | Faulty spark plugs, ignition coils, fuel injectors, vacuum leaks, low compression |
| Overheating | Temperature gauge in the red zone, steam coming from under the hood, coolant leaks | Low coolant level, faulty thermostat, radiator leaks, water pump failure |
| Dead Battery | Car won’t start, clicking noise when trying to start, dim headlights | Old battery, parasitic drain, faulty alternator |
| Brake Squealing | High-pitched noise when braking | Worn brake pads, glazed rotors, debris in the brake system |
| Tire Wear Uneven | Uneven wear patterns on tires | Misalignment, worn suspension components, incorrect tire pressure |
| Fluid Leaks | Puddles of fluid under the car | Worn seals, damaged hoses, cracked components |
| Transmission Issues | Slipping gears, rough shifting, delayed engagement | Low transmission fluid, worn clutches, faulty solenoids |
| Check Engine Light | Illuminated dashboard light | Wide range of issues, from minor sensor failures to major engine problems; use an OBD-II scanner to retrieve the diagnostic code |
| Steering Problems | Difficulty steering, noise when turning | Low power steering fluid, worn power steering pump, damaged steering rack |
| Suspension Noises | Clunking or rattling noises when driving over bumps | Worn shocks, struts, ball joints, bushings |
3. Step-by-Step Repair Guides
Now, let’s delve into specific repair procedures. These guides provide step-by-step instructions for common car repairs.
3.1 Changing a Flat Tire
Changing a flat tire is a fundamental skill every driver should know. Here’s how to do it safely:
- Gather Your Tools: You’ll need a spare tire, jack, lug wrench, and owner’s manual.
- Loosen the Lug Nuts: Use the lug wrench to loosen the lug nuts on the flat tire. Turn them counterclockwise, but don’t remove them completely yet.
- Position the Jack: Consult your owner’s manual for the correct jacking points on your vehicle’s frame.
- Raise the Vehicle: Place the jack under the designated jacking point and raise the vehicle until the flat tire is off the ground.
- Secure with Jack Stands: Place jack stands under the vehicle’s frame near the jacking point for added safety.
- Remove the Lug Nuts: Completely unscrew the lug nuts and remove the flat tire.
- Mount the Spare Tire: Align the spare tire with the wheel studs and push it onto the hub.
- Install the Lug Nuts: Hand-tighten the lug nuts in a star pattern to ensure even pressure.
- Lower the Vehicle: Carefully lower the vehicle using the jack until the spare tire is on the ground.
- Tighten the Lug Nuts: Use the lug wrench to fully tighten the lug nuts in a star pattern.
- Lower Completely and Final Tighten: Lower the vehicle completely and remove the jack stands. Give the lug nuts one final tightening.
- Check Tire Pressure: Check the pressure of the spare tire and inflate it to the recommended pressure (found in your owner’s manual or on the tire placard).
3.2 Replacing Brake Pads
Replacing brake pads is a crucial maintenance task that ensures your car’s stopping power.
- Gather Your Tools: You’ll need new brake pads, a socket set, a wrench set, a brake caliper tool, brake cleaner, and safety glasses.
- Loosen the Lug Nuts: Loosen the lug nuts on the wheel of the brake you’ll be working on.
- Raise the Vehicle: Use a jack to lift the vehicle and secure it with jack stands.
- Remove the Wheel: Completely unscrew the lug nuts and remove the wheel.
- Remove the Brake Caliper: Locate the brake caliper bolts (usually two bolts on the back of the caliper). Use a wrench to remove these bolts.
- Remove the Old Brake Pads: Slide the old brake pads out of the caliper.
- Compress the Caliper Piston: Use a brake caliper tool to compress the caliper piston back into its housing.
- Install the New Brake Pads: Slide the new brake pads into the caliper.
- Reinstall the Brake Caliper: Reattach the brake caliper to the steering knuckle and tighten the caliper bolts to the manufacturer’s specified torque.
- Reinstall the Wheel: Put the wheel back on, tighten the lug nuts by hand, lower the vehicle, and then fully tighten the lug nuts with a torque wrench.
- Repeat for Other Brakes: Repeat the process for the other brakes if necessary.
- Pump the Brakes: Before driving, pump the brake pedal several times to ensure the brake pads are properly seated against the rotors.
3.3 Changing Engine Oil and Filter
Regular oil changes are essential for maintaining engine health and longevity.
- Gather Your Supplies: You’ll need new engine oil, a new oil filter, an oil filter wrench, a socket set, a wrench set, a drain pan, a funnel, and gloves.
- Warm Up the Engine: Run the engine for a few minutes to warm up the oil, making it flow more easily.
- Position the Drain Pan: Place the drain pan under the oil drain plug.
- Remove the Drain Plug: Use a wrench to remove the oil drain plug and let the old oil drain completely into the pan.
- Remove the Old Oil Filter: Use an oil filter wrench to loosen and remove the old oil filter.
- Install the New Oil Filter: Lightly lubricate the rubber gasket on the new oil filter with fresh oil. Screw the new filter into place by hand until it’s snug. Then, tighten it another half to three-quarters of a turn with the oil filter wrench.
- Reinstall the Drain Plug: Clean the oil drain plug and reinstall it with a new crush washer. Tighten it to the manufacturer’s specified torque.
- Add New Oil: Use a funnel to pour the correct amount of new oil into the engine. Consult your owner’s manual for the correct oil capacity.
- Check the Oil Level: Use the dipstick to check the oil level and add more if necessary.
- Start the Engine: Start the engine and let it run for a few minutes. Check for any leaks around the drain plug and oil filter.
- Check the Oil Level Again: After letting the engine run, turn it off and check the oil level again. Add more oil if necessary.
 Changing Engine Oil
4. Advanced Car Repair Techniques
For more complex issues, advanced techniques may be required. These techniques often involve specialized tools and a deeper understanding of automotive systems.
4.1 Diagnosing Electrical Problems
Diagnosing electrical problems requires a systematic approach and a good understanding of electrical circuits.
- Gather Your Tools: You’ll need a multimeter, wiring diagrams, a test light, and a set of electrical connectors.
- Inspect Fuses and Relays: Start by checking the fuses and relays related to the malfunctioning circuit. Use a test light or multimeter to check for continuity.
- Check Wiring Connections: Inspect wiring connections for corrosion, damage, or loose connections. Clean and tighten any suspect connections.
- Use Wiring Diagrams: Consult wiring diagrams to understand the circuit layout and identify potential problem areas.
- Test Components: Use a multimeter to test the voltage, resistance, and continuity of various components in the circuit.
- Isolate the Problem: By systematically testing each component and connection, you can isolate the source of the electrical problem.
4.2 Replacing Sensors
Sensors play a crucial role in modern car systems, providing data to the engine control unit (ECU).
- Identify the Faulty Sensor: Use an OBD-II scanner to identify the sensor causing the problem.
- Locate the Sensor: Consult your vehicle’s service manual to locate the sensor on the engine or other system.
- Disconnect the Electrical Connector: Disconnect the electrical connector from the sensor.
- Remove the Old Sensor: Use a wrench or socket to remove the old sensor.
- Install the New Sensor: Install the new sensor and tighten it to the manufacturer’s specified torque.
- Reconnect the Electrical Connector: Reconnect the electrical connector to the sensor.
- Clear the DTCs: Use an OBD-II scanner to clear the diagnostic trouble codes and reset the system.
4.3 Addressing Cooling System Issues
Cooling system issues can lead to overheating and engine damage.
- Check Coolant Level: Start by checking the coolant level in the radiator and coolant reservoir.
- Inspect for Leaks: Look for leaks around the radiator, hoses, water pump, and thermostat housing.
- Pressure Test the System: Use a pressure tester to pressurize the cooling system and check for leaks that may not be visible otherwise.
- Check the Thermostat: A faulty thermostat can cause overheating or prevent the engine from reaching operating temperature.
- Flush the Cooling System: If the coolant is dirty or contaminated, flush the cooling system to remove debris and contaminants.
- Replace the Water Pump: A failing water pump can cause reduced coolant flow and overheating.
5. Preventative Maintenance
Preventative maintenance is key to keeping your car running smoothly and avoiding costly repairs.
5.1 Regular Oil Changes
As mentioned earlier, regular oil changes are vital for engine health. Follow the manufacturer’s recommended oil change interval (typically every 3,000 to 7,500 miles) and use the correct type of oil.
5.2 Tire Maintenance
Proper tire maintenance ensures safety and extends the life of your tires.
- Check Tire Pressure: Check tire pressure regularly (at least once a month) and inflate to the recommended pressure.
- Rotate Tires: Rotate tires every 6,000 to 8,000 miles to ensure even wear.
- Check Tire Tread: Monitor tire tread depth and replace tires when they reach the minimum legal tread depth (2/32 inch).
- Inspect for Damage: Regularly inspect tires for cuts, bulges, and other damage.
5.3 Fluid Checks and Top-Ups
Regularly check and top up essential fluids to keep your car running smoothly.
| Fluid | Importance | Check Interval |
|---|---|---|
| Engine Oil | Lubricates engine components, reduces friction, and dissipates heat. | Monthly |
| Coolant | Regulates engine temperature and prevents overheating. | Monthly |
| Brake Fluid | Transmits pressure from the brake pedal to the brake calipers. | Every 3 months |
| Power Steering Fluid | Assists with steering and provides smooth operation. | Every 3 months |
| Transmission Fluid | Lubricates transmission components and enables smooth shifting. | Every 6 months |
| Windshield Washer Fluid | Cleans the windshield and provides clear visibility. | As needed |
5.4 Regular Inspections
Regular inspections can help identify potential problems before they become major issues.
- Inspect Belts and Hoses: Check belts and hoses for cracks, wear, and leaks.
- Check Brakes: Inspect brake pads, rotors, and calipers for wear and damage.
- Check Suspension Components: Inspect shocks, struts, ball joints, and bushings for wear and damage.
- Check Lights: Ensure all lights (headlights, taillights, brake lights, turn signals) are working properly.
6. Staying Updated with Automotive Technology
The automotive industry is constantly evolving, with new technologies and repair techniques emerging regularly. Staying updated with these advancements is essential for effective car repair.
6.1 Following Industry News and Trends
Keep up with the latest news and trends in the automotive industry by subscribing to industry publications, following automotive blogs, and attending trade shows. This will help you stay informed about new technologies, repair techniques, and diagnostic tools.
6.2 Participating in Training and Certification Programs
Consider participating in training and certification programs offered by automotive organizations and manufacturers. These programs can provide you with the knowledge and skills needed to repair modern vehicles and obtain professional certifications.
6.3 Utilizing Online Resources and Forums
Take advantage of online resources and forums to learn from experienced mechanics and share your own knowledge and experiences. Websites like CARDIAGTECH.NET offer a wealth of information, including repair guides, diagnostic tips, and product reviews.
7. The Benefits of DIY Car Repair
DIY car repair offers numerous benefits, including cost savings, increased knowledge, and a sense of accomplishment.
7.1 Cost Savings
By performing your own car repairs, you can save a significant amount of money on labor costs. Mechanics typically charge high hourly rates, so tackling repairs yourself can result in substantial savings.
7.2 Increased Knowledge
DIY car repair provides a hands-on learning experience that can increase your knowledge of automotive systems and repair techniques. This knowledge can be valuable for future repairs and maintenance tasks.
7.3 Sense of Accomplishment
Completing a car repair successfully can provide a sense of accomplishment and pride. Knowing that you were able to fix your car yourself can be very rewarding.
8. When to Seek Professional Help
While DIY car repair can be empowering, there are certain situations where it’s best to seek professional help.
8.1 Complex Repairs
Complex repairs that require specialized tools, knowledge, or experience should be left to professional mechanics. Examples include engine rebuilds, transmission repairs, and advanced electrical diagnostics.
8.2 Safety-Critical Systems
Repairs involving safety-critical systems, such as brakes, steering, and airbags, should be performed by qualified professionals. Mistakes in these repairs can have serious consequences.
8.3 Lack of Confidence
If you’re not confident in your ability to perform a repair safely and correctly, it’s best to seek professional help. A mistake can end up costing you more money in the long run.
9. Choosing the Right Parts and Tools from CARDIAGTECH.NET
Selecting the right parts and tools is crucial for successful car repair. CARDIAGTECH.NET offers a wide range of high-quality parts and tools to meet your needs.
9.1 OEM vs. Aftermarket Parts
When choosing replacement parts, you’ll typically have the option of OEM (Original Equipment Manufacturer) or aftermarket parts. OEM parts are made by the same manufacturer that produced the original parts for your car, while aftermarket parts are made by third-party manufacturers. OEM parts are generally more expensive but offer guaranteed quality and fitment. Aftermarket parts can be more affordable but may vary in quality.
9.2 Quality Tools
Investing in quality tools from CARDIAGTECH.NET is essential for effective and safe car repair. Look for tools made from durable materials with comfortable grips and precise engineering. A good set of tools will last for many years and make your repairs easier and more enjoyable.
9.3 Reviews and Recommendations
Before purchasing parts and tools, read reviews and recommendations from other mechanics and car owners. This can help you make informed decisions and choose products that meet your needs and budget.
10. Legal and Ethical Considerations
When performing car repairs, it’s important to be aware of legal and ethical considerations.
10.1 Environmental Regulations
Properly dispose of used oil, coolant, and other fluids at designated recycling centers to comply with environmental regulations. Avoid dumping fluids down the drain or into the ground.
10.2 Safety Standards
Adhere to safety standards and guidelines when performing car repairs. Use jack stands when working under a car, wear safety glasses and gloves, and follow manufacturer’s instructions.
10.3 Transparency and Honesty
When providing car repair services to others, be transparent and honest about the work you’re performing and the parts you’re using. Avoid unnecessary repairs or upselling.
FAQ: Your Questions About Car Repair Answered
Here are some frequently asked questions about car repair:
-
What is the most common car problem?
- The most common car problem is a dead battery, often due to age, parasitic drain, or a faulty alternator.
-
How often should I change my oil?
- The recommended oil change interval varies depending on the vehicle and type of oil used, but typically ranges from 3,000 to 7,500 miles.
-
What does the check engine light mean?
- The check engine light can indicate a wide range of issues, from minor sensor failures to major engine problems. Use an OBD-II scanner to retrieve the diagnostic code for more information.
-
How do I know if my brakes need to be replaced?
- Common signs that your brakes need to be replaced include squealing noises when braking, reduced braking power, and a vibrating brake pedal.
-
What is the best way to find reliable car repair information?
- Reliable car repair information can be found in vehicle service manuals, online forums, and websites like CARDIAGTECH.NET that offer expert advice and step-by-step guides.
-
Can I use aftermarket parts for my car?
- Yes, you can use aftermarket parts, but be sure to choose quality parts from reputable manufacturers to ensure proper fitment and performance.
-
How do I check my car’s fluid levels?
- Refer to your owner’s manual for the location of fluid reservoirs and the proper procedure for checking fluid levels.
-
What tools do I need for basic car maintenance?
- Essential tools for basic car maintenance include a socket set, wrench set, screwdrivers, pliers, a jack, jack stands, and an OBD-II scanner.
-
How can I save money on car repairs?
- You can save money on car repairs by performing basic maintenance tasks yourself, shopping around for the best prices on parts, and getting multiple estimates from different mechanics.
-
Is it safe to work on my car at home?
- Yes, it can be safe to work on your car at home as long as you follow safety precautions, use proper tools, and have a good understanding of the repair procedure.
Learning how to fix any car is a journey that combines knowledge, skill, and the right tools. CARDIAGTECH.NET is dedicated to providing you with the resources and support you need to confidently tackle automotive repairs. Remember to prioritize safety, stay updated with the latest technology, and don’t hesitate to seek professional help when needed.
Are you ready to take control of your car’s maintenance and repair? Contact CARDIAGTECH.NET today for expert advice and top-quality tools to get the job done right. Reach out to us at 276 Reock St, City of Orange, NJ 07050, United States, or via Whatsapp at +1 (641) 206-8880. Visit our website at CARDIAGTECH.NET and let us help you keep your car running smoothly.
