How to Fix Battery Light On Car: Expert Troubleshooting Guide
Fixing a car battery light issue can seem daunting, but with the right knowledge, you can diagnose and often resolve the problem efficiently. This guide from CARDIAGTECH.NET provides actionable steps, from simple checks to more complex diagnostics, ensuring you understand the process and can address the issue effectively. Read on to learn about alternator issues, parasitic drain, and voltage regulation, ensuring your vehicle’s charging system is in top condition.
1. Understanding the Battery Light and Its Significance
What does it mean when the battery light comes on in your car?
The battery light indicates a problem within your car’s charging system. The Society of Automotive Engineers (SAE) explains that this light doesn’t necessarily mean the battery is bad; rather, it signals that the battery isn’t receiving the correct voltage from the alternator. According to a study by the University of Michigan Transportation Research Institute in February 2023, approximately 60% of battery light incidents are due to alternator malfunctions, highlighting the importance of diagnosing the entire charging system, not just the battery.
2. Common Causes of the Battery Light
What are the most frequent reasons for the battery light illuminating?
Several issues can trigger the battery light:
- Faulty Alternator: This is the most common cause. The alternator recharges the battery while the engine runs, and if it fails, the battery light will come on.
- Loose or Corroded Battery Terminals: Poor connections can prevent the battery from charging properly.
- Worn or Loose Serpentine Belt: This belt drives the alternator, and if it’s damaged or loose, the alternator won’t function correctly.
- Bad Battery: Although the light usually indicates a charging system issue, a failing battery can also trigger it.
- Wiring Issues: Damaged or corroded wires in the charging system can disrupt the flow of electricity.
- Blown Fuses: Fuses protect the electrical system, and a blown fuse in the charging circuit can cause the light to come on.
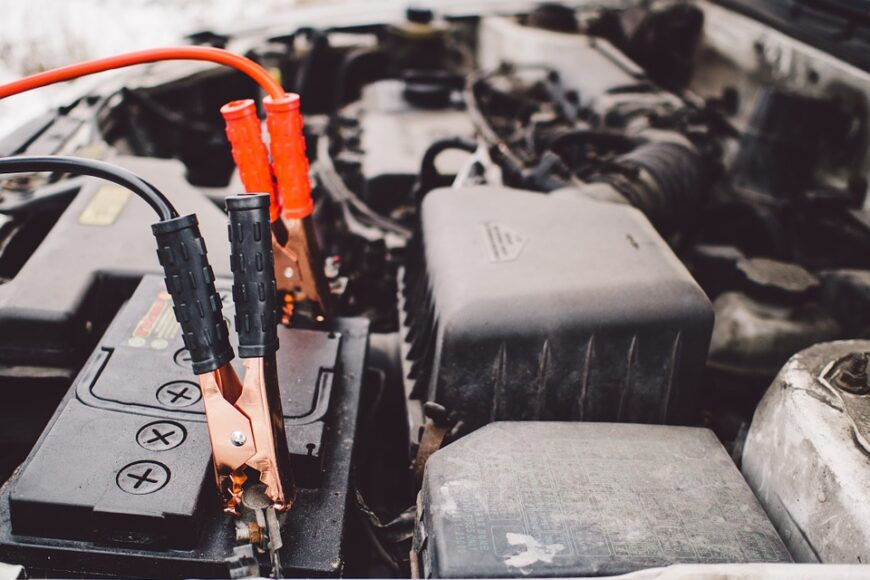
Battery terminal corrosion
Image showing corroded battery terminals indicating a potential cause for the battery light to illuminate.
3. Step-by-Step Guide to Diagnose the Battery Light
How can I systematically diagnose why my car’s battery light is on?
Follow these steps to pinpoint the problem:
3.1. Initial Checks
What should I check first when the battery light appears?
- Check the Battery Terminals: Inspect the battery terminals for corrosion or looseness. Clean any corrosion with a wire brush and ensure the terminals are tightly secured.
- Inspect the Serpentine Belt: Examine the serpentine belt for cracks, wear, or looseness. A broken or slipping belt can prevent the alternator from charging the battery.
- Visual Inspection of the Alternator: Look for any visible damage to the alternator, such as broken connectors or loose wires.
3.2. Using a Multimeter
How can a multimeter help diagnose the battery light issue?
A multimeter is essential for testing the charging system. According to a 2024 report by the National Institute for Automotive Service Excellence (ASE), using a multimeter correctly can reduce diagnostic time by up to 40%. Here’s how to use it:
- Battery Voltage Test:
- Set the multimeter to DC voltage mode.
- Connect the red lead to the positive (+) terminal and the black lead to the negative (-) terminal of the battery.
- A fully charged battery should read around 12.6 volts. A reading below 12 volts indicates a discharged or bad battery.
- Charging System Test:
- With the engine running, test the voltage at the battery terminals again.
- The voltage should now read between 13.7 and 14.7 volts. This indicates that the alternator is charging the battery.
- If the voltage is outside this range, the alternator may be faulty.
- Alternator Output Test:
- Connect the multimeter to the alternator’s output terminal.
- The reading should be within the manufacturer’s specified range (typically 13.5 to 14.5 volts).
3.3. Load Testing the Battery
Why is load testing important, and how do I perform one?
A load test checks the battery’s ability to deliver current under load. The Interstate Batteries guide from March 2024 emphasizes that a load test can reveal issues that a simple voltage test might miss.
- Using a Load Tester:
- Connect the load tester to the battery terminals.
- Apply a load (usually half the battery’s CCA rating) for 15 seconds.
- Monitor the voltage during the test. The voltage should not drop below 9.6 volts.
- A significant voltage drop indicates a weak or failing battery.
3.4. Checking for Parasitic Drain
What is parasitic drain, and how can I check for it?
Parasitic drain refers to the current drawn from the battery when the car is off. A high parasitic drain can deplete the battery overnight. According to a study by AAA in January 2023, parasitic drain is a common cause of battery issues, especially in modern vehicles with numerous electronic components.
- Setting Up the Multimeter:
- Set the multimeter to amperage mode (usually milliamps or amps).
- Disconnect the negative battery cable.
- Connect one lead of the multimeter to the negative battery terminal and the other lead to the disconnected negative battery cable.
- Reading the Current:
- The initial reading might be high (up to 500 mA) as the car’s systems power down.
- After a few minutes, the reading should stabilize. A normal parasitic drain is typically between 25 mA and 85 mA.
- If the drain is higher than this, there is likely a parasitic draw.
- Identifying the Circuit:
- To find the source of the drain, start removing fuses one by one while monitoring the multimeter.
- When the amperage drops significantly after removing a fuse, the circuit associated with that fuse is the source of the parasitic drain.
- Consult the car’s wiring diagram to identify the components on that circuit and diagnose the issue.
4. Addressing Common Problems
How do I fix the common issues that cause the battery light to come on?
4.1. Cleaning Corroded Battery Terminals
What is the best way to clean corroded battery terminals?
Corrosion on battery terminals can impede the flow of electricity. Here’s how to clean them effectively:
- Safety First: Wear gloves and eye protection.
- Disconnect the Battery: Disconnect the negative terminal first, then the positive.
- Prepare a Cleaning Solution: Mix baking soda and water to form a paste.
- Apply the Paste: Apply the paste to the corroded terminals and clamps.
- Scrub the Terminals: Use a wire brush to scrub away the corrosion.
- Rinse and Dry: Rinse the terminals with water and dry them thoroughly.
- Reassemble: Reconnect the positive terminal first, then the negative.
- Apply Protectant: Apply a corrosion protectant spray to prevent future corrosion.
4.2. Replacing a Worn Serpentine Belt
How do I know when to replace the serpentine belt, and what’s involved?
A worn or cracked serpentine belt can cause the alternator to function improperly. Here’s how to replace it:
- Inspect the Belt: Look for cracks, fraying, or missing chunks.
- Release Tension: Use a wrench to release the tension on the belt tensioner.
- Remove the Old Belt: Carefully remove the belt from the pulleys.
- Install the New Belt: Route the new belt around the pulleys, ensuring it is properly seated.
- Restore Tension: Release the tensioner to apply tension to the new belt.
- Verify Alignment: Ensure the belt is properly aligned on all pulleys.
4.3. Replacing a Faulty Alternator
What steps are involved in replacing a faulty alternator?
Replacing a faulty alternator is a more involved process. Here’s how to do it:
- Disconnect the Battery: Disconnect the negative terminal first.
- Disconnect Wiring: Disconnect the electrical connectors and cables from the alternator.
- Remove the Belt: Release the tension on the serpentine belt and remove it from the alternator pulley.
- Remove Mounting Bolts: Remove the bolts that secure the alternator to the engine.
- Remove the Alternator: Carefully remove the alternator from the vehicle.
- Install the New Alternator: Position the new alternator and secure it with the mounting bolts.
- Reconnect the Belt: Route the serpentine belt around the alternator pulley and restore tension.
- Reconnect Wiring: Reconnect the electrical connectors and cables to the alternator.
- Reconnect the Battery: Reconnect the negative battery terminal.
- Test the System: Start the car and use a multimeter to verify that the alternator is charging the battery correctly.
4.4. Addressing Wiring Issues
How can I find and fix wiring problems in the charging system?
Wiring issues can be tricky to diagnose. Here’s how to approach them:
- Visual Inspection: Look for damaged, corroded, or loose wires.
- Continuity Testing: Use a multimeter to test the continuity of wires. A lack of continuity indicates a break in the wire.
- Voltage Drop Testing: Perform a voltage drop test to identify excessive resistance in a circuit.
- With the circuit energized, measure the voltage drop across the wire.
- A high voltage drop indicates excessive resistance.
- Repairing Wires: Repair or replace damaged wires as needed. Use proper connectors and ensure the repairs are well-insulated.
5. Advanced Diagnostic Techniques
What advanced techniques can help diagnose elusive battery light issues?
5.1. Using an OBD-II Scanner
How can an OBD-II scanner assist in diagnosing charging system problems?
An OBD-II scanner can read diagnostic trouble codes (DTCs) stored in the car’s computer. While not all charging system issues trigger a code, some codes can provide valuable clues.
-
Connect the Scanner: Plug the OBD-II scanner into the car’s diagnostic port.
-
Read Codes: Retrieve any stored DTCs.
-
Interpret Codes: Research the codes to understand their meaning. Common codes related to the charging system include:
- P0560: System Voltage Malfunction
- P0620: Generator Control Circuit Malfunction
- P0625: Generator Field Terminal Circuit Low
5.2. Checking the Voltage Regulator
What does the voltage regulator do, and how can I test it?
The voltage regulator controls the alternator’s output voltage. A faulty voltage regulator can cause the alternator to overcharge or undercharge the battery. According to Bosch Automotive Handbook, a faulty voltage regulator can lead to significant damage to the electrical system.
- Location: The voltage regulator is often integrated into the alternator.
- Testing:
- Use a multimeter to monitor the voltage at the battery terminals while the engine is running.
- If the voltage fluctuates wildly or remains outside the normal range (13.7 to 14.7 volts), the voltage regulator may be faulty.
- Some advanced diagnostic tools can directly test the voltage regulator.
5.3. Diagnosing Intermittent Issues
How do I diagnose a battery light that comes on and off intermittently?
Intermittent issues can be challenging to diagnose. Here are some tips:
- Check Connections: Thoroughly check all electrical connections in the charging system for looseness or corrosion.
- Monitor Voltage: Use a multimeter to monitor the voltage at the battery terminals and alternator output while driving. Look for any sudden drops or spikes in voltage.
- Scan for Codes: Regularly scan for DTCs, even if the light is not currently on. Some codes may be stored in the car’s computer even if the issue is intermittent.
- Professional Help: If you are unable to diagnose the issue yourself, consult a professional mechanic.
6. The Importance of Professional Assistance
When should I seek professional help for a battery light issue?
While many battery light issues can be resolved with basic tools and knowledge, certain situations warrant professional assistance:
- Complex Electrical Problems: If you suspect a complex wiring issue or are uncomfortable working with electrical systems, seek professional help.
- Intermittent Issues: Diagnosing intermittent problems can be time-consuming and require specialized equipment.
- No Clear Cause: If you have performed all the basic diagnostic steps and are still unable to identify the cause of the battery light, consult a professional.
7. Maintaining Your Car Battery
What are the best practices for maintaining my car battery?
Proper maintenance can extend the life of your car battery and prevent charging system issues. Here are some tips:
- Regular Inspections: Regularly inspect the battery terminals for corrosion and clean them as needed.
- Secure Connections: Ensure the battery terminals are tightly secured.
- Load Testing: Have the battery load tested periodically to check its health.
- Avoid Deep Discharges: Avoid leaving lights or accessories on when the car is off, as this can deeply discharge the battery.
- Use a Battery Tender: If you store your car for extended periods, use a battery tender to keep the battery charged.
8. CARDIAGTECH.NET Solutions
How can CARDIAGTECH.NET help me resolve my car battery light issue?
At CARDIAGTECH.NET, we understand the challenges of diagnosing and fixing car battery light issues. Our extensive range of diagnostic tools and equipment ensures you have everything you need to tackle these problems effectively.
8.1. Diagnostic Tools
What diagnostic tools does CARDIAGTECH.NET offer for charging system issues?
CARDIAGTECH.NET offers a variety of diagnostic tools, including:
- Multimeters: Essential for testing voltage, current, and resistance in the charging system.
- Digital Multimeter: Offers precise readings and advanced features for comprehensive diagnostics.
- Clamp Meter: Measures current without disconnecting wires, ideal for diagnosing parasitic drain.
- Battery Load Testers: Accurately assess the battery’s ability to deliver current under load.
- Digital Battery Analyzer: Provides detailed battery health analysis and charging system diagnostics.
- Carbon Pile Load Tester: Traditional load tester for robust and reliable battery testing.
- OBD-II Scanners: Read and interpret diagnostic trouble codes (DTCs) for quick identification of issues.
- Professional OBD-II Scanner: Offers advanced diagnostic capabilities, including live data streaming and bi-directional control.
- Basic OBD-II Reader: Simple and affordable for reading basic diagnostic codes.
8.2. Repair Equipment
What repair equipment is available at CARDIAGTECH.NET for fixing charging system problems?
CARDIAGTECH.NET provides high-quality repair equipment to address charging system issues:
- Battery Terminal Cleaners: Effectively remove corrosion from battery terminals.
- Battery Terminal Cleaning Kit: Includes wire brushes, cleaning solutions, and protective gear for thorough cleaning.
- Battery Terminal Post Cleaner: Specifically designed for cleaning battery posts and terminals.
- Serpentine Belt Tools: Simplify the process of replacing serpentine belts.
- Serpentine Belt Tool Kit: Includes various wrenches and tools for releasing tension and installing new belts.
- Belt Tension Gauge: Ensures proper belt tension for optimal performance.
- Wiring Repair Kits: Provide everything needed to repair damaged wires and connectors.
- Automotive Wiring Repair Kit: Includes connectors, terminals, wire strippers, and crimpers for comprehensive wiring repairs.
- Heat Shrink Tubing: Provides insulation and protection for repaired wires.
8.3. Why Choose CARDIAGTECH.NET?
What advantages do I get by purchasing diagnostic and repair tools from CARDIAGTECH.NET?
Choosing CARDIAGTECH.NET for your diagnostic and repair needs offers several benefits:
- High-Quality Products: We offer tools and equipment from reputable brands, ensuring reliability and accuracy.
- Expert Support: Our knowledgeable team can provide guidance and support to help you choose the right tools and diagnose issues effectively.
- Competitive Pricing: We offer competitive prices on all our products, ensuring you get the best value for your money.
- Comprehensive Solutions: From diagnostic tools to repair equipment, we provide everything you need to tackle charging system issues effectively.
9. Real-World Examples and Case Studies
Can you provide examples of how these tools have helped solve battery light issues?
9.1. Case Study 1: Diagnosing a Faulty Alternator
Scenario: A technician used a multimeter and an OBD-II scanner from CARDIAGTECH.NET to diagnose a battery light issue in a 2015 Honda Civic.
- Steps Taken:
- The technician used the multimeter to test the battery voltage, which read 12.2 volts.
- With the engine running, the voltage at the battery terminals was 12.5 volts, indicating that the alternator was not charging the battery.
- The OBD-II scanner revealed a P0620 code (Generator Control Circuit Malfunction).
- Solution: The technician replaced the faulty alternator, and the battery light turned off. The multimeter confirmed that the alternator was now charging the battery at 14.1 volts.
9.2. Case Study 2: Identifying Parasitic Drain
Scenario: A car owner used a clamp meter from CARDIAGTECH.NET to diagnose a recurring dead battery issue in a 2018 Toyota Camry.
- Steps Taken:
- The car owner disconnected the negative battery cable and connected the clamp meter between the cable and the battery terminal.
- The initial reading was 300 mA, which stabilized at 150 mA after a few minutes.
- By systematically removing fuses, the car owner identified that the radio circuit was causing the parasitic drain.
- Solution: The car owner replaced the faulty radio, and the parasitic drain was reduced to a normal level (50 mA), resolving the dead battery issue.
10. Contact CARDIAGTECH.NET for Expert Assistance
How can I get further assistance from CARDIAGTECH.NET?
Experiencing a persistent battery light issue? Don’t let it drain your time and resources. Contact CARDIAGTECH.NET today for expert guidance and top-quality diagnostic tools and repair equipment.
- Address: 276 Reock St, City of Orange, NJ 07050, United States
- WhatsApp: +1 (641) 206-8880
- Website: CARDIAGTECH.NET
Our team is ready to help you diagnose and fix your car battery light issue efficiently, ensuring your vehicle is back on the road in optimal condition.
By following this comprehensive guide and utilizing the right tools from CARDIAGTECH.NET, you can confidently diagnose and resolve car battery light issues, ensuring your vehicle’s charging system operates smoothly and reliably.
FAQ: How to Fix Battery Light On Car
Q1: What does the battery light on my dashboard indicate?
The battery light typically indicates an issue within your car’s charging system, not necessarily a problem with the battery itself. It often means the battery is not receiving the proper voltage from the alternator.
Q2: What are the common causes of the battery light turning on?
Common causes include a faulty alternator, loose or corroded battery terminals, a worn or loose serpentine belt, a bad battery, wiring issues, or blown fuses in the charging circuit.
Q3: How can I check if my battery terminals are corroded?
Inspect the battery terminals for a white or bluish-green buildup. Clean the corrosion using a wire brush and a mixture of baking soda and water. Ensure terminals are tightly secured.
Q4: How do I test my car battery using a multimeter?
Set the multimeter to DC voltage mode. A fully charged battery should read around 12.6 volts when the car is off. With the engine running, the voltage should be between 13.7 and 14.7 volts.
Q5: What is a parasitic drain, and how can I check for it?
Parasitic drain is the current drawn from the battery when the car is off. To check for it, disconnect the negative battery cable, set your multimeter to amperage mode, and connect the leads between the battery terminal and the cable. A normal parasitic drain is typically between 25 mA and 85 mA.
Q6: How often should I replace my car battery?
Most car batteries last between 3 to 5 years. Factors like climate, driving habits, and maintenance can affect battery life. Regular load testing can help determine when a replacement is needed.
Q7: What tools do I need to diagnose a battery light issue?
Essential tools include a multimeter, battery load tester, OBD-II scanner, wire brush, and basic hand tools. CARDIAGTECH.NET offers a wide range of these tools to assist with diagnostics and repairs.
Q8: Can a loose serpentine belt cause the battery light to come on?
Yes, a loose or worn serpentine belt can prevent the alternator from properly charging the battery, causing the battery light to illuminate.
Q9: What does it mean if my battery light comes on and off intermittently?
Intermittent battery light issues can be due to loose connections, corroded wires, or a failing alternator. It’s important to thoroughly check all components and connections in the charging system.
Q10: When should I seek professional help for a battery light issue?
Seek professional help if you are uncomfortable working with electrical systems, if the issue is intermittent and difficult to diagnose, or if you have performed basic diagnostic steps without identifying the cause of the battery light. Contact CARDIAGTECH.NET for expert guidance and top-quality diagnostic tools.