**How To Fix Black Paint Chips On Car: A Pro Guide**

Black paint chips on your car can be a real eyesore, but don’t worry, CARDIAGTECH.NET is here to help you restore your vehicle’s sleek appearance. This comprehensive guide provides expert advice and step-by-step instructions on repairing those annoying chips, ensuring a professional-looking finish. Using quality tools and techniques is critical for any auto repair and CARDIAGTECH.NET supplies the very best.
1. Understanding Black Paint Chips on Cars
Black paint on cars, while stylish, is particularly susceptible to showing chips and scratches. Because black is a dark color, even small imperfections can be quite noticeable. Stone chips, road debris, and minor collisions can all cause these unsightly blemishes.
1.1. Common Causes of Paint Chips
Paint chips are often caused by:
- Road Debris: Gravel, stones, and other debris kicked up by tires.
- Collisions: Minor bumps and scrapes in parking lots or on the road.
- Weather: Extreme temperatures and harsh weather conditions.
- Poor Maintenance: Neglecting regular washing and waxing can weaken the paint’s protective layer.
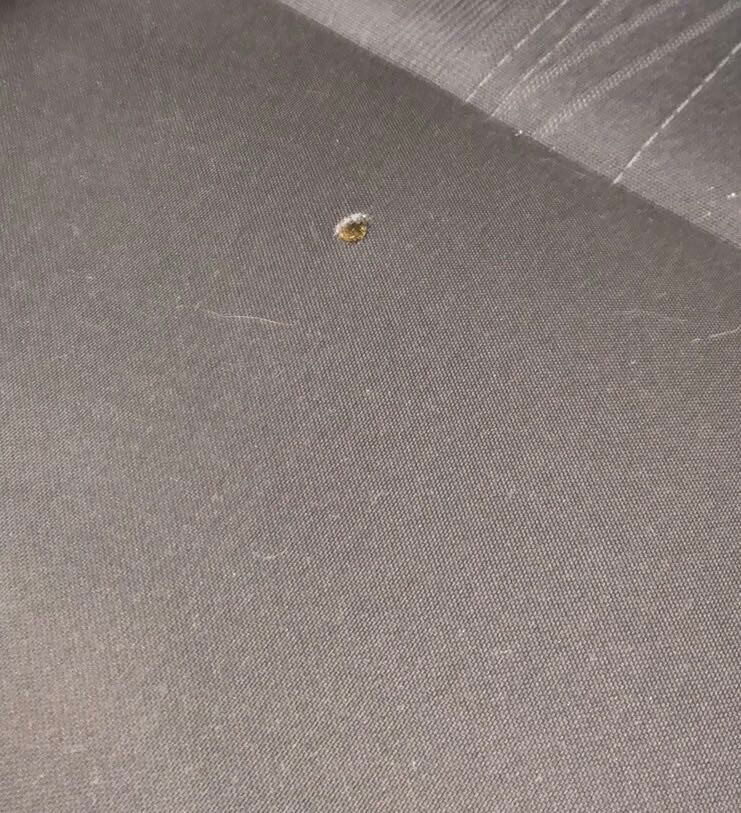
Close-up of a black car paint chip
Image alt: Close-up of a black car paint chip highlighting the damage.
1.2. Why Black Paint Shows Chips More Easily
Black paint absorbs more light than lighter colors, making imperfections more visible. Additionally, the contrast between the dark paint and the lighter primer or metal underneath makes chips stand out.
- High Contrast: Black paint provides a stark contrast with underlying layers.
- Light Absorption: Black absorbs light, highlighting imperfections.
- Surface Visibility: The smooth, glossy finish of black paint accentuates any flaws.
2. Identifying the Damage
Before you begin, it’s important to assess the extent of the damage. This will help you determine the best approach for repair.
2.1. Types of Chips and Scratches
- Minor Chips: Small, shallow chips that only affect the clear coat or top layer of paint.
- Deep Chips: Chips that penetrate through the paint layers and expose the metal underneath.
- Scratches: Surface scratches that can often be buffed out.
2.2. Assessing the Severity
Examine the chips closely to determine their depth and size. Check for any signs of rust, which can complicate the repair process.
- Surface Level: Damage limited to the clear coat.
- Paint Layer Penetration: Chips extending into the base coat.
- Metal Exposure: Damage reaching the bare metal, requiring immediate attention to prevent rust.
3. Essential Tools and Materials for Black Paint Chip Repair
Having the right tools and materials is crucial for achieving a professional-looking repair. CARDIAGTECH.NET offers a wide range of high-quality auto repair tools to ensure you get the job done right.
3.1. Required Tools
- Cleaning Supplies: Soap, water, and wax remover.
- Sandpaper: Fine-grit sandpaper (2000-3000 grit).
- Primer: Automotive primer suitable for your car’s paint.
- Touch-Up Paint: Matching black touch-up paint (ensure it matches your car’s paint code).
- Clear Coat: Automotive clear coat to protect the repaired area.
- Applicators: Small brushes, paint pens, or toothpicks.
- Polishing Compound: Fine polishing compound.
- Microfiber Cloths: Clean, lint-free microfiber cloths.
- Rubbing Alcohol: For cleaning surfaces.
3.2. Optional Tools
- Heat Gun: To speed up drying times.
- Detailing Swabs: For precise application.
- Paint Leveling Solution: To blend the touch-up paint seamlessly.
- Magnifying Glass: For detailed inspection.
4. Step-by-Step Guide to Fixing Black Paint Chips
Follow these steps to effectively repair black paint chips on your car and achieve a professional finish.
4.1. Preparation
- Wash the Area: Clean the area around the chip with soap and water to remove any dirt or debris.
- Remove Wax: Use a wax remover to ensure a clean surface for the paint to adhere to.
- Dry Thoroughly: Allow the area to dry completely.
4.2. Sanding
- Wet Sand: Lightly wet sand the edges of the chip using fine-grit sandpaper (2000-3000 grit) to smooth out any rough edges.
- Clean Again: Wipe the area with rubbing alcohol to remove any sanding residue.
4.3. Applying Primer
- Apply Primer: Use a small brush or applicator to apply a thin layer of automotive primer to the chip.
- Allow to Dry: Let the primer dry completely (refer to the manufacturer’s instructions for drying time).
- Light Sanding (Optional): If the primer is uneven, lightly sand it with fine-grit sandpaper.
4.4. Applying Touch-Up Paint
- Shake Well: Shake the touch-up paint thoroughly to ensure even distribution of pigment.
- Apply Thin Layers: Apply thin, even layers of touch-up paint to the chip using a small brush, paint pen, or toothpick.
- Allow to Dry: Let each layer dry completely before applying the next (usually 10-20 minutes between coats).
- Multiple Coats: Apply multiple coats until the paint is level with the surrounding surface.
4.5. Applying Clear Coat
- Apply Clear Coat: Once the touch-up paint is completely dry, apply a thin layer of automotive clear coat to protect the paint and add shine.
- Allow to Dry: Let the clear coat dry completely (refer to the manufacturer’s instructions).
4.6. Leveling and Polishing
- Wet Sand (Optional): If there are any imperfections in the clear coat, lightly wet sand with ultra-fine-grit sandpaper (3000 grit).
- Apply Polishing Compound: Apply a small amount of polishing compound to a clean microfiber cloth and gently buff the repaired area in a circular motion.
- Buff Clean: Use a clean microfiber cloth to remove any polishing compound residue.
5. Advanced Techniques for a Flawless Finish
For those looking to achieve an even more seamless repair, consider these advanced techniques.
5.1. Using a Paint Leveling Solution
Paint leveling solutions help blend the touch-up paint with the surrounding paint, creating a smooth, uniform surface.
- Apply Solution: After the touch-up paint is dry, apply a small amount of paint leveling solution to the repaired area.
- Blend Carefully: Use a clean microfiber cloth to gently blend the paint with the surrounding area.
5.2. Blending with an Airbrush
For larger chips or areas with multiple chips, using an airbrush can provide a more even and professional finish.
- Prepare Airbrush: Load the airbrush with touch-up paint.
- Apply Evenly: Spray thin, even layers of paint onto the chip, blending it with the surrounding area.
- Clear Coat: Apply clear coat after the paint is dry.
6. Preventing Future Paint Chips
Prevention is key to maintaining your car’s pristine appearance. Here are some tips to minimize the risk of future paint chips.
6.1. Protective Measures
- Paint Protection Film (PPF): Applying PPF to vulnerable areas like the hood, bumper, and fenders can provide a strong barrier against chips and scratches. According to a study by the International Carwash Association, PPF can reduce paint damage by up to 80%.
- Mud Flaps: Installing mud flaps can help prevent road debris from being kicked up and hitting your car.
- Car Bras: Car bras can protect the front of your car during long trips.
6.2. Regular Maintenance
- Regular Washing: Washing your car regularly removes dirt and debris that can cause scratches and chips.
- Waxing: Applying wax creates a protective layer that helps prevent damage from the elements and minor impacts. Studies show that regular waxing can extend the life of your car’s paint by up to 30%.
- Avoid Following Too Closely: Maintain a safe following distance to reduce the risk of being hit by road debris.
7. Addressing Rust Issues
If the paint chip has exposed the metal and rust has formed, it’s crucial to address the rust before proceeding with the repair.
7.1. Removing Rust
- Sand the Rust: Use a wire brush or sandpaper to remove any rust from the affected area.
- Apply Rust Converter: Apply a rust converter to neutralize any remaining rust and prevent it from spreading.
- Prime: Apply automotive primer to the area.
7.2. Preventing Future Rust
- Keep the Area Clean: Regularly clean and inspect the repaired area to ensure no new rust is forming.
- Apply Protective Coatings: Use rust-inhibiting primers and sealants to protect the metal from moisture and oxidation.
8. Professional vs. DIY Repair
While DIY repair can be effective for minor chips, there are situations where professional repair is recommended.
8.1. When to Seek Professional Help
- Extensive Damage: If there are numerous chips or large areas of damage.
- Rust Issues: If there is significant rust that requires specialized treatment.
- Color Matching: If you are unable to find a perfect match for your car’s paint color.
8.2. Benefits of Professional Repair
- Expert Color Matching: Professionals have the tools and expertise to perfectly match your car’s paint color.
- Advanced Techniques: Professionals use advanced techniques and equipment to achieve a seamless finish.
- Warranty: Professional repairs often come with a warranty, providing peace of mind.
9. Cost Considerations
The cost of repairing black paint chips can vary depending on the extent of the damage and whether you choose to do it yourself or hire a professional.
9.1. DIY Costs
- Materials: The cost of touch-up paint, primer, sandpaper, and other supplies can range from $20 to $50.
- Time: DIY repair can take several hours, depending on your skill level and the complexity of the job.
9.2. Professional Repair Costs
- Minor Chips: Professional repair of minor chips can cost between $50 and $150 per chip.
- Extensive Damage: Repairing extensive damage can cost several hundred dollars or more.
10. Choosing the Right Products
Selecting high-quality products is essential for achieving a durable and professional-looking repair. CARDIAGTECH.NET offers a curated selection of top-notch auto repair tools and materials.
10.1. Touch-Up Paint Brands
- Dupli-Color: Known for their wide range of color matches and easy-to-use applicators.
- AutomotiveTouchup: Offers custom-matched paints and a variety of repair products.
- Dr. ColorChip: Provides a unique paint application system that minimizes imperfections.
10.2. Clear Coat Brands
- Spraymax 2K Clear Coat: A high-quality clear coat that provides excellent durability and gloss.
- USC Spray Max: Offers a range of clear coats for various automotive applications.
11. Environmental Considerations
When repairing paint chips, it’s important to consider the environmental impact of the products you use and the methods you employ.
11.1. Using Eco-Friendly Products
- Water-Based Paints: Opt for water-based touch-up paints and clear coats, which have lower VOC (volatile organic compound) emissions.
- Recycled Materials: Choose products made from recycled materials whenever possible.
11.2. Proper Disposal
- Hazardous Waste: Dispose of used sandpaper, paint cans, and other materials properly at a hazardous waste disposal facility.
- Recycle: Recycle empty aerosol cans and other recyclable materials.
12. Safety Precautions
Always take necessary safety precautions when working with automotive paints and chemicals.
12.1. Protective Gear
- Gloves: Wear nitrile gloves to protect your hands from chemicals.
- Mask: Use a respirator or dust mask to avoid inhaling paint fumes and sanding dust.
- Eye Protection: Wear safety glasses to protect your eyes from splashes and debris.
12.2. Ventilation
- Work in a Well-Ventilated Area: Ensure adequate ventilation to avoid inhaling harmful fumes.
- Use a Fan: Use a fan to circulate air and remove fumes from the work area.
13. Long-Term Care for Your Car’s Paint
Maintaining your car’s paint requires ongoing care and attention.
13.1. Regular Washing and Waxing
- Wash Regularly: Wash your car at least every two weeks to remove dirt, debris, and contaminants.
- Wax Every Three Months: Apply a coat of wax every three months to protect the paint and maintain its shine.
13.2. Avoiding Harsh Chemicals
- Use Automotive-Specific Cleaners: Avoid using household cleaners or dish soap, which can strip the wax and damage the paint.
- Remove Contaminants Promptly: Remove bird droppings, tree sap, and other contaminants as soon as possible to prevent them from damaging the paint.
14. Troubleshooting Common Issues
Even with careful preparation and execution, issues can arise during the paint chip repair process.
14.1. Paint Not Matching
- Verify Paint Code: Double-check your car’s paint code to ensure you have the correct touch-up paint.
- Blend Carefully: Blend the touch-up paint with the surrounding area to minimize color differences.
14.2. Uneven Finish
- Apply Thin Layers: Apply multiple thin layers of touch-up paint to build up the finish gradually.
- Wet Sand: Wet sand the repaired area to smooth out any imperfections.
15. Real-World Examples
Let’s look at some real-world examples of black paint chip repair to illustrate the process and potential outcomes.
15.1. Case Study 1: Minor Chip Repair
- Problem: Small chip on the hood caused by road debris.
- Solution: Cleaned the area, applied touch-up paint, and clear coat.
- Result: The chip was filled and blended seamlessly with the surrounding paint.
15.2. Case Study 2: Deep Chip with Rust
- Problem: Deep chip exposing metal with signs of rust.
- Solution: Removed rust, applied rust converter, primed, applied touch-up paint, and clear coat.
- Result: The rust was treated, and the chip was repaired, preventing further damage.
16. Why Choose CARDIAGTECH.NET for Your Auto Repair Needs
CARDIAGTECH.NET is your trusted partner for all your auto repair needs, offering a wide range of high-quality tools and supplies.
16.1. Quality Products
- Wide Selection: We offer a wide selection of auto repair tools, including touch-up paints, primers, sandpapers, and polishing compounds.
- Trusted Brands: We carry products from leading brands known for their quality and performance.
16.2. Expert Advice
- Knowledgeable Staff: Our knowledgeable staff can provide expert advice and guidance to help you choose the right tools and materials for your specific needs.
- Comprehensive Guides: We offer comprehensive guides and tutorials to help you tackle any auto repair project with confidence.
16.3. Customer Satisfaction
- Satisfaction Guarantee: We stand behind our products and offer a satisfaction guarantee.
- Excellent Customer Service: Our dedicated customer service team is available to answer your questions and address any concerns you may have.
17. Testimonials from Satisfied Customers
Here’s what some of our satisfied customers have to say about their experience with CARDIAGTECH.NET:
- John D.: “I was able to repair a nasty paint chip on my car thanks to the high-quality touch-up paint and sandpaper I purchased from CARDIAGTECH.NET. The color match was perfect!”
- Sarah M.: “The expert advice I received from the staff at CARDIAGTECH.NET was invaluable. They helped me choose the right products for my project, and I couldn’t be happier with the results.”
- Mike L.: “I’ve been a loyal customer of CARDIAGTECH.NET for years. Their products are always top-notch, and their customer service is outstanding.”
18. Future Trends in Automotive Paint Repair
The automotive paint repair industry is constantly evolving, with new technologies and techniques emerging all the time.
18.1. Self-Healing Paints
- Innovative Technology: Self-healing paints are designed to repair minor scratches and chips automatically, reducing the need for manual repair.
- Future Potential: This technology is still in its early stages, but it has the potential to revolutionize the automotive paint repair industry.
18.2. Nanotechnology
- Enhanced Durability: Nanotechnology is being used to create paints that are more durable, scratch-resistant, and UV-resistant.
- Improved Color Matching: Nanotechnology can also improve the accuracy of color matching, ensuring a seamless repair.
19. Call to Action
Ready to restore your car’s flawless finish? Contact CARDIAGTECH.NET today for expert advice and high-quality auto repair tools.
19.1. Get in Touch
- Address: 276 Reock St, City of Orange, NJ 07050, United States
- WhatsApp: +1 (641) 206-8880
- Website: CARDIAGTECH.NET
19.2. Why Contact Us?
- Personalized Advice: Our knowledgeable staff can provide personalized advice to help you choose the right tools and materials for your specific needs.
- Expert Support: We offer expert support throughout the repair process, ensuring you achieve a professional-looking result.
- Premium Tools: Access the best auto repair tools available on the market and achieve superior results.
20. Conclusion
Repairing black paint chips on your car doesn’t have to be a daunting task. With the right tools, materials, and techniques, you can restore your vehicle’s sleek appearance and protect it from further damage. CARDIAGTECH.NET is here to support you every step of the way, providing high-quality products and expert advice to ensure your success.
20.1. Final Thoughts
Remember, prevention is key to maintaining your car’s paint. Regularly wash and wax your car, avoid following too closely, and consider protective measures like paint protection film and mud flaps.
20.2. Your Next Step
Contact CARDIAGTECH.NET today to get started on your paint chip repair project. Our team is ready to help you choose the right tools and materials and provide expert support to ensure a professional-looking result. Don’t let those unsightly paint chips detract from your car’s beauty any longer!
Frequently Asked Questions (FAQ)
Here are some frequently asked questions about repairing black paint chips on cars:
1. What is the best way to clean the area around a paint chip before repairing it?
The best way to clean the area around a paint chip is to use soap and water to remove any dirt and debris, followed by a wax remover to ensure a clean surface for the paint to adhere to. Finish by wiping the area with rubbing alcohol to remove any residue.
2. How many layers of touch-up paint should I apply to a paint chip?
You should apply multiple thin layers of touch-up paint, allowing each layer to dry completely before applying the next. Continue applying layers until the paint is level with the surrounding surface.
3. What is the purpose of applying clear coat after touch-up paint?
Clear coat is applied to protect the touch-up paint and add shine, helping to blend the repaired area with the surrounding paint.
4. Can I use a heat gun to speed up the drying time of touch-up paint?
Yes, a heat gun can be used to speed up the drying time of touch-up paint, but it’s important to use it carefully and avoid overheating the paint, which can cause it to bubble or crack.
5. How do I prevent rust from forming after repairing a paint chip?
To prevent rust from forming after repairing a paint chip, make sure to remove any rust from the affected area, apply a rust converter to neutralize any remaining rust, and prime the area before applying touch-up paint and clear coat.
6. Is it necessary to wet sand the repaired area after applying clear coat?
Wet sanding the repaired area after applying clear coat is optional, but it can help to smooth out any imperfections and create a more seamless finish.
7. What is a paint leveling solution, and how does it help with paint chip repair?
A paint leveling solution helps blend the touch-up paint with the surrounding paint, creating a smooth, uniform surface. It is applied after the touch-up paint is dry and gently blended with a clean microfiber cloth.
8. When should I seek professional help for paint chip repair?
You should seek professional help for paint chip repair if there is extensive damage, significant rust, or if you are unable to find a perfect match for your car’s paint color.
9. What are some protective measures I can take to prevent future paint chips?
Protective measures you can take to prevent future paint chips include applying paint protection film (PPF) to vulnerable areas, installing mud flaps, and avoiding following too closely.
10. How often should I wash and wax my car to protect the paint?
You should wash your car at least every two weeks and wax it every three months to protect the paint and maintain its shine.