How To Fix Burn Holes In Car Interior Like A Pro
Fixing burn holes in your car interior can seem daunting, but CARDIAGTECH.NET offers expert solutions to restore your vehicle’s aesthetics. This guide will walk you through effective methods and the best tools to repair those unsightly burns, ensuring a professional finish and maintaining your car’s value. Learn about DIY fixes, professional repair options, and preventative measures to keep your car interior pristine with upholstery repair and interior restoration techniques.
1. Understanding the Types of Burn Damage in Car Interiors
Before diving into the repair process, it’s essential to identify the type and extent of the burn damage. Different materials require different approaches, and understanding the damage will help you choose the most effective repair method.
1.1. Identifying Common Causes and Affected Materials
Burn damage in car interiors is often caused by cigarettes, lighters, or other heat sources. Common affected materials include:
- Fabric Upholstery: Seats, headliners, and door panels.
- Leather/Vinyl Upholstery: Seats, dashboards, and armrests.
- Carpeting: Floor mats and carpeting.
- Plastic Trim: Dashboards, door panels, and consoles.
Understanding the specific material is crucial for selecting the right repair products and techniques.
1.2. Assessing the Severity of the Damage
Burn damage can range from minor surface burns to deep, structural damage. Here’s how to assess the severity:
- Minor Burns: Small surface burns that only affect the top layer of material.
- Moderate Burns: Burns that penetrate deeper into the material, causing noticeable holes or discoloration.
- Severe Burns: Large, deep burns that compromise the structural integrity of the material.
For minor burns, DIY methods may suffice, while moderate to severe damage may require professional repair services.
2. Essential Tools and Materials for DIY Burn Hole Repair
Before you start any repair, gather the necessary tools and materials. Having the right equipment will make the process smoother and more effective. CARDIAGTECH.NET offers a range of high-quality tools that can assist you in this task.
2.1. Must-Have Tools for Fabric, Leather, and Vinyl Repairs
Here’s a list of essential tools for repairing burn holes in various materials:
- Razor Blade or Utility Knife: For trimming frayed edges and removing damaged material.
- Scissors: For cutting patches and fabric pieces.
- Tweezers: For precise placement of fibers and patches.
- Small Vacuum Cleaner: For cleaning debris and loose particles.
- Sanding Block: For smoothing rough edges on plastic or vinyl.
- Heat Gun: For setting adhesives and blending repairs (use with caution).
- Mixing Cups and Applicators: For mixing and applying repair compounds.
- Protective Gloves and Mask: To protect your skin and respiratory system.
2.2. Repair Kits and Products Available at CARDIAGTECH.NET
CARDIAGTECH.NET provides comprehensive repair kits and individual products designed for specific materials:
- Fabric Repair Kit: Includes color-matching fibers, adhesives, and application tools.
- Price: $29.99
- Features: Wide range of colors, durable adhesive, easy-to-follow instructions.
- Leather and Vinyl Repair Kit: Includes fillers, color pigments, and texturing pads.
- Price: $39.99
- Features: Flexible filler, custom color mixing, realistic texture replication.
- Upholstery Repair Kit: Includes multiple tools and a variety of materials to handle a wide array of repair issues.
- Price: $59.99
- Features: Comprehensive, high-quality, perfect for the experienced repair technician.
- Adhesives and Fillers: High-quality products that ensure a strong and lasting repair.
- Price: Varies
- Features: Durable, chemical resistant, easy to apply.
- Color-Matching Dyes and Pigments: Essential for achieving a seamless repair.
- Price: Varies
- Features: UV resistant, long-lasting, accurate color matching.
Having these tools and products on hand will ensure you’re well-prepared for any burn hole repair.
3. Step-by-Step Guide to Fixing Burn Holes in Fabric Upholstery
Repairing burn holes in fabric upholstery can be straightforward with the right approach. Follow these steps for a seamless repair.
3.1. Preparing the Damaged Area
- Clean the Area: Vacuum the area around the burn hole to remove loose debris and particles.
- Trim Frayed Edges: Use a razor blade or scissors to carefully trim any frayed or burnt edges around the hole.
- Gather Matching Fibers: Find a hidden area of the upholstery (e.g., under the seat) and carefully cut a small piece of fabric to harvest matching fibers.
3.2. Applying Fabric Repair Techniques
- Apply Adhesive: Use a small amount of fabric adhesive inside the burn hole.
- Fill with Fibers: Use tweezers to carefully place the harvested fibers into the adhesive-filled hole, mimicking the original fabric pattern.
- Allow to Dry: Let the adhesive dry completely, usually for 24 hours.
- Trim Excess Fibers: Once dry, trim any excess fibers to blend the repair seamlessly with the surrounding upholstery.
- Clean the Area: Gently vacuum the repaired area to remove any loose fibers or debris.
This method effectively restores the fabric upholstery, making the burn hole virtually invisible.
3.3. Achieving a Seamless Finish
To achieve a professional finish, consider these tips:
- Color Matching: Ensure the harvested fibers closely match the color and texture of the original upholstery.
- Fiber Placement: Carefully arrange the fibers to mimic the original fabric pattern.
- Blending: Use a soft brush to gently blend the repaired area with the surrounding fabric.
With patience and attention to detail, you can achieve a flawless repair that enhances the look of your car interior.
4. Repairing Burn Holes in Leather and Vinyl Upholstery
Leather and vinyl upholstery require a different approach than fabric. Here’s how to repair burn holes in these materials effectively.
4.1. Preparing the Damaged Area
- Clean the Area: Use a leather or vinyl cleaner to thoroughly clean the area around the burn hole.
- Trim Frayed Edges: Carefully trim any frayed or burnt edges using a razor blade or utility knife.
- Sand Rough Edges: Use a fine-grit sanding block to smooth any rough edges around the hole.
- Apply Adhesive Promoter: Apply an adhesive promoter to the area to ensure proper adhesion of the repair compound.
4.2. Applying Leather and Vinyl Repair Techniques
- Apply Filler: Use a leather or vinyl filler to fill the burn hole, slightly overfilling it to allow for sanding.
- Allow to Dry: Let the filler dry completely, usually for several hours or overnight.
- Sand Smooth: Use a fine-grit sanding block to carefully sand the filler smooth, level with the surrounding upholstery.
- Apply Color Coat: Use a color-matching leather or vinyl dye to paint the repaired area, blending it with the surrounding upholstery.
- Apply Sealer: Apply a leather or vinyl sealer to protect the repaired area and enhance its durability.
4.3. Matching Color and Texture
Achieving a seamless finish on leather and vinyl requires careful color and texture matching.
- Color Matching: Use a color-matching kit to mix the perfect color for your upholstery. Test the color on a hidden area before applying it to the repair.
- Texture Replication: Use a texturing pad to replicate the original texture of the leather or vinyl on the repaired area. Press the texturing pad onto the wet color coat and allow it to dry.
- Blending: Use a soft cloth to gently blend the repaired area with the surrounding upholstery, creating a seamless transition.
With these techniques, you can effectively repair burn holes in leather and vinyl upholstery, restoring the look and feel of your car interior.
5. Restoring Burn Damage on Car Carpeting
Repairing burn damage on car carpeting requires a different approach than upholstery. Follow these steps to restore your car’s carpeting.
5.1. Preparing the Damaged Area
- Clean the Area: Vacuum the area around the burn to remove loose debris and particles.
- Trim Burnt Fibers: Use scissors to carefully trim any burnt or melted carpet fibers.
- Gather Matching Fibers: Find a hidden area of the carpet (e.g., under the seat) and carefully cut a small piece of carpet to harvest matching fibers.
5.2. Applying Carpet Repair Techniques
- Apply Adhesive: Use a small amount of carpet adhesive inside the burn.
- Fill with Fibers: Use tweezers to carefully place the harvested fibers into the adhesive-filled burn, mimicking the original carpet texture.
- Allow to Dry: Let the adhesive dry completely, usually for 24 hours.
- Trim Excess Fibers: Once dry, trim any excess fibers to blend the repair seamlessly with the surrounding carpet.
- Clean the Area: Gently vacuum the repaired area to remove any loose fibers or debris.
5.3. Blending the Repair Seamlessly
To achieve a seamless finish, consider these tips:
- Color Matching: Ensure the harvested fibers closely match the color and texture of the original carpet.
- Fiber Placement: Carefully arrange the fibers to mimic the original carpet texture.
- Blending: Use a soft brush to gently blend the repaired area with the surrounding carpet.
This method effectively restores the carpet, making the burn virtually invisible.
6. Dealing with Burn Marks on Plastic Trim and Dashboard
Plastic trim and dashboards are susceptible to burn damage, requiring a specialized approach for repair.
6.1. Preparing the Damaged Area
- Clean the Area: Use a plastic cleaner to thoroughly clean the area around the burn mark.
- Sand Rough Edges: Use a fine-grit sanding block to smooth any rough edges around the burn mark.
- Apply Adhesive Promoter: Apply an adhesive promoter to the area to ensure proper adhesion of the repair compound.
6.2. Applying Plastic Repair Techniques
- Apply Filler: Use a plastic filler to fill the burn mark, slightly overfilling it to allow for sanding.
- Allow to Dry: Let the filler dry completely, usually for several hours or overnight.
- Sand Smooth: Use a fine-grit sanding block to carefully sand the filler smooth, level with the surrounding plastic.
- Apply Color Coat: Use a color-matching plastic paint to paint the repaired area, blending it with the surrounding plastic.
- Apply Sealer: Apply a plastic sealer to protect the repaired area and enhance its durability.
6.3. Achieving a Factory-Like Finish
To achieve a factory-like finish on plastic trim and dashboards:
- Color Matching: Use a color-matching kit to mix the perfect color for your plastic trim. Test the color on a hidden area before applying it to the repair.
- Texture Replication: Use a texturing pad to replicate the original texture of the plastic on the repaired area. Press the texturing pad onto the wet color coat and allow it to dry.
- Blending: Use a soft cloth to gently blend the repaired area with the surrounding plastic, creating a seamless transition.
By following these steps, you can effectively repair burn marks on plastic trim and dashboards, restoring the original appearance of your car interior.
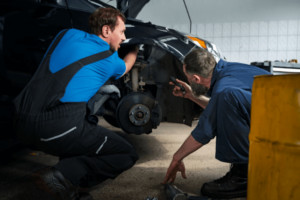
7. Professional Car Interior Repair Services: When to Seek Help
While DIY methods can be effective for minor burn damage, severe damage may require professional repair services. CARDIAGTECH.NET can connect you with trusted professionals.
7.1. Identifying Situations Requiring Professional Intervention
Consider professional repair services in the following situations:
- Extensive Damage: Large, deep burns that compromise the structural integrity of the material.
- Complex Repairs: Repairs that require specialized tools and techniques.
- Color Matching Difficulties: When you are unable to accurately match the color of the upholstery or trim.
- Time Constraints: When you don’t have the time or patience to perform the repair yourself.
7.2. Benefits of Professional Repair Services
Professional repair services offer several benefits:
- Expertise: Experienced technicians with specialized knowledge and skills.
- Quality Results: High-quality repairs that restore the original appearance and durability of the interior.
- Time Savings: Professionals can complete the repair quickly and efficiently.
- Warranty: Many professional services offer a warranty on their work.
7.3. Finding Reliable Repair Services Through CARDIAGTECH.NET
CARDIAGTECH.NET partners with trusted repair professionals to provide reliable and high-quality services. Contact us for referrals to qualified technicians in your area. You can reach us at:
- Address: 276 Reock St, City of Orange, NJ 07050, United States
- WhatsApp: +1 (641) 206-8880
- Website: CARDIAGTECH.NET
8. Cost-Effective Solutions: DIY vs. Professional Repairs
Deciding between DIY and professional repairs often comes down to cost. Here’s a comparison to help you make the right choice.
8.1. Comparing DIY Repair Costs
DIY repair costs can vary depending on the materials and tools required. Here’s an estimate of the costs:
- Minor Burn Repair Kit: $20 – $40
- Essential Tools (Razor, Scissors, Tweezers): $10 – $20
- Cleaning Supplies: $5 – $10
Total Estimated Cost: $35 – $70
8.2. Understanding Professional Repair Costs
Professional repair costs can vary depending on the extent of the damage and the type of material. Here’s an estimate of the costs:
- Minor Burn Repair: $50 – $100
- Moderate Burn Repair: $100 – $200
- Severe Burn Repair: $200 – $500+
8.3. Making the Right Choice Based on Budget and Skill Level
Consider the following factors when deciding between DIY and professional repairs:
- Budget: DIY repairs are generally more affordable, but professional repairs may be necessary for severe damage.
- Skill Level: If you are comfortable working with tools and have experience with DIY repairs, you may be able to handle minor burn damage.
- Time: DIY repairs can take several hours or days to complete, while professionals can often complete the repair in a shorter amount of time.
- Quality: Professional repairs typically offer higher quality results and a warranty on the work.
Assess your budget, skill level, and time constraints to determine the best approach for your specific situation.
9. Preventing Burn Damage: Tips and Best Practices
Prevention is always better than cure. Here are some tips and best practices to prevent burn damage in your car interior.
9.1. Implementing Preventative Measures
- No Smoking Policy: Enforce a strict no smoking policy in your car.
- Use Ashtrays: If smoking is unavoidable, use ashtrays to contain ashes and extinguish cigarettes properly.
- Be Cautious with Lighters: Be careful when using lighters or matches inside the car.
- Avoid Open Flames: Avoid using open flames, such as candles or torches, inside the car.
9.2. Choosing the Right Interior Protectors
- Seat Covers: Use seat covers to protect your upholstery from burns and other damage.
- Price: $30 – $100
- Features: Durable, easy to install, available in various colors and materials.
- Floor Mats: Use floor mats to protect your carpeting from burns and spills.
- Price: $20 – $50
- Features: Durable, waterproof, easy to clean.
- Dashboard Covers: Use dashboard covers to protect your dashboard from sun damage and burns.
- Price: $25 – $60
- Features: UV resistant, easy to install, available in various colors and materials.
9.3. Regular Maintenance and Cleaning
- Vacuum Regularly: Vacuum your car interior regularly to remove loose debris and particles that can contribute to burn damage.
- Clean Spills Promptly: Clean up spills immediately to prevent stains and damage to your upholstery and carpeting.
- Use Interior Cleaners: Use interior cleaners to maintain the appearance and condition of your car interior.
By implementing these preventative measures and practicing regular maintenance, you can significantly reduce the risk of burn damage and keep your car interior looking its best.
10. Maintaining Car Interior Value Through Proper Repair
Properly repairing burn damage in your car interior is essential for maintaining its value. Here’s how to ensure your repairs contribute to the overall value of your vehicle.
10.1. The Impact of Interior Condition on Resale Value
The condition of your car interior can significantly impact its resale value. Potential buyers often assess the interior as an indicator of how well the car has been maintained. Burn damage can detract from the overall appearance and value of the vehicle.
10.2. Choosing Quality Repair Materials and Techniques
Using high-quality repair materials and techniques is crucial for achieving a professional finish that enhances the value of your car. Invest in quality repair kits and products from CARDIAGTECH.NET to ensure lasting results.
10.3. Documenting Repairs for Future Reference
Keep a record of all repairs performed on your car interior, including the date, type of repair, and materials used. This documentation can be valuable when selling your car, as it demonstrates that you have taken care of the vehicle and addressed any issues promptly.
By maintaining your car interior and performing quality repairs, you can preserve its value and ensure a higher resale price.
11. Real-Life Examples: Success Stories of Burn Hole Repair
To inspire you and demonstrate the effectiveness of burn hole repair, here are some real-life success stories.
11.1. Case Study 1: Fabric Upholstery Repair
Situation: A car owner had a cigarette burn on the driver’s seat of their fabric upholstery.
Solution: The owner used a fabric repair kit from CARDIAGTECH.NET, carefully following the instructions to clean the area, trim the edges, and fill the hole with matching fibers.
Result: The repair was virtually invisible, restoring the seat to its original condition and preventing further damage.
11.2. Case Study 2: Leather Seat Restoration
Situation: A car owner had a burn mark on the leather seat of their luxury vehicle.
Solution: The owner hired a professional repair service recommended by CARDIAGTECH.NET. The technician used specialized tools and techniques to fill the burn mark, match the color, and replicate the texture of the leather.
Result: The repair was seamless, restoring the seat to its original condition and maintaining the value of the vehicle.
11.3. Case Study 3: Dashboard Burn Mark Removal
Situation: A car owner had a burn mark on the plastic dashboard of their car.
Solution: The owner used a plastic repair kit to fill the burn mark, sand it smooth, and paint it with a color-matching plastic paint.
Result: The repair was successful, removing the unsightly burn mark and restoring the dashboard to its original appearance.
These success stories demonstrate that with the right tools, techniques, and expertise, burn hole repair can be highly effective in restoring the appearance and value of your car interior.
12. Latest Innovations in Car Interior Repair Technology
The field of car interior repair is constantly evolving, with new technologies and techniques emerging to make repairs easier and more effective.
12.1. Advanced Repair Materials
- Self-Healing Polymers: These innovative materials can repair minor scratches and burns on their own, reducing the need for manual repairs.
- Color-Changing Fillers: These fillers can automatically match the color of the surrounding material, simplifying the color-matching process.
- 3D-Printed Patches: These custom-designed patches can be used to repair complex damage, providing a seamless and durable repair.
12.2. Innovative Repair Tools
- Laser Repair Systems: These systems use lasers to precisely repair burn damage, providing a clean and accurate repair.
- Ultrasonic Cleaners: These cleaners use ultrasonic waves to thoroughly clean and prepare the damaged area for repair.
- Digital Color Matching Devices: These devices can accurately measure the color of the surrounding material and provide the exact color code for a perfect match.
12.3. The Future of Car Interior Restoration
The future of car interior restoration is likely to be driven by these advanced technologies, making repairs easier, more effective, and more accessible to car owners. Stay tuned to CARDIAGTECH.NET for the latest innovations in car interior repair technology.
13. Reader Engagement: Share Your Burn Hole Repair Experiences
We want to hear from you! Share your burn hole repair experiences, tips, and questions in the comments section below. Your insights can help other car owners tackle their own repair projects and maintain the value of their vehicles.
13.1. Encouraging Reader Participation
- Ask Questions: What challenges have you faced when repairing burn holes in your car interior?
- Share Tips: What tips and techniques have you found most effective for burn hole repair?
- Submit Photos: Share before-and-after photos of your burn hole repair projects.
13.2. Building a Community of Car Enthusiasts
By sharing your experiences and insights, you can help build a community of car enthusiasts who are passionate about maintaining the appearance and value of their vehicles.
14. Exclusive Offers and Discounts on Repair Kits at CARDIAGTECH.NET
To help you get started on your burn hole repair project, CARDIAGTECH.NET is offering exclusive offers and discounts on our repair kits and products.
14.1. Current Promotions
- Fabric Repair Kit: 15% off with code FABRIC15
- Leather and Vinyl Repair Kit: 20% off with code LEATHER20
- Free Shipping: On orders over $50
14.2. How to Redeem Offers
To redeem these offers, simply visit CARDIAGTECH.NET and add the desired repair kits to your cart. Enter the corresponding code at checkout to apply the discount.
14.3. Limited-Time Offers
These offers are available for a limited time only, so don’t miss out on this opportunity to save on high-quality repair kits and products.
15. Conclusion: Restore Your Car Interior with Confidence
Repairing burn holes in your car interior can be a rewarding DIY project or a task best left to professionals. With the right tools, techniques, and information, you can restore the appearance and value of your vehicle with confidence. CARDIAGTECH.NET is here to support you every step of the way, providing high-quality repair kits, expert advice, and referrals to trusted professionals.
15.1. Recap of Key Points
- Identify the type and extent of burn damage.
- Gather the necessary tools and materials.
- Follow step-by-step repair techniques for fabric, leather, vinyl, and plastic.
- Consider professional repair services for severe damage.
- Implement preventative measures to avoid future burn damage.
- Maintain your car interior to preserve its value.
15.2. Final Thoughts and Encouragement
Don’t let burn damage detract from the appearance and value of your car. Take action today to restore your car interior and enjoy a clean, comfortable, and valuable vehicle.
15.3. Call to Action: Contact CARDIAGTECH.NET for Assistance
For expert advice, high-quality repair kits, and referrals to trusted professionals, contact CARDIAGTECH.NET today. Our team is here to help you restore your car interior with confidence.
- Address: 276 Reock St, City of Orange, NJ 07050, United States
- WhatsApp: +1 (641) 206-8880
- Website: CARDIAGTECH.NET
Restore your car’s interior and drive with pride!
FAQ: Frequently Asked Questions About Burn Hole Repair
Here are some frequently asked questions about burn hole repair to help you address common concerns and challenges.
1. Can I repair a burn hole myself, or do I need a professional?
For minor burns, DIY methods can be effective. Severe damage may require professional repair services.
2. What tools do I need to repair a burn hole in my car seat?
Essential tools include a razor blade, scissors, tweezers, vacuum cleaner, sanding block, heat gun, mixing cups, applicators, protective gloves, and a mask.
3. How do I match the color of the repair material to my car’s interior?
Use a color-matching kit or consult a professional for accurate color matching.
4. What is the best way to clean the area before repairing a burn hole?
Use a vacuum cleaner to remove loose debris, and then clean the area with a specialized cleaner for the specific material (fabric, leather, vinyl, or plastic).
5. How long does it take to repair a burn hole in a car seat?
DIY repairs can take several hours to a day, depending on the severity of the damage. Professional repairs may be completed in a shorter amount of time.
6. Can I prevent burn holes in my car interior?
Yes, implement a no smoking policy, use ashtrays, be cautious with lighters, and use interior protectors like seat covers and floor mats.
7. What type of adhesive should I use for repairing a burn hole?
Use a specialized adhesive designed for the specific material (fabric adhesive, leather adhesive, vinyl adhesive, or plastic adhesive).
8. How do I blend the repaired area seamlessly with the surrounding material?
Use a soft brush or cloth to gently blend the repaired area with the surrounding material, creating a seamless transition.
9. Is it worth repairing a burn hole in my car interior?
Yes, repairing burn holes can enhance the appearance and value of your car.
10. Where can I find high-quality repair kits and products?
CARDIAGTECH.NET offers a wide range of high-quality repair kits and products for car interior repair.
Contact CARDIAGTECH.NET at +1 (641) 206-8880 or visit our website at CARDIAGTECH.NET for more information and assistance.
By addressing these frequently asked questions, you can gain a better understanding of burn hole repair and make informed decisions about how to restore your car interior.
Now that you’re equipped with the knowledge and resources, take the next step towards a flawless car interior! Contact CARDIAGTECH.NET today and let us help you fix those burn holes like a pro. Your car will thank you.