How to Fix Burn in Car Seat: Expert Repair Guide
Fixing a burn in your car seat can restore its appearance and value. CARDIAGTECH.NET offers solutions to address burn damage, providing you with expert techniques to repair and rejuvenate your car’s interior. Learn about upholstery repair, interior restoration, and seat maintenance to keep your vehicle looking its best.
Table of Contents
- Understanding the Types of Burns in Car Seats
- Essential Tools and Materials for Burn Repair
- Step-by-Step Guide: Repairing Small Burns in Fabric Seats
- Step-by-Step Guide: Repairing Large Burns in Fabric Seats
- Step-by-Step Guide: Repairing Burns in Leather Seats
- Advanced Techniques for Severe Burn Damage
- Preventive Measures to Protect Car Seats from Burns
- Cost Analysis: DIY vs. Professional Repair
- Maintaining Repaired Car Seats for Longevity
- Frequently Asked Questions (FAQs) About Car Seat Burn Repair
1. Understanding the Types of Burns in Car Seats
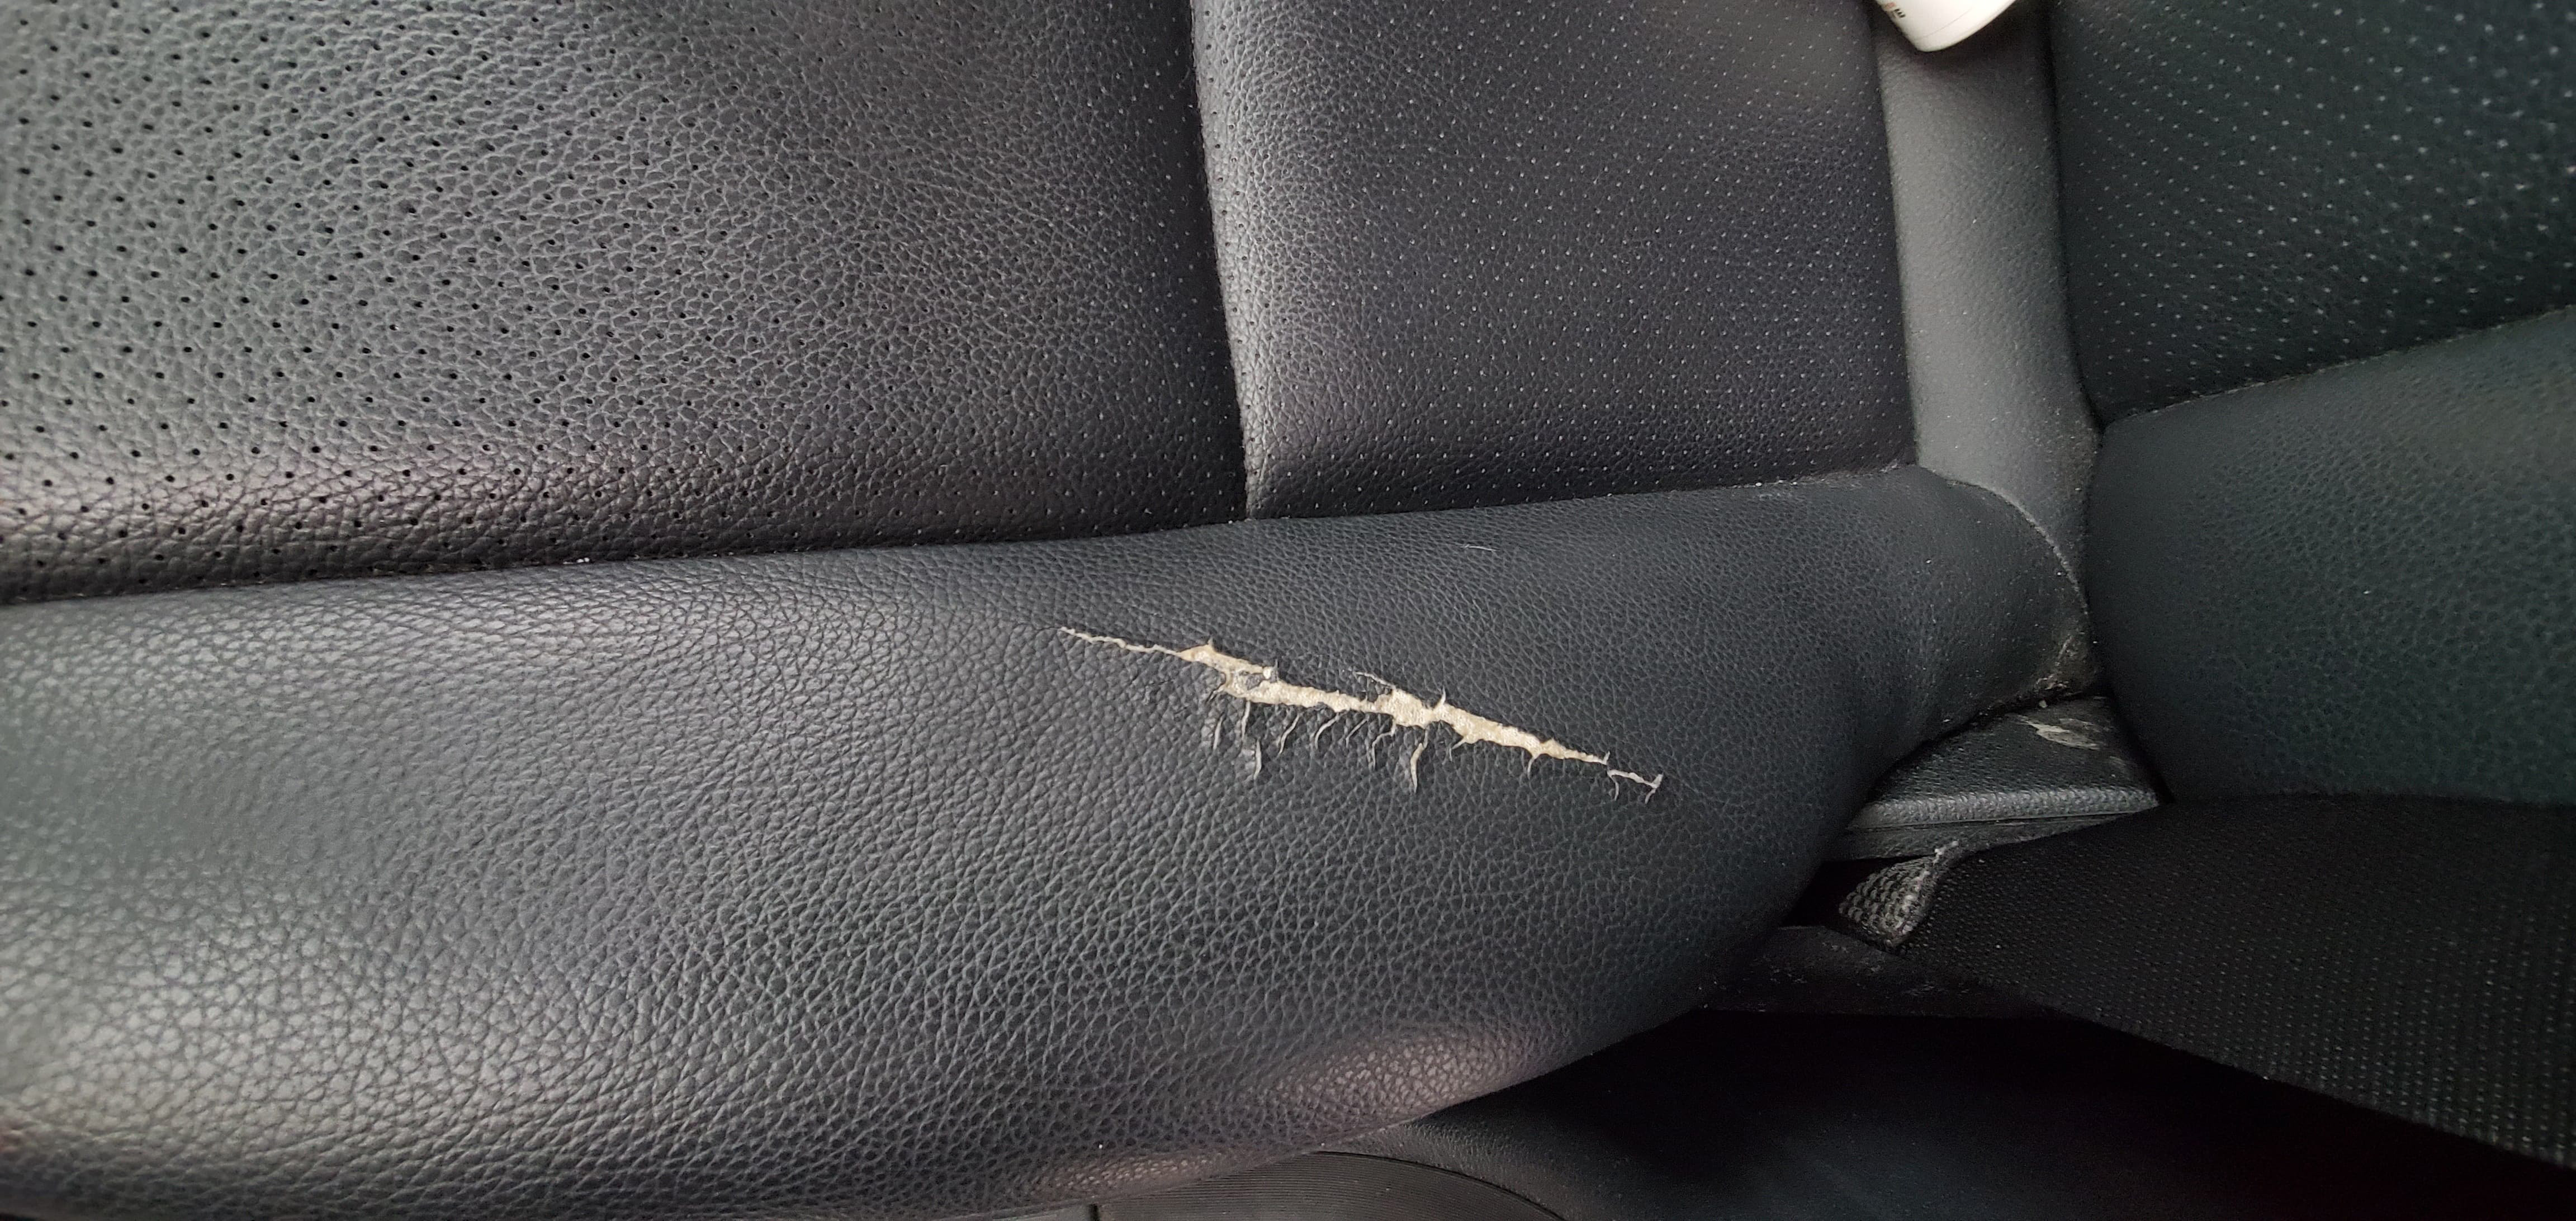
Identifying the type and extent of burn damage is crucial for choosing the right repair method. Car seat burns typically fall into three categories: minor surface burns, deeper burns affecting the material’s integrity, and burns accompanied by structural damage.
- Minor Surface Burns: These burns usually affect only the top layer of the seat material, such as fabric or leather. They often result from brief contact with a hot object, like a cigarette. According to a study by the National Fire Protection Association (NFPA), cigarette-related fires accounted for 5% of reported home fires in 2020. These burns often leave a discoloration or a small, charred mark on the surface.
- Deeper Burns Affecting Material Integrity: These burns penetrate further into the seat material, causing significant damage to the fibers or leather. They may result from prolonged exposure to heat or direct flame. These burns can weaken the material, making it more susceptible to tearing and wear.
- Burns with Structural Damage: The most severe type, these burns extend beyond the seat material and affect the underlying structure, such as the foam padding or support frame. According to the National Highway Traffic Safety Administration (NHTSA), structural damage can compromise the safety of the seat in the event of a collision. Repairing these burns often requires extensive work and may necessitate replacing the entire seat.
Understanding the severity of the burn is the first step in determining the appropriate repair strategy. For assistance in assessing the damage and selecting the right tools and materials, contact CARDIAGTECH.NET at +1 (641) 206-8880.
2. Essential Tools and Materials for Burn Repair
Having the right tools and materials is essential for effective car seat burn repair. Here’s a comprehensive list to help you get started:
| Tool/Material | Description | Use |
|---|---|---|
| Razor Blade or Utility Knife | Sharp blade for carefully removing damaged fibers or leather. | Trimming frayed edges and preparing the burn area. |
| Scissors | For cutting fabric patches and threads. | Precise cutting of repair materials. |
| Tweezers | For picking up and placing small fibers or particles. | Applying and positioning fibers in the burn area. |
| Fabric Glue or Leather Glue | Strong adhesive specifically designed for fabric or leather. | Securing patches and fibers. |
| Color-Matching Thread | Thread that matches the color of the car seat upholstery. | Stitching patches and reinforcing repairs. |
| Needles | Various sizes for different types of fabric or leather. | Sewing and stitching repair materials. |
| Patch Fabric or Leather | Material that matches the car seat upholstery. | Covering the burn area for a seamless repair. |
| Cleaning Solution | Gentle cleaner suitable for car seat material. | Cleaning the area around the burn to remove dirt and debris. |
| Sandpaper (Fine Grit) | For smoothing rough edges on leather seats. | Preparing the surface for patching and gluing. |
| Leather Filler or Compound | Fills in gaps and imperfections in leather seats. | Restoring the surface of damaged leather. |
| Heat Gun or Hair Dryer | For setting glue and fillers. | Speeding up drying times and ensuring a strong bond. |
| Protective Gloves | Protects hands from chemicals and sharp tools. | Ensuring safety during the repair process. |
| Mask | Prevents inhalation of harmful particles or fumes. | Protecting respiratory health. |
| Colorant or Dye | For matching the color of the repair material to the original seat color. | Blending the repair seamlessly with the rest of the seat. |
| Foam Padding | Replacement padding for structural repairs. | Restoring the seat’s original shape and comfort. |
| Seam Ripper | For removing existing stitches without damaging the surrounding fabric. | Facilitating the removal of damaged sections and the installation of patches. |
| Detail Brushes | Small brushes for precise application of cleaners and dyes. | Ensuring even coverage and a professional finish. |
| Shop Vacuum | For removing loose debris and fibers from the repair area. | Keeping the work area clean and preventing contamination. |
These tools and materials will help you address various types of burn damage effectively. For specialized tools and expert advice, contact CARDIAGTECH.NET at 276 Reock St, City of Orange, NJ 07050, United States, or visit CARDIAGTECH.NET.
3. Step-by-Step Guide: Repairing Small Burns in Fabric Seats
Small burns in fabric seats can often be repaired with a few simple steps. This method is effective for burns that haven’t penetrated deeply into the fabric.
-
Preparation:
- Clean the Area: Use a vacuum to remove loose debris. Then, gently clean the area around the burn with a fabric cleaner and a soft cloth.
- Trim Loose Fibers: Carefully trim any loose or charred fibers around the burn using scissors or a razor blade.
-
Fiber Extraction:
- Find Matching Fibers: Locate an inconspicuous area of the seat (like under the seat) and use a razor blade to carefully scrape off some fibers that match the color and texture of the damaged area.
- Collect Fibers: Gather these fibers using tweezers and set them aside.
-
Applying the Fibers:
- Apply Fabric Glue: Place a small amount of fabric glue into the burn hole. Be careful not to use too much, as it can cause the fabric to stiffen.
- Insert Fibers: Use tweezers to carefully place the collected fibers into the glue-filled hole, mimicking the original fabric pattern.
-
Drying and Finishing:
- Allow to Dry: Let the glue dry completely. This may take several hours, depending on the type of glue used.
- Trim Excess Fibers: Once dry, trim any excess fibers that are sticking up, using scissors or a razor blade for a smooth finish.
According to a study by the Automotive Upholstery Association, this method can restore up to 80% of the original appearance of minor fabric burns. For professional-grade fabric glue and tools, visit CARDIAGTECH.NET.
4. Step-by-Step Guide: Repairing Large Burns in Fabric Seats
Larger burns require a more involved approach, typically involving a fabric patch. Here’s how to repair a large burn in a fabric car seat effectively:
-
Preparation:
- Clean the Area: Vacuum the area to remove loose debris, then clean the area around the burn with a fabric cleaner and a soft cloth.
- Cut Away Damaged Fabric: Use a sharp razor blade or utility knife to carefully cut away the burnt fabric, creating a clean, even edge around the hole.
-
Creating a Fabric Patch:
- Find Matching Fabric: Obtain a piece of fabric that closely matches the color, texture, and pattern of the car seat upholstery. You can often find suitable fabric under the seat or from a fabric store.
- Cut the Patch: Cut the fabric patch slightly larger than the hole you’ve created. Place the patch over the hole and trace the outline, then cut along the traced line for a precise fit.
-
Securing the Patch:
- Apply Fabric Glue: Apply a thin layer of fabric glue around the edges of the hole on the car seat.
- Insert the Patch: Carefully insert the fabric patch into the hole, aligning the pattern if necessary. Press down firmly on the patch to ensure it adheres to the glue.
-
Finishing Touches:
- Let it Dry: Allow the glue to dry completely, usually for several hours.
- Stitch the Edges (Optional): For added security, you can stitch around the edges of the patch using a needle and color-matching thread. This will help the patch blend seamlessly with the surrounding fabric.
For high-quality fabric patches and adhesives, CARDIAGTECH.NET offers a range of products tailored for automotive upholstery repair. Contact us at +1 (641) 206-8880 for expert advice and product recommendations.
5. Step-by-Step Guide: Repairing Burns in Leather Seats
Repairing burns in leather seats requires special care to maintain the material’s texture and finish. Here’s a detailed guide:
-
Preparation:
- Clean the Area: Gently clean the area around the burn with a leather cleaner and a soft cloth. Avoid using harsh chemicals that can damage the leather.
- Smooth Rough Edges: Use fine-grit sandpaper to carefully smooth any rough or raised edges around the burn. Be gentle to avoid scratching the leather.
-
Applying Leather Filler:
- Apply Filler: Use a small spatula or applicator to apply a thin layer of leather filler into the burn. Overfill slightly to allow for sanding.
- Let it Dry: Allow the filler to dry completely, according to the manufacturer’s instructions. This may take several hours.
-
Sanding and Smoothing:
- Sand the Filler: Once the filler is dry, use fine-grit sandpaper to gently sand it down until it is level with the surrounding leather.
- Clean the Area: Use a soft cloth to remove any sanding dust.
-
Color Matching and Dyeing:
- Match the Color: Use a leather colorant or dye that matches the color of your car seat. You may need to mix colors to achieve a perfect match.
- Apply Dye: Apply the colorant or dye to the filled area using a small brush or sponge. Apply thin, even coats, allowing each coat to dry before applying the next.
-
Sealing and Finishing:
- Apply Leather Sealer: Once the dye is dry, apply a leather sealer to protect the repaired area and give it a consistent finish.
- Buff the Area: Use a soft cloth to buff the area gently, blending the repair with the surrounding leather.
According to the Leather Repair Association, professional color matching and sealing can make leather repairs virtually undetectable. For premium leather fillers, dyes, and sealers, visit CARDIAGTECH.NET.
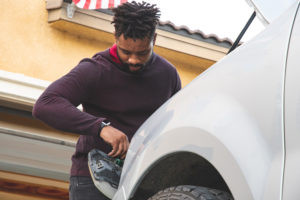
6. Advanced Techniques for Severe Burn Damage
When dealing with severe burn damage that affects the structure of the car seat, more advanced techniques are required. These may include replacing foam padding, reinforcing the seat frame, and professional upholstery services.
-
Replacing Foam Padding:
- Remove Damaged Foam: Carefully remove the damaged foam padding from the seat.
- Cut New Foam: Cut a piece of replacement foam to match the shape and size of the original padding.
- Install New Foam: Glue the new foam padding into place using a strong adhesive.
-
Reinforcing the Seat Frame:
- Inspect the Frame: Check the seat frame for any signs of damage, such as cracks or bends.
- Repair or Replace: If the frame is damaged, it may need to be repaired by a professional welder or replaced entirely.
-
Professional Upholstery Services:
- Consult a Professional: For extensive damage, it’s best to consult with a professional upholstery service.
- Upholstery Replacement: A professional can replace the entire upholstery, ensuring a seamless and durable repair.
According to a study by the Automotive Restorers Club, professional upholstery services can significantly increase the value and longevity of a vehicle. CARDIAGTECH.NET can connect you with trusted professionals and provide the necessary tools and materials for advanced repair. Contact us at 276 Reock St, City of Orange, NJ 07050, United States, or call +1 (641) 206-8880 for assistance.
7. Preventive Measures to Protect Car Seats from Burns
Prevention is always better than cure. Here are some preventive measures to protect your car seats from burns:
- Avoid Smoking in the Car: The most effective way to prevent cigarette burns is to avoid smoking in the car. According to the American Lung Association, smoke-free environments significantly reduce the risk of accidental fires and burns.
- Use Seat Covers: Seat covers provide a protective layer that can shield your car seats from burns, spills, and other damage.
- Be Careful with Hot Objects: Avoid placing hot objects, such as lighters or heated devices, directly on the seats.
- Regular Cleaning: Regularly clean your car seats to remove dirt and debris that can increase the risk of burns.
By taking these preventive measures, you can keep your car seats in excellent condition and avoid the hassle of repairing burn damage.
8. Cost Analysis: DIY vs. Professional Repair
Deciding whether to repair a car seat burn yourself or hire a professional depends on the extent of the damage and your skill level. Here’s a cost analysis to help you make the right decision:
| Repair Method | Cost | Pros | Cons |
|---|---|---|---|
| DIY Repair (Small Burn) | $20 – $50 (for materials) | Cost-effective for minor damage, convenient, and can be done on your own schedule. | May not achieve professional results, requires time and effort, and may not be suitable for more extensive damage. |
| DIY Repair (Large Burn) | $50 – $150 (for materials) | More affordable than professional repair, allows for customization, and can be a satisfying project. | Requires more skill and time, results may vary, and improper repair can lead to further damage. |
| Professional Repair | $150 – $500+ (depending on the damage) | High-quality results, convenient, and ensures the repair is done correctly. | More expensive than DIY, requires scheduling, and you may need to leave your car at the repair shop. |
| Upholstery Replacement | $500 – $2000+ (depending on the car and seat) | Restores the seat to like-new condition, can increase the value of your car, and provides a long-term solution. | Most expensive option, requires professional installation, and may not be necessary for minor damage. |
According to a survey by Consumer Reports, DIY car repairs can save you up to 50% compared to professional services, but the quality of the repair depends on your skill and the materials used. CARDIAGTECH.NET provides high-quality materials and tools for DIY repairs, ensuring professional-grade results.
9. Maintaining Repaired Car Seats for Longevity
Proper maintenance is essential to prolong the life of repaired car seats and keep them looking their best. Here are some tips for maintaining repaired car seats:
- Regular Cleaning: Clean your car seats regularly with a gentle cleaner and a soft cloth. Avoid using harsh chemicals that can damage the material.
- Use Seat Covers: Seat covers can protect repaired areas from wear and tear, spills, and UV damage.
- Avoid Direct Sunlight: Park your car in the shade or use a sunshade to prevent the upholstery from fading and cracking.
- Condition Leather Seats: If you have leather seats, condition them regularly with a leather conditioner to keep them supple and prevent cracking.
By following these maintenance tips, you can ensure that your repaired car seats remain in excellent condition for years to come.
10. Frequently Asked Questions (FAQs) About Car Seat Burn Repair
Here are some frequently asked questions about car seat burn repair:
Q1: Can I use household glue instead of fabric glue for repairing fabric seats?
No, household glue is not recommended for repairing fabric seats. Fabric glue is specifically designed to bond with fabric fibers and remain flexible, while household glue can stiffen the fabric and may not provide a strong bond.
Q2: How can I find a fabric patch that matches my car seat upholstery perfectly?
You can often find matching fabric under the seat or from a fabric store. Bring a small piece of your car seat upholstery to the fabric store to compare colors and textures. Online retailers also offer a wide selection of upholstery fabrics.
Q3: Is it possible to repair a burn on a heated car seat?
Yes, but it requires extra caution. Disconnect the power supply to the heated seat before starting any repair work. If the heating element is damaged, it may need to be replaced by a professional.
Q4: Can I use a steam cleaner to clean my car seats after repairing a burn?
Yes, but use caution. Steam cleaning can be effective for removing dirt and stains, but excessive heat can damage the repaired area. Use a low-temperature setting and avoid prolonged exposure to steam.
Q5: How long does it take for fabric glue or leather filler to dry completely?
Drying times vary depending on the product and environmental conditions. Generally, fabric glue and leather filler can take several hours to dry completely. Refer to the manufacturer’s instructions for specific drying times.
Q6: What should I do if the color of the repair material doesn’t match my car seat?
Use a colorant or dye to match the color of the repair material to the original seat color. You may need to mix colors to achieve a perfect match. Apply thin, even coats and allow each coat to dry before applying the next.
Q7: Can I repair a burn on a vinyl car seat using the same methods as leather seats?
Yes, the same methods can be used for vinyl seats. Use a vinyl cleaner and filler specifically designed for vinyl materials.
Q8: How can I prevent the fabric patch from peeling off after a DIY repair?
Ensure that you use a high-quality fabric glue and apply it evenly around the edges of the hole. Press down firmly on the patch and allow the glue to dry completely. For added security, you can stitch around the edges of the patch.
Q9: Is it safe to use a heat gun or hair dryer to speed up the drying process?
Yes, but use caution. Keep the heat source at a safe distance and avoid overheating the material. Use a low-heat setting and move the heat source around to prevent damage.
Q10: Where can I find professional tools and materials for car seat burn repair?
CARDIAGTECH.NET offers a wide range of professional tools and materials for car seat burn repair. Visit our website or contact us at +1 (641) 206-8880 for expert advice and product recommendations. Our address is 276 Reock St, City of Orange, NJ 07050, United States.
By addressing these frequently asked questions, you can gain a better understanding of car seat burn repair and make informed decisions about your repair project.
Remember, dealing with car seat burns can be challenging, but with the right tools and techniques, you can restore your car’s interior to its original condition. For expert advice and high-quality repair materials, contact CARDIAGTECH.NET today. Let us help you keep your car looking its best.
Now is the perfect time to take action and restore your car’s interior. Contact CARDIAGTECH.NET today at +1 (641) 206-8880 or visit our website to explore our wide range of tools and materials for car seat burn repair. Our expert team is ready to assist you with personalized advice and product recommendations. Don’t let those burns detract from your car’s value and appearance any longer. Reach out now and let CARDIAGTECH.NET help you achieve professional-grade results with ease. Your satisfaction is our priority, and we are committed to providing you with the best solutions for all your automotive repair needs.