How To Fix Burnt Paint On Car Professionally
Burnt car paint happens, but don’t fret because CARDIAGTECH.NET is here to guide you through the process of restoring your vehicle’s finish. We’ll explore various methods to fix burnt paint, discuss preventive measures, and highlight the importance of using the right tools for the job. Learn about automotive refinishing, paint correction, and car detailing to bring back that showroom shine.
1. Understanding Burnt Paint on Cars
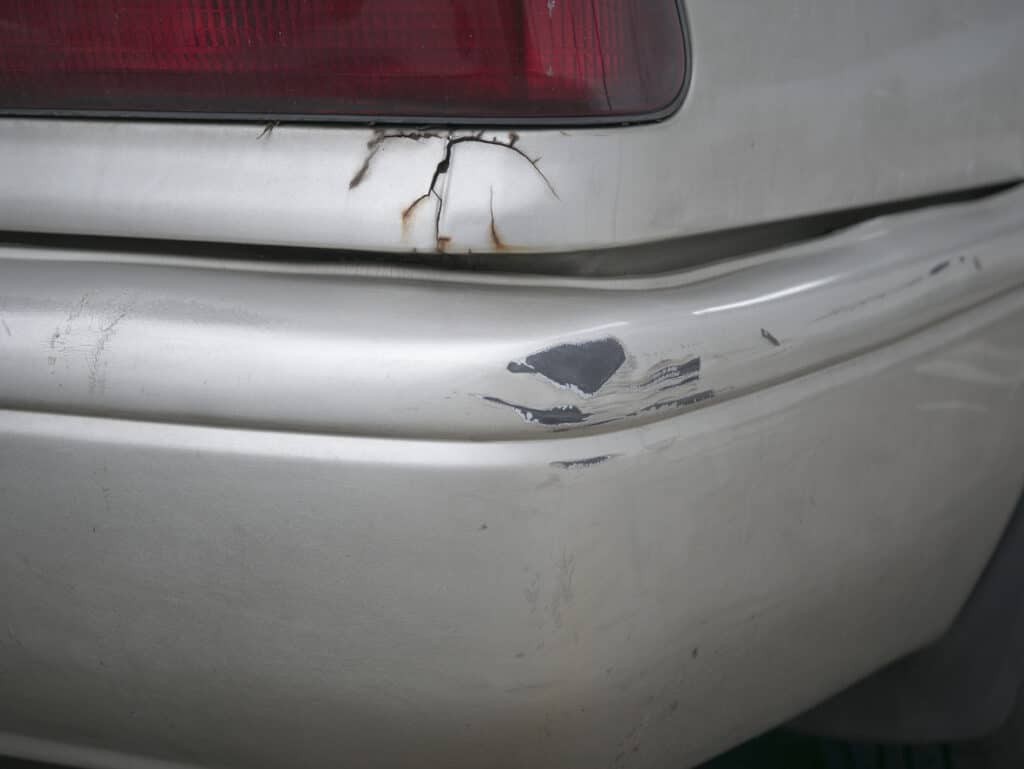
Burnt paint on a car occurs when the clear coat or paint layers are damaged due to excessive heat, friction, or chemical exposure. This can happen during improper polishing, prolonged sun exposure, or even from harsh chemicals. Recognizing the causes and types of damage is crucial for effective repair.
1.1. Causes of Paint Burning
Several factors can contribute to burnt car paint:
- Improper Polishing Techniques: Using a rotary buffer with too much speed or pressure can generate excessive heat, leading to paint burning.
- Prolonged Sun Exposure: Ultraviolet (UV) rays from the sun can break down the paint’s chemical bonds, causing it to fade, crack, or burn over time.
- Chemical Exposure: Harsh chemicals, such as strong detergents or industrial solvents, can corrode the paint surface, leading to damage.
- Environmental Factors: Acid rain, bird droppings, and tree sap can also cause paint damage if not promptly removed.
- Thin Paint Layers: Vehicles with thinner paint layers are more susceptible to burning during polishing.
1.2. Types of Paint Damage
Understanding the specific type of paint damage helps in choosing the appropriate repair method:
- Clear Coat Failure: This involves the clear coat peeling, cracking, or fading, exposing the base coat to environmental elements.
- Oxidation: Oxidation causes the paint to look dull and faded, often resulting in a chalky appearance.
- Swirl Marks: These are fine scratches in the clear coat caused by improper washing or polishing techniques.
- Holograms: Holograms are circular marks left by rotary buffers when used incorrectly.
- Burn-Through: This is the most severe form of damage, where the polisher removes the clear coat and base coat, exposing the primer or bare metal.
2. Identifying Burnt Paint
Identifying burnt paint early can prevent further damage and simplify the repair process. Look for visual cues and perform simple tests to assess the extent of the problem.
2.1. Visual Inspection
Carefully examine the car’s surface for signs of burnt paint. Look for:
- Discoloration: Areas where the paint looks faded or has a different hue than the surrounding areas.
- Cracking or Peeling: The clear coat may show signs of cracking or peeling away from the base coat.
- Dullness: A lack of gloss or shine in certain areas, indicating oxidation or clear coat failure.
- Visible Scratches: Swirl marks or holograms that appear as circular or spiderweb-like patterns.
2.2. Touch Test
Run your hand over the paint surface to feel for any irregularities:
- Roughness: Burnt paint may feel rough or uneven compared to undamaged areas.
- Chalkiness: Oxidized paint may leave a chalky residue on your fingers when touched.
2.3. Water Test
Pour water over the affected area and observe how it behaves:
- Beading: If the water beads up and rolls off, the paint is still protected.
- Sheeting: If the water spreads out evenly, the protective layer is compromised.
3. Essential Tools and Materials
Before attempting to fix burnt paint, gather the necessary tools and materials. Using high-quality products from CARDIAGTECH.NET ensures the best possible results.
3.1. Polishing Machines
- Dual-Action (DA) Polisher: Ideal for beginners, DA polishers oscillate and rotate, reducing the risk of burning the paint.
- Rotary Polisher: More powerful and efficient, but requires experience to avoid causing damage.
- Forced Rotation Polisher: Combines the benefits of both DA and rotary polishers, offering more control and cutting power.
3.2. Polishing Pads
- Foam Pads: Available in various levels of abrasiveness for cutting, polishing, and finishing.
- Microfiber Pads: Offer more cutting power than foam pads and are suitable for removing deeper imperfections.
- Wool Pads: Highly aggressive and typically used for heavy correction on heavily damaged paint.
3.3. Polishing Compounds and Polishes
- Cutting Compound: Used to remove severe imperfections like deep scratches and oxidation.
- Polishing Compound: Refines the paint surface after using a cutting compound, removing swirl marks and holograms.
- Finishing Polish: Enhances gloss and clarity, leaving a smooth and reflective finish.
3.4. Other Essential Supplies
- Microfiber Towels: For wiping away polish residue and cleaning the paint surface.
- Detailing Clay: Removes bonded contaminants from the paint surface.
- Clay Lubricant: Prevents the clay from scratching the paint.
- Isopropyl Alcohol (IPA): Used to remove polishing oils and reveal the true condition of the paint.
- Paint Thickness Gauge (PTG): Measures the thickness of the paint to avoid over-polishing.
- Masking Tape: Protects trim and delicate areas from polish.
- Spray Bottles: For dispensing water and IPA solutions.
- Gloves and Eye Protection: Ensures safety during the repair process.
4. Step-by-Step Guide to Fixing Burnt Paint
Follow this detailed guide to safely and effectively fix burnt paint on your car. Remember to always work in a well-lit and ventilated area.
4.1. Preparation
- Wash the Car: Thoroughly wash the car to remove dirt, grime, and loose contaminants. Use a pH-neutral car soap and a soft wash mitt.
- Decontaminate the Paint: Use detailing clay and lubricant to remove any bonded contaminants. This ensures a smooth surface for polishing.
- Dry the Car: Use a clean microfiber towel or a blower to dry the car completely.
- Inspect the Paint: Carefully inspect the paint for any signs of damage, such as scratches, swirl marks, or oxidation.
- Measure Paint Thickness: Use a paint thickness gauge (PTG) to measure the thickness of the paint in the affected area. This helps prevent over-polishing and potential burn-through.
4.2. Test Spot
- Choose a Small Area: Select a small, inconspicuous area to perform a test spot. This allows you to evaluate the effectiveness of your chosen products and techniques without risking further damage to the entire surface.
- Apply Compound: Apply a small amount of cutting compound to a polishing pad.
- Polish the Area: Using a DA polisher, work the compound into the paint using overlapping passes. Start with low speed and gradually increase it as needed.
- Wipe Clean: Wipe away the compound residue with a clean microfiber towel.
- Inspect Results: Examine the test spot under good lighting to assess the level of correction. If the results are satisfactory, proceed to the next step. If not, adjust your technique or try a different compound and pad combination.
4.3. Compounding
- Apply Compound: Apply a small amount of cutting compound to a polishing pad.
- Polish the Area: Using a DA or rotary polisher, work the compound into the paint using overlapping passes. Maintain consistent pressure and speed.
- Monitor Heat: Regularly check the paint surface temperature to prevent overheating. If the paint becomes too hot, stop and allow it to cool down.
- Wipe Clean: Wipe away the compound residue with a clean microfiber towel.
4.4. Polishing
- Apply Polish: Apply a small amount of polishing compound to a polishing pad.
- Polish the Area: Using a DA polisher, work the polish into the paint using overlapping passes. Use a lower speed than you did with the cutting compound.
- Wipe Clean: Wipe away the polish residue with a clean microfiber towel.
4.5. Finishing
- Apply Finishing Polish: Apply a small amount of finishing polish to a polishing pad.
- Polish the Area: Using a DA polisher, work the finishing polish into the paint using overlapping passes. Use the lowest speed setting on your polisher.
- Wipe Clean: Wipe away the polish residue with a clean microfiber towel.
4.6. Inspection
- Inspect the Paint: Carefully inspect the repaired area under good lighting. Look for any remaining imperfections, such as swirl marks or holograms.
- Repeat if Necessary: If necessary, repeat the polishing and finishing steps to achieve the desired level of correction.
4.7. Protection
- Apply Wax or Sealant: Apply a coat of wax or sealant to protect the repaired paint and enhance its shine.
- Cure Time: Allow the wax or sealant to cure according to the manufacturer’s instructions.
- Final Wipe Down: Use a clean microfiber towel to wipe away any excess wax or sealant residue.
5. Advanced Techniques for Severe Damage
For severely burnt paint, more advanced techniques may be required. These methods involve wet sanding and professional-grade products.
5.1. Wet Sanding
Wet sanding involves using fine-grit sandpaper with water as a lubricant to remove a thin layer of damaged paint. This technique is effective for leveling severe imperfections but requires skill and caution.
- Prepare the Surface: Clean the area thoroughly and mask off surrounding areas.
- Soak Sandpaper: Soak a sheet of fine-grit sandpaper (e.g., 2000-grit or 3000-grit) in water for at least 15 minutes.
- Sand the Area: Gently sand the affected area using light, even pressure. Keep the surface wet by spraying it with water frequently.
- Inspect the Surface: Wipe the area clean and inspect the surface. Repeat the sanding process if necessary.
- Compound and Polish: After wet sanding, use a cutting compound, polishing compound, and finishing polish to restore the paint’s gloss and clarity.
5.2. Professional Grade Products
Using professional-grade polishing compounds and polishes can significantly improve the results of paint correction. These products often contain more aggressive abrasives and advanced formulations that are designed for tackling severe paint damage.
- Research Products: Research and select high-quality, professional-grade compounds and polishes from reputable brands.
- Follow Instructions: Carefully follow the manufacturer’s instructions for application and usage.
- Use Appropriate Pads: Use appropriate polishing pads that are designed for use with professional-grade products.
- Monitor Progress: Regularly monitor the progress of your work and adjust your technique as needed.
6. Preventing Paint Burning
Preventing paint burning is always better than trying to fix it. Follow these preventive measures to maintain your car’s paint in top condition.
6.1. Proper Polishing Techniques
- Use the Right Tools: Use a dual-action polisher instead of a rotary polisher if you are a beginner.
- Avoid Excessive Speed and Pressure: Use moderate speed and pressure when polishing.
- Keep the Pad Clean: Regularly clean your polishing pad to remove accumulated polish residue and debris.
- Monitor Heat: Pay attention to the paint surface temperature and avoid overheating.
6.2. Regular Maintenance
- Wash Regularly: Wash your car regularly to remove dirt, grime, and contaminants.
- Wax or Seal: Apply a coat of wax or sealant every few months to protect the paint from UV rays and environmental damage.
- Address Issues Promptly: Promptly address any paint issues, such as scratches or oxidation, to prevent them from worsening.
6.3. Protective Measures
- Park in Shade: Park your car in the shade whenever possible to minimize exposure to the sun.
- Use a Car Cover: Use a car cover to protect the paint from UV rays, dust, and other environmental elements.
- Apply Paint Protection Film (PPF): Consider applying paint protection film to high-impact areas, such as the hood, fenders, and bumpers.
7. When to Seek Professional Help
While many paint burning issues can be resolved with DIY methods, some situations require professional help. Consider seeking professional assistance if:
- The Damage is Severe: If the paint is severely burnt or the damage extends to the base coat or primer.
- You Lack Experience: If you are not comfortable using polishing tools or wet sanding techniques.
- You Don’t Have the Right Tools: If you lack the necessary tools or materials for the repair.
- You Are Unsure of the Process: If you are unsure of the proper steps to take or are concerned about causing further damage.
8. Benefits of Professional Paint Correction
Professional paint correction services offer several benefits:
- Expertise: Professional detailers have the knowledge and experience to properly assess and repair paint damage.
- Tools and Equipment: They have access to professional-grade tools and equipment that are not typically available to consumers.
- Quality Results: They can achieve superior results compared to DIY methods.
- Time Savings: They can complete the repair process more quickly and efficiently.
- Warranty: Many professional detailers offer a warranty on their work.
9. Choosing the Right Products from CARDIAGTECH.NET
Selecting the right products from CARDIAGTECH.NET is crucial for achieving professional-quality results. Here’s a guide to help you choose the best products for your needs.
9.1. Polishing Machines
- For Beginners: Opt for a dual-action (DA) polisher like the Meguiar’s MT300 or Griot’s Garage BOSS G15. These are easy to use and minimize the risk of damage.
- For Experienced Users: Consider a rotary polisher like the Makita 9237C or FLEX PE14-2-150 for more aggressive correction.
- For Versatility: A forced rotation polisher like the FLEX XFE 7-15 150 offers a balance of power and control.
9.2. Polishing Pads
- For Cutting: Use microfiber pads like the Meguiar’s DMC5 or foam cutting pads like the Chemical Guys Hex-Logic Orange.
- For Polishing: Opt for foam polishing pads like the Meguiar’s DMF5 or Lake Country White Polishing Pad.
- For Finishing: Use foam finishing pads like the Meguiar’s DFF5 or Rupes Yellow Foam Pad.
9.3. Polishing Compounds and Polishes
- For Cutting: Choose a cutting compound like Meguiar’s Ultimate Compound or Chemical Guys V32.
- For Polishing: Select a polishing compound like Meguiar’s M205 or Menzerna 2500.
- For Finishing: Opt for a finishing polish like Meguiar’s M210 or Menzerna 3800.
9.4. Protection Products
- Waxes: Consider a carnauba wax like Meguiar’s Gold Class Carnauba Plus or a synthetic wax like Chemical Guys Butter Wet Wax.
- Sealants: Opt for a paint sealant like Meguiar’s Ultimate Paint Sealant or Chemical Guys JetSeal.
- Coatings: Choose a ceramic coating for long-lasting protection like Ceramic Pro or Gtechniq Crystal Serum Light.
10. Real-World Examples and Case Studies
Examining real-world examples and case studies can provide valuable insights into fixing burnt paint on cars.
10.1. Case Study 1: Clear Coat Failure on a Black Sedan
A black sedan suffered from severe clear coat failure due to prolonged sun exposure. The owner attempted to fix the issue with a rotary polisher and aggressive compound, resulting in burnt paint.
- Assessment: The paint thickness was measured, revealing that the clear coat was extremely thin.
- Solution: Wet sanding with 3000-grit sandpaper was performed to level the surface, followed by polishing with a DA polisher and a fine polishing compound.
- Results: The burnt paint was successfully removed, and the clear coat was restored to its original shine.
10.2. Case Study 2: Swirl Marks on a Red Sports Car
A red sports car had significant swirl marks from improper washing techniques. The owner tried to remove the swirls with a DA polisher but ended up burning the paint in some areas.
- Assessment: The paint was inspected, revealing that the swirls were deep and the paint was thin in certain spots.
- Solution: A combination of compounding and polishing was used to remove the swirls and burnt paint. A foam cutting pad with a mild compound was used first, followed by a foam polishing pad with a finishing polish.
- Results: The swirl marks were removed, and the paint was restored to its original gloss and clarity.
11. Maintaining Your Car’s Paint After Repair
Maintaining your car’s paint after repair is crucial to prevent future damage and keep it looking its best.
11.1. Regular Washing and Drying
- Use a pH-Neutral Soap: Use a pH-neutral car soap to avoid damaging the paint.
- Use a Soft Wash Mitt: Use a soft wash mitt to prevent scratching the paint.
- Dry with Microfiber Towels: Dry the car with clean microfiber towels to avoid water spots and streaks.
11.2. Waxing and Sealing
- Apply Wax or Sealant: Apply a coat of wax or sealant every few months to protect the paint from UV rays, oxidation, and environmental damage.
- Choose the Right Product: Choose a wax or sealant that is appropriate for your car’s paint type and the climate in your area.
11.3. Protecting from Environmental Factors
- Park in the Shade: Park your car in the shade whenever possible to minimize exposure to the sun.
- Use a Car Cover: Use a car cover to protect the paint from UV rays, dust, and other environmental elements.
- Address Issues Promptly: Promptly address any paint issues, such as scratches, bird droppings, or tree sap, to prevent them from causing permanent damage.
12. Safety Precautions
When fixing burnt paint on a car, it’s important to take the necessary safety precautions to protect yourself and prevent accidents.
12.1. Personal Protective Equipment (PPE)
- Wear Gloves: Wear gloves to protect your hands from chemicals and abrasives.
- Wear Eye Protection: Wear safety glasses or goggles to protect your eyes from flying debris and polish splatter.
- Wear a Mask: Wear a dust mask or respirator to avoid inhaling harmful dust and fumes.
12.2. Working Environment
- Work in a Well-Ventilated Area: Work in a well-ventilated area to avoid inhaling harmful fumes.
- Keep the Area Clean: Keep the work area clean and free of clutter to prevent accidents.
- Use Proper Lighting: Use proper lighting to ensure you can see the paint surface clearly.
12.3. Equipment Safety
- Read the Instructions: Read and follow the manufacturer’s instructions for all tools and products.
- Inspect Equipment: Regularly inspect your equipment for any signs of damage or wear.
- Use Proper Techniques: Use proper techniques when operating polishing machines and other tools.
13. Innovative Solutions for Paint Repair
The automotive industry is constantly evolving, with new and innovative solutions for paint repair emerging all the time.
13.1. Nanotechnology Coatings
Nanotechnology coatings are advanced paint protection products that use nanoparticles to create a durable, hydrophobic layer on the paint surface. These coatings offer superior protection against scratches, UV rays, and chemical damage.
13.2. Self-Healing Paint
Self-healing paint is a revolutionary technology that allows minor scratches and swirl marks to disappear over time. This type of paint contains special polymers that can reflow and repair themselves when exposed to heat or sunlight.
13.3. Laser Paint Repair
Laser paint repair is a cutting-edge technique that uses lasers to precisely remove damaged paint and blend new paint seamlessly. This method is highly effective for repairing small scratches and blemishes without the need for extensive repainting.
14. Cost Analysis: DIY vs. Professional Repair
When deciding whether to fix burnt paint on your car yourself or hire a professional, it’s important to consider the cost implications.
14.1. DIY Repair Costs
- Tools and Equipment: Polishing machine, pads, compounds, towels, etc.
- Materials: Sandpaper, masking tape, cleaning products, etc.
- Time: The amount of time you spend on the repair.
- Potential Risks: The risk of causing further damage to the paint.
14.2. Professional Repair Costs
- Labor: The cost of the detailer’s time and expertise.
- Materials: The cost of the products used in the repair.
- Equipment: The cost of using professional-grade tools and equipment.
- Warranty: The cost of the warranty offered by the detailer.
| Item | DIY Cost (USD) | Professional Cost (USD) |
|---|---|---|
| Polishing Machine | 100 – 300 | N/A |
| Polishing Pads | 20 – 50 | Included |
| Compounds and Polishes | 30 – 70 | Included |
| Other Materials | 20 – 50 | Included |
| Labor | N/A | 200 – 500+ |
| Total Estimated Cost | 170 – 470 | 200 – 500+ |
Ultimately, the decision of whether to DIY or hire a professional depends on your budget, skill level, and the severity of the paint damage.
15. The Future of Automotive Paint Repair
The future of automotive paint repair is likely to be shaped by technological advancements and a growing emphasis on sustainability.
15.1. Advanced Materials
New materials, such as graphene-enhanced coatings and bio-based paints, are being developed to offer improved durability, scratch resistance, and environmental performance.
15.2. Automation and Robotics
Automated paint repair systems and robotic polishing machines are becoming increasingly common in professional detailing shops, offering greater precision and efficiency.
15.3. Sustainable Practices
The automotive industry is moving towards more sustainable paint repair practices, such as using water-based paints, reducing waste, and minimizing energy consumption.
16. Reader Engagement and Community
Engaging with the CARDIAGTECH.NET community can provide valuable insights and support for your paint repair projects.
16.1. Forums and Online Communities
Participate in online forums and communities dedicated to car detailing and paint repair. Share your experiences, ask questions, and learn from other enthusiasts.
16.2. Social Media
Follow CARDIAGTECH.NET on social media platforms like Facebook, Instagram, and YouTube for tips, tutorials, and product reviews.
16.3. Local Events and Workshops
Attend local car shows, detailing workshops, and training events to network with other enthusiasts and learn from experts.
17. Testimonials and Success Stories
Reading testimonials and success stories from other car owners can provide inspiration and reassurance for your paint repair journey.
17.1. Testimonial 1: John S.
“I accidentally burnt the paint on my new sports car while trying to remove some swirl marks. I was devastated, but after following the steps outlined in this article and using the recommended products from CARDIAGTECH.NET, I was able to fix the damage and restore the paint to its original shine. Thank you, CARDIAGTECH.NET”
17.2. Testimonial 2: Mary L.
“I had some severe oxidation on my classic car, and I didn’t know where to start. I found this article on CARDIAGTECH.NET and decided to give it a try. I purchased a DA polisher and some polishing compounds from their website and followed the instructions carefully. I was amazed at the results I was able to achieve. My car looks better than ever”
18. Actionable Steps and Checklist
To help you get started with your paint repair project, here’s a checklist of actionable steps:
- Assess the Damage: Identify the type and extent of the paint damage.
- Gather Supplies: Collect the necessary tools and materials.
- Prepare the Surface: Wash, decontaminate, and dry the car.
- Perform a Test Spot: Evaluate your chosen products and techniques.
- Compound: Remove severe imperfections.
- Polish: Refine the paint surface.
- Finish: Enhance gloss and clarity.
- Inspect: Check for any remaining imperfections.
- Protect: Apply wax or sealant.
- Maintain: Wash and wax regularly to prevent future damage.
19. Overcoming Challenges and Pitfalls
Fixing burnt paint on a car can be challenging, but with the right knowledge and techniques, you can overcome common pitfalls.
19.1. Over-Polishing
- Challenge: Over-polishing can remove too much paint and cause burn-through.
- Solution: Use a paint thickness gauge to monitor the thickness of the paint. Use moderate pressure and speed when polishing.
19.2. Holograms
- Challenge: Holograms are circular marks left by rotary buffers.
- Solution: Use a DA polisher instead of a rotary buffer. Use a fine polishing pad and a finishing polish.
19.3. Swirl Marks
- Challenge: Swirl marks are fine scratches in the clear coat.
- Solution: Use proper washing techniques. Use a soft wash mitt and a pH-neutral soap.
20. Resources and Further Reading
To expand your knowledge of automotive paint repair, here are some additional resources:
- Books: “The Art of Detailing” by Renny Doyle, “How to Detail Cars” by Don Taylor.
- Websites: AutogeekOnline.net, DetailingWorld.com.
- YouTube Channels: Ammo NYC, The Detail Geek.
21. The Role of CARDIAGTECH.NET in Automotive Care
CARDIAGTECH.NET is committed to providing high-quality tools, products, and information for automotive care enthusiasts and professionals. Our mission is to help you achieve the best possible results with your detailing and repair projects.
21.1. Product Selection
We offer a wide range of polishing machines, pads, compounds, and other detailing supplies from top brands. Our product experts are available to help you choose the right products for your specific needs.
21.2. Educational Resources
We provide a wealth of educational resources, including articles, tutorials, and videos, to help you learn the latest techniques and best practices for automotive care.
21.3. Customer Support
Our customer support team is available to answer your questions and provide assistance with your orders. We are committed to ensuring your satisfaction with our products and services.
22. Innovations at CARDIAGTECH.NET
CARDIAGTECH.NET is at the forefront of automotive care innovation, constantly seeking out new and improved products and techniques.
22.1. New Product Development
We work closely with manufacturers to develop innovative products that meet the evolving needs of our customers.
22.2. Technology Integration
We integrate the latest technology into our products and services to provide you with the most advanced tools for automotive care.
22.3. Sustainability Initiatives
We are committed to sustainability and strive to minimize our environmental impact through responsible sourcing, packaging, and operations.
23. Expert Insights and Tips
To provide you with the best possible advice, we’ve gathered insights and tips from leading experts in the automotive detailing industry.
23.1. Renny Doyle
Renny Doyle is a renowned detailer and trainer with over 30 years of experience. His advice for fixing burnt paint is to always start with the least aggressive method and gradually increase the aggressiveness as needed.
23.2. Larry Kosilla
Larry Kosilla is the founder of Ammo NYC and a respected authority on car detailing. His tip for preventing paint burning is to always keep the polishing pad clean and to monitor the paint surface temperature.
23.3. Jason Rose
Jason Rose is the owner of Lake Country Manufacturing and a leading expert on polishing pads. His recommendation is to use the right pad for the right application and to always prime the pad before use.
24. The Psychology of Car Care
Taking care of your car is more than just a practical task; it can also have psychological benefits.
24.1. Stress Relief
Detailing your car can be a relaxing and meditative activity that helps relieve stress.
24.2. Sense of Accomplishment
Achieving a showroom shine on your car can provide a sense of accomplishment and pride.
24.3. Emotional Connection
Many car owners develop an emotional connection with their vehicles, and taking care of them can strengthen that bond.
25. Visual Aids and Demonstrations
Visual aids and demonstrations can be incredibly helpful for understanding how to fix burnt paint on a car.
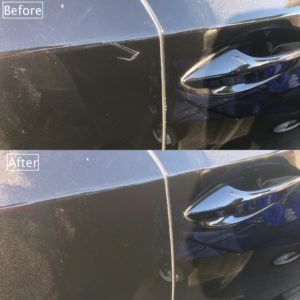
25.1. Before and After Photos
Before and after photos can illustrate the dramatic results that can be achieved with proper paint repair techniques.
25.2. Video Tutorials
Video tutorials can provide step-by-step instructions on how to fix burnt paint, including demonstrations of proper polishing techniques.
25.3. Diagrams and Illustrations
Diagrams and illustrations can help explain complex concepts, such as paint thickness and polishing machine mechanics.
26. The Importance of Paint Thickness Measurement
Measuring paint thickness is a crucial step in the paint correction process.
26.1. Preventing Burn-Through
A paint thickness gauge can help you avoid over-polishing and causing burn-through.
26.2. Assessing Paint Condition
Measuring paint thickness can provide valuable information about the condition of the paint and the extent of any damage.
26.3. Determining Safe Correction Levels
By knowing the paint thickness, you can determine the safe levels of correction that can be performed without risking damage.
27. Advanced Polishing Techniques
For experienced detailers, advanced polishing techniques can help achieve even better results.
27.1. Jewelling
Jewelling is a technique that involves using a very fine polishing pad and a finishing polish to create an exceptionally glossy and reflective finish.
27.2. Rotary Buffing
Rotary buffing is a more aggressive polishing technique that can be used to remove severe imperfections, but it requires skill and caution.
27.3. Wet Sanding
Wet sanding is a technique that involves using fine-grit sandpaper with water as a lubricant to remove a thin layer of damaged paint.
28. Maximizing Gloss and Clarity
Achieving maximum gloss and clarity requires attention to detail and the use of high-quality products.
28.1. Proper Surface Preparation
Proper surface preparation, including washing, decontaminating, and claying, is essential for achieving maximum gloss and clarity.
28.2. Using the Right Products
Using the right polishing compounds, polishes, and finishing products is crucial for achieving the desired results.
28.3. Applying a Protective Coating
Applying a protective coating, such as a wax, sealant, or ceramic coating, can enhance gloss and clarity and protect the paint from future damage.
29. Frequently Asked Questions (FAQ)
- What causes burnt paint on a car? Burnt paint is typically caused by excessive heat generated during polishing, prolonged sun exposure, or chemical exposure.
- Can I fix burnt paint myself? Yes, minor cases of burnt paint can often be fixed with DIY methods, but severe damage may require professional help.
- What tools do I need to fix burnt paint? You’ll need a polishing machine, polishing pads, polishing compounds, microfiber towels, and other detailing supplies.
- How do I prevent paint burning? Use proper polishing techniques, avoid excessive speed and pressure, and protect your car from sun exposure and harsh chemicals.
- What is a paint thickness gauge? A paint thickness gauge measures the thickness of the paint on your car, helping you avoid over-polishing and potential burn-through.
- How often should I wax my car? You should wax your car every few months to protect the paint from UV rays, oxidation, and environmental damage.
- What is wet sanding? Wet sanding involves using fine-grit sandpaper with water as a lubricant to remove a thin layer of damaged paint.
- What is a ceramic coating? A ceramic coating is a long-lasting paint protection product that provides superior protection against scratches, UV rays, and chemical damage.
- How do I choose the right polishing pad? Choose a polishing pad based on the severity of the paint damage and the type of polishing compound you’re using.
- Where can I find high-quality detailing supplies? CARDIAGTECH.NET offers a wide range of high-quality detailing supplies from top brands.
30. Final Thoughts: Restoring Your Car’s Beauty
Fixing burnt paint on your car can be a challenging but rewarding process. By following the steps outlined in this article and using the right tools and products from CARDIAGTECH.NET, you can restore your car’s beauty and protect it from future damage.
Are you ready to bring back the showroom shine to your car? Don’t let burnt paint diminish your vehicle’s appearance. Contact CARDIAGTECH.NET today for expert advice and premium tools that will make paint correction a breeze. Our team is ready to assist you with personalized recommendations and support to tackle any automotive repair challenge. Reach out now and let us help you achieve professional-quality results right at home!
Address: 276 Reock St, City of Orange, NJ 07050, United States
Whatsapp: +1 (641) 206-8880
Website: CARDIAGTECH.NET
Let CARDIAGTECH.NET be your partner in achieving automotive perfection. Connect with us today and experience the difference quality tools and expert guidance can make!