How To Fix Car AC Not Blowing Air: A Comprehensive Guide
Is your car AC failing to blow air? CARDIAGTECH.NET provides a comprehensive guide on how to diagnose and repair your car’s AC system, ensuring you stay cool on the road. We’ll cover common issues, troubleshooting steps, and the right tools to get the job done effectively, enhancing your automotive AC repair expertise.
1. Understanding the Basics of Your Car’s AC System
Before diving into troubleshooting, it’s crucial to understand the fundamental components of your car’s AC system. This knowledge will help you pinpoint the source of the problem when your AC isn’t blowing air.
- Compressor: The heart of the system, the compressor circulates refrigerant.
- Condenser: This component cools the refrigerant.
- Evaporator: The evaporator absorbs heat from the cabin air, providing cool air.
- Expansion Valve or Orifice Tube: These regulate the flow of refrigerant.
- Blower Motor: This forces air through the evaporator and into the cabin.
- Refrigerant: The substance that absorbs and releases heat within the system.
Understanding how these components interact is the first step toward fixing an AC system that’s not blowing air.
2. Common Reasons Why Your Car AC is Not Blowing Air
Several factors can cause your car’s AC to stop blowing air. Identifying the correct cause is essential for an effective repair. Here’s a list of potential culprits:
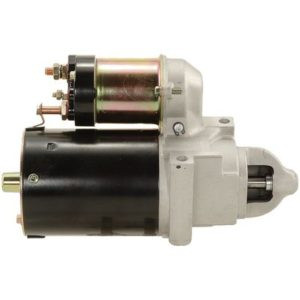
- Blower Motor Failure: The blower motor is responsible for pushing air through the vents. If it fails, no air will circulate.
- Electrical Issues: Problems with fuses, relays, or wiring can prevent the blower motor from functioning.
- Blocked Air Vents: Obstructions in the vents or ductwork can restrict airflow.
- Evaporator Core Freeze-Up: Ice buildup on the evaporator can block airflow.
- Low Refrigerant: Although low refrigerant usually results in warm air, in severe cases, it can cause the system to shut down completely.
- Faulty AC Control Module: The control module regulates the AC system, and a malfunction can prevent it from operating correctly.
3. Step-by-Step Guide to Diagnosing the Problem
Follow these steps to diagnose why your car AC is not blowing air. This systematic approach will help you narrow down the potential causes and perform targeted repairs.
3.1 Check the Blower Motor
The blower motor is the primary suspect when the AC isn’t blowing air.
- Locate the Blower Motor: Typically located under the dashboard on the passenger side, or sometimes in the engine compartment. Consult your vehicle’s repair manual for the exact location.
- Test the Blower Motor:
- Turn the ignition on and set the AC to the highest fan speed.
- Listen for any sounds from the blower motor. If you hear nothing, the motor may be dead.
- If accessible, try giving the blower motor a gentle tap. Sometimes, a stuck motor will start running again.
- Inspect the Wiring: Check the wiring harness connected to the blower motor for any signs of damage, such as frayed wires or loose connections.
- Use a Multimeter:
- Disconnect the blower motor connector.
- Use a multimeter to check for voltage at the connector when the AC is turned on.
- If there’s no voltage, the problem lies upstream, such as a fuse, relay, or the AC control module.
3.2 Inspect Fuses and Relays
Fuses and relays protect the AC system and blower motor from electrical overload.
- Locate the Fuse Box: Typically found under the dashboard or in the engine compartment.
- Identify the AC and Blower Motor Fuses: Consult your vehicle’s owner’s manual or a fuse box diagram to locate the correct fuses.
- Check the Fuses:
- Visually inspect each fuse for a broken filament.
- Use a multimeter to test the continuity of the fuses. A blown fuse will show no continuity.
- Replace Blown Fuses: Replace any blown fuses with a fuse of the same amperage rating.
- Check the Relays:
- Locate the AC and blower motor relays.
- Swap the relays with a known working relay of the same type.
- If the AC starts working, the original relay is faulty and needs replacement.
3.3 Check for Blocked Air Vents and Ducts
Obstructions in the air vents or ductwork can restrict airflow, making it seem like the AC is not blowing air.
- Inspect the Cabin Air Filter:
- Locate the cabin air filter (usually behind the glove box or under the hood).
- Remove the filter and inspect it for dirt, leaves, and debris.
- Replace the filter if it’s clogged. A clean cabin air filter ensures proper airflow and improves AC performance.
- Check the Vents:
- Ensure that all vents are open and free from obstructions.
- Use a vacuum cleaner to remove any debris from the vents.
- Inspect the Ductwork:
- Check the ductwork for any kinks, bends, or collapses that could restrict airflow.
- Ensure that the ducts are properly connected and sealed.
3.4 Check for Evaporator Core Freeze-Up
An evaporator core freeze-up can block airflow, especially if the AC has been running for a long time.
- Symptoms of Freeze-Up:
- AC works initially but gradually stops blowing air.
- Airflow returns after the car has been turned off for a while.
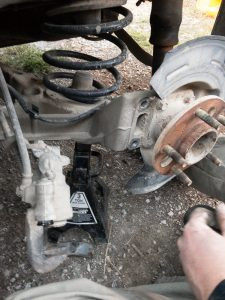
- Check the Evaporator Drain:
- Locate the evaporator drain tube (usually under the car near the firewall).
- Ensure that the drain tube is not clogged, allowing condensation to escape.
- Clear any obstructions with a wire or compressed air.
- Inspect the Low-Pressure Switch: A faulty low-pressure switch can cause the compressor to run continuously, leading to freeze-up. Use a multimeter to test the switch for proper operation.
3.5 Check Refrigerant Levels
Low refrigerant can cause the AC system to shut down to protect the compressor.
- Symptoms of Low Refrigerant:
- AC blows warm air.
- Compressor cycles on and off frequently.
- Use a Manifold Gauge Set:
- Connect a manifold gauge set to the high and low-pressure ports on the AC system.
- Read the pressure levels. Compare the readings to the specifications in your vehicle’s repair manual.
- If the pressure is low, there’s likely a refrigerant leak.
- Check for Leaks:
- Use a UV leak detection kit to find leaks in the AC system.
- Add UV dye to the system and use a UV light to inspect components for leaks.
- Common leak areas include hoses, fittings, the compressor, and the condenser.
3.6 Inspect the AC Control Module
The AC control module regulates the AC system. A faulty module can cause various issues, including the AC not blowing air.
- Symptoms of a Faulty Control Module:
- Inconsistent AC operation.
- AC not responding to adjustments.
- Error codes related to the AC system.
- Check for Diagnostic Trouble Codes (DTCs):
- Use an OBD-II scanner to check for any DTCs related to the AC system.
- Consult your vehicle’s repair manual to interpret the codes and diagnose the problem.
- Inspect the Module Connectors:
- Check the connectors for any signs of corrosion or damage.
- Ensure that the connectors are securely attached to the module.
- Test the Module:
- If possible, test the module with a specialized diagnostic tool.
- Consider consulting a professional technician for module testing and replacement.
4. Tools You’ll Need
Having the right tools is essential for diagnosing and repairing your car’s AC system. Here’s a list of must-have tools:
- Multimeter: For testing electrical circuits and components.
- Manifold Gauge Set: For measuring refrigerant pressure.
- UV Leak Detection Kit: For finding refrigerant leaks.
- OBD-II Scanner: For reading diagnostic trouble codes.
- Fuse Tester: For checking the continuity of fuses.
- Socket Set and Wrenches: For removing and installing components.
- Screwdrivers: Various sizes and types for different fasteners.
- Pliers: For gripping and manipulating parts.
- Vacuum Pump: For evacuating the AC system after repairs.
- Refrigerant Recharging Station: For safely recharging the AC system with refrigerant.
Investing in quality tools from CARDIAGTECH.NET ensures you have the right equipment to tackle any AC repair job effectively.
5. Repairing the AC System
Once you’ve diagnosed the problem, it’s time to make the necessary repairs. Here are some common repairs you might encounter:
5.1 Replacing the Blower Motor
- Disconnect the Battery: Disconnect the negative terminal of the battery to prevent electrical shock.
- Remove the Old Blower Motor:
- Locate the blower motor (usually under the dashboard on the passenger side).
- Disconnect the wiring harness from the blower motor.
- Remove the screws or bolts securing the blower motor.
- Carefully remove the old blower motor.
- Install the New Blower Motor:
- Position the new blower motor in place.
- Secure it with the screws or bolts.
- Reconnect the wiring harness.
- Test the Blower Motor:
- Reconnect the battery.
- Turn the ignition on and set the AC to the highest fan speed.
- Ensure that the blower motor is running and blowing air.
5.2 Replacing a Fuse or Relay
- Locate the Fuse or Relay: Identify the blown fuse or faulty relay in the fuse box.
- Remove the Old Fuse or Relay: Use a fuse puller to remove the fuse. For relays, simply pull them out.
- Install the New Fuse or Relay:
- Insert the new fuse with the same amperage rating into the fuse slot.
- Plug the new relay into the relay socket.
- Test the AC System: Turn on the AC to ensure it’s working correctly.
5.3 Clearing Blocked Air Vents and Ducts
- Remove Obstructions:
- Inspect the vents and ductwork for any visible obstructions.
- Use a vacuum cleaner or compressed air to remove debris.
- Clean the Cabin Air Filter:
- Remove the cabin air filter.
- Replace it with a new, clean filter.
- Ensure Proper Airflow: Verify that air is flowing freely through all vents.
5.4 Addressing Evaporator Core Freeze-Up
- Clear the Evaporator Drain:
- Locate the evaporator drain tube under the car.
- Use a wire or compressed air to clear any clogs.
- Check the Low-Pressure Switch:
- Use a multimeter to test the low-pressure switch.
- Replace the switch if it’s faulty.
- Adjust Refrigerant Levels: Ensure that the refrigerant levels are correct to prevent freeze-up.
5.5 Repairing Refrigerant Leaks
- Locate the Leak: Use a UV leak detection kit to find the source of the leak.
- Repair the Leak:
- Replace any damaged hoses or fittings.
- Tighten loose connections.
- Repair or replace the condenser, evaporator, or compressor if necessary.
- Evacuate the System: Use a vacuum pump to evacuate the AC system, removing any air and moisture.
- Recharge the System: Use a refrigerant recharging station to add the correct amount of refrigerant to the system.
6. Safety Precautions
Working on your car’s AC system involves handling refrigerants and electrical components. Always follow these safety precautions:
- Wear Safety Glasses: Protect your eyes from debris and refrigerant.
- Wear Gloves: Protect your hands from chemicals and sharp objects.
- Work in a Well-Ventilated Area: Avoid breathing refrigerant fumes.
- Disconnect the Battery: Prevent electrical shock by disconnecting the negative terminal of the battery before starting any repairs.
- Handle Refrigerant Safely: Refrigerant can cause frostbite. Avoid contact with skin and eyes.
- Dispose of Refrigerant Properly: Do not release refrigerant into the atmosphere. Take it to a certified recycling center.
7. Tips for Maintaining Your Car’s AC System
Regular maintenance can prevent many AC problems and extend the life of your system. Here are some tips:
- Run the AC Regularly: Even in winter, run the AC for a few minutes each month to keep the components lubricated.
- Check Refrigerant Levels: Have the refrigerant levels checked periodically by a professional.
- Replace the Cabin Air Filter: Replace the cabin air filter every 12,000 to 15,000 miles.
- Inspect Hoses and Belts: Check the hoses and belts for cracks, wear, and leaks.
- Clean the Condenser: Keep the condenser free from debris to ensure proper airflow.
- Professional Service: Schedule a professional AC service every few years to ensure optimal performance.
8. Advanced Troubleshooting Techniques
If you’ve tried the basic troubleshooting steps and your AC is still not blowing air, you may need to employ some advanced techniques.
8.1 Using a Scan Tool for Advanced Diagnostics
Modern vehicles have sophisticated AC systems that are controlled by electronic modules. A scan tool can provide valuable insights into the system’s operation and help diagnose complex issues.
- Connect the Scan Tool: Plug the scan tool into the OBD-II port.
- Read Diagnostic Trouble Codes (DTCs): Check for any DTCs related to the AC system.
- Analyze Live Data: Monitor live data from sensors, such as temperature sensors, pressure sensors, and the blower motor speed.
- Perform Actuator Tests: Use the scan tool to perform actuator tests, such as turning the blower motor on and off or cycling the compressor clutch.
8.2 Checking the Compressor Clutch
The compressor clutch engages and disengages the compressor, allowing it to cycle on and off. A faulty clutch can prevent the compressor from operating, resulting in no cool air.
- Inspect the Clutch: Visually inspect the clutch for any signs of damage or wear.
- Check the Air Gap: Use a feeler gauge to check the air gap between the clutch plate and the pulley. The air gap should be within the manufacturer’s specifications.
- Test the Clutch Coil: Use a multimeter to test the resistance of the clutch coil. An open or shorted coil will need to be replaced.
- Check for Voltage: Ensure that the clutch is receiving voltage when the AC is turned on.
8.3 Testing Temperature Sensors
Temperature sensors play a crucial role in regulating the AC system. Faulty sensors can provide incorrect readings, leading to poor AC performance.
- Locate the Sensors: Identify the temperature sensors in the AC system, such as the evaporator temperature sensor and the ambient temperature sensor.
- Test the Sensors: Use a multimeter to test the resistance of the sensors. Compare the readings to the manufacturer’s specifications.
- Check the Wiring: Inspect the wiring and connectors for any signs of damage or corrosion.
9. The Role of CARDIAGTECH.NET in Your AC Repair Journey
At CARDIAGTECH.NET, we understand the challenges you face when dealing with car AC issues. Our mission is to provide you with the highest quality tools and equipment to make your repair process as smooth and efficient as possible. Here’s how CARDIAGTECH.NET supports your AC repair needs:
- Comprehensive Tool Selection: We offer a wide range of tools, from basic multimeters to advanced refrigerant recharging stations, ensuring you have everything you need for any AC repair job.
- Expert Guidance: Our team of experts is always available to provide technical support and guidance, helping you choose the right tools and troubleshoot complex issues. Contact us via WhatsApp at +1 (641) 206-8880 for immediate assistance.
- High-Quality Products: We source our tools from trusted manufacturers, ensuring durability and reliability. Our products are designed to withstand the rigors of professional use, providing you with long-lasting performance.
- Competitive Pricing: We offer competitive pricing on all our tools and equipment, making it affordable for both professional technicians and DIY enthusiasts to access high-quality products.
- Convenient Shopping Experience: Our website, CARDIAGTECH.NET, provides a user-friendly shopping experience, allowing you to easily browse our products, place orders, and track shipments.
- Fast Shipping: We understand the importance of timely repairs, which is why we offer fast shipping to get your tools to you as quickly as possible.
- Customer Satisfaction: Your satisfaction is our top priority. We stand behind our products with a satisfaction guarantee, ensuring you can shop with confidence.
10. Why Choose CARDIAGTECH.NET for Your Automotive Needs?
Choosing the right supplier for your automotive tools and equipment is crucial for ensuring successful repairs and maintaining customer satisfaction. CARDIAGTECH.NET stands out as the premier choice for several reasons:
- Extensive Product Range: We offer a comprehensive selection of automotive tools and equipment, covering everything from diagnostics and repair to maintenance and detailing.
- Quality Assurance: We partner with leading manufacturers to ensure that our products meet the highest standards of quality and performance.
- Expert Support: Our team of automotive experts is available to provide technical support and guidance, helping you choose the right tools and troubleshoot complex issues.
- Competitive Pricing: We offer competitive pricing on all our products, making it affordable for both professional technicians and DIY enthusiasts to access high-quality tools.
- Customer-Centric Approach: We prioritize customer satisfaction and are committed to providing exceptional service and support.
- Innovative Solutions: We stay up-to-date with the latest automotive technologies and offer innovative solutions to meet the evolving needs of the industry.
- Reliable Performance: Our tools are designed to deliver reliable performance and withstand the rigors of professional use, providing you with long-lasting value.
- Convenient Shopping: Our user-friendly website and efficient ordering process make it easy to find and purchase the tools you need.
- Fast Shipping: We offer fast shipping to ensure that you receive your tools quickly, minimizing downtime and maximizing productivity.
- Trusted Reputation: CARDIAGTECH.NET has earned a reputation as a trusted supplier of automotive tools and equipment, serving customers worldwide.
10.1 Tools for Leak Detection
- Electronic Leak Detectors: Pinpoint even the smallest leaks with precision.
- UV Dye Kits: Quickly identify leaks using ultraviolet light.
10.2 Diagnostic Tools
- OBD-II Scanners: Read and clear diagnostic trouble codes.
- Multimeters: Test electrical components with accuracy.
10.3 AC System Tools
- Manifold Gauge Sets: Accurately measure system pressures.
- Vacuum Pumps: Prepare the system for refrigerant recharge.
10.4 Blower Motor Testers
- Digital Multimeters: These versatile tools can measure voltage, current, and resistance, allowing you to diagnose electrical issues in the blower motor circuit.
- Test Lights: Simple and effective for checking if power is reaching the blower motor.
- Specialized Blower Motor Testers: Some advanced testers can simulate blower motor operation to confirm functionality.
10.5 Electrical System Analyzers
- Circuit Testers: Quickly identify shorts, opens, and other circuit issues.
- Oscilloscopes: Visualize electrical signals for in-depth analysis.
By providing these specialized tools, CARDIAGTECH.NET ensures that automotive technicians have the necessary resources to diagnose and repair complex AC and electrical system problems efficiently and accurately.
11. Real-World Examples
Scenario 1: Blower Motor Failure
Problem: A technician is called to inspect a vehicle where the AC is not blowing any air. The customer mentions the issue started intermittently and then became constant.
Diagnosis:
- The technician uses a digital multimeter from CARDIAGTECH.NET to check the voltage at the blower motor connector. There is no voltage present.
- Next, the technician checks the fuse box using a fuse tester, also from CARDIAGTECH.NET, and finds that the blower motor fuse is blown.
Solution:
- The technician replaces the blown fuse with a new one of the correct amperage.
- He then tests the blower motor again with the multimeter to ensure voltage is now present.
- The technician turns on the AC, and the blower motor starts working, restoring airflow.
Scenario 2: Refrigerant Leak
Problem: A vehicle’s AC is blowing warm air. The technician suspects a refrigerant leak.
Diagnosis:
- Using a manifold gauge set from CARDIAGTECH.NET, the technician checks the system pressures and finds them to be significantly lower than the recommended levels.
- The technician then uses a UV leak detection kit to inspect the AC components. He identifies a leak at the condenser.
Solution:
- The technician replaces the faulty condenser.
- He uses a vacuum pump to evacuate the AC system and then recharges it with the correct amount of refrigerant.
- The technician tests the AC again, and it now blows cold air.
12. Understanding Customer Needs and Challenges
At CARDIAGTECH.NET, we recognize that our customers face unique challenges in their daily work. Understanding these challenges allows us to provide better solutions and support. Here are some common issues and how we address them:
- Physical Demands: Automotive work can be physically demanding, requiring strength and endurance.
- Our Solution: We offer ergonomic tools designed to reduce strain and fatigue, making your job easier and more comfortable.
- Exposure to Chemicals: Technicians often work with oils, solvents, and other chemicals that can be harmful.
- Our Solution: We provide safety equipment, such as gloves and eye protection, to minimize exposure to hazardous substances.
- Keeping Up with Technology: The automotive industry is constantly evolving, with new technologies and techniques emerging all the time.
- Our Solution: We offer a wide range of diagnostic tools and training resources to help you stay up-to-date with the latest advancements.
- Time Constraints: Technicians are often under pressure to complete repairs quickly and efficiently.
- Our Solution: We offer high-quality tools that are designed to improve efficiency and reduce repair times.
- Competition: The automotive repair industry is highly competitive, with numerous shops vying for customers.
- Our Solution: We provide tools and equipment that can help you differentiate your business and offer superior service.
- Finding the Right Tools: It can be challenging to find the right tools for specific tasks, especially with so many options available.
- Our Solution: Our expert team can help you choose the right tools for your needs, providing personalized recommendations and technical support.
12.1 Call to Action
Are you ready to take your AC repair skills to the next level? Contact CARDIAGTECH.NET today for expert advice and top-quality tools. Call us at +1 (641) 206-8880 or visit our website at CARDIAGTECH.NET. Let us help you enhance your efficiency, accuracy, and profitability.
13. FAQ: Frequently Asked Questions
1. Why is my car AC not blowing any air?
*Possible causes include a faulty blower motor, blown fuse, blocked vents, evaporator freeze-up, or low refrigerant.
2. How do I check the blower motor in my car?
*Locate the blower motor, test it with a multimeter for voltage, and inspect the wiring for damage.
3. What tools do I need to diagnose AC problems?
*Essential tools include a multimeter, manifold gauge set, UV leak detection kit, and OBD-II scanner.
4. Can I recharge my car AC myself?
*While it’s possible, it’s recommended to have a professional recharge the AC system to ensure proper levels and prevent damage.
5. How often should I replace my cabin air filter?
*Replace the cabin air filter every 12,000 to 15,000 miles, or as recommended in your vehicle’s owner’s manual.
6. What causes an evaporator core to freeze up?
*Evaporator freeze-up can be caused by a clogged drain tube, faulty low-pressure switch, or incorrect refrigerant levels.
7. How can I find refrigerant leaks in my car’s AC system?
*Use a UV leak detection kit to find leaks in the AC system. Add UV dye and use a UV light to inspect components.
8. What are the symptoms of low refrigerant in my car?
*Symptoms include the AC blowing warm air, the compressor cycling on and off frequently, and a hissing sound from the AC system.
9. How do I test the AC compressor clutch?
*Inspect the clutch for damage, check the air gap with a feeler gauge, and test the clutch coil with a multimeter.
10. Is it safe to work on my car’s AC system myself?
*Working on the AC system can be dangerous due to the high pressures and chemicals involved. Always follow safety precautions and wear appropriate protective gear.
14. Final Thoughts
Diagnosing and repairing a car AC system that’s not blowing air can be a complex task, but with the right knowledge, tools, and guidance, it’s entirely manageable. By following the steps outlined in this guide and utilizing the high-quality tools available at CARDIAGTECH.NET, you can effectively troubleshoot and repair your AC system, ensuring a comfortable and cool driving experience. Remember to prioritize safety and seek professional help when needed. With CARDIAGTECH.NET, you have a reliable partner to support all your automotive needs.