**How To Fix Car Chipped Paint: Your Ultimate Guide**

How to fix car chipped paint effectively is a common concern for car owners, and CARDIAGTECH.NET offers the perfect solutions. Our comprehensive guide covers everything from identifying the best tools to mastering the techniques for flawless car paint chip repair. Let us help you keep your vehicle looking its best with our expert advice and top-tier products, ensuring your car’s longevity and aesthetic appeal. We’ll also delve into paint protection and color matching for a seamless finish.
1. Understanding Car Paint Chips
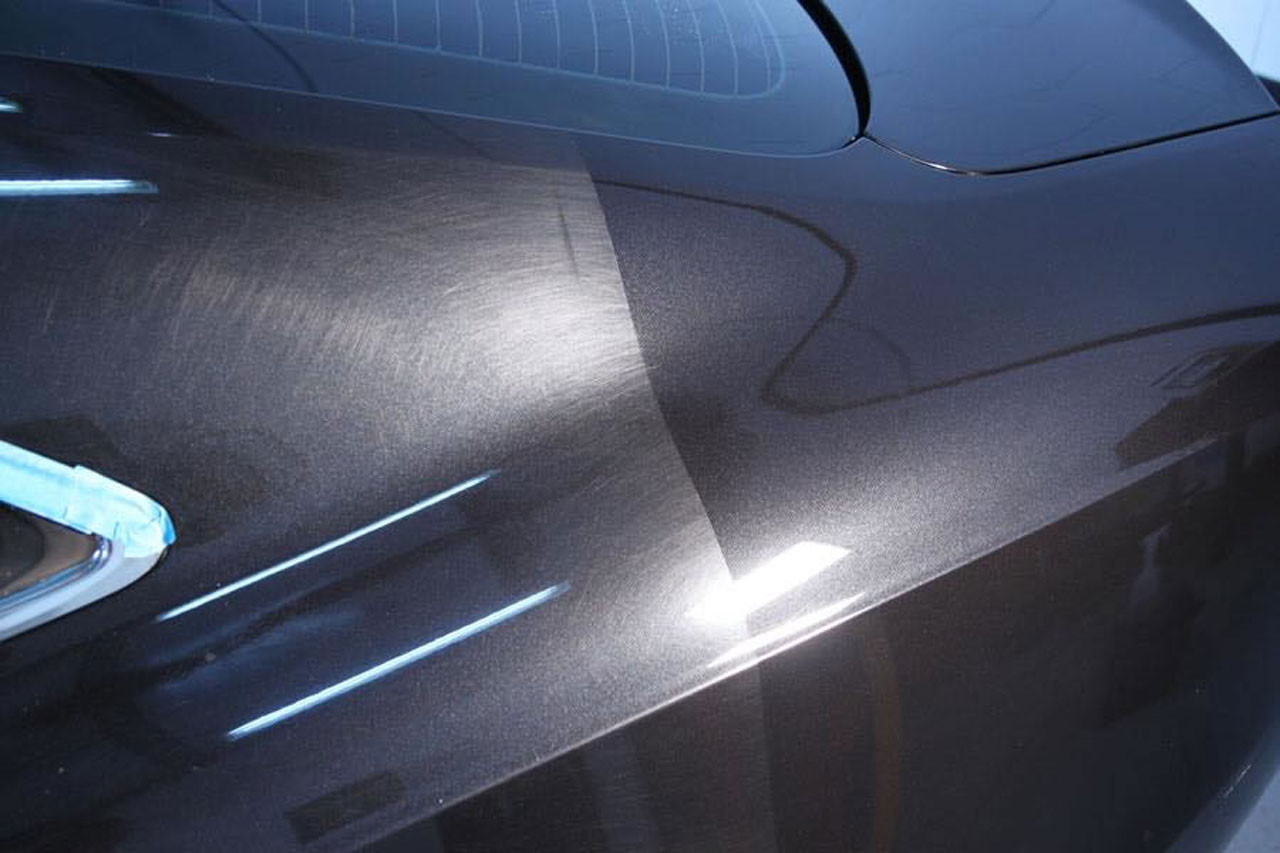
Car paint chips are minor damages to your vehicle’s paintwork, often caused by road debris, gravel, or small impacts. These chips expose the underlying metal, leading to potential rust and corrosion if left untreated. Understanding the anatomy of your car’s paint can help you choose the right repair method. The typical paint system consists of a primer layer, a base coat (the color you see), and a clear coat for protection and shine. Identifying the severity and depth of the chip is the first step in determining the appropriate repair strategy, preventing further damage and maintaining the integrity of your car’s finish.
Understanding Car Paint Layers
1.1. Types of Car Paint Chips
Identifying the specific type of paint chip is crucial for selecting the right repair approach. Surface-level chips only affect the clear coat, leaving the base coat intact. These are usually the easiest to fix. Deeper chips penetrate the clear coat and base coat, exposing the primer. More severe chips reach the bare metal, requiring immediate attention to prevent rust. Knowing the type of chip ensures you use the correct materials and techniques, leading to a more effective and long-lasting repair.
1.2. Common Causes of Car Paint Chips
Car paint chips can arise from several common sources. Road debris, such as rocks, gravel, and salt, are frequently kicked up by tires, especially at high speeds. Parking lot mishaps, like bumping into other vehicles or shopping carts, can also cause chips. Weather elements, such as hail and extreme temperatures, can weaken paint over time, making it more susceptible to chipping. Understanding these common causes can help you take preventive measures and minimize potential damage.
1.3. The Importance of Prompt Repair
Addressing car paint chips promptly is essential for several reasons. Left untreated, the exposed metal can rust, leading to structural damage and costly repairs. Chips detract from your vehicle’s appearance, reducing its overall value. Timely repairs prevent further damage, maintain your car’s aesthetic appeal, and protect your investment. By acting quickly, you can avoid more extensive and expensive repairs down the line.
2. Assessing the Damage: Is DIY Repair Possible?
Before diving into a DIY repair, carefully assess the extent of the damage. Small, surface-level chips that haven’t reached the metal can often be handled at home with the right tools and techniques. However, larger chips, rust spots, or damages that expose the base metal may require professional attention. Evaluate your skill level and comfort with auto repairs. If unsure, it’s best to consult with a professional to avoid causing further damage.
2.1. Identifying Minor vs. Major Damage
Distinguishing between minor and major car paint damage is crucial for deciding on a repair strategy. Minor damage typically includes small, shallow chips that only affect the clear coat or base coat. These are usually repairable with DIY methods. Major damage involves deep chips that expose bare metal, rust, or large areas of missing paint. These require professional intervention to ensure proper repair and prevent further corrosion.
2.2. Recognizing When to Seek Professional Help
Knowing when to seek professional help can save you time, money, and potential headaches. If you notice rust, large areas of missing paint, or damage that extends to the metal, consult a professional. Also, if you’re uncomfortable with DIY repairs or lack the necessary tools, professional services are the best option. Professionals have the expertise, tools, and materials to perform high-quality repairs that restore your car’s finish and prevent future issues.
2.3. Tools and Materials for DIY Repair: A Checklist
Having the right tools and materials is essential for a successful DIY car paint chip repair. Here’s a checklist to ensure you’re prepared:
| Tool/Material | Description | Purpose |
|---|---|---|
| Touch-up Paint | Matching your car’s exact color code. Available at auto parts stores or dealerships. | Fills in the chip and restores the original color. |
| Fine-tipped Applicator | Small brushes or paint pens. | Allows for precise application of paint within the chip. |
| Cleaning Solution | Automotive soap and water or wax and grease remover. | Cleans the area around the chip to ensure proper adhesion. |
| Rubbing Alcohol | Isopropyl alcohol. | Further cleans the area and removes any remaining contaminants. |
| Sandpaper | Ultra-fine grit (2000-3000 grit) wet/dry sandpaper. | Smooths out rough edges around the chip. |
| Polishing Compound | Abrasive paste used to restore shine. | Blends the repair with the surrounding paint. |
| Clear Coat | Protective layer applied over the touch-up paint. | Adds shine and protects the repair. |
| Microfiber Cloths | Soft, lint-free cloths. | Used for cleaning, applying solutions, and buffing. |
| Masking Tape | Protects surrounding areas from accidental paint application. | Creates a clean work area. |
| Primer | Applied before touch-up paint. | Improves adhesion and provides a base for the paint. |
3. Step-by-Step Guide: How to Fix Car Chipped Paint
Repairing car paint chips can be a straightforward process with the right tools and techniques. This step-by-step guide will walk you through each stage, ensuring a professional-looking finish.
3.1. Preparing the Area: Cleaning and Sanding
Start by thoroughly cleaning the area around the paint chip with automotive soap and water. This removes dirt, grease, and other contaminants that can interfere with the repair. Rinse and dry the area, then use a wax and grease remover for a deeper clean. Next, gently sand the edges of the chip with ultra-fine grit sandpaper (2000-3000 grit) to smooth any rough edges. Wet the sandpaper and use light, circular motions to avoid scratching the surrounding paint. Wipe away any residue with a clean microfiber cloth.
3.2. Applying Primer: Creating a Base for Paint
If the chip exposes bare metal or primer, apply a thin layer of automotive primer. This helps the touch-up paint adhere properly and prevents rust. Shake the primer well and apply it sparingly with a fine-tipped applicator brush. Ensure the primer is only applied to the chip and not the surrounding paint. Allow the primer to dry completely according to the manufacturer’s instructions, typically about 30 minutes.
3.3. Touch-Up Paint Application: Matching the Color
Using touch-up paint that precisely matches your car’s color is crucial for a seamless repair. Find your car’s paint code (usually located on a sticker inside the driver’s side door or in the owner’s manual) and purchase the corresponding touch-up paint. Shake the paint well and apply it in thin, even layers using a fine-tipped applicator brush. Avoid applying too much paint at once, as this can create drips and unevenness. Allow each layer to dry completely before applying the next, usually about 15-30 minutes. Repeat until the paint is level with the surrounding surface.
3.4. Clear Coat Application: Protecting the Paint
After the touch-up paint is completely dry, apply a thin layer of clear coat to protect the paint and add shine. Shake the clear coat well and apply it sparingly with a fine-tipped applicator brush. Ensure the clear coat covers the entire repaired area, blending it slightly with the surrounding paint. Allow the clear coat to dry completely according to the manufacturer’s instructions, typically about 24 hours.
3.5. Blending and Polishing: Achieving a Seamless Finish
Once the clear coat is fully cured, use a polishing compound to blend the repaired area with the surrounding paint. Apply a small amount of polishing compound to a clean microfiber cloth and rub it gently over the repaired area in circular motions. This smooths out any imperfections and restores the shine. Wipe away any residue with a clean microfiber cloth. For best results, follow up with a wax or sealant to protect the repaired area and enhance the overall appearance.
4. Advanced Techniques for a Professional Finish
To achieve a truly professional-looking finish when repairing car paint chips, consider using advanced techniques that go beyond the basics. These methods require more skill and attention to detail but can significantly improve the final result.
4.1. Wet Sanding: Smoothing Imperfections
Wet sanding involves using ultra-fine grit sandpaper (2000-3000 grit) with water to smooth out any imperfections in the touch-up paint and clear coat. This technique is particularly useful for removing orange peel texture or minor bumps. Soak the sandpaper in water for several minutes before use. Gently sand the repaired area in light, circular motions, keeping the surface wet at all times. Rinse the area and inspect your work frequently. Once the surface is smooth, dry it with a clean microfiber cloth and proceed with polishing.
4.2. Color Matching: Ensuring a Perfect Match
Achieving a perfect color match is crucial for a seamless repair. While using your car’s paint code is a good starting point, variations in paint due to age and environmental factors can make it difficult to get an exact match. Consider having a professional auto paint supplier custom-mix a small batch of touch-up paint based on a sample from your car. This ensures the color is as close as possible to the original, resulting in a less noticeable repair.
4.3. Using a Paint Leveling Solution: Eliminating High Spots
A paint leveling solution is a specialized product designed to dissolve and smooth out high spots in touch-up paint. Apply a small amount of the solution to a clean microfiber cloth and gently dab it onto the high spot. Allow the solution to dwell for a few seconds, then wipe it away with a clean area of the cloth. Repeat as necessary until the high spot is leveled with the surrounding paint. This technique is particularly useful for removing small imperfections without sanding.
5. Preventing Future Paint Chips
Preventing car paint chips is always better than fixing them. Several strategies can help minimize the risk of damage and keep your car looking its best.
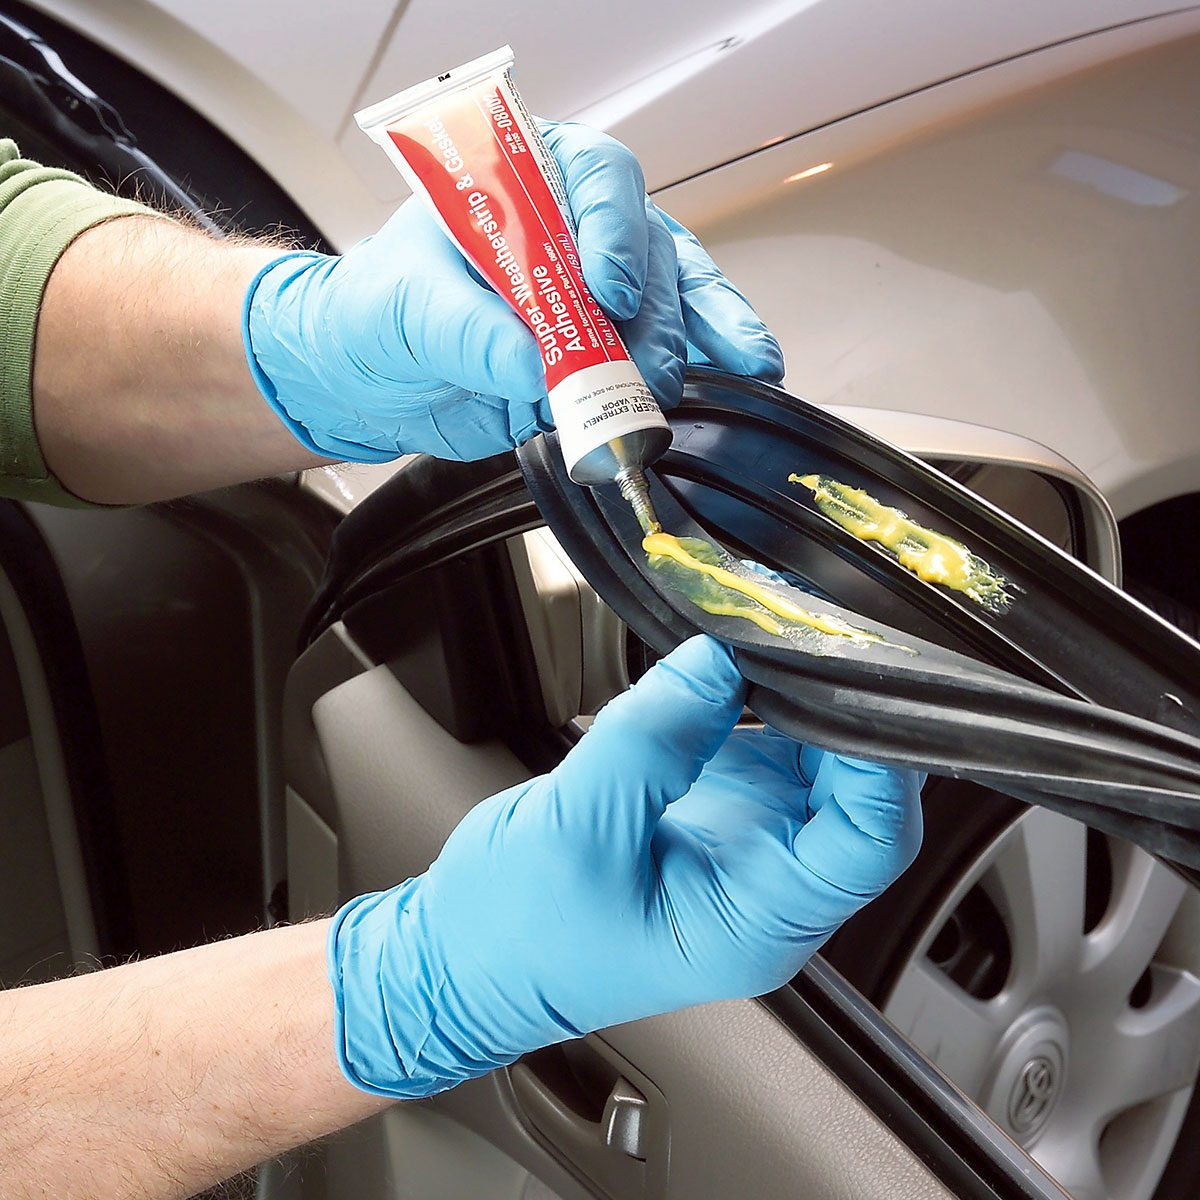
5.1. Paint Protection Film (PPF): A Shield Against Debris
Paint Protection Film (PPF) is a transparent, self-adhesive film that is applied to the vulnerable areas of your car, such as the hood, bumper, and fenders. PPF acts as a shield against road debris, rocks, and other potential sources of damage. It’s a durable and long-lasting solution that can significantly reduce the risk of paint chips. While PPF can be expensive, it’s a worthwhile investment for protecting your car’s finish.
5.2. Mud Flaps: Deflecting Road Debris
Mud flaps are installed behind the wheels to deflect road debris and prevent it from being kicked up and hitting your car’s paint. They are particularly effective at reducing the risk of stone chips and other damage caused by gravel and rocks. Mud flaps are relatively inexpensive and easy to install, making them a practical addition to any vehicle.
5.3. Regular Washing and Waxing: Maintaining Paint Integrity
Regular washing and waxing help maintain the integrity of your car’s paint and protect it from environmental damage. Washing removes dirt, grime, and other contaminants that can scratch or dull the paint. Waxing adds a protective layer that repels water and provides a barrier against UV rays and other harmful elements. Aim to wash your car at least every two weeks and wax it every three to six months to keep the paint in optimal condition.
6. Cost Analysis: DIY vs. Professional Repair
Deciding whether to repair car paint chips yourself or hire a professional often comes down to cost. Understanding the expenses associated with each option can help you make an informed decision.
6.1. DIY Repair Costs: Material and Time Investment
DIY repair costs typically include the price of touch-up paint, primer, clear coat, sandpaper, polishing compound, and other necessary materials. These costs can range from $20 to $100, depending on the quality of the materials and the extent of the repair. Additionally, consider the time investment required for DIY repair, which can range from a few hours to a full day, depending on your skill level and the complexity of the job.
6.2. Professional Repair Costs: Factors Affecting Price
Professional repair costs vary depending on the extent of the damage, the type of paint, and the location of the repair shop. Minor chip repairs may cost between $50 and $150, while more extensive damage requiring bodywork and repainting can range from $200 to $500 or more. Factors that affect the price include the shop’s labor rates, the cost of materials, and the complexity of the repair.
6.3. Weighing the Pros and Cons: Making the Right Choice
When deciding between DIY and professional repair, weigh the pros and cons of each option. DIY repair is more affordable and allows you to work at your own pace, but it requires skill and attention to detail. Professional repair is more expensive but ensures a high-quality finish and saves you time and effort. Consider your budget, skill level, and the extent of the damage when making your decision.
7. Common Mistakes to Avoid When Fixing Car Paint Chips
Repairing car paint chips can be a rewarding DIY project, but it’s essential to avoid common mistakes that can lead to unsatisfactory results. Here are some pitfalls to watch out for.
7.1. Neglecting Proper Preparation: The Foundation of a Good Repair
Skipping or rushing the preparation stage is a common mistake that can compromise the entire repair. Thoroughly cleaning and sanding the area around the chip is crucial for ensuring proper adhesion and a smooth finish. Neglecting this step can result in poor paint adhesion, uneven surfaces, and a less durable repair.
7.2. Applying Too Much Paint: Creating Drips and Unevenness
Applying too much touch-up paint at once is another common mistake. This can create drips, runs, and unevenness that are difficult to correct. Instead, apply the paint in thin, even layers, allowing each layer to dry completely before applying the next. This ensures a smoother, more professional-looking finish.
7.3. Using the Wrong Materials: Ensuring Compatibility and Quality
Using the wrong materials can lead to compatibility issues, poor adhesion, and a less durable repair. Always use automotive-grade products that are specifically designed for car paint repair. Ensure that the touch-up paint matches your car’s color code and that the primer and clear coat are compatible with the paint. Using high-quality materials is essential for achieving a long-lasting, professional-looking repair.
8. Maintaining Your Car’s Paint After Repair
After successfully repairing car paint chips, proper maintenance is essential for preserving the repair and protecting your car’s paint. Here are some tips to keep your car looking its best.
8.1. Regular Washing and Waxing: Protecting the Finish
Regular washing and waxing help protect your car’s paint from environmental damage and maintain its shine. Wash your car at least every two weeks to remove dirt, grime, and other contaminants that can scratch or dull the paint. Wax your car every three to six months to add a protective layer that repels water and provides a barrier against UV rays and other harmful elements.
8.2. Avoiding Harsh Chemicals: Protecting the Repaired Area
Avoid using harsh chemicals or abrasive cleaners that can damage the repaired area and the surrounding paint. Use automotive-specific cleaning products that are designed to be gentle on your car’s finish. When washing your car, use a soft sponge or microfiber cloth to avoid scratching the paint.
8.3. Inspecting Regularly: Catching New Chips Early
Regularly inspect your car’s paint for new chips or damage. Catching new chips early allows you to repair them before they worsen and potentially lead to rust or other issues. A quick inspection during your regular car washing routine can help you identify and address any new damage promptly.
9. CARDIAGTECH.NET: Your Partner in Car Care
At CARDIAGTECH.NET, we understand the importance of maintaining your vehicle’s appearance and protecting its value. That’s why we offer a wide range of high-quality auto repair tools and accessories to help you keep your car looking its best.
9.1. High-Quality Auto Repair Tools: Ensuring Professional Results
We offer a comprehensive selection of auto repair tools, including touch-up paint applicators, sandpaper, polishing compounds, and more. Our tools are designed to help you achieve professional-quality results, whether you’re a seasoned DIYer or a first-time car owner.
9.2. Expert Advice and Support: Guiding You Through the Process
Our team of experienced auto experts is here to provide you with expert advice and support every step of the way. Whether you need help choosing the right tools or guidance on repairing car paint chips, we’re here to help. Contact us at +1 (641) 206-8880 for personalized assistance.
9.3. Contact Us Today: Let Us Help You Maintain Your Vehicle
Don’t let car paint chips detract from your vehicle’s appearance and value. Contact CARDIAGTECH.NET today to learn more about our products and services. Visit our website at CARDIAGTECH.NET or stop by our location at 276 Reock St, City of Orange, NJ 07050, United States. Let us help you maintain your vehicle and keep it looking its best for years to come.
10. Frequently Asked Questions (FAQs) About Car Paint Chip Repair
Here are some frequently asked questions about car paint chip repair to help you better understand the process.
10.1. Can I use nail polish to fix a car paint chip?
While nail polish may seem like a convenient option, it’s not recommended for fixing car paint chips. Nail polish is not designed to withstand the harsh conditions that car paint endures, such as exposure to sunlight, rain, and road debris. It can also damage your car’s paint over time. It’s best to use automotive-specific touch-up paint that is designed to match your car’s color and protect the underlying metal.
10.2. How long does it take for touch-up paint to dry?
The drying time for touch-up paint can vary depending on the type of paint, the humidity, and the temperature. Generally, it takes about 15-30 minutes for touch-up paint to dry to the touch. However, it’s best to wait at least 24 hours before applying clear coat or polishing the repaired area to ensure the paint is fully cured.
10.3. What is the best way to find my car’s paint code?
Your car’s paint code is typically located on a sticker inside the driver’s side door or in the owner’s manual. The sticker may also contain other information, such as the car’s VIN and manufacturing date. If you can’t find the paint code, you can contact your local car dealership or auto paint supplier for assistance.
10.4. Can I fix a rusty car paint chip myself?
Fixing a rusty car paint chip requires extra steps to remove the rust and prevent it from spreading. Start by sanding the rust with a coarse-grit sandpaper to remove as much of it as possible. Then, apply a rust converter to neutralize any remaining rust. Follow the instructions on the rust converter label and allow it to dry completely before applying primer and touch-up paint.
10.5. How do I prevent clear coat from peeling after a touch-up?
To prevent clear coat from peeling after a touch-up, ensure that the touch-up paint is fully cured before applying the clear coat. Also, apply the clear coat in thin, even layers to avoid creating a thick film that can peel over time. Using high-quality clear coat and following the manufacturer’s instructions can also help prevent peeling.
10.6. Can I use a heat gun to speed up the drying process?
While a heat gun can speed up the drying process, it’s not recommended for touch-up paint. Applying too much heat can cause the paint to bubble, crack, or peel. It’s best to allow the paint to dry naturally or use a low-heat hair dryer to gently warm the area and speed up the drying process.
10.7. How do I store touch-up paint properly?
Store touch-up paint in a cool, dry place away from direct sunlight. Ensure that the lid is tightly closed to prevent the paint from drying out. You can also store the paint upside down to create a better seal and prevent air from entering the container.
10.8. What is the best time of day to repair car paint chips?
The best time of day to repair car paint chips is during daylight hours when the temperature is mild and the humidity is low. Avoid repairing car paint chips in direct sunlight or in extreme temperatures, as this can affect the drying time and the quality of the repair.
10.9. How often should I wax my car to protect the paint?
You should wax your car every three to six months to protect the paint and maintain its shine. Waxing adds a protective layer that repels water and provides a barrier against UV rays and other harmful elements. Regular waxing can help prevent paint chips, scratches, and other damage.
10.10. What should I do if I accidentally get touch-up paint on the surrounding paint?
If you accidentally get touch-up paint on the surrounding paint, act quickly to remove it before it dries. Use a clean microfiber cloth and a small amount of rubbing alcohol or wax and grease remover to gently wipe away the paint. Avoid rubbing too hard, as this can damage the surrounding paint.
Repairing car paint chips is a manageable task with the right knowledge, tools, and techniques. By following this comprehensive guide, you can keep your car looking its best and protect its value. And remember, for all your auto repair needs, CARDIAGTECH.NET is here to help. Contact us today to learn more about our products and services!