How To Fix Car Cracked Paint: A Comprehensive Guide

Fixing car cracked paint doesn’t have to be a headache. CARDIAGTECH.NET provides expert insights and solutions to address this common automotive issue, ensuring a flawless finish. From identifying the causes to implementing effective repair techniques, discover how to restore your car’s paint job and protect it from future damage, incorporating innovative methods, surface preparation steps and the right equipment.
1. Understanding Car Cracked Paint
Car cracked paint, also known as crazing or lacquer checking, is a common automotive issue characterized by small, hairline cracks appearing on the surface of the paint. These cracks can vary in width and length, creating an uneven and unsightly finish. Understanding the causes and types of paint cracking is the first step in effectively addressing this problem.
1.1. What is Car Paint Cracking?
Car paint cracking refers to the development of fissures or fractures in the top layer of a vehicle’s paint. These cracks can range from superficial hairline fractures to more profound, visible splits in the paint film.
According to a study by the American Coatings Association, paint cracking is often a result of environmental factors and improper application techniques.
1.2. Types of Paint Cracking
There are several types of paint cracking, each with its distinct characteristics and causes:
- Hairline Cracks: These are fine, superficial cracks that appear as thin lines on the paint surface.
- Spiderweb Cracks: These cracks radiate outward from a central point, resembling a spiderweb pattern.
- Map Cracking: This type of cracking creates a network of interconnected cracks, resembling a road map.
- Checking: This involves short, parallel cracks that typically occur in older lacquer or varnish finishes.
1.3. Causes of Car Paint Cracking
Several factors can contribute to car paint cracking, including:
- Incorrect Paint Preparation: Improper mixing of paint, incorrect thinner ratios, or using incompatible products can lead to cracking.
- Temperature Fluctuations: Extreme temperature changes and exposure to UV radiation can cause the paint to expand and contract, leading to cracks.
- Excessive Paint Layer Thickness: Applying too much paint in a single coat or failing to allow sufficient drying time between coats can result in cracking.
- Substrate Movement: Movement or flexing of the underlying substrate (e.g., body filler or plastic components) can cause the paint to crack.
- Old or Deteriorated Paint: Over time, paint can become brittle and prone to cracking due to age and environmental exposure.
- A report by the National Highway Traffic Safety Administration (NHTSA) indicates that older vehicles are more susceptible to paint cracking due to prolonged exposure to the elements.
- Impact Damage: Physical impacts, such as stone chips or minor collisions, can create stress points that lead to cracking.
- Chemical Exposure: Exposure to harsh chemicals, such as solvents or cleaning agents, can degrade the paint and cause it to crack.
- Improper Curing: If the paint is not cured properly during the drying process, it can remain soft and prone to cracking.
1.4. Identifying the Severity of Cracking
The severity of car paint cracking can vary, influencing the repair approach. Here’s how to assess the extent of the damage:
- Superficial Cracks: These cracks are limited to the clear coat and do not penetrate the base coat. They often appear as fine lines and can sometimes be addressed with polishing or light sanding.
- Moderate Cracks: These cracks extend into the base coat but do not reach the primer or substrate. They may require more extensive sanding and refinishing.
- Severe Cracks: These cracks penetrate all layers of paint, including the primer and substrate. They often indicate underlying structural issues and require comprehensive repairs.
- Deep Cracks: These are large, noticeable cracks that significantly affect the appearance of the vehicle and require immediate attention.
1.5. Tools and Materials You’ll Need
Before diving into the repair process, gather the necessary tools and materials:
- Sandpaper: Different grits (e.g., P1500, P2000, P3000) for sanding the cracked area.
- Masking Tape: To protect adjacent areas from damage during sanding.
- Degreaser: To clean the surface and remove contaminants.
- Microfiber Cloths: For cleaning and polishing.
- Polishing Compound: To restore the paint’s shine after sanding.
- Polishing Machine: For efficient and uniform polishing.
- Body Filler: For filling deep cracks or imperfections.
- Primer: To prepare the surface for repainting.
- Base Coat Paint: Matching the vehicle’s original color.
- Clear Coat: To protect the base coat and provide a glossy finish.
- Spray Gun: For applying primer, base coat, and clear coat.
- Mixing Cups and Sticks: For accurately mixing paint and other products.
- Safety Gear: Including gloves, eye protection, and a respirator.
- Heat Gun: To accelerate the drying process of paint and filler.
- A study by the Society of Automotive Engineers (SAE) found that proper safety equipment significantly reduces the risk of injury during automotive repairs.
By understanding the nature, causes, and types of car paint cracking, you can better diagnose the problem and implement the appropriate repair techniques. With the right tools and materials, you can restore your vehicle’s finish and protect it from future damage. CARDIAGTECH.NET offers a wide range of high-quality products and resources to help you achieve professional-looking results. Contact us at +1 (641) 206-8880 for expert advice and support.
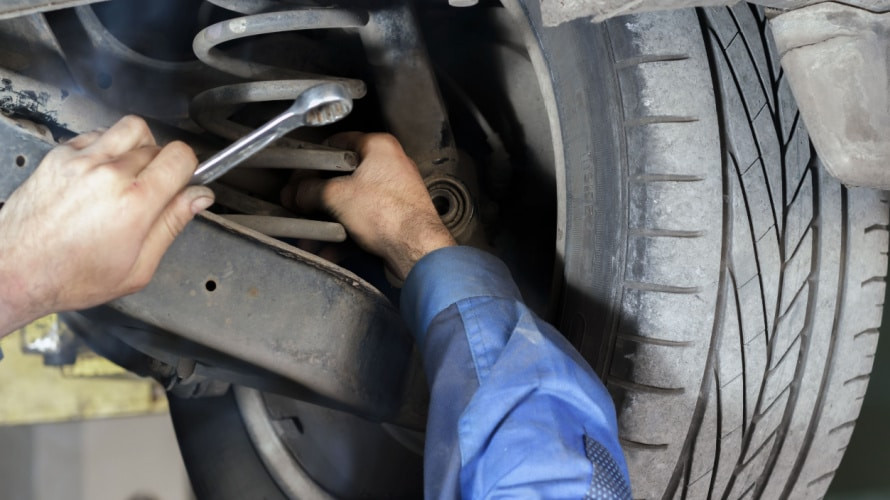
Automotive paint surface showing cracking and crazing
2. Preparing for the Repair
Proper preparation is crucial for achieving a flawless repair of cracked car paint. This involves cleaning the area, gathering the necessary tools and materials, and ensuring a safe working environment. Neglecting these steps can lead to unsatisfactory results and potential safety hazards.
2.1. Cleaning the Affected Area
Before beginning any repair work, thoroughly clean the area around the cracked paint. This removes dirt, grease, wax, and other contaminants that can interfere with the adhesion of repair materials.
- Wash the Vehicle: Start by washing the entire vehicle to remove loose dirt and debris. Use a mild automotive soap and water solution.
- Rinse Thoroughly: Rinse the vehicle thoroughly to remove all soap residue.
- Dry the Area: Use a clean, lint-free microfiber cloth to dry the affected area.
- Apply Degreaser: Apply a high-quality degreaser to the cracked paint and surrounding area. This will remove any remaining grease, wax, or silicone contaminants.
- Wipe Clean: Use a clean microfiber cloth to wipe the degreaser from the surface. Repeat this step if necessary to ensure the area is completely clean.
2.2. Gathering Tools and Materials
Having the right tools and materials on hand is essential for an efficient and effective repair. Here’s a comprehensive list:
- Sandpaper:
- P1500 grit: For initial sanding of the cracked area.
- P2000 grit: For removing scratches left by the P1500 grit.
- P3000 grit: For final smoothing and preparing the surface for polishing.
- Sanding Block: Provides a flat, even surface for sanding, ensuring uniform removal of material.
- Masking Tape: High-quality automotive masking tape to protect adjacent areas from sanding and painting.
- Masking Paper or Film: To cover larger areas and prevent overspray.
- Body Filler (if needed): For filling deep cracks or imperfections in the paint.
- Sanding Primer: To prepare the filled areas for painting.
- Base Coat Paint: Matching the vehicle’s original color. Ensure you have the correct paint code.
- Clear Coat: To protect the base coat and provide a glossy finish.
- Spray Gun: For applying primer, base coat, and clear coat.
- Mixing Cups and Sticks: For accurately mixing paint and other products.
- Tack Cloth: To remove any remaining dust or particles before painting.
- Polishing Compound: To restore the paint’s shine after sanding and painting.
- Polishing Machine: For efficient and uniform polishing.
- Microfiber Polishing Pads: For use with the polishing machine.
- Safety Gear:
- Gloves: To protect your hands from chemicals and abrasives.
- Eye Protection: Safety glasses or goggles to prevent debris from entering your eyes.
- Respirator: To protect your lungs from paint fumes and dust particles.
- Heat Gun (Optional): To accelerate the drying process of paint and filler.
2.3. Setting Up a Safe Work Environment
A safe work environment is crucial for protecting yourself and preventing accidents. Follow these guidelines:
- Ventilation: Work in a well-ventilated area to avoid inhaling paint fumes and dust particles. If working indoors, use a ventilation system or open windows and doors.
- Lighting: Ensure adequate lighting to see the surface clearly and avoid mistakes. Use work lights if necessary.
- Surface Protection: Cover the surrounding area with drop cloths or plastic sheeting to protect it from overspray and spills.
- Fire Safety: Keep flammable materials away from heat sources and ensure a fire extinguisher is readily available.
- Personal Protection: Always wear safety gear, including gloves, eye protection, and a respirator, to protect yourself from hazards.
- Cleanliness: Keep the work area clean and organized to prevent accidents and ensure a smooth workflow.
2.4. Testing the Paint Color
Before applying any new paint to your vehicle, it’s essential to test the color to ensure a perfect match. This prevents unsightly variations and ensures a seamless repair.
- Locate the Paint Code: Find your vehicle’s paint code. This is typically located on a sticker in the door jamb, glove compartment, or engine bay.
- Purchase Matching Paint: Purchase a small amount of base coat paint that matches your vehicle’s paint code.
- Prepare a Test Panel: Find a piece of scrap metal or plastic that can be used as a test panel. Clean and prime the panel.
- Apply the Paint: Apply a thin coat of the base coat paint to the test panel using a spray gun or aerosol can.
- Allow to Dry: Allow the paint to dry completely according to the manufacturer’s instructions.
- Compare the Color: Compare the color of the test panel to the surrounding paint on your vehicle. Check the color in different lighting conditions to ensure a match.
- Adjust if Necessary: If the color does not match, consult with an automotive paint supplier to adjust the formula.
2.5. Masking Off the Surrounding Areas
Proper masking is essential for protecting the surrounding areas from overspray and damage during the repair process. Follow these steps for effective masking:
- Apply Masking Tape: Apply high-quality automotive masking tape around the perimeter of the cracked paint. Ensure the tape is applied smoothly and adheres well to the surface.
- Overlap the Tape: Overlap the tape slightly to prevent paint from seeping underneath.
- Use Masking Paper or Film: Cover larger areas with masking paper or film, overlapping the masking tape.
- Secure the Masking: Use additional masking tape to secure the paper or film in place, ensuring it is taut and wrinkle-free.
- Check for Gaps: Carefully inspect the masking to ensure there are no gaps or openings that could allow paint to reach the surrounding areas.
- Trim Excess Material: Trim any excess masking paper or film with a sharp blade to create a clean, precise edge.
By following these preparation steps, you can ensure a safe, efficient, and effective repair of cracked car paint. Proper cleaning, tool preparation, safety measures, paint testing, and masking are all crucial for achieving professional-looking results. For high-quality tools and materials, visit CARDIAGTECH.NET or contact us at +1 (641) 206-8880 for expert advice and support.
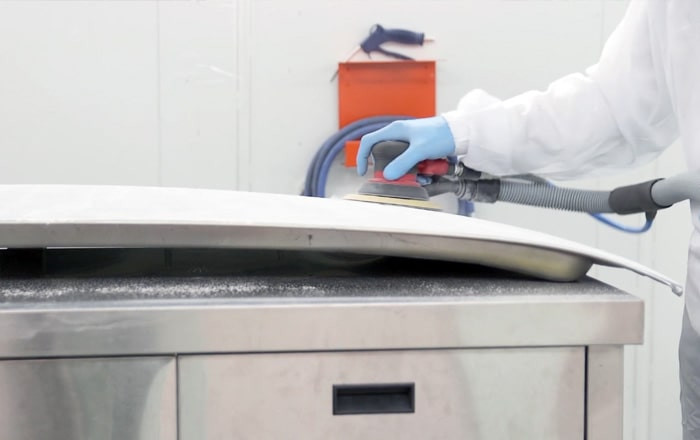 Surface of car being prepped for painting with blue masking tape and brown paper covering the surrounding area
3. Step-by-Step Guide to Repairing Car Cracked Paint
Repairing car cracked paint requires a systematic approach to ensure a seamless and durable finish. This step-by-step guide outlines the process, from sanding and filling to priming and painting.
3.1. Sanding the Cracked Area
Sanding is a crucial step in removing the cracked paint and creating a smooth surface for repair. Follow these steps carefully:
- Initial Sanding with P1500 Grit: Begin by sanding the cracked area with P1500 grit sandpaper. Use a sanding block to ensure even pressure and prevent gouging the surface. Sand in a circular motion to feather the edges of the cracked paint.
- Expand the Sanded Area: Gradually expand the sanded area beyond the cracked paint to blend the repair seamlessly with the surrounding paint.
- Removing Scratches with P2000 Grit: Switch to P2000 grit sandpaper to remove any scratches left by the P1500 grit. Use a sanding block and continue sanding in a circular motion.
- Final Smoothing with P3000 Grit: Finish the sanding process with P3000 grit sandpaper to create an ultra-smooth surface for painting. Use a sanding block and apply light pressure.
- Wet Sanding (Optional): For an even smoother finish, wet sand with P3000 grit sandpaper. Use a spray bottle to keep the surface wet during sanding.
3.2. Filling Deep Cracks (If Necessary)
If the cracks are deep or extend into the substrate, you may need to use body filler to create a smooth, even surface.
- Clean the Sanded Area: Use a degreaser to clean the sanded area and remove any dust or contaminants.
- Mix the Body Filler: Mix the body filler according to the manufacturer’s instructions. Typically, this involves mixing the filler with a hardener.
- Apply the Filler: Apply a thin layer of body filler to the cracked area using a plastic spreader. Press the filler firmly into the cracks to ensure good adhesion.
- Allow to Dry: Allow the body filler to dry completely according to the manufacturer’s instructions. This may take several hours.
- Sand the Filler: Once the filler is dry, sand it smooth using progressively finer grits of sandpaper (e.g., P80, P180, P320). Use a sanding block to maintain a flat, even surface.
- Feather the Edges: Feather the edges of the filled area to blend seamlessly with the surrounding paint.
3.3. Applying Primer
Primer is essential for creating a smooth, uniform surface for the base coat to adhere to. It also helps to seal the repaired area and prevent corrosion.
- Clean the Surface: Use a tack cloth to remove any remaining dust or particles from the sanded area.
- Mix the Primer: Mix the primer according to the manufacturer’s instructions.
- Apply the Primer: Apply a thin, even coat of primer to the repaired area using a spray gun. Hold the gun approximately 8-10 inches from the surface and move it in smooth, overlapping strokes.
- Allow to Dry: Allow the primer to dry completely according to the manufacturer’s instructions.
- Sand the Primer: Once the primer is dry, sand it smooth using P400 grit sandpaper. This will remove any imperfections and create a smooth surface for the base coat.
- Clean Again: Use a tack cloth to remove any remaining dust or particles from the sanded area.
3.4. Painting the Base Coat
The base coat provides the color and finish to your repair. It’s important to apply it evenly and in multiple thin coats.
- Mix the Base Coat: Mix the base coat paint according to the manufacturer’s instructions.
- Apply the Base Coat: Apply a thin, even coat of base coat paint to the primed area using a spray gun. Hold the gun approximately 8-10 inches from the surface and move it in smooth, overlapping strokes.
- Allow to Dry: Allow the base coat to dry for the recommended time between coats, typically 10-20 minutes.
- Apply Additional Coats: Apply two to three additional coats of base coat paint, allowing each coat to dry before applying the next.
- Check for Coverage: Ensure that the base coat provides full, uniform coverage over the repaired area.
- Allow to Dry Completely: Allow the final coat of base coat paint to dry completely before applying the clear coat.
3.5. Applying the Clear Coat
The clear coat protects the base coat and provides a glossy, durable finish.
- Mix the Clear Coat: Mix the clear coat according to the manufacturer’s instructions.
- Apply the Clear Coat: Apply a thin, even coat of clear coat to the painted area using a spray gun. Hold the gun approximately 8-10 inches from the surface and move it in smooth, overlapping strokes.
- Allow to Dry: Allow the clear coat to dry for the recommended time between coats, typically 10-20 minutes.
- Apply Additional Coats: Apply one to two additional coats of clear coat, allowing each coat to dry before applying the next.
- Check for Uniformity: Ensure that the clear coat provides a uniform, glossy finish over the painted area.
- Allow to Dry Completely: Allow the final coat of clear coat to dry completely for at least 24 hours before polishing.
3.6. Polishing the Repaired Area
Polishing is the final step in restoring the paint’s shine and blending the repaired area with the surrounding paint.
- Wet Sand (Optional): If there are any imperfections in the clear coat, wet sand with P3000 grit sandpaper to smooth the surface.
- Apply Polishing Compound: Apply a small amount of polishing compound to a microfiber polishing pad.
- Polish the Surface: Use a polishing machine to polish the surface in a circular motion. Apply moderate pressure and move the machine slowly and evenly.
- Remove Residue: Use a clean microfiber cloth to remove any polishing compound residue.
- Apply Wax or Sealant: Apply a coat of wax or sealant to protect the paint and enhance its shine.
- Final Inspection: Inspect the repaired area to ensure a seamless, glossy finish.
By following these steps carefully, you can effectively repair car cracked paint and restore your vehicle’s appearance. Remember to use high-quality tools and materials from CARDIAGTECH.NET to achieve professional-looking results. Contact us at +1 (641) 206-8880 for expert advice and support.
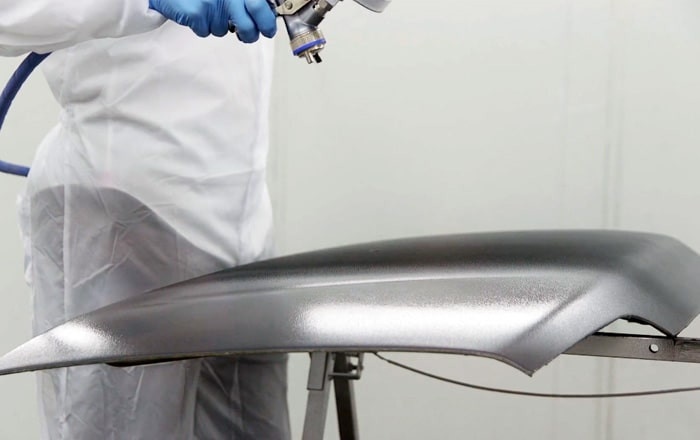 Application of clear coat on vehicle hood
4. Advanced Techniques for Car Cracked Paint Repair
For more complex cases of car cracked paint, advanced techniques may be required to achieve a flawless repair. These techniques include color blending, dealing with specific types of cracking, and using specialized tools.
4.1. Color Blending Techniques
Color blending is a technique used to seamlessly blend the repaired area with the surrounding paint, especially when dealing with metallic or pearlescent finishes.
- Understanding Color Variance: Recognize that paint colors can vary slightly due to age, exposure to the elements, and manufacturing differences.
- Feathering the Paint: When applying the base coat, feather the paint outward beyond the repaired area to create a gradual transition.
- Using Blending Clear Coat: Apply a blending clear coat to further smooth the transition between the new and old paint. This product contains solvents that help to melt the edges of the clear coat together.
- Panel Painting: In some cases, it may be necessary to paint an entire panel to achieve a perfect color match. This involves masking off the adjacent panels and applying the base coat and clear coat to the entire panel.
4.2. Repairing Specific Types of Cracking
Different types of cracking may require specific repair approaches.
- Hairline Cracks: For fine hairline cracks, try using a paint sealant or glaze to fill the cracks and restore the paint’s shine.
- Spiderweb Cracks: Spiderweb cracks often indicate an impact point. Repairing these cracks may require filling the damaged area with body filler and refinishing.
- Map Cracking: Map cracking can be challenging to repair due to the extensive network of cracks. In severe cases, it may be necessary to strip the paint and start from scratch.
4.3. Using Specialized Tools and Products
Certain specialized tools and products can make the repair process easier and more effective.
- Infrared Lamps: Infrared lamps can be used to accelerate the drying process of paint and filler. This can save time and improve the quality of the finish.
- Paint Thickness Gauges: Paint thickness gauges can be used to measure the thickness of the paint layers and ensure that they are within the recommended range.
- Detailing Brushes: Detailing brushes can be used to clean hard-to-reach areas and apply paint or filler in tight spaces.
4.4. Addressing Underlying Issues
In some cases, car cracked paint may be a symptom of an underlying issue, such as rust or corrosion. Addressing these issues is essential for preventing the cracking from recurring.
- Inspect for Rust: Carefully inspect the area around the cracked paint for signs of rust.
- Remove Rust: If rust is present, remove it using a wire brush or chemical rust remover.
- Apply Rust Inhibitor: Apply a rust inhibitor to protect the area from future corrosion.
- Repair Structural Damage: If the cracking is caused by structural damage, such as a dent or collision damage, repair the damage before refinishing the paint.
4.5. Working with Different Paint Types
Different types of paint may require different repair techniques.
- Single-Stage Paints: Single-stage paints contain both the color and the clear coat in a single layer. Repairing these paints involves sanding, applying new paint, and polishing.
- Two-Stage Paints: Two-stage paints consist of a base coat and a clear coat. Repairing these paints involves sanding, applying a new base coat, and applying a new clear coat.
- Lacquer Paints: Lacquer paints are older types of paint that are less common today. Repairing lacquer paints requires specialized techniques and products.
By mastering these advanced techniques, you can tackle even the most challenging cases of car cracked paint and achieve professional-looking results. Remember to use high-quality tools and materials from CARDIAGTECH.NET to ensure a durable and flawless finish. Contact us at +1 (641) 206-8880 for expert advice and support.
5. Preventing Future Paint Cracking
Preventing car cracked paint is crucial for maintaining your vehicle’s appearance and value. By understanding the factors that contribute to paint cracking and implementing preventive measures, you can minimize the risk of this issue.
5.1. Proper Paint Preparation
Proper paint preparation is essential for ensuring a durable and long-lasting finish. Follow these guidelines:
- Thorough Cleaning: Clean the surface thoroughly to remove dirt, grease, wax, and other contaminants.
- Proper Mixing: Mix the paint according to the manufacturer’s instructions, using the correct thinner ratios and additives.
- Surface Preparation: Prepare the surface properly by sanding, priming, and applying a sealer if necessary.
- Avoid Contamination: Avoid contaminating the paint with dust, dirt, or other particles.
5.2. Controlling Temperature and Humidity
Extreme temperature fluctuations and high humidity can contribute to paint cracking. Follow these guidelines to control these factors:
- Paint in a Controlled Environment: Paint in a temperature-controlled environment, such as a paint booth or garage.
- Avoid Extreme Temperatures: Avoid painting in extreme hot or cold temperatures.
- Control Humidity: Control the humidity level in the painting environment. High humidity can cause the paint to dry slowly and unevenly, leading to cracking.
5.3. Applying the Correct Paint Layer Thickness
Applying the correct paint layer thickness is essential for preventing cracking. Follow these guidelines:
- Follow Manufacturer’s Instructions: Follow the manufacturer’s instructions for paint layer thickness.
- Apply Multiple Thin Coats: Apply multiple thin coats of paint rather than one thick coat. This will allow the paint to dry evenly and prevent cracking.
- Use a Paint Thickness Gauge: Use a paint thickness gauge to measure the thickness of the paint layers and ensure that they are within the recommended range.
5.4. Protecting Your Car from the Elements
Protecting your car from the elements can help to prevent paint cracking. Follow these guidelines:
- Park in a Garage or Carport: Park your car in a garage or carport to protect it from the sun, rain, and other elements.
- Use a Car Cover: Use a car cover to protect your car from the sun, rain, and other elements when parking outdoors.
- Wash Your Car Regularly: Wash your car regularly to remove dirt, salt, and other contaminants that can damage the paint.
- Wax Your Car Regularly: Wax your car regularly to protect the paint and enhance its shine.
5.5. Avoiding Harsh Chemicals
Exposure to harsh chemicals can damage the paint and cause it to crack. Follow these guidelines:
- Use Automotive-Specific Cleaners: Use automotive-specific cleaners and detergents to wash your car.
- Avoid Harsh Solvents: Avoid using harsh solvents, such as acetone or lacquer thinner, on your car’s paint.
- Protect from Chemical Spills: Protect your car from chemical spills, such as gasoline or brake fluid.
5.6. Regular Inspections and Maintenance
Regular inspections and maintenance can help to identify and address potential issues before they lead to paint cracking. Follow these guidelines:
- Inspect Regularly: Inspect your car’s paint regularly for signs of cracking, chipping, or other damage.
- Address Issues Promptly: Address any issues promptly to prevent them from worsening.
- Touch Up Chips and Scratches: Touch up chips and scratches to prevent rust and corrosion.
By following these preventive measures, you can minimize the risk of car cracked paint and maintain your vehicle’s appearance and value for years to come. For high-quality automotive products and expert advice, visit CARDIAGTECH.NET or contact us at +1 (641) 206-8880.
6. Why Choose CARDIAGTECH.NET for Your Auto Repair Needs?
CARDIAGTECH.NET stands out as the premier choice for all your auto repair needs, offering a unique combination of high-quality products, expert advice, and exceptional customer service. Here’s why you should choose CARDIAGTECH.NET:
6.1. High-Quality Products
CARDIAGTECH.NET offers a wide range of high-quality automotive tools, equipment, and supplies from leading brands. Our products are rigorously tested and selected to ensure they meet the highest standards of performance and durability. Whether you need sandpaper, polishing compounds, spray guns, or safety gear, CARDIAGTECH.NET has you covered.
6.2. Expert Advice and Support
Our team of experienced automotive professionals is dedicated to providing expert advice and support to help you with your auto repair projects. We can answer your questions, offer guidance on the best products for your needs, and provide step-by-step instructions for completing your repairs. Contact us at +1 (641) 206-8880 for personalized assistance.
6.3. Comprehensive Solutions
CARDIAGTECH.NET offers comprehensive solutions for all your auto repair needs, from diagnosing problems to performing repairs and maintenance. We provide detailed guides, tutorials, and videos to help you every step of the way. Whether you’re a professional mechanic or a DIY enthusiast, CARDIAGTECH.NET has the resources you need to succeed.
6.4. Exceptional Customer Service
At CARDIAGTECH.NET, we are committed to providing exceptional customer service. We offer fast shipping, easy returns, and a satisfaction guarantee. If you’re not completely satisfied with your purchase, we’ll do everything we can to make it right.
6.5. Competitive Pricing
We offer competitive pricing on all our products, ensuring you get the best value for your money. We also offer special deals and discounts to help you save even more.
6.6. Wide Range of Products
CARDIAGTECH.NET offers a wide range of products to meet all your auto repair needs, including:
- Sanding and Polishing: Sandpaper, sanding blocks, polishing compounds, polishing machines, and microfiber polishing pads.
- Painting: Spray guns, mixing cups, tack cloths, base coat paint, clear coat, and safety gear.
- Body Repair: Body filler, spreaders, sanding primer, and rust inhibitors.
- Safety Gear: Gloves, eye protection, and respirators.
- Detailing: Detailing brushes, automotive-specific cleaners, and wax.
6.7. Convenient Shopping Experience
Our website, CARDIAGTECH.NET, provides a convenient and user-friendly shopping experience. You can easily browse our products, read reviews, and place orders online. We offer secure payment options and fast shipping to ensure you get your products quickly and easily.
6.8. Commitment to Quality
CARDIAGTECH.NET is committed to providing high-quality products and services that meet the needs of our customers. We stand behind our products and offer a satisfaction guarantee.
6.9. Community Engagement
We are actively engaged in the automotive community and participate in industry events and forums. We are committed to sharing our knowledge and expertise to help others succeed in their auto repair projects.
6.10. Continuous Improvement
CARDIAGTECH.NET is committed to continuous improvement. We are constantly seeking feedback from our customers and using it to improve our products, services, and website.
Choose CARDIAGTECH.NET for all your auto repair needs and experience the difference. Visit our website at CARDIAGTECH.NET or contact us at +1 (641) 206-8880 for expert advice and support. Our address is 276 Reock St, City of Orange, NJ 07050, United States.
7. Testimonials and Success Stories
Hearing from satisfied customers can provide additional confidence in the quality and effectiveness of CARDIAGTECH.NET’s products and services. Here are a few testimonials and success stories from our valued customers:
7.1. John D., Professional Mechanic
“I’ve been a professional mechanic for over 20 years, and I’ve used products from many different suppliers. CARDIAGTECH.NET consistently provides the highest quality tools and supplies at competitive prices. Their expert advice has been invaluable in helping me tackle even the most challenging repairs. I highly recommend CARDIAGTECH.NET to any professional mechanic.”
7.2. Sarah M., DIY Enthusiast
“I’m a DIY enthusiast, and I love working on my own car. CARDIAGTECH.NET has been a lifesaver. Their website is easy to navigate, and they offer a wide range of products to meet all my needs. The step-by-step guides and tutorials have been incredibly helpful, and I’ve been able to complete repairs that I never thought possible. Thank you, CARDIAGTECH.NET”
7.3. Mike R., Auto Body Shop Owner
“As an auto body shop owner, I need reliable products and suppliers. CARDIAGTECH.NET has consistently exceeded my expectations. Their products are high quality, their prices are competitive, and their customer service is exceptional. I highly recommend CARDIAGTECH.NET to any auto body shop owner.”
7.4. Lisa P., Car Enthusiast
“I’m a car enthusiast, and I’m always looking for ways to improve the appearance and performance of my vehicle. CARDIAGTECH.NET has been a great resource. They offer a wide range of detailing products and performance parts, and their expert advice has helped me achieve the results I’m looking for. Thank you, CARDIAGTECH.NET”
7.5. Success Story: Restoring a Classic Car
One of our customers, a classic car enthusiast, used CARDIAGTECH.NET’s products to restore a vintage vehicle with severe paint cracking. By following our step-by-step guides and using our high-quality sanding, painting, and polishing products, he was able to restore the car’s paint to its original glory. The car is now a show-stopper and a source of pride for its owner.
These testimonials and success stories demonstrate the value and effectiveness of CARDIAGTECH.NET’s products and services. We are committed to providing our customers with the best possible experience and helping them achieve their auto repair goals.
8. Contact CARDIAGTECH.NET Today
Ready to take the next step in repairing or preventing car cracked paint? Contact CARDIAGTECH.NET today for expert advice, high-quality products, and exceptional customer service.
- Phone: +1 (641) 206-8880
- Address: 276 Reock St, City of Orange, NJ 07050, United States
- Website: CARDIAGTECH.NET
Our team of experienced automotive professionals is ready to assist you with all your auto repair needs. Whether you have questions about our products, need help with a repair project, or want to place an order, we are here to help.
Visit our website at CARDIAGTECH.NET to browse our wide range of products, read our detailed guides and tutorials, and place your order online. We offer secure payment options and fast shipping to ensure you get your products quickly and easily.
Thank you for choosing CARDIAGTECH.NET. We look forward to serving you!
9. FAQ: How to Fix Car Cracked Paint
Here are some frequently asked questions about how to fix car cracked paint:
9.1. What causes car paint to crack?
Car paint can crack due to various factors, including improper paint preparation, temperature fluctuations, excessive paint layer thickness, substrate movement, old or deteriorated paint, impact damage, chemical exposure, and improper curing.
9.2. Can I fix car cracked paint myself, or do I need to take it to a professional?
Whether you can fix car cracked paint yourself depends on the severity of the cracking. Superficial cracks can often be repaired with DIY techniques, while more severe cracks may require professional attention.
9.3. What tools and materials do I need to fix car cracked paint?
The tools and materials you need include sandpaper (various grits), masking tape, degreaser, microfiber cloths, polishing compound, a polishing machine, body filler (if needed), primer, base coat paint, clear coat, a spray gun, mixing cups, and safety gear.
9.4. How do I prepare the area before repairing cracked paint?
Proper preparation involves cleaning the area thoroughly, gathering the necessary tools and materials, setting up a safe work environment, testing the paint color, and masking off the surrounding areas.
9.5. What are the steps for repairing car cracked paint?
The steps include sanding the cracked area, filling deep cracks (if necessary), applying primer, painting the base coat, applying the clear coat, and polishing the repaired area.
9.6. How do I blend the repaired area with the surrounding paint?
Color blending techniques involve feathering the paint, using blending clear coat, and, in some cases, painting an entire panel to achieve a perfect color match.
9.7. How can I prevent future paint cracking?
Preventive measures include proper paint preparation, controlling temperature and humidity, applying the correct paint layer thickness, protecting your car from the elements, avoiding harsh chemicals, and conducting regular inspections and maintenance.