How to Fix Car Door Hitting Fender: A Comprehensive Guide
Car door hitting fender is a common issue that can be frustrating for car owners. CARDIAGTECH.NET offers solutions! This in-depth guide provides practical steps and expert tips on how to fix a car door hitting fender, covering everything from simple adjustments to more complex repairs. Addressing misaligned panels and preventing further damage with top-notch auto body tools is key!
1. Understanding the Problem: Why is Your Car Door Hitting the Fender?
Before diving into solutions, it’s essential to understand why your car door is hitting the fender. Several factors can contribute to this issue, ranging from minor misalignments to more significant structural problems.
1.1. Common Causes of Car Door and Fender Contact
- Collision Damage: Even minor accidents can shift the alignment of body panels, causing the door to rub against the fender.
- Worn Hinges: Over time, door hinges can wear out, leading to door sag and contact with the fender.
- Loose Fender Bolts: If the bolts holding the fender in place are loose, the fender can shift, causing interference with the door.
- Corrosion: Rust and corrosion can weaken the metal around the door or fender, leading to misalignment.
- Frame Damage: In more severe cases, frame damage can cause significant body panel misalignment, including the door and fender.
- Poor Prior Repairs: Previous repairs that weren’t done correctly can lead to misalignment issues down the road.
- Natural Wear and Tear: Continuous use and environmental factors can gradually cause the door and fender to shift over time.
- Impact from Road Debris: Hitting potholes or road debris can sometimes be enough to knock the fender out of alignment.
- Improper Installation of Aftermarket Parts: Installing aftermarket fenders or door components incorrectly can lead to fitment issues.
- Vibration: Constant vibration while driving can gradually loosen bolts and shift panels.
1.2 Assessing the Damage
Carefully inspect the area where the door and fender are making contact. Look for:
- Scratches or paint damage: This indicates the severity of the rubbing.
- Dents or bends: These suggest a more significant impact or misalignment.
- Rust or corrosion: This can weaken the metal and contribute to the problem.
- Uneven gaps: Notice if the gap between the door and fender is inconsistent.
Understanding the root cause and extent of the damage will help you choose the appropriate repair method.
2. Essential Tools and Materials for Fender and Door Alignment
Having the right tools and materials on hand will make the repair process smoother and more efficient. Here’s a list of essential items:
2.1. List of Necessary Tools
| Tool | Description | Use |
|---|---|---|
| Socket Set | A variety of socket sizes to loosen and tighten fender bolts. | Loosening and tightening fender bolts. |
| Wrench Set | Wrenches of various sizes for adjusting bolts and nuts. | Adjusting fender and door components. |
| Screwdriver Set | Includes Phillips head and flathead screwdrivers for removing screws and trim pieces. | Removing screws and accessing hidden bolts. |
| Rubber Mallet | A soft-headed hammer to gently persuade body panels into alignment without causing damage. | Adjusting fender alignment. |
| Body Spreader | A tool used to gently pry apart or align body panels. | Creating space between the door and fender for adjustment. |
| Panel Beater Hammer | Specialized hammer for shaping and smoothing metal panels. | Repairing dents and reshaping the fender. |
| Fender Roller | A tool used to roll the inner lip of the fender to create more clearance. | Preventing tire rub after fender adjustment. |
| Pry Bar | For levering and adjusting the position of the fender. | Adjusting the fender’s position. |
| Alignment Shims | Thin metal or plastic shims used to fine-tune the alignment of body panels. | Fine-tuning panel gaps and alignment. |
| Touch-Up Paint | Matching paint to cover up scratches and protect the metal. | Protecting exposed metal from rust and corrosion after adjustments. |
| Sandpaper | Various grits for smoothing out rough edges and preparing surfaces for paint. | Preparing surfaces for paint and removing rust. |
| Masking Tape | To protect surrounding areas from paint and prevent overspray. | Protecting surrounding areas during touch-up painting. |
| Safety Glasses | To protect your eyes from debris and chemicals. | Ensuring eye safety during repairs. |
| Gloves | To protect your hands from sharp edges and chemicals. | Protecting hands from injury and chemicals. |
| Jack and Jack Stands | To safely lift the vehicle for better access to the fender bolts. | Lifting the vehicle safely for easier access. |
| Work Light | Provides ample illumination to see the work area clearly. | Improving visibility during the repair process. |
| Measuring Tape | For precise measurements of panel gaps and alignment. | Ensuring accurate alignment. |
| Level | To ensure the fender is properly aligned vertically. | Checking vertical alignment. |
| Magnetic Level | Useful for attaching to metal surfaces to check alignment. | Hands-free leveling during adjustments. |
| Door Alignment Tool | Specialized tool for adjusting door hinges and alignment. | Fine-tuning door alignment. |
| Body Files | Tools used to smooth out and shape body filler. | Smoothing body filler for a seamless finish. |
| Angle Grinder | Used for removing rust and smoothing welds. | Removing rust and preparing metal for welding. |
| Welding Machine | For welding if structural repairs are necessary. | Repairing structural damage. |
| Spot Welder | Used for precise welding in specific areas. | Precise welding for panel repairs. |
| Clamps | Various clamps for holding panels in place during welding or gluing. | Holding panels securely during repair. |
| Stud Welder | Used for pulling dents in metal panels. | Pulling dents out of the fender. |
| Slide Hammer | A tool used with the stud welder for pulling dents. | Assisting in dent removal. |
| Heat Gun | Used for heating panels to make them more pliable. | Making metal more pliable for adjustments. |
| Infrared Lamp | Used for curing body filler and paint. | Speeding up the curing process. |
| Paint Sprayer | For applying paint evenly and professionally. | Achieving a professional paint finish. |
| Air Compressor | Powers pneumatic tools like grinders and sprayers. | Powering air-powered tools. |
| Respirator | Protects against harmful fumes and particles during painting. | Ensuring respiratory safety during painting. |
| Trim Removal Tools | Plastic tools used to remove interior trim without damage. | Removing interior trim panels. |
2.2. List of Necessary Materials
| Material | Description | Use |
|---|---|---|
| Body Filler | Used to fill in dents and imperfections in the fender. | Filling in dents and imperfections. |
| Fiberglass Resin | For repairing cracks and holes in fiberglass fenders. | Repairing fiberglass fenders. |
| Automotive Primer | Provides a base for paint to adhere to. | Preparing surfaces for paint. |
| Clear Coat | Protects the paint and provides a glossy finish. | Protecting the paint and adding gloss. |
| Rubbing Compound | Used to smooth out imperfections in the paint. | Smoothing paint imperfections. |
| Polishing Compound | Enhances the shine of the paint. | Enhancing paint shine. |
| Wax | Protects the paint from the elements. | Protecting the paint. |
| Rust Converter | Converts rust into a stable compound. | Treating rust. |
| Anti-Seize Lubricant | Prevents bolts from seizing. | Preventing bolts from seizing. |
| Penetrating Oil | Helps to loosen rusted bolts. | Loosening rusted bolts. |
| Shop Rags | For cleaning and wiping surfaces. | Cleaning surfaces. |
| Degreaser | For removing grease and oil. | Removing grease and oil. |
| Wax and Grease Remover | For removing wax and grease before painting. | Preparing surfaces for painting. |
| Masking Paper | For protecting areas from overspray. | Protecting areas from overspray. |
| Plastic Sheeting | For covering large areas to protect from overspray. | Covering large areas for protection. |
| Mixing Sticks | For mixing body filler and paint. | Mixing materials. |
| Mixing Cups | For measuring and mixing paint. | Measuring and mixing paint. |
| Tack Cloth | For removing dust and debris before painting. | Removing dust before painting. |
| Sanding Blocks | For sanding surfaces evenly. | Sanding surfaces. |
| Wet/Dry Sandpaper | For wet sanding to achieve a smooth finish. | Wet sanding for a smooth finish. |
| Body Sealer | To seal seams and prevent water intrusion. | Sealing seams. |
| Sound Deadening Material | To reduce noise and vibration. | Reducing noise and vibration. |
| Trim Adhesive | For reattaching trim pieces. | Reattaching trim pieces. |
| Weather Stripping | To seal the door and prevent leaks. | Sealing the door. |
| Rivets | For attaching panels together. | Attaching panels. |
| Screws | Various screws for reassembling parts. | Reassembling parts. |
| Bolts | Various bolts for reassembling parts. | Reassembling parts. |
| Washers | Various washers for use with bolts and screws. | Using with bolts and screws. |
| Nuts | Various nuts for use with bolts. | Using with bolts. |
| Clips | Various clips for attaching trim and panels. | Attaching trim and panels. |
| Zip Ties | For securing wires and hoses. | Securing wires and hoses. |
| Electrical Tape | For insulating wires. | Insulating wires. |
| Heat Shrink Tubing | For protecting and insulating electrical connections. | Protecting electrical connections. |
| Cable Ties | For organizing and securing cables. | Organizing cables. |
| Vacuum Hose | For removing dust and debris. | Removing dust and debris. |
| Shop Towels | For general cleaning and wiping. | General cleaning. |
| Hand Cleaner | For cleaning hands after working. | Cleaning hands. |
| Safety Data Sheets | Information on the safe handling and disposal of chemicals. | Safe handling of chemicals. |
Having these tools and materials readily available will save you time and ensure you can complete the repair effectively.
2.3. Where to Buy High-Quality Tools
For top-notch auto body repair tools, visit CARDIAGTECH.NET. We offer a wide selection of professional-grade tools to ensure your repairs are done right. Our team at 276 Reock St, City of Orange, NJ 07050, United States, is ready to assist you. Contact us via Whatsapp at +1 (641) 206-8880 for expert advice and support.
3. Step-by-Step Guide: Fixing a Car Door Hitting the Fender
Now that you have the necessary tools and a clear understanding of the problem, let’s move on to the repair process.
3.1. Preliminary Steps
- Safety First: Wear safety glasses and gloves to protect yourself.
- Inspect: Closely examine the area where the door is hitting the fender.
- Clean: Clean the area with soap and water to remove any dirt or debris.
- Document: Take photos of the damaged area before you start the repair.
3.2. Adjusting the Fender
This is often the first and simplest solution to try.
- Loosen Fender Bolts: Locate the bolts that hold the fender in place. These are usually found along the inner fender well and near the door jamb. Use a socket wrench to loosen these bolts, but don’t remove them completely.
- Adjust Fender Position: With the bolts loosened, you should be able to gently move the fender. Use your hands or a rubber mallet to nudge the fender away from the door. Aim for a consistent gap of about 3-5mm between the door and fender.
- Tighten Fender Bolts: Once you’re satisfied with the fender’s position, tighten the bolts securely.
- Test the Door: Open and close the door to ensure it no longer rubs against the fender. If it still rubs, repeat the adjustment process.
3.3. Adjusting the Door Hinges
If adjusting the fender doesn’t completely solve the problem, you may need to adjust the door hinges.
- Locate Hinge Bolts: Open the door and locate the bolts that attach the hinges to the door frame and the car body.
- Loosen Hinge Bolts: Use a socket wrench to slightly loosen the hinge bolts.
- Adjust Door Position: With the bolts loosened, you can now adjust the door’s position. You may need a helper to hold the door while you make adjustments.
- Use Shims: If the door is sagging, you can use shims to lift it slightly. Place the shims between the hinge and the car body.
- Tighten Hinge Bolts: Once the door is properly aligned, tighten the hinge bolts securely.
- Test the Door: Open and close the door to check for proper alignment and smooth operation.
3.4. Using a Body Spreader or Pry Bar
For minor misalignments, a body spreader or pry bar can be helpful.
- Protect the Surfaces: Place a soft cloth or padding between the tool and the fender or door to prevent scratches.
- Gently Pry: Use the body spreader or pry bar to gently push the fender away from the door or vice versa.
- Check Alignment: Regularly check the alignment as you make adjustments to avoid overcorrection.
3.5. Addressing Dents and Bends
If the fender has dents or bends, you’ll need to address these before making alignment adjustments.
- Use a Panel Beater Hammer: For small dents, use a panel beater hammer to gently tap the metal back into shape.
- Stud Welder and Slide Hammer: For larger dents, a stud welder and slide hammer may be necessary. Weld studs to the dented area and use the slide hammer to pull the dent out.
- Body Filler: Once the dents are mostly removed, use body filler to smooth out any remaining imperfections. Sand the filler smooth and prime the surface before painting.
3.6. Dealing with Rust and Corrosion
Rust and corrosion can weaken the metal and cause misalignment.
- Remove Rust: Use a wire brush or angle grinder to remove any rust from the affected area.
- Apply Rust Converter: Apply a rust converter to neutralize any remaining rust.
- Repair Metal: If the rust has caused significant damage, you may need to weld in new metal to repair the area.
- Protect the Area: After repairing the metal, apply primer and paint to protect the area from future corrosion.
3.7. Reinstalling and Securing Components
After making the necessary adjustments and repairs, it’s time to reinstall any components you removed.
- Reinstall Trim: Reinstall any trim pieces that you removed, making sure they are securely attached.
- Check Wiring: Check any wiring that may have been affected by the repair and make sure it is properly connected.
- Test Operation: Test the operation of the door, windows, and any other affected components to ensure they are working properly.
3.8. Final Touches
Once the adjustments and repairs are complete, it’s time to add the final touches.
- Touch-Up Paint: Use touch-up paint to cover any scratches or exposed metal.
- Wax and Polish: Wax and polish the repaired area to blend it with the surrounding paint.
- Inspect: Give the repaired area a final inspection to make sure everything is properly aligned and secured.
4. Advanced Techniques for Complex Cases
In some cases, the damage may be too severe for simple adjustments. Here are some advanced techniques for more complex situations.
4.1. Frame Straightening
If the frame is bent, you’ll need to take the vehicle to a professional body shop for frame straightening. This involves using specialized equipment to pull the frame back into alignment.
4.2. Welding and Metal Fabrication
For significant rust damage or structural repairs, welding and metal fabrication may be necessary. This involves cutting out the damaged metal and welding in new pieces.
4.3. Using Specialized Alignment Tools
Professional body shops often use specialized alignment tools to precisely align body panels. These tools can help to ensure that the door and fender are perfectly aligned.
4.4. Professional Body Work
When in doubt, it’s always best to take your vehicle to a professional body shop for repairs. They have the expertise and equipment to handle even the most complex repairs.
5. Preventing Future Door and Fender Misalignment
Once you’ve fixed the problem, it’s important to take steps to prevent it from happening again.
5.1. Regular Maintenance
Regularly inspect your vehicle for signs of wear and tear. Check the door hinges, fender bolts, and body panels for any signs of misalignment or damage.
5.2. Safe Driving Habits
Avoid driving in areas where you are likely to encounter potholes or road debris. Be careful when parking to avoid bumping into other vehicles or objects.
5.3. Prompt Repairs
Address any minor damage promptly to prevent it from becoming a major problem. Small dents or scratches can lead to rust and corrosion, which can weaken the metal and cause misalignment.
5.4. Quality Replacement Parts
When replacing body panels or components, use high-quality parts that are designed to fit your vehicle properly.
5.5. Professional Installation
Have any body work or repairs done by a qualified professional to ensure that the work is done correctly.
6. Choosing the Right Repair Approach
Deciding whether to DIY or seek professional help depends on several factors.
6.1. DIY vs. Professional Repair
DIY Repair:
- Pros:
- Cost savings
- Personal satisfaction
- Convenience
- Cons:
- Requires skill and experience
- Can be time-consuming
- May not achieve professional results
Professional Repair:
- Pros:
- High-quality results
- Saves time and effort
- Ensures proper repair
- Cons:
- More expensive
- Requires scheduling an appointment
6.2. Factors to Consider
- Skill Level: Do you have experience with auto body repair?
- Tools and Equipment: Do you have the necessary tools and equipment?
- Time: Do you have the time to complete the repair?
- Severity of Damage: Is the damage minor or severe?
- Budget: How much are you willing to spend on the repair?
7. Real-World Examples and Case Studies
To illustrate the repair process, let’s look at some real-world examples and case studies.
7.1. Case Study 1: Minor Fender Misalignment
Problem: A car door was slightly rubbing against the fender due to a minor impact.
Solution: The owner loosened the fender bolts, adjusted the fender position, and tightened the bolts. The door no longer rubbed against the fender.
Tools Used: Socket wrench set
7.2. Case Study 2: Worn Door Hinges
Problem: A car door was sagging and rubbing against the fender due to worn hinges.
Solution: The owner replaced the worn hinges with new ones. The door was properly aligned and no longer rubbed against the fender.
Tools Used: Socket wrench set, door alignment tool
7.3. Case Study 3: Rust Damage
Problem: A car fender had significant rust damage, causing misalignment.
Solution: The owner removed the rust, repaired the damaged metal, and applied primer and paint. The fender was properly aligned and protected from further corrosion.
Tools Used: Wire brush, angle grinder, welding machine, body filler, sandpaper, primer, paint
8. Cost Considerations: What to Expect
The cost of repairing a car door hitting the fender can vary widely depending on the extent of the damage and whether you choose to DIY or seek professional help.
8.1. DIY Costs
- Tools: $50 – $200
- Materials: $30 – $100
- Total: $80 – $300
8.2. Professional Repair Costs
- Minor Adjustments: $100 – $300
- Hinge Replacement: $200 – $500
- Rust Repair: $300 – $1000+
- Frame Straightening: $500 – $2000+
8.3. Factors Affecting Costs
- Severity of Damage
- Type of Vehicle
- Labor Rates
- Parts Costs
9. The Importance of Proper Tools
Having the right tools can make all the difference when fixing a car door hitting the fender. High-quality tools not only make the job easier but also ensure that the repairs are done correctly and safely.
9.1. Why Invest in Quality Tools
- Precision and Accuracy: Quality tools provide better precision and accuracy, leading to better results.
- Durability: They are built to last, saving you money in the long run.
- Safety: Well-designed tools are safer to use, reducing the risk of injury.
- Efficiency: They make the job faster and more efficient.
9.2. Tools Available at CARDIAGTECH.NET
At CARDIAGTECH.NET, we offer a wide range of high-quality auto body repair tools to meet your needs. Our tools are designed to provide precision, durability, and safety, ensuring that your repairs are done right.
10. Call to Action: Get Professional Advice
Is your car door hitting the fender? Don’t wait until the problem gets worse. Contact CARDIAGTECH.NET today for professional advice and top-quality auto body repair tools. Our team is ready to help you get your car back in perfect condition.
10.1. Contact Information
- Address: 276 Reock St, City of Orange, NJ 07050, United States
- Whatsapp: +1 (641) 206-8880
- Website: CARDIAGTECH.NET
Let CARDIAGTECH.NET provide the expert guidance and tools you need. Contact us today to learn more and take the first step toward restoring your vehicle’s condition!
FAQ: How to Fix Car Door Hitting Fender
1. Is it safe to drive with a car door hitting the fender?
It is generally not recommended to drive with a car door hitting the fender as it can cause further damage to both the door and fender. Additionally, it may affect the door’s ability to close properly, compromising safety.
2. Can I fix a car door hitting the fender myself?
Yes, in many cases, you can fix a car door hitting the fender yourself, especially if the issue is minor. Adjusting the fender or door hinges can often resolve the problem. However, for more complex issues like frame damage, professional help is recommended.
3. What tools do I need to fix a car door hitting the fender?
Essential tools include a socket set, wrench set, screwdriver set, rubber mallet, body spreader, and alignment shims. For more complex repairs, you may need a panel beater hammer, stud welder, and body filler.
4. How much does it cost to fix a car door hitting the fender?
The cost varies depending on the extent of the damage and whether you DIY or seek professional help. DIY costs range from $80 to $300, while professional repairs can cost from $100 to $2000 or more.
5. How do I adjust the fender to stop the door from hitting it?
To adjust the fender, loosen the fender bolts, gently move the fender away from the door to create a consistent gap, and then tighten the bolts securely. Test the door to ensure it no longer rubs against the fender.
6. What causes a car door to hit the fender?
Common causes include collision damage, worn hinges, loose fender bolts, corrosion, frame damage, poor prior repairs, and natural wear and tear.
7. How can I prevent my car door from hitting the fender in the future?
Regular maintenance, safe driving habits, prompt repairs of minor damage, using quality replacement parts, and professional installation of body work can help prevent future issues.
8. What should I do if the frame is bent?
If the frame is bent, it’s best to take your vehicle to a professional body shop for frame straightening. They have the specialized equipment to pull the frame back into alignment.
9. Can rust cause a car door to hit the fender?
Yes, rust and corrosion can weaken the metal and cause misalignment, leading to the door hitting the fender. Removing rust and repairing the damaged metal is essential to resolve this issue.
10. Where can I buy high-quality auto body repair tools?
You can buy high-quality auto body repair tools at CARDIAGTECH.NET. We offer a wide selection of professional-grade tools to ensure your repairs are done right. Visit us at 276 Reock St, City of Orange, NJ 07050, United States, or contact us via Whatsapp at +1 (641) 206-8880 for expert advice and support.
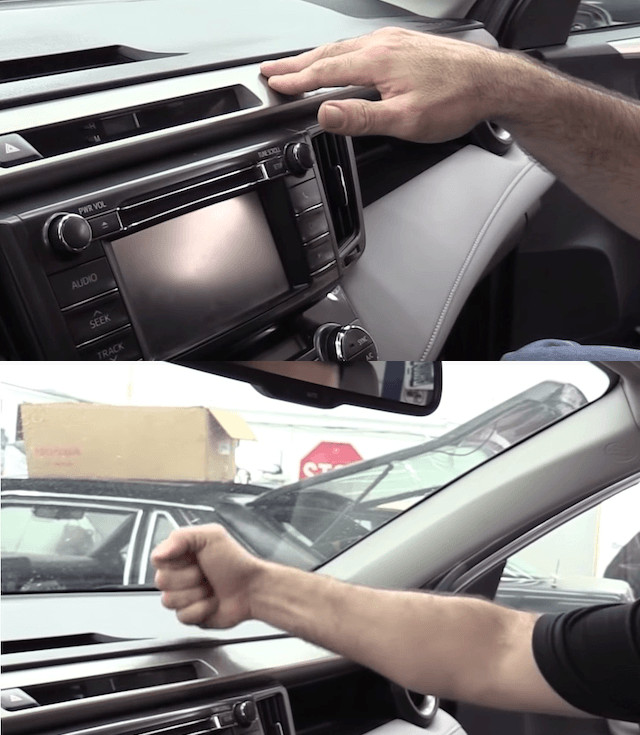
Car door hitting fender, showing damage
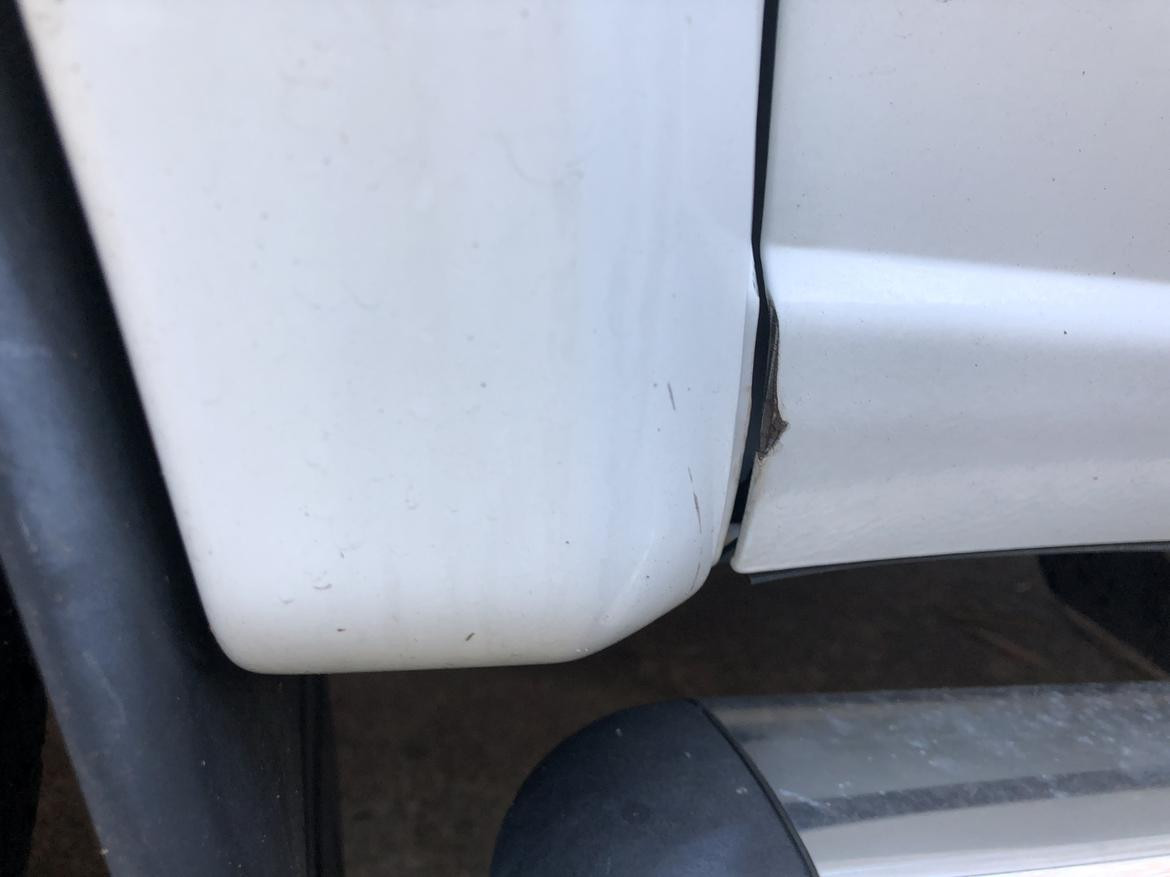
 Car door alignment issue: close-up of fender rubbing
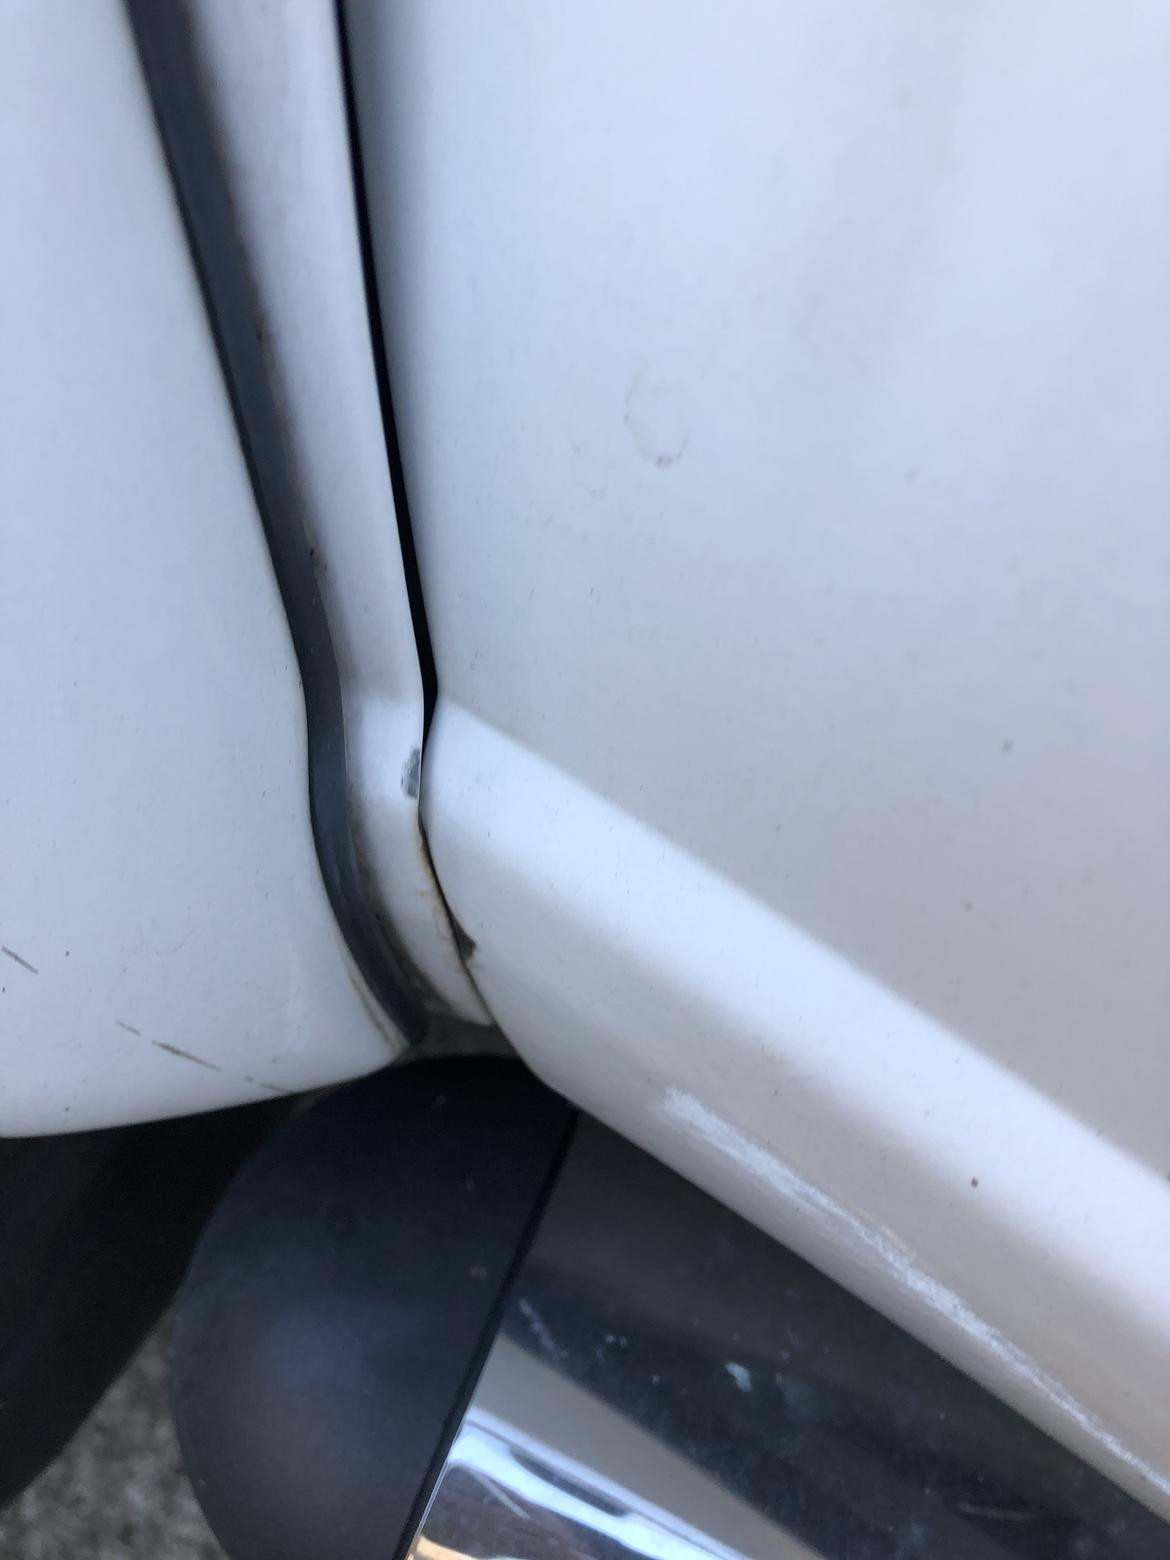
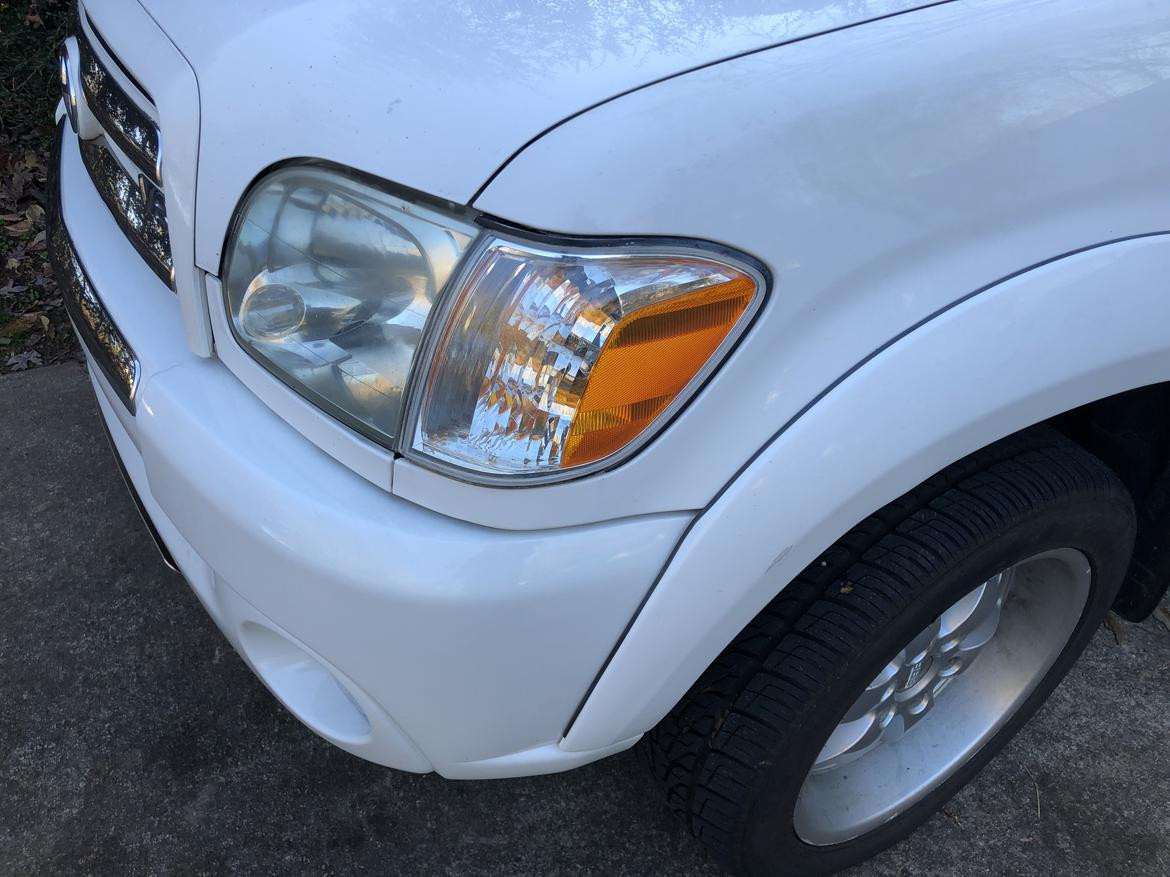 Misalignment at headlight: indicating fender damage
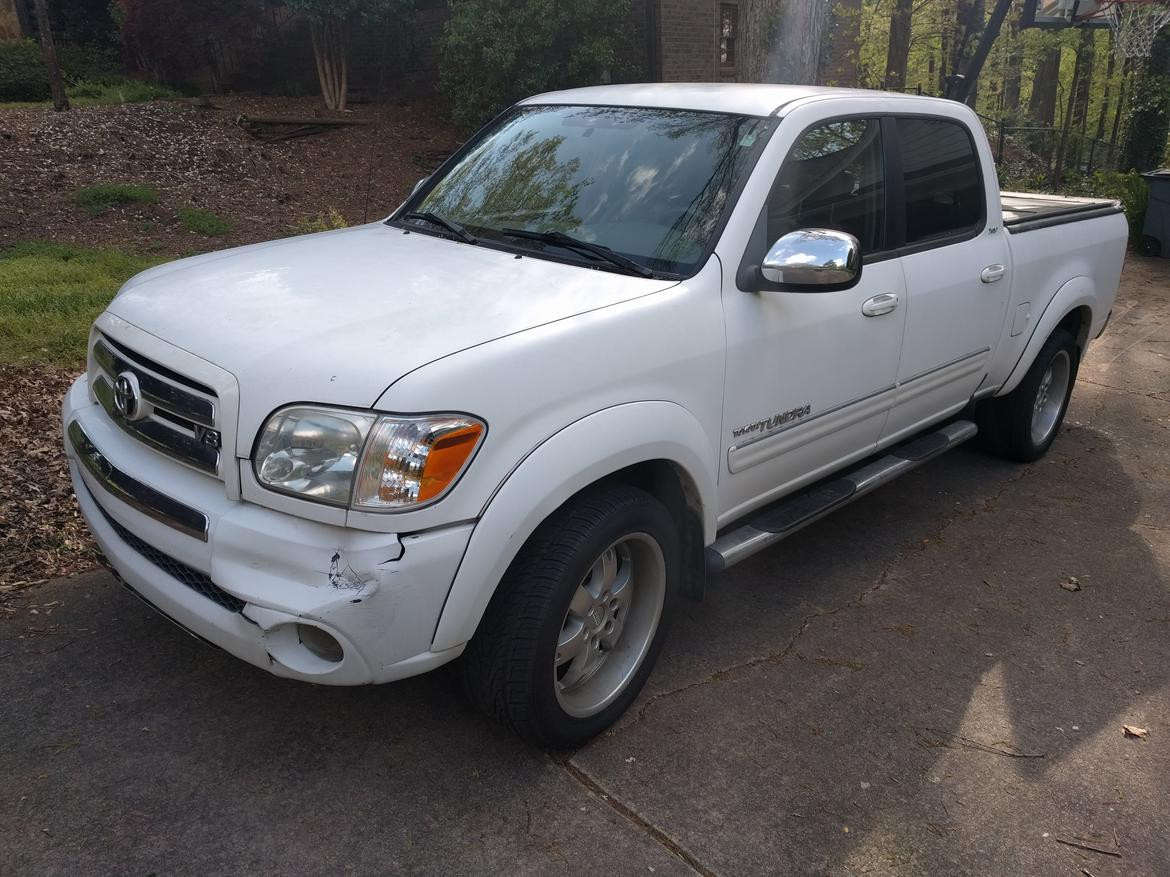 Front-end collision damage affecting car door alignment