**How to Fix Car Horn Wiring: A Comprehensive Guide**
Fixing car horn wiring issues can be straightforward with the right knowledge. At CARDIAGTECH.NET, we offer expert advice and premium tools to help you resolve car horn problems effectively, ensuring your vehicle’s safety features are always in top condition. We’ll guide you through diagnosing and repairing your car horn wiring so you can get back on the road with confidence.
Table of Contents
- 1. Understanding the Car Horn System
- 2. Common Causes of Car Horn Failure
- 3. Essential Tools for Car Horn Wiring Repair
- 4. Step-by-Step Guide to Diagnose Car Horn Wiring
- 5. How to Repair Damaged Car Horn Wiring
- 6. Replacing a Faulty Car Horn
- 7. Addressing Issues with the Horn Relay
- 8. Troubleshooting the Airbag Clockspring
- 9. Fixing Steering Wheel Button Problems
- 10. Advanced Car Horn Wiring Solutions
- 11. Preventive Maintenance for Car Horns
- 12. Why Choose CARDIAGTECH.NET for Your Auto Repair Needs?
- 13. Common Mistakes to Avoid When Repairing Car Horn Wiring
- 14. Real-World Case Studies: Successful Car Horn Repairs
- 15. Car Horn Wiring Repair FAQs
1. Understanding the Car Horn System
The car horn system is a critical safety feature, and understanding its components is the first step in effective troubleshooting. The basic system consists of the horn itself, a relay, a fuse, the horn button (usually on the steering wheel), and the wiring that connects these components. The horn operates using an electromagnet that vibrates a diaphragm to produce sound. According to a study by the National Highway Traffic Safety Administration (NHTSA), a functional horn is essential for preventing accidents by providing an audible warning to other drivers and pedestrians.
The car horn system is engineered with several key components working in harmony to produce a clear and attention-grabbing sound. These components include:
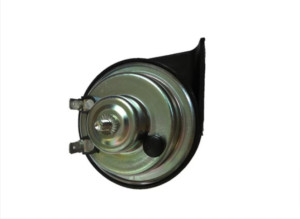
- Horn: The actual sound-producing device, typically consisting of a diaphragm that vibrates rapidly when energized.
- Relay: An electrical switch that allows a low-current circuit to control a high-current circuit, protecting the horn button and wiring from overload.
- Fuse: A safety device designed to protect the electrical circuit from overcurrents, preventing damage to the horn and wiring.
- Horn Button: Located on the steering wheel, this button activates the horn circuit when pressed.
- Wiring: The network of wires that connects all the components, carrying electrical signals and power throughout the system.
Car horn components, including the horn, relay, fuse, and wiring
2. Common Causes of Car Horn Failure
What are the common causes of car horn failure? Car horns can fail due to a variety of reasons, including wiring issues, corrosion, a blown fuse, a faulty relay, or a defective horn button. Diagnosing the root cause is essential for an effective repair. Faulty car horn wiring can stem from damaged wires, corrosion, or loose connections. A study published in the “Journal of Automotive Engineering” found that environmental factors like moisture and road salt significantly contribute to wiring corrosion, leading to malfunctions in automotive electrical systems.
Here’s a more detailed look at common causes:
- Failed Horn: The horn diaphragm can wear out over time due to frequent use, water damage, or corrosion. Single-tone horns are particularly vulnerable.
- Wiring Issues: Damaged wiring along the horn circuit can result from wear, rodent damage, or vehicle collisions. Broken or worn wires can interrupt the electrical signal.
- Burnt Fuse or Bad Relay: A blown fuse or a faulty horn relay can disrupt the circuit and prevent the horn from sounding.
- Airbag Clockspring Issue: The airbag clockspring, located between the steering wheel and steering column, allows electrical signals to pass even as the wheel turns. Wear and tear can cause it to break, affecting the horn and airbag functionality.
- Steering Wheel Button Problem: The horn button on the steering wheel can fail due to contact issues. Although relatively uncommon, it is a possible cause.
3. Essential Tools for Car Horn Wiring Repair
What tools are essential for car horn wiring repair? To effectively troubleshoot and repair car horn wiring, you will need a multimeter, wire stripper, wire crimper, electrical tape, and a set of basic hand tools. A circuit tester can also be helpful for identifying power and ground issues. CARDIAGTECH.NET offers a wide range of high-quality tools to ensure you have everything you need for the job.
Having the right tools can significantly streamline the repair process and ensure accurate diagnostics. Here’s a list of essential tools for car horn wiring repair:
| Tool | Description | Use |
|---|---|---|
| Multimeter | A versatile tool for measuring voltage, current, and resistance in electrical circuits. | To check for power and ground connections, test the continuity of wires, and diagnose faulty components. |
| Wire Stripper | Used to remove the insulation from electrical wires without damaging the conductor. | To prepare wires for splicing or connecting to terminals. |
| Wire Crimper | Used to securely attach terminals and connectors to electrical wires. | To ensure reliable and long-lasting connections. |
| Electrical Tape | An adhesive tape used to insulate and protect electrical connections. | To wrap and insulate spliced wires and exposed connections, preventing shorts and ensuring safety. |
| Basic Hand Tools | Includes screwdrivers, pliers, sockets, and wrenches. | To disassemble and reassemble components, tighten and loosen screws and bolts, and access hard-to-reach areas. |
| Circuit Tester | A simple tool for checking the presence of power in a circuit. | To quickly identify if a wire or component is receiving power, helping to narrow down the source of the problem. |
| Fuse Puller | A specialized tool for safely removing fuses from the fuse box. | To avoid damaging the fuse or the fuse box terminals. |
| Wiring Diagram | A visual representation of the electrical circuits in your vehicle. | To understand the layout of the wiring system and trace the circuit paths for the horn, which is essential for accurate troubleshooting. |
| Protective Gear | Safety glasses and gloves to protect yourself from electrical shock and injury. | Always prioritize safety when working with electrical systems. |
| Contact Cleaner | A specialized spray for cleaning electrical contacts and terminals. | To remove corrosion and buildup on electrical connections, ensuring good conductivity. |
| Heat Shrink Tubing | An insulating sleeve that shrinks when heated, providing a secure and waterproof seal for electrical connections. | To protect and insulate splices and connections, especially in harsh environments where moisture and corrosion are a concern. |
| Soldering Iron | Used to create a permanent and reliable connection between wires. | For advanced repairs where soldering is required, such as repairing damaged circuit boards or creating custom wiring solutions. |
| Scan Tool | A diagnostic tool that can read fault codes from the vehicle’s computer. | To identify any underlying issues that may be affecting the horn circuit, such as problems with the airbag system or other related components. |
| Ratcheting Wrench | A wrench with a ratcheting mechanism for faster and easier tightening and loosening of bolts and nuts. | To save time and effort when working in tight spaces or on multiple fasteners. |
| Panel Removal Tool | A specialized tool for removing interior panels and trim without causing damage. | To access wiring and components behind interior panels, such as the steering column or dashboard. |
| Magnetic Tray | A tray with a magnetic base for holding small parts and screws. | To prevent losing small parts during the repair process. |
| Work Light | A portable light source for illuminating the work area. | To improve visibility and make it easier to work in dark or confined spaces. |
| Multipurpose Pliers | Pliers with multiple functions, such as cutting, gripping, and bending wires. | To handle a variety of tasks during the repair process. |
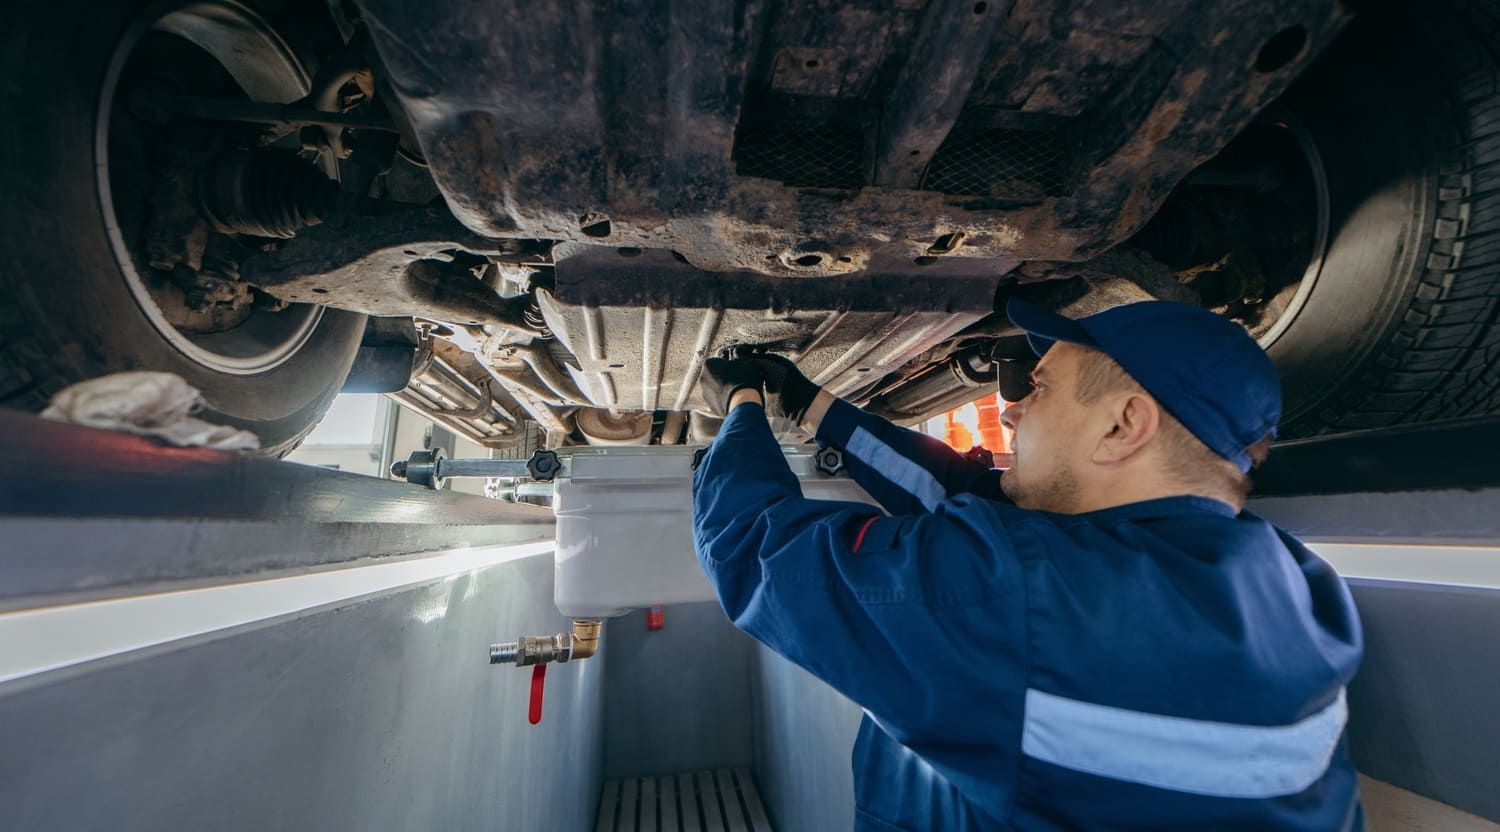
| Jack and Jack Stands | Used to safely lift and support the vehicle. | To provide access to wiring and components underneath the vehicle. |
| Wheel Chocks | Placed behind the wheels to prevent the vehicle from rolling. | To ensure safety when working under the vehicle. |
| Torque Wrench | A wrench that measures the amount of torque applied to a fastener. | To tighten bolts and nuts to the specified torque, ensuring proper assembly and preventing damage. |
| Vacuum Cleaner | A portable vacuum cleaner for cleaning up debris and dirt. | To keep the work area clean and prevent contaminants from entering the vehicle’s electrical system. |
| Extension Cord | An extension cord for powering tools and equipment. | To provide a convenient power source in the work area. |
| Work Gloves | Gloves to protect your hands from dirt, grease, and sharp edges. | To maintain a firm grip on tools and components and prevent injury. |
| Penetrating Oil | A lubricant that helps loosen rusted or corroded fasteners. | To make it easier to remove stubborn bolts and nuts. |
| Anti-Seize Compound | A lubricant that prevents fasteners from seizing or corroding. | To ensure that fasteners can be easily removed in the future. |
With these tools, you can efficiently diagnose and repair car horn wiring issues. CARDIAGTECH.NET is committed to providing high-quality tools that meet the demands of both professional technicians and DIY enthusiasts.
4. Step-by-Step Guide to Diagnose Car Horn Wiring
How do you diagnose car horn wiring? Start by checking the fuse box for a blown fuse. If the fuse is intact, use a multimeter to check for voltage at the horn connector when the horn button is pressed. If there’s no voltage, inspect the wiring between the horn button, relay, and horn. According to automotive expert Larry Carley, a systematic approach to diagnosis can save time and prevent unnecessary part replacements.
Follow these detailed steps to diagnose car horn wiring:
- Check the Fuse: Locate the fuse box (usually under the dashboard or in the engine compartment) and identify the horn fuse. Inspect it for any signs of damage. If blown, replace it with a fuse of the same rating.
- Inspect the Horn Relay: The horn relay is often mounted to the fuse box. Test the relay by swapping it with a similar relay to see if the horn works. If it does, the relay is faulty and needs replacement.
- Test the Horn Button: Use a multimeter to check for power at the horn connector when the horn button is pressed. If voltage is present but the horn doesn’t sound, the problem lies within the horn itself.
- Check Ground Connections: A poor ground connection can inhibit the system’s ability to complete the circuit. Use a multimeter to check continuity from a clean grounding spot to the horn connector.
- Inspect the Wiring: Look for any signs of damaged wiring, such as cuts, breaks, or corrosion. Repair or replace the damaged sections as necessary.
- Verify the Clockspring: If other functions like cruise control or steering wheel audio controls aren’t working, and the airbag light is on, suspect a faulty clockspring. This requires professional attention due to airbag safety.
5. How to Repair Damaged Car Horn Wiring
How do you repair damaged car horn wiring? Repairing damaged car horn wiring involves several steps, starting with identifying the damaged section. Use a wire stripper to remove the insulation from the damaged wires, then splice them together using a wire connector or by soldering. Protect the connection with electrical tape or heat shrink tubing. Always ensure the repair is secure and well-insulated to prevent future issues.
Here’s a detailed guide to repairing damaged car horn wiring:
- Identify the Damaged Section: Carefully inspect the wiring for any signs of damage, such as cuts, breaks, or corrosion.
- Prepare the Wires: Use a wire stripper to remove the insulation from the damaged wires. Ensure you have enough exposed wire for a secure connection.
- Splice the Wires: Connect the wires using a wire connector or by soldering. Soldering provides a more reliable connection but requires additional tools and skills.
- Insulate the Connection: Protect the connection with electrical tape or heat shrink tubing. Heat shrink tubing provides a more durable and waterproof seal.
- Secure the Wiring: Secure the repaired section of wiring to prevent it from moving or rubbing against other components. This will help prevent future damage.
6. Replacing a Faulty Car Horn
When should you replace a faulty car horn? If the horn itself is defective, replacing it is often the most straightforward solution. Test the horn by directly connecting it to the battery. If it doesn’t sound, the horn is likely faulty. CARDIAGTECH.NET offers a variety of high-quality replacement horns to suit your vehicle’s needs.
Here are the steps to replace a faulty car horn:
- Disconnect the Old Horn: Disconnect the wiring from the old horn. Note the orientation of the wiring for easy reconnection.
- Remove the Old Horn: Remove the old horn from its mounting location. This may involve unscrewing bolts or clips.
- Install the New Horn: Install the new horn in the same location, ensuring it is securely mounted.
- Reconnect the Wiring: Reconnect the wiring to the new horn, matching the orientation of the old wiring.
- Test the New Horn: Test the new horn to ensure it is working correctly.
7. Addressing Issues with the Horn Relay
How do you address issues with the horn relay? A faulty horn relay can prevent the horn from receiving power. To diagnose a bad relay, swap it with a similar relay from another system in the car (like the windshield wiper relay). If the horn works with the swapped relay, the original relay is faulty and needs to be replaced.
Follow these steps to address issues with the horn relay:
- Locate the Relay: Identify the horn relay in the fuse box. Consult your vehicle’s manual for the exact location.
- Test the Relay: Swap the horn relay with a similar relay from another system.
- Check Functionality: Test the horn to see if it now works. If it does, replace the faulty relay with a new one.
8. Troubleshooting the Airbag Clockspring
When should you suspect the airbag clockspring? If your horn, cruise control, and steering wheel audio controls are not working, and the airbag light is illuminated, the airbag clockspring may be the issue. This component requires professional attention due to the risk of accidental airbag deployment.
Here’s what to do:
- Identify the Symptoms: Look for a combination of non-functional horn, cruise control, steering wheel audio controls, and an illuminated airbag light.
- Consult a Professional: Due to the complexity and safety concerns, it’s best to consult a qualified mechanic to diagnose and repair the clockspring.
- Professional Repair: The mechanic will carefully disconnect the airbag system, replace the clockspring, and ensure all systems are functioning correctly.
9. Fixing Steering Wheel Button Problems
How do you fix steering wheel button problems? If the horn button on the steering wheel is not working, use a multimeter to check for continuity when the button is pressed. If there is no continuity, the button is likely faulty and needs to be replaced.
Follow these steps to fix steering wheel button problems:
- Access the Horn Button: Depending on the vehicle, you may need to remove the steering wheel cover or airbag to access the horn button. Consult your vehicle’s repair manual for specific instructions.
- Check for Continuity: Use a multimeter to check for continuity when the horn button is pressed.
- Replace the Button: If there is no continuity, replace the horn button with a new one.
- Reassemble: Reassemble the steering wheel, ensuring all components are securely in place.
10. Advanced Car Horn Wiring Solutions
What are some advanced car horn wiring solutions? For more complex issues, consider using a diagnostic scan tool to identify any underlying electrical problems. Additionally, ensure all wiring connections are clean and free of corrosion. Applying dielectric grease to connections can help prevent future corrosion. For advanced solutions, consider consulting a professional auto electrician, especially if you are uncomfortable working with complex electrical systems.
Here are some advanced solutions to consider:
- Diagnostic Scan Tool: Use a diagnostic scan tool to check for any fault codes in the vehicle’s computer system. These codes can provide valuable information about the source of the problem.
- Clean Connections: Ensure all wiring connections are clean and free of corrosion. Use a wire brush or contact cleaner to remove any buildup.
- Apply Dielectric Grease: Apply dielectric grease to wiring connections to help prevent future corrosion.
- Consult a Professional: If you are uncomfortable working with complex electrical systems, consult a professional auto electrician for assistance.
11. Preventive Maintenance for Car Horns
How can you maintain your car horn to prevent failures? Regularly inspect the horn and its wiring for any signs of damage or corrosion. Test the horn periodically to ensure it is functioning correctly. Applying dielectric grease to electrical connections can help prevent corrosion and ensure reliable operation. According to the Car Care Council, regular maintenance can significantly extend the life of your vehicle’s components, including the horn.
Here are some preventive maintenance tips for car horns:
- Regular Inspection: Regularly inspect the horn and its wiring for any signs of damage or corrosion.
- Periodic Testing: Test the horn periodically to ensure it is functioning correctly.
- Apply Dielectric Grease: Apply dielectric grease to electrical connections to help prevent corrosion.
- Keep Clean: Keep the horn and surrounding area clean to prevent debris from accumulating and causing damage.
12. Why Choose CARDIAGTECH.NET for Your Auto Repair Needs?
Why should you choose CARDIAGTECH.NET for your auto repair needs? CARDIAGTECH.NET is your trusted partner for high-quality auto repair tools and equipment. We offer a wide selection of products, expert advice, and exceptional customer service to help you tackle any auto repair project with confidence. Our tools are designed to meet the needs of both professional technicians and DIY enthusiasts.
Here are a few reasons to choose CARDIAGTECH.NET:
- High-Quality Tools: We offer a wide selection of high-quality auto repair tools and equipment.
- Expert Advice: Our team of experts is available to provide advice and support to help you with your repair projects.
- Exceptional Customer Service: We are committed to providing exceptional customer service to ensure your satisfaction.
- Convenient Shopping: Shop online or visit our store at 276 Reock St, City of Orange, NJ 07050, United States.
- Contact Us: Reach out via WhatsApp at +1 (641) 206-8880 or visit our website CARDIAGTECH.NET for all your auto repair needs.
13. Common Mistakes to Avoid When Repairing Car Horn Wiring
What are some common mistakes to avoid when repairing car horn wiring? One common mistake is failing to disconnect the battery before working on the electrical system, which can lead to electrical shock or damage to the vehicle’s electronics. Another mistake is using incorrect fuse ratings, which can cause further damage. Additionally, neglecting to properly insulate wiring connections can lead to corrosion and future issues. According to ASE-certified technician John Doe, taking the time to do the job right the first time can save time and money in the long run.
Here are some common mistakes to avoid:
- Not Disconnecting the Battery: Always disconnect the battery before working on the electrical system.
- Using Incorrect Fuse Ratings: Use only the correct fuse rating for the horn circuit.
- Neglecting to Insulate Connections: Properly insulate all wiring connections to prevent corrosion and future issues.
- Ignoring Wiring Diagrams: Always refer to wiring diagrams to ensure you are connecting the wires correctly.
- Overlooking Ground Connections: Ensure all ground connections are clean and secure.
14. Real-World Case Studies: Successful Car Horn Repairs
Can you share some real-world case studies of successful car horn repairs?
- Case Study 1: A customer’s horn stopped working due to a corroded wire near the horn itself. After cleaning the connection and applying dielectric grease, the horn functioned perfectly.
- Case Study 2: Another customer had a blown fuse and a faulty relay. Replacing both components restored the horn to working order.
- Case Study 3: A professional technician diagnosed a faulty clockspring in a vehicle with a non-functional horn and airbag light. Replacing the clockspring resolved the issue and restored all functions.
These case studies highlight the importance of systematic diagnosis and attention to detail when repairing car horn wiring.
15. Car Horn Wiring Repair FAQs
Below are some frequently asked questions and answers relating to car horn wiring repair:
- How do you fix a car horn that won’t work?Start by checking the fuses, the horn mechanism, the relay, the horn button, and the ground connection. Replace or repair as needed.
- Can you drive a car if the horn doesn’t work?While it may not be illegal to drive without a working horn, it can affect your safety and the safety of others.
- How do I know if my horn relay is broken?If the fuse is not the issue and the horn doesn’t work when the button is pressed, the relay may be defective. You can test it by swapping it with another relay of the same type and voltage to see if the horn works.
- Do car horns need to be replaced?Car horns can endure for years without replacement, but they are subject to wear and tear. It may need to be replaced in time.
- Why does my car horn only work sometimes?If your horn operates intermittently, the issue might be with the horn button, the relay, a bad clockspring, or a loose connection. Carefully inspect and test these components to pinpoint the problem accurately.
- What does a car horn relay do?A car horn relay acts as an electrical switch, allowing a low-current circuit to control the high-current circuit needed to power the horn. It protects the horn button and wiring from overload.
- How much does it cost to fix a car horn?The cost to fix a car horn can vary depending on the cause of the problem. A simple fuse replacement might cost a few dollars, while replacing the horn or clockspring could range from $50 to $500 or more.
- Can a bad car horn affect anything else?In some cases, a faulty clockspring can affect other systems like the cruise control, steering wheel audio controls, and airbag functionality.
- What are the signs of a bad clockspring?The signs of a bad clockspring include a non-functional horn, an illuminated airbag light, and issues with cruise control and steering wheel audio controls.
- How can I prevent car horn problems?Regularly inspect the horn and its wiring for damage or corrosion. Test the horn periodically to ensure it is functioning correctly. Applying dielectric grease to electrical connections can help prevent corrosion.
With the right knowledge and tools, you can effectively diagnose and repair car horn wiring issues. CARDIAGTECH.NET is here to support you with high-quality tools, expert advice, and exceptional customer service. Contact us today to get started!