How To Fix Car Leather Seat Tear: A Comprehensive Guide
Is your car’s leather seat marred by an unsightly tear? Don’t despair. CARDIAGTECH.NET offers expert guidance and premium tools to restore your car’s interior to its former glory. With the right techniques and products, repairing a leather car seat tear is a manageable DIY project. Let’s explore the detailed steps involved in leather repair, leather conditioning, and leather restoration, ensuring a seamless finish.
1. Understanding the Problem: Types of Leather Seat Tears
Before diving into the repair process, it’s essential to identify the type of tear you’re dealing with. Different tears require different approaches.
- Small Scratches and Scuffs: These are typically surface-level and can be easily addressed with leather conditioners and color restorers.
- Minor Tears: These involve small rips or cuts in the leather. They require patching and filling.
- Large Tears and Holes: These are more significant and demand a more robust repair strategy, including backing patches and specialized fillers.
Understanding the extent of the damage helps you choose the appropriate repair method and products.
2. Gathering Your Supplies: The Essential Repair Kit
Having the right tools and materials is crucial for a successful repair. Here’s a list of essential items for your leather car seat repair kit, all available at CARDIAGTECH.NET:
| Item | Description |
|---|---|
| Leather Cleaner | Cleans and degreases the leather surface, preparing it for repair. |
| Leather Prep | Removes the factory finish and any remaining contaminants, ensuring proper adhesion of repair materials. |
| Alcohol Cleaner | Further cleans the area, removing any lingering dirt or dust. |
| Leather Repair Kit | Contains essential items like leather glue, sub-patch material, and heavy filler. |
| Leather Glue | Bonds the backing patch securely to the underside of the leather. |
| Sub-Patch Material | Provides a strong foundation for the repair, supporting the filler. |
| Heavy Filler | Fills the tear, creating a smooth, even surface. |
| Leather Colorant Kit | Includes colorant matched to your car’s leather, ensuring a seamless blend. |
| Leather Finish | Seals the colorant, protecting it from wear and tear. |
| Abrasive Pad | Gently abrades the leather surface, aiding in cleaning and preparation. |
| Palette Knife | Applies and smooths the filler, ensuring a level surface. |
| Tweezers | Helps position the backing patch accurately under the tear. |
| Scalpel or Scissors | Trims away excess leather around the tear, creating a clean edge. |
| Airbrush | Sprays the colorant and finish evenly for a professional look. |
| Sponges | Applies the initial coat of colorant, working it into the leather’s grain. |
| Hair Dryer | Speeds up the drying process for the filler and colorant. |
| Sandpaper | Smooths down any excess filler after it has dried. |
Investing in high-quality supplies from CARDIAGTECH.NET ensures a durable and professional-looking repair.
3. Step-by-Step Guide: Fixing a Leather Car Seat Tear
Follow these detailed steps to repair your car’s leather seat tear effectively:
3.1. Step 1: Preparing the Leather
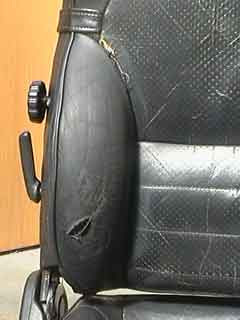
The first step is to thoroughly clean the leather surface.
-
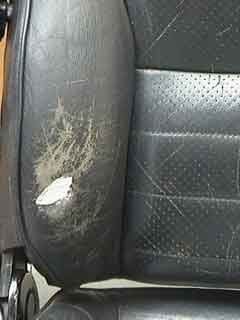
Clean the Area: Apply leather cleaner to the affected area and gently rub with an abrasive pad. This removes dirt, grease, and oils that have accumulated over time.
Cleaning a leather car seat with leather cleaner -
Prepare the Leather: Use the leather prep solution and abrasive pad to remove the manufactured finish. This step ensures the colorant adheres properly.
-
Wipe with Alcohol Cleaner: After prepping, wipe the area with alcohol cleaner to remove any remaining dirt or dust.
This thorough preparation is crucial for achieving a strong and lasting repair.
3.2. Step 2: Tidy the Tear
Next, you need to tidy the edges of the tear.
-
Remove Excess Leather: Examine the tear for any protruding or loose leather, creating a “lip.”
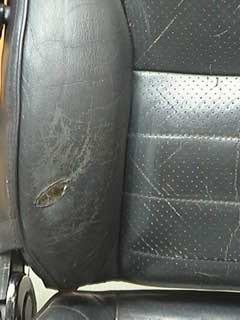 Removing excess leather from a tear with a scalpel
 -
Trim the Edges: Using a scalpel or scissors, carefully trim away this excess leather at the base. Be cautious not to damage the surrounding leather.
Removing the lip ensures a smooth, even surface for the repair.
3.3. Step 3: Apply the Backing Patch
A backing patch provides a solid foundation for the repair.
-
Cut the Patch: Take the sub-patch material from the repair kit and cut it to a size that completely covers the tear with an extra 1cm of material surrounding the hole.
 Applying a sub-patch under a leather tear
 -
Insert the Patch: Use tweezers to insert one side of the patch under the leather. Ensure the 1cm excess is completely under the leather.
-
Secure the Patch: Apply pressure to hold the patch in place and gently feed it under the remaining edges of the hole. The patch should lie flat under the repair.
-
Apply Leather Glue: Put a small amount of leather glue on the spatula and feed it under the edges of the hole, coating the underside of the leather surrounding it. Avoid moving the canvas patch.
-
Bond the Leather: Apply pressure to bond the leather to the patch and allow it to dry completely.
The backing patch is essential for preventing the filler from sinking and ensuring a durable repair.
3.4. Step 4: Filling the Hole
Filling the hole requires patience and precision.
-
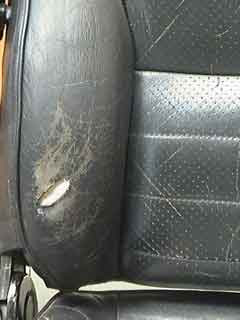
Apply Thin Layers: Take a small amount of heavy filler using the palette knife and apply a thin layer into the hole over the backing patch.
 Applying heavy filler to a leather tear
 -
Dry Each Layer: Ensure each layer is very thin, just covering the sub-patch, and allow 20 minutes to dry. Use a hair dryer to speed up the drying process.
-
Repeat: Continue applying the heavy filler in thin layers. Using thin layers is crucial as the filler shrinks as it dries and may not cure properly if applied too thickly.
-
Build Up the Filler: Apply at least 5-6 thin layers to build up the filler until it is just below the top of the hole.
-
Remove Excess: With each layer, smooth the area with the sharper edge of the palette knife before drying.
3.5. Step 5: The Final Layer of Filler
The final layer should bring the filler level with the surrounding leather.
-
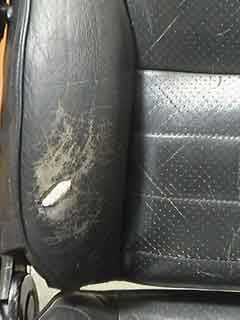
Apply the Final Layer: Apply the final layer of filler to completely fill the hole, ensuring it is level with the surrounding leather.
 Hole filled with multiple layers of heavy filler
 -
Cure Properly: Allow this final layer to cure properly. The filler can shrink as it cures, so add more if necessary.
-
Remove Excess: If filler gets onto the leather, remove it with the palette knife.
-
Achieve Level Surface: Aim to fill the hole so it is level with the leather and not overfilled. If you overfill it, you can reduce it with sandpaper after it’s dry.
-
Clean the Area: Once you are happy with the level of the filler and can no longer feel any ridge between the filler and the surrounding leather, clean the area with alcohol cleaner to remove any unwanted filler and dust.
3.6. Step 6: Applying Colorant
Colorant is crucial for blending the repair seamlessly with the rest of the seat.
-
Match the Color: Ensure the colorant matches the color of your car’s leather.
 Applying an initial coat of colorant to a leather repair
 -
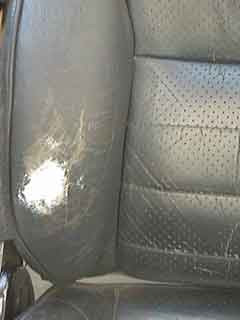
Apply Initial Coat: Take one of the sponges and apply a small amount of colorant to it, then rub this into the area of the repair thoroughly. This allows the colorant to penetrate into the creases of the leather and valleys of the grain, giving a better overall finish.
-
Move to Spraying: After the initial coat, move on to spraying the colorant for an even finish.
3.7. Step 7: Finishing the Job
The final steps involve spraying the colorant and applying the finish for protection.
-
Spray Colorant: Using an airbrush, spray many thin coats of color over the leather car seat to thoroughly blend in the repair.
 Using an airbrush to spray colorant on a leather car seat repair
 -
Allow Drying Time: For the best results, ensure that each coat is very thin and given sufficient time to cure before applying the next. This enables an even finish to be built up and avoids problems with uncured colorant.
-
Apply Multiple Coats: It is not uncommon for the best repairs to apply 10-15 thin coats of colorant, depending on the extent of the damage and the color used.
-
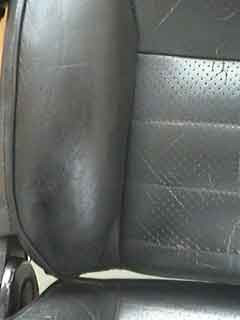
Apply Finish: Once you are happy that the repair is concealed, the colorant is cured properly, and it is well blended with the surrounding leather, apply the finish using the spray gun.
-
Spray Thin Coats: Apply 4 or 5 thin coats of the finish, again allowing time for it to dry between each coat. The finish seals the colorant in the leather, preventing it from wearing and prolonging the leather’s life.
-
Allow to Cure: When complete, allow 24 hours before using the item to ensure the filler, colorant, and finish have cured sufficiently.
By following these steps meticulously, you can achieve a professional-quality repair that restores the look and feel of your car’s leather seats.
4. Advanced Techniques and Tips
For those seeking to elevate their leather repair skills, consider these advanced techniques and tips:
- Color Matching Expertise: Achieve a flawless match by consulting with CARDIAGTECH.NET’s color matching specialists. They can provide custom colorant blends tailored to your specific leather.
- Grain Matching Mastery: For textured leather, employ grain matching techniques to seamlessly integrate the repair. Use specialized tools to replicate the original grain pattern.
- Professional Airbrushing: Invest in a high-quality airbrush system for smooth, even application of colorant and finish. Practice proper airbrushing techniques to avoid runs and inconsistencies.
5. Maintaining Your Repaired Leather Seat
Once your leather seat is repaired, proper maintenance is essential to prolong its life and prevent future damage. Here are some key maintenance tips:
- Regular Cleaning: Clean your leather seats regularly with a gentle leather cleaner to remove dirt, dust, and body oils.
- Conditioning: Apply a leather conditioner every 3-6 months to keep the leather soft and supple. This prevents cracking and drying.
- Protection: Use a leather protectant to shield against UV rays, spills, and stains.
- Prompt Spill Cleanup: Address spills immediately to prevent them from soaking into the leather.
- Avoid Harsh Chemicals: Never use harsh chemicals or abrasive cleaners on leather, as they can damage the finish.
- Professional Care: Consider professional leather cleaning and conditioning services annually for comprehensive maintenance.
6. Why Choose CARDIAGTECH.NET for Your Leather Repair Needs?
At CARDIAGTECH.NET, we understand the importance of quality and durability. Here’s why you should choose us for all your leather car seat repair needs:
- Premium Quality Products: We offer a wide range of high-quality leather repair products, ensuring a professional and long-lasting repair.
- Expert Guidance: Our team of experts provides detailed guides and support to help you through every step of the repair process.
- Color Matching Services: We offer precise color matching services to ensure a seamless blend with your car’s interior.
- Comprehensive Kits: Our leather repair kits include all the necessary tools and materials for a successful repair.
- Customer Satisfaction: We are committed to customer satisfaction, providing excellent service and support to ensure you achieve the best results.
Ready to restore your car’s leather seats? Contact CARDIAGTECH.NET today for expert advice and premium repair products. Our knowledgeable staff can help you select the right tools and materials for your specific needs.
7. Cost-Effective Solutions
Repairing a leather car seat tear yourself can save you a significant amount of money compared to professional services. Here’s a breakdown of the potential cost savings:
| Service | Estimated Cost | DIY Cost with CARDIAGTECH.NET | Savings |
|---|---|---|---|
| Professional Repair | $300 – $800 | $50 – $150 | $250 – $650 |
| Seat Replacement | $500 – $2000+ | N/A | $500 – $2000+ |
| Minor Scratch Repair | $100 – $300 | $20 – $50 | $80 – $250 |
| Full Leather Restoration | $1000 – $3000+ | $200 – $500 | $800 – $2500+ |
By choosing CARDIAGTECH.NET, you gain access to professional-quality products at a fraction of the cost, empowering you to achieve outstanding results without breaking the bank.
8. Addressing Common Issues
Even with careful execution, challenges can arise during the repair process. Here are solutions to common issues:
- Filler Cracking: Apply thinner layers of filler and allow each layer to dry completely before applying the next.
- Colorant Mismatch: Contact CARDIAGTECH.NET for custom color matching services to achieve a perfect blend.
- Uneven Texture: Use grain matching techniques and specialized tools to replicate the original texture of the leather.
9. Enhancing Vehicle Value
Maintaining your car’s interior not only improves your driving experience but also enhances its resale value. Potential buyers are more attracted to vehicles with well-maintained interiors, making your investment in leather repair a worthwhile endeavor. According to Kelley Blue Book, a clean and well-maintained interior can increase a car’s resale value by up to 10-15%.
10. Call to Action
Don’t let a torn leather seat detract from your car’s beauty and value. Contact CARDIAGTECH.NET today at 276 Reock St, City of Orange, NJ 07050, United States or WhatsApp us at +1 (641) 206-8880. Visit our website, CARDIAGTECH.NET, to explore our full range of leather repair products and take the first step towards restoring your car’s interior to its former glory. Let our experts guide you in selecting the perfect tools and materials to achieve a flawless, long-lasting repair.
FAQ: Addressing Your Leather Car Seat Repair Questions
Here are some frequently asked questions about repairing leather car seats:
-
Can I repair a leather car seat tear myself?
Yes, with the right tools, materials, and guidance from CARDIAGTECH.NET, you can effectively repair a leather car seat tear yourself.
-
What tools do I need to repair a leather car seat tear?
You’ll need a leather cleaner, leather prep, alcohol cleaner, leather repair kit, leather glue, sub-patch material, heavy filler, leather colorant kit, leather finish, abrasive pad, palette knife, tweezers, scalpel or scissors, airbrush, sponges, hair dryer, and sandpaper.
-
How do I match the color of the repair to my car’s leather?
CARDIAGTECH.NET offers color matching services to ensure a seamless blend with your car’s interior.
-
How long does it take to repair a leather car seat tear?
The repair time depends on the size and complexity of the tear. A minor tear may take a few hours, while a larger tear may take a full day.
-
How can I prevent future tears in my leather car seats?
Regular cleaning, conditioning, and protection can help prevent future tears. Avoid harsh chemicals and address spills immediately.
-
Is it cheaper to repair a leather car seat tear myself or hire a professional?
Repairing a leather car seat tear yourself is significantly cheaper than hiring a professional.
-
What is the best way to clean leather car seats?
Use a gentle leather cleaner and a soft cloth to clean your leather car seats regularly.
-
How often should I condition my leather car seats?
You should condition your leather car seats every 3-6 months to keep them soft and supple.
-
Can I use household products to repair a leather car seat tear?
No, you should only use specialized leather repair products to ensure a durable and professional-looking repair.
-
Where can I buy high-quality leather repair products?
You can buy high-quality leather repair products at CARDIAGTECH.NET.
By addressing these common questions, you can approach your leather car seat repair with confidence and achieve outstanding results.
