How To Fix Car Scrape: Your Ultimate Guide

How to fix car scrapes is a common concern for vehicle owners. At CARDIAGTECH.NET, we understand the frustration that comes with unsightly blemishes on your car’s finish. Our comprehensive guide offers effective solutions and preventative measures, utilizing the best tools and techniques for paint correction, scratch removal, and surface restoration. With the right approach, you can restore your car’s aesthetic appeal and protect its value using automotive detailing and professional car care products.
1. Identifying Car Scrape Types for Effective Repair
Before diving into the repair process, it’s crucial to accurately identify the type of car scrape you’re dealing with. Different types of scrapes require different approaches and products. Understanding the depth and severity of the damage ensures you choose the right method for optimal results.
1.1. Clear Coat Scratches
Clear coat scratches are the most superficial type of damage, affecting only the outermost layer of your car’s paint. They are typically caused by minor abrasions from tree branches, car washes, or accidental brushes against other objects.
- Characteristics: These scratches appear as fine lines or swirl marks on the surface.
- Identification: A simple test is to run your fingernail gently over the scratch. If your nail doesn’t catch, it’s likely a clear coat scratch.
- Repair: These scratches are usually the easiest to fix and can often be removed with polishing compounds and a microfiber cloth.
1.2. Base Coat Scratches
Base coat scratches penetrate deeper, going through the clear coat and into the colored base coat layer. These are more noticeable and require a slightly more involved repair process.
- Characteristics: These scratches are more visible and may show the color of the base coat underneath.
- Identification: Your fingernail might catch slightly on the edge of the scratch.
- Repair: Repairing base coat scratches often involves using touch-up paint to fill the scratch before leveling and polishing the surface.
1.3. Primer Coat Scratches
Primer coat scratches are the most severe, extending through the clear coat, base coat, and reaching the primer layer. These are usually caused by significant impacts or deep abrasions.
- Characteristics: These scratches are deep and easily visible, often exposing the gray or white primer layer.
- Identification: Your fingernail will definitely catch on these scratches, and you can clearly see the different layers of paint.
- Repair: Repairing primer coat scratches requires more extensive work, including sanding, filling, priming, painting, and clear coating. In some cases, professional help may be necessary to achieve a seamless repair.
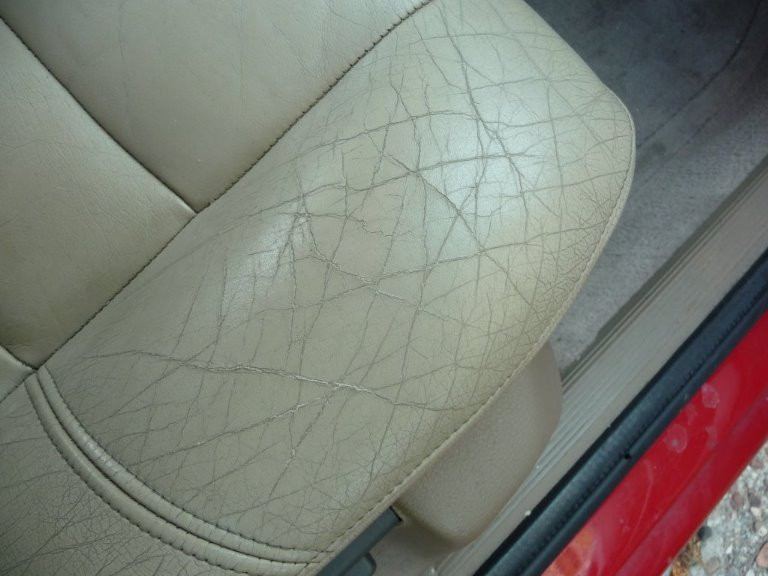
Clear coat car scratch
Clear coat damage on a car.
2. Essential Tools and Materials for Fixing Car Scrapes
Having the right tools and materials on hand is crucial for effectively fixing car scrapes. Using quality products ensures a better finish and helps prevent further damage. Here’s a list of essential items you’ll need:
| Tool/Material | Description | Use |
|---|---|---|
| Car Wash Soap | A gentle soap specifically formulated for automotive paint. | Cleaning the area around the scratch to remove dirt and debris. |
| Microfiber Cloths | Soft, lint-free cloths that won’t scratch the paint. | Applying and buffing compounds, polishes, and waxes. |
| Scratch Remover | A compound designed to remove minor scratches and swirl marks from the clear coat. | Buffing out clear coat scratches. |
| Rubbing Compound | A more abrasive compound used for leveling paint and removing deeper imperfections. | Leveling touch-up paint and removing deeper scratches. |
| Car Polish | A fine abrasive that refines the paint surface, restoring shine and clarity. | Polishing the repaired area to restore gloss. |
| Touch-Up Paint | Paint that matches your car’s color, used to fill in deeper scratches. | Filling base coat and primer coat scratches. |
| Sandpaper (Various Grits) | Used for smoothing out imperfections and preparing the surface for paint. Common grits include 1000, 2000, and 3000. | Sanding down touch-up paint and smoothing rough edges. |
| Primer | A base coat that helps paint adhere to the surface. | Applying to bare metal or plastic before painting. |
| Clear Coat | A protective layer that adds gloss and protects the paint from UV damage. | Applying over the painted area to provide a durable finish. |
| Masking Tape | Used to protect surrounding areas from being accidentally sanded or painted. | Masking off areas around the scratch to prevent damage. |
| Detailing Swabs | Small cotton swabs for precise application of touch-up paint. | Applying touch-up paint in small, controlled amounts. |
| Tack Cloth | A sticky cloth used to remove dust and debris before painting. | Wiping down the surface to ensure a clean finish. |
| Buffing Pads | Foam pads used with a polishing machine for efficient buffing. | Buffing and polishing larger areas for a professional finish. |
| Polishing Machine | An electric tool used to apply compounds and polishes evenly and efficiently. (Optional but recommended) | Smoothing and polishing the repaired area. |
| Clay Bar | A detailing tool used to remove embedded contaminants from the paint surface. | Cleaning the surface before starting any repair work. |
| Degreaser | A cleaning agent used to remove wax, grease, and other contaminants. | Ensuring the surface is clean and free of contaminants before painting. |
| Nitrile Gloves | Protect your hands from chemicals and contaminants. | Maintaining a clean and safe working environment. |
| Safety Glasses | Protect your eyes from dust and debris. | Ensuring your safety while sanding and buffing. |
| Drop Cloths | Protect the surrounding areas from overspray and drips. | Maintaining a clean workspace. |
| Good Lighting | Provides clear visibility for assessing the scrape and performing the repair. | Ensuring you can see the scrape clearly and monitor your progress. |
3. Step-by-Step Guide: How to Fix Car Scrapes
Follow these detailed steps to effectively repair car scrapes, ensuring a professional-looking finish. Remember to work in a well-lit and clean environment to achieve the best results.
3.1. Fixing Clear Coat Scratches
Clear coat scratches are the easiest to repair, often requiring just a few simple steps.
Step 1: Clean the Area
Begin by thoroughly cleaning the area around the scratch with car wash soap and water. This removes any dirt, grime, or wax that could interfere with the repair process. Rinse the area well and dry it completely with a clean microfiber cloth.
Step 2: Apply Scratch Remover
Apply a small amount of scratch remover compound to a clean microfiber cloth. Gently rub the compound onto the scratch using a circular motion. Apply light pressure and continue buffing the area until the scratch starts to fade.
Step 3: Buff the Area
Switch to a clean section of the microfiber cloth and continue buffing the area to remove any remaining scratch remover residue. Use a firm, steady pressure and a circular motion to blend the repaired area with the surrounding paint.
Step 4: Apply Car Polish
Once the scratch is gone, apply a small amount of car polish to a clean microfiber cloth. Buff the area to restore the shine and clarity of the clear coat. This step helps to smooth out any minor imperfections and leave a glossy finish.
Step 5: Wax the Area
Finally, apply a coat of car wax to protect the repaired area and enhance the shine. This helps to seal the paint and prevent future damage. Use a clean applicator pad to apply the wax evenly, and then buff it off with a clean microfiber cloth.
3.2. Repairing Base Coat Scratches
Base coat scratches require a bit more attention and the use of touch-up paint.
Step 1: Clean the Area
As with clear coat scratches, start by cleaning the area around the scratch with car wash soap and water. Dry the area thoroughly with a clean microfiber cloth.
Step 2: Prepare the Scratch
Use a fine-grit sandpaper (2000-grit or higher) to gently smooth the edges of the scratch. This helps to create a smooth surface for the touch-up paint to adhere to. Be careful not to sand too aggressively, as you could damage the surrounding paint.
Step 3: Apply Touch-Up Paint
Using a small brush or detailing swab, carefully apply a small amount of touch-up paint to the scratch. Apply the paint in thin layers, allowing each layer to dry completely before applying the next. This prevents the paint from running or clumping.
Step 4: Allow the Paint to Dry
Allow the touch-up paint to dry completely, usually for several hours or overnight. This ensures that the paint is fully cured and ready for the next step.
Step 5: Level the Paint
Once the paint is dry, use a fine-grit sandpaper (3000-grit) to gently level the touch-up paint with the surrounding paint. Wrap the sandpaper around a small block for better control, and use a light touch to avoid damaging the surrounding area.
Step 6: Apply Rubbing Compound
Apply a small amount of rubbing compound to a clean microfiber cloth. Rub the compound onto the leveled area using a circular motion. This helps to smooth out any remaining imperfections and blend the touch-up paint with the surrounding paint.
Step 7: Apply Car Polish
Once the scratch is gone, apply a small amount of car polish to a clean microfiber cloth. Buff the area to restore the shine and clarity of the clear coat.
Step 8: Wax the Area
Apply a coat of car wax to protect the repaired area and enhance the shine.
3.3. Addressing Primer Coat Scratches
Primer coat scratches require the most extensive repair process, often involving multiple steps and products.
Step 1: Clean the Area
Start by cleaning the area around the scratch with car wash soap and water. Dry the area thoroughly with a clean microfiber cloth.
Step 2: Sand the Area
Use a medium-grit sandpaper (400-grit) to remove any rust or rough edges from the scratch. Then, switch to a finer-grit sandpaper (800-grit) to smooth the surface and prepare it for primer.
Step 3: Apply Primer
Apply a thin, even coat of automotive primer to the sanded area. This helps the paint adhere to the surface and provides a uniform base for the touch-up paint. Allow the primer to dry completely, usually for several hours.
Step 4: Sand the Primer
Once the primer is dry, use a fine-grit sandpaper (2000-grit) to gently smooth the surface. This helps to remove any imperfections and create a smooth base for the touch-up paint.
Step 5: Apply Touch-Up Paint
Using a small brush or detailing swab, carefully apply a small amount of touch-up paint to the primed area. Apply the paint in thin layers, allowing each layer to dry completely before applying the next.
Step 6: Allow the Paint to Dry
Allow the touch-up paint to dry completely, usually for several hours or overnight.
Step 7: Level the Paint
Once the paint is dry, use a fine-grit sandpaper (3000-grit) to gently level the touch-up paint with the surrounding paint.
Step 8: Apply Rubbing Compound
Apply a small amount of rubbing compound to a clean microfiber cloth. Rub the compound onto the leveled area using a circular motion.
Step 9: Apply Car Polish
Apply a small amount of car polish to a clean microfiber cloth and buff the area to restore the shine and clarity of the clear coat.
Step 10: Apply Clear Coat (Optional)
For added protection and shine, you can apply a thin coat of clear coat over the painted area. Allow the clear coat to dry completely before proceeding to the final step.
Step 11: Wax the Area
Apply a coat of car wax to protect the repaired area and enhance the shine.
4. Advanced Techniques for Car Scrape Repair
For deeper scratches and more complex repairs, consider these advanced techniques:
4.1. Wet Sanding
Wet sanding involves using sandpaper with water as a lubricant to smooth out imperfections and level paint surfaces. This technique is particularly useful for removing orange peel texture and blending touch-up paint.
- Process: Soak the sandpaper in water for several minutes before use. Apply a small amount of water to the area being sanded and use light, even pressure to sand the surface. Rinse the area frequently to remove debris and monitor your progress.
4.2. Color Sanding
Color sanding is a technique used to remove imperfections in the paint’s color coat before applying clear coat. It involves using fine-grit sandpaper to lightly sand the color coat, creating a smooth surface for the clear coat to adhere to.
- Process: After applying the color coat and allowing it to dry, use 2000-grit sandpaper to lightly sand the surface. Be careful not to sand through the color coat. Clean the surface thoroughly before applying the clear coat.
4.3. Paintless Dent Repair (PDR)
While not directly related to scratch repair, Paintless Dent Repair (PDR) is a technique used to remove minor dents without damaging the paint. If you have a dent alongside a scratch, PDR can be used to restore the panel’s shape before addressing the scratch.
- Process: PDR involves using specialized tools to gently massage the metal from behind the panel, pushing the dent back into its original shape. This technique requires skill and experience but can save you the cost of traditional bodywork.
5. The Importance of Professional Car Detailing
While DIY methods can be effective for minor scratches, professional car detailing offers a more comprehensive solution for more severe damage. Professional detailers have the expertise, equipment, and products to restore your car’s paint to its original condition.
5.1. Benefits of Professional Detailing
- Expertise: Professional detailers have extensive knowledge of paint types, scratch removal techniques, and the best products for your car’s finish.
- Equipment: They have access to professional-grade equipment, such as polishing machines, paint thickness gauges, and specialized lighting, which allows them to achieve a superior finish.
- Time Savings: Detailing can be a time-consuming process, especially for more extensive repairs. Hiring a professional saves you time and effort.
- Quality Results: Professional detailers can achieve results that are difficult to replicate with DIY methods, leaving your car looking like new.
- Long-Term Protection: They can apply protective coatings, such as ceramic coatings, that provide long-term protection against scratches, UV damage, and other environmental factors.
5.2. When to Seek Professional Help
Consider seeking professional help for the following situations:
- Deep Scratches: Primer coat scratches or scratches that extend to the metal.
- Large Areas of Damage: Scratches that cover a significant portion of the car’s surface.
- Complex Paint Finishes: Cars with multi-stage paint finishes or custom paint jobs.
- Lack of Experience: If you are not comfortable performing the repairs yourself or lack the necessary experience.
6. Preventing Car Scrapes: Proactive Measures
Prevention is always better than cure. Taking proactive measures to protect your car’s paint can save you time, money, and frustration in the long run.
6.1. Regular Washing and Waxing
Regular washing removes dirt, grime, and other contaminants that can scratch the paint. Waxing provides a protective layer that shields the paint from minor abrasions and UV damage.
- Frequency: Wash your car every two weeks and wax it every three to six months.
- Products: Use a high-quality car wash soap and wax that is specifically formulated for your car’s paint type.
6.2. Protective Coatings
Protective coatings, such as ceramic coatings and paint protection film (PPF), provide a durable barrier against scratches, UV damage, and other environmental factors.
- Ceramic Coatings: These coatings are applied to the paint’s surface and form a hard, glossy layer that is resistant to scratches and chemicals.
- Paint Protection Film (PPF): PPF is a clear, self-healing film that is applied to the car’s surface, providing a physical barrier against scratches, rock chips, and other damage.
6.3. Careful Parking
Be mindful of where you park your car. Avoid parking near trees, bushes, or other objects that could scratch the paint.
- Tips: Park in well-lit areas, avoid tight spaces, and be careful when opening doors to avoid hitting other vehicles.
6.4. Safe Driving Habits
Avoid driving on gravel roads or in areas with construction debris. These conditions can increase the risk of scratches and rock chips.
- Tips: Maintain a safe following distance from other vehicles and avoid sudden stops or turns that could cause debris to kick up.
6.5. Professional Detailing
Consider having your car professionally detailed on a regular basis. Professional detailers can identify and address minor scratches before they become more severe, helping to maintain your car’s appearance and value.
- Frequency: Schedule a professional detailing appointment every six to twelve months.
7. Cost Considerations for Car Scrape Repair
The cost of repairing car scrapes can vary widely depending on the severity of the damage, the type of repair, and whether you choose to do it yourself or hire a professional.
7.1. DIY Repair Costs
DIY repairs can be more cost-effective for minor scratches, but you’ll need to factor in the cost of the necessary tools and materials.
| Item | Estimated Cost |
|---|---|
| Car Wash Soap | $10 – $20 |
| Microfiber Cloths | $10 – $30 |
| Scratch Remover | $15 – $30 |
| Rubbing Compound | $15 – $30 |
| Car Polish | $15 – $30 |
| Touch-Up Paint | $20 – $40 |
| Sandpaper | $10 – $20 |
| Primer | $10 – $20 |
| Clear Coat | $10 – $20 |
| Masking Tape | $5 – $10 |
| Detailing Swabs | $5 – $10 |
| Total | $125 – $260 |
7.2. Professional Repair Costs
Professional repairs can be more expensive, but they offer the advantage of expertise and quality results.
| Type of Repair | Estimated Cost |
|---|---|
| Clear Coat Scratch Removal | $50 – $150 |
| Base Coat Scratch Repair | $150 – $300 |
| Primer Coat Scratch Repair | $300 – $500+ |
| Paintless Dent Repair (PDR) | $100 – $300 |
| Full Car Detailing | $200 – $500+ |
| Ceramic Coating Application | $500 – $2000+ |
| Paint Protection Film (PPF) | $1000 – $5000+ |
7.3. Factors Affecting Cost
- Severity of Damage: Deeper scratches and larger areas of damage will cost more to repair.
- Type of Paint: Complex paint finishes, such as multi-stage paints or custom colors, may require specialized techniques and products, increasing the cost.
- Location: Labor costs can vary depending on your location.
- Shop Reputation: More reputable shops may charge higher prices for their services.
8. Common Mistakes to Avoid When Fixing Car Scrapes
Avoiding common mistakes can save you time, money, and frustration when repairing car scrapes.
8.1. Using the Wrong Products
Using the wrong products can damage your car’s paint and make the problem worse. Always use products that are specifically formulated for automotive paint.
- Tip: Read the product labels carefully and choose products that are appropriate for the type of scratch you are trying to repair.
8.2. Sanding Too Aggressively
Sanding too aggressively can remove too much paint and damage the surrounding area. Use a light touch and fine-grit sandpaper to avoid damaging the paint.
- Tip: Start with a higher grit sandpaper and gradually work your way down to a lower grit if necessary.
8.3. Applying Too Much Touch-Up Paint
Applying too much touch-up paint can create a blob or uneven surface. Apply the paint in thin layers, allowing each layer to dry completely before applying the next.
- Tip: Use a small brush or detailing swab for precise application.
8.4. Not Cleaning the Area Properly
Failing to clean the area properly can leave dirt and debris that will interfere with the repair process. Always clean the area thoroughly with car wash soap and water before starting any repair work.
- Tip: Use a clay bar to remove embedded contaminants from the paint surface.
8.5. Rushing the Process
Rushing the repair process can lead to mistakes and poor results. Take your time and follow each step carefully to ensure a professional-looking finish.
- Tip: Allow ample time for each layer of paint and compound to dry completely before proceeding to the next step.
9. How to Match Car Paint Color for Touch-Up
Matching the touch-up paint to your car’s exact color is essential for a seamless repair. Here’s how to find the correct paint code and ensure a perfect match:
9.1. Locate the Paint Code
The paint code is a unique identifier that specifies the exact color of your car’s paint. It is typically located on a sticker or plate in one of the following locations:
- Driver’s Side Doorjamb: Check the sticker on the doorjamb for a “Paint Code” or “Color Code” designation.
- Engine Compartment: Look for a plate or sticker on the firewall or inner fender.
- Glove Box: Some manufacturers place the paint code sticker inside the glove box.
- Owner’s Manual: Consult your owner’s manual for the location of the paint code.
9.2. Decode the Paint Code
Once you’ve located the paint code, you’ll need to decode it to determine the exact color of your car’s paint. The paint code may consist of letters, numbers, or a combination of both.
- Example: A common paint code format is “WA-8555” for Bright White.
9.3. Purchase Matching Touch-Up Paint
With the paint code in hand, you can purchase matching touch-up paint from an automotive paint supplier or your car’s manufacturer.
- Options:
- Dealership: Your car’s dealership can provide touch-up paint that is specifically matched to your car’s paint code.
- Automotive Paint Supplier: These suppliers can mix custom touch-up paint based on your car’s paint code.
- Online Retailers: Online retailers offer a wide selection of touch-up paints, but be sure to verify that the paint code matches your car’s color.
9.4. Test the Paint
Before applying the touch-up paint to your car, test it on a small, inconspicuous area to ensure a perfect match.
- Process: Apply a small amount of paint to a piece of cardboard or masking tape and compare it to your car’s paint in natural light. If the color matches, you can proceed with the repair. If not, return the paint and try a different supplier.
10. When to Consult CARDIAGTECH.NET Experts
While DIY repairs are feasible, sometimes it’s best to consult experts at CARDIAGTECH.NET. Our skilled professionals offer top-notch tools for automotive repair, ensuring your vehicle receives the best care.
10.1. Recognizing Limitations
If the scratch is too deep, covers a large area, or you’re uncomfortable performing the repair, it’s time to seek professional assistance. Attempting a repair beyond your capabilities can lead to further damage and higher costs.
10.2. CARDIAGTECH.NET Services
CARDIAGTECH.NET provides professional car detailing services using advanced techniques and premium products. Our technicians are trained to handle all types of scratches and paint imperfections.
- Comprehensive Assessment: We thoroughly inspect your car’s paint to identify the type and extent of the damage.
- Customized Solutions: We develop a tailored repair plan based on your car’s specific needs.
- Expert Techniques: We use advanced techniques such as wet sanding, color sanding, and paint correction to achieve a seamless finish.
- Quality Products: We use premium products from trusted brands to ensure long-lasting results.
10.3. Contact Information
For professional car detailing services and expert advice, contact CARDIAGTECH.NET today:
- Address: 276 Reock St, City of Orange, NJ 07050, United States
- WhatsApp: +1 (641) 206-8880
- Website: CARDIAGTECH.NET
Don’t let car scrapes diminish your vehicle’s appeal. Contact CARDIAGTECH.NET for expert solutions and premium automotive care. Let us help you restore your car to its pristine condition.
FAQ: How to Fix Car Scrapes
1. What is the best way to fix a minor scratch on my car?
For minor clear coat scratches, use a scratch remover compound applied with a microfiber cloth. Gently rub in a circular motion, then buff the area to restore shine.
2. Can I use toothpaste to remove car scratches?
While toothpaste may temporarily reduce the appearance of very fine scratches, it’s not a long-term solution and can potentially damage your car’s paint. It’s better to use a dedicated scratch remover.
3. How do I know if a scratch is too deep to fix myself?
If your fingernail catches on the scratch and you can see the primer or bare metal, the scratch is likely too deep to fix yourself and requires professional attention.
4. What is touch-up paint, and how do I use it?
Touch-up paint is paint that matches your car’s color, used to fill in deeper scratches. Apply thin layers to the cleaned and sanded scratch, allowing each layer to dry before applying the next.
5. How can I prevent future scratches on my car?
Regular washing and waxing, using protective coatings like ceramic coatings, careful parking, and safe driving habits can help prevent future scratches.
6. What is the difference between rubbing compound and car polish?
Rubbing compound is more abrasive and used for leveling paint and removing deeper imperfections. Car polish is a finer abrasive used to restore shine and clarity.
7. Is it necessary to wax my car after fixing a scratch?
Yes, waxing is essential as it protects the repaired area and enhances the shine. It helps seal the paint and prevent future damage.
8. Can I use a household cleaner to wash my car?
No, household cleaners can be too harsh and damage your car’s paint. Use a car wash soap specifically formulated for automotive finishes.
9. What is paint correction, and is it necessary?
Paint correction is the process of removing imperfections like swirl marks, scratches, and oxidation to restore the paint’s original condition. It’s not always necessary but highly recommended for a flawless finish.
10. Where can I find professional car detailing services near me?
Contact CARDIAGTECH.NET for professional car detailing services. We offer expert solutions and premium automotive care to restore your car to its pristine condition.
Looking for the right tools to fix those annoying car scrapes? Don’t wait any longer. Contact CARDIAGTECH.NET at +1 (641) 206-8880 today and let our experts guide you to the perfect solutions. Our team at 276 Reock St, City of Orange, NJ 07050, United States is ready to provide you with professional advice and high-quality products. Visit our website CARDIAGTECH.NET now and take the first step towards a flawless car finish.