How To Fix Car Upholstery: A Comprehensive Guide
Is your car’s interior looking a little worse for wear? Don’t worry, CARDIAGTECH.NET is here to help. This guide provides simple yet effective methods to rejuvenate your vehicle’s interior, focusing on easy and affordable upholstery repair techniques. Discover how to fix wear and tear and keep your vehicle looking its best with fabric repair solutions that you can buy from CARDIAGTECH.NET.
1. Understanding the Basics of Car Upholstery Repair
Before diving into specific repair methods, let’s cover some essential knowledge about car upholstery. Upholstery refers to the materials used to cover the seats and interior of your car. These materials can range from cloth and vinyl to leather and synthetic alternatives. Each material has its own set of care requirements and repair techniques. Knowing what you’re working with will help you choose the best approach.
1.1. Identifying Common Types of Upholstery Damage
Recognizing the kind of damage you’re dealing with is the first step toward effective repair. Here are a few common types of upholstery damage:
- Tears: These can range from small rips to large gashes, often caused by sharp objects or wear and tear.
- Holes: Common culprits include cigarette burns, pet damage, or punctures from sharp items.
- Stains: Spills, dirt, and grime can lead to unsightly stains that diminish the overall look of your car’s interior.
- Fading: Prolonged exposure to sunlight can cause upholstery to fade, particularly in darker colors.
- Scratches and Scuffs: These are common in leather and vinyl upholstery, often caused by abrasion or sharp objects.
1.2. Essential Tools and Materials for Upholstery Repair
Having the right tools and materials on hand can make the repair process smoother and more efficient. Here’s a list of essentials:
- Upholstery Needles: Curved and straight needles are useful for different types of repairs.
- Upholstery Thread: Choose a heavy-duty thread that matches the color of your upholstery.
- Fabric Scissors: Sharp scissors for precise cutting of fabric patches.
- Seam Ripper: Useful for removing old stitching or damaged fabric.
- Fabric Adhesive: For bonding patches to the upholstery.
- Leather Repair Kit: If you have leather upholstery, a specialized kit can help with scratches and minor damage.
- Cleaning Supplies: Including upholstery cleaner, brushes, and microfiber cloths.
- Steamer: For removing stubborn stains and refreshing the fabric.
- Vacuum Cleaner: To remove loose debris and prepare the surface for repair.
- Heat Gun or Iron: For activating fabric adhesive.
CARDIAGTECH.NET provides all the necessary tools and materials you need to perform professional-grade upholstery repairs.
1.3. Safety Precautions
Before you begin any upholstery repair project, it’s important to take necessary safety precautions:
- Ventilation: Work in a well-ventilated area, especially when using adhesives or cleaning chemicals.
- Protective Gear: Wear gloves and eye protection to avoid contact with chemicals and sharp tools.
- Disconnect Battery: If you’re working near electrical components, disconnect the car battery to prevent accidental shocks.
- Read Instructions: Always read and follow the manufacturer’s instructions for all products you use.
2. Step-by-Step Guide to Fixing Cloth Upholstery
Cloth upholstery is common in many vehicles due to its comfort and affordability. Here’s how to repair common types of damage:
2.1. Repairing Small Tears
Small tears in cloth upholstery can often be repaired with basic sewing techniques.
Materials Needed:
- Curved upholstery needle
- Upholstery thread (matching color)
- Fabric sealant
Steps:
- Prepare the Area: Clean the area around the tear with a vacuum cleaner and upholstery cleaner.
- Thread the Needle: Thread the curved upholstery needle with a length of upholstery thread.
- Stitch the Tear: Starting from the back of the fabric, insert the needle and begin stitching the edges of the tear together. Use small, even stitches to create a tight seam.
- Secure the Stitch: Once you’ve closed the tear, tie off the thread securely and trim any excess.
- Apply Fabric Sealant: Apply a thin layer of fabric sealant along both sides of the repair to prevent fraying.
- Dry: Allow the sealant to dry completely before using the seat.
Sewing car upholstery
2.2. Patching Holes in Cloth Seats
For holes caused by burns or other damage, patching is an effective solution.
Materials Needed:
- Fabric patch (matching color and texture)
- Fabric adhesive
- Scissors
- Iron or heat gun
- Interfacing fabric
Steps:
- Prepare the Area: Clean the area around the hole and trim any frayed edges.
- Cut the Patch: Cut a piece of fabric patch slightly larger than the hole.
- Apply Adhesive: Place a piece of interfacing fabric over the hole, then apply fabric adhesive to the back of the patch.
- Position the Patch: Carefully position the patch over the hole, ensuring it aligns with the surrounding fabric.
- Bond the Patch: Use an iron or heat gun to activate the adhesive, pressing firmly for the recommended time.
- Dry: Allow the adhesive to dry completely before using the seat.
2.3. Removing Stains from Cloth Upholstery
Stains can be unsightly and diminish the appearance of your car’s interior.
Materials Needed:
- Upholstery cleaner
- Soft brush
- Microfiber cloths
- Steamer (optional)
Steps:
- Vacuum the Area: Remove loose debris and dirt from the stained area.
- Apply Cleaner: Spray upholstery cleaner onto the stain, following the manufacturer’s instructions.
- Scrub Gently: Use a soft brush to gently scrub the stain in a circular motion.
- Blot the Area: Use a clean microfiber cloth to blot the area, lifting the stain.
- Repeat: Repeat the process as needed until the stain is removed.
- Steam (Optional): Use a steamer to further lift the stain and refresh the fabric.
- Dry: Allow the area to dry completely, preferably in a well-ventilated area.
3. Restoring Leather Upholstery: Tips and Techniques
Leather upholstery requires special care due to its unique properties. Here’s how to address common issues:
3.1. Buffing Out Scratches
Minor scratches can often be buffed out with leather conditioning cream.
Materials Needed:
- Leather conditioning cream
- Soft microfiber cloths
Steps:
- Clean the Area: Clean the scratched area with a leather cleaner to remove any dirt or debris.
- Apply Cream: Apply a small amount of leather conditioning cream to a soft microfiber cloth.
- Buff the Scratch: Gently buff the scratched area in a circular motion, applying light pressure.
- Wipe Away Excess: Use a clean microfiber cloth to wipe away any excess cream.
- Repeat: Repeat the process as needed until the scratch is minimized.
3.2. Repairing Cracks and Tears in Leather
For more significant damage, a leather repair kit is essential.
Materials Needed:
- Leather repair kit
- Leather filler
- Sandpaper
- Leather dye (matching color)
- Applicator sponges
Steps:
- Clean the Area: Clean the damaged area with a leather cleaner.
- Apply Leather Filler: Apply leather filler to the cracks or tears, smoothing it out with an applicator sponge.
- Sand the Filler: Once the filler is dry, gently sand the area to create a smooth surface.
- Apply Leather Dye: Apply leather dye to the repaired area, blending it with the surrounding leather.
- Dry: Allow the dye to dry completely before using the seat.
- Apply Conditioner: Finish by applying leather conditioner to protect and moisturize the leather.
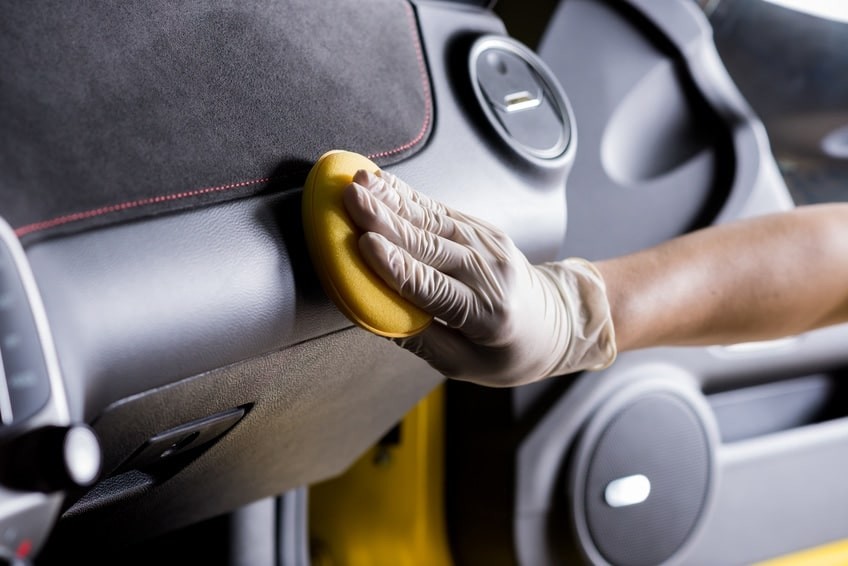
3.3. Cleaning and Conditioning Leather Upholstery
Regular cleaning and conditioning can help maintain the appearance and longevity of leather upholstery.
Materials Needed:
- Leather cleaner
- Leather conditioner
- Soft microfiber cloths
Steps:
- Vacuum the Area: Remove loose debris and dirt from the leather surface.
- Apply Cleaner: Spray leather cleaner onto a soft microfiber cloth and gently wipe the leather surface.
- Wipe Away Excess: Use a clean, damp microfiber cloth to wipe away any excess cleaner.
- Apply Conditioner: Apply leather conditioner to a clean microfiber cloth and gently massage it into the leather.
- Dry: Allow the conditioner to absorb into the leather for the recommended time.
- Buff the Surface: Buff the leather surface with a clean, dry microfiber cloth to remove any excess conditioner.
4. Vinyl Upholstery Repair: A Practical Approach
Vinyl is a durable and easy-to-maintain upholstery option. Here’s how to repair common damage:
4.1. Fixing Small Tears and Punctures
Small tears and punctures in vinyl can be repaired with a vinyl repair kit.
Materials Needed:
- Vinyl repair kit
- Vinyl adhesive
- Applicator tool
- Heat gun
Steps:
- Clean the Area: Clean the damaged area with a vinyl cleaner.
- Apply Adhesive: Apply vinyl adhesive to the edges of the tear or puncture.
- Position Repair Fabric: Place the repair fabric from the kit over the adhesive.
- Apply Heat: Use a heat gun to activate the adhesive, pressing firmly with the applicator tool.
- Cure: Allow the adhesive to cure completely before using the seat.
4.2. Restoring Faded Vinyl
Faded vinyl can be restored with a vinyl restorer product.
Materials Needed:
- Vinyl restorer
- Soft microfiber cloths
Steps:
- Clean the Area: Clean the faded vinyl surface with a vinyl cleaner.
- Apply Restorer: Apply vinyl restorer to a soft microfiber cloth and gently wipe the vinyl surface.
- Allow to Absorb: Allow the restorer to absorb into the vinyl for the recommended time.
- Buff the Surface: Buff the vinyl surface with a clean, dry microfiber cloth to remove any excess restorer.
4.3. Cleaning and Maintaining Vinyl Upholstery
Regular cleaning can keep vinyl upholstery looking its best.
Materials Needed:
- Vinyl cleaner
- Soft brush
- Microfiber cloths
Steps:
- Vacuum the Area: Remove loose debris and dirt from the vinyl surface.
- Apply Cleaner: Spray vinyl cleaner onto a soft brush and gently scrub the vinyl surface.
- Wipe Away Excess: Use a clean, damp microfiber cloth to wipe away any excess cleaner.
- Dry: Allow the vinyl surface to dry completely.
5. Advanced Techniques for Upholstery Repair
For more complex repairs, consider these advanced techniques:
5.1. Replacing Seat Panels
When damage is extensive, replacing an entire seat panel may be necessary.
Materials Needed:
- New seat panel
- Upholstery tools (hog ring pliers, seam ripper)
- Upholstery thread
- Sewing machine
Steps:
- Remove Old Panel: Use a seam ripper to remove the old seat panel from the seat frame.
- Install New Panel: Align the new seat panel with the seat frame and secure it in place with hog rings or by sewing it with an upholstery sewing machine.
- Reassemble: Reassemble the seat, ensuring all components are properly secured.
5.2. Dealing with Sagging Seats
Sagging seats can be uncomfortable and unsightly. Here’s how to address this issue:
Materials Needed:
- Seat foam
- Upholstery adhesive
- Scissors
Steps:
- Remove Seat Cover: Carefully remove the seat cover to expose the underlying foam.
- Add Foam: Add new seat foam to the areas where the foam has deteriorated.
- Secure Foam: Use upholstery adhesive to secure the new foam in place.
- Reinstall Cover: Reinstall the seat cover, ensuring a snug fit.
5.3. Customizing Upholstery
Consider customizing your car’s upholstery for a unique look.
Materials Needed:
- New upholstery fabric
- Upholstery tools
- Sewing machine
Steps:
- Remove Old Upholstery: Remove the old upholstery from the seats.
- Create Pattern: Use the old upholstery as a pattern to cut the new fabric.
- Sew New Upholstery: Sew the new upholstery pieces together, following the pattern.
- Install New Upholstery: Install the new upholstery onto the seats, securing it in place with hog rings or by sewing.
6. Maintaining Your Car’s Upholstery: Best Practices
Proper maintenance is key to prolonging the life of your car’s upholstery.
6.1. Regular Cleaning Schedule
- Weekly: Vacuum the upholstery to remove loose dirt and debris.
- Monthly: Clean the upholstery with a suitable cleaner, following the manufacturer’s instructions.
- Annually: Deep clean the upholstery with a steamer to refresh the fabric and remove stubborn stains.
6.2. Protection Measures
- Seat Covers: Use seat covers to protect the upholstery from wear and tear, spills, and sunlight.
- Sun Shades: Use sun shades to minimize fading caused by prolonged exposure to sunlight.
- Avoid Sharp Objects: Be careful when placing sharp objects on the seats to avoid tears and punctures.
6.3. Professional Detailing
Consider professional detailing services for a thorough cleaning and restoration of your car’s interior.
7. Why Choose CARDIAGTECH.NET for Your Upholstery Repair Needs
CARDIAGTECH.NET is your trusted partner for all your car upholstery repair needs. Here’s why:
- High-Quality Products: We offer a wide range of high-quality tools and materials for upholstery repair.
- Expert Advice: Our team of experts can provide advice and guidance on the best repair techniques for your specific needs.
- Comprehensive Kits: We offer comprehensive repair kits that include everything you need to tackle common upholstery issues.
- Competitive Pricing: Our products are competitively priced, ensuring you get the best value for your money.
- Customer Satisfaction: We are committed to providing exceptional customer service and ensuring your satisfaction.
8. Upholstery Repair Cost Analysis
Understanding the costs associated with upholstery repair can help you make informed decisions.
8.1. DIY vs. Professional Repair Costs
- DIY Repair: Costs can range from $20 to $100, depending on the tools and materials needed.
- Professional Repair: Costs can range from $100 to $500 or more, depending on the extent of the damage and the type of upholstery.
8.2. Factors Affecting Repair Costs
- Type of Upholstery: Leather and other premium materials typically cost more to repair than cloth or vinyl.
- Extent of Damage: Minor tears and stains are less expensive to repair than extensive damage requiring panel replacement.
- Labor Costs: Professional labor costs vary depending on the region and the complexity of the repair.
8.3. Cost-Saving Tips
- Address Damage Early: Repair small tears and stains promptly to prevent them from worsening.
- Use Quality Products: Invest in high-quality repair products to ensure long-lasting results.
- Consider DIY for Minor Repairs: Tackle minor repairs yourself to save on labor costs.
9. Upholstery Repair: Before and After
See the dramatic difference upholstery repair can make.
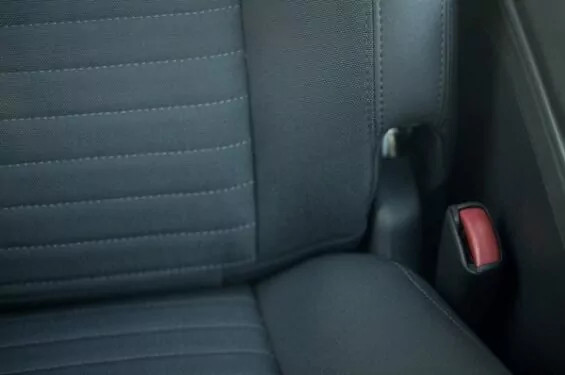
9.1. Case Study 1: Cloth Seat Tear
- Before: A small tear in a cloth seat diminishes the overall appearance of the interior.
- After: The tear is repaired with a curved needle and upholstery thread, and the fabric is sealed to prevent fraying.
9.2. Case Study 2: Leather Seat Scratch
- Before: Scratches on a leather seat make the interior look worn and neglected.
- After: The scratches are buffed out with leather conditioning cream, restoring the leather’s smooth appearance.
9.3. Case Study 3: Vinyl Seat Fade
- Before: Faded vinyl seats make the interior look old and tired.
- After: The vinyl is restored with a vinyl restorer, bringing back its original color and luster.
10. Frequently Asked Questions (FAQ) About Car Upholstery Repair
Here are some common questions about car upholstery repair:
- What is the best way to clean car upholstery? Vacuum the area, apply an appropriate cleaner, scrub gently, and blot with a clean cloth.
- How can I remove stains from my car seats? Use an upholstery cleaner, scrub gently, and blot the area. For stubborn stains, consider a steamer.
- Can I repair a tear in my leather car seat? Yes, use a leather repair kit with leather filler and dye.
- How do I fix a burn hole in my car seat? Use a fabric patch and adhesive for cloth seats, or a vinyl repair kit for vinyl seats.
- What tools do I need for car upholstery repair? Upholstery needles, thread, scissors, fabric adhesive, and a steamer.
- How much does it cost to repair car upholstery? DIY repairs can cost $20-$100, while professional repairs can range from $100-$500 or more.
- Can I replace a seat panel myself? Yes, but it requires specialized tools and knowledge.
- How can I prevent damage to my car upholstery? Use seat covers, sun shades, and avoid placing sharp objects on the seats.
- What is the best way to condition leather seats? Apply leather conditioner to a clean cloth and massage it into the leather.
- Where can I find quality upholstery repair products? CARDIAGTECH.NET offers a wide range of high-quality tools and materials for upholstery repair.
Maintaining your car’s upholstery is essential for preserving its value and comfort. With the right tools, techniques, and products from CARDIAGTECH.NET, you can keep your car’s interior looking its best.
Don’t let damaged upholstery detract from your driving experience. Contact CARDIAGTECH.NET today at:
- Address: 276 Reock St, City of Orange, NJ 07050, United States
- WhatsApp: +1 (641) 206-8880
- Website: CARDIAGTECH.NET
Our team is ready to assist you with expert advice and the highest quality products to restore your car’s interior to its former glory.