How To Fix Caster On A Car: A Comprehensive Guide
Fixing the caster on your car can significantly improve handling and stability. This detailed guide by CARDIAGTECH.NET will show you how to measure, adjust, and understand the effects of caster adjustment, helping you achieve optimal performance.
1. Understanding Caster: The Basics
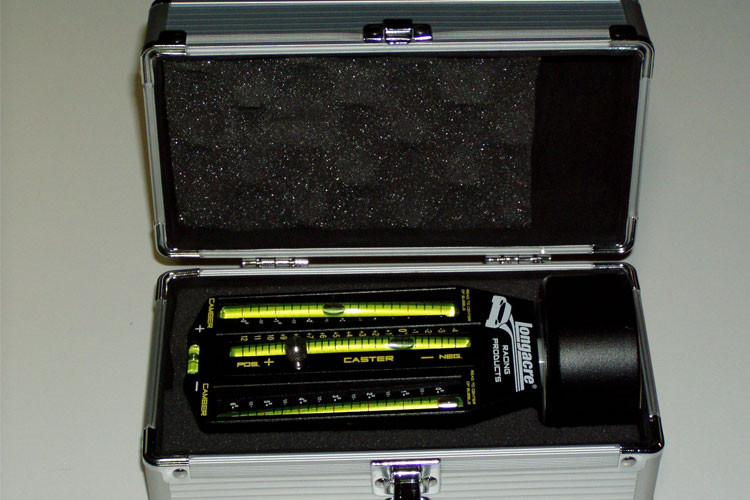
Caster is the angle of the steering axis relative to the vertical axis of a wheel, viewed from the side of the vehicle. Understanding caster, camber, and toe settings is crucial for vehicle alignment. Positive caster means the steering axis is tilted towards the rear of the car, while negative caster means it’s tilted forward. Proper caster alignment is essential for achieving optimal handling characteristics. A specialized tool like a caster camber gauge can help ensure accurate measurements.
1.1. Why Caster Matters
Proper caster helps your car maintain straight-line stability, improves steering feel, and enhances cornering performance. Addressing these common issues can greatly enhance the driving experience.
- Stability: Caster helps keep your car tracking straight, especially at high speeds.
- Steering Feel: It affects how the steering wheel returns to center after a turn.
- Cornering: Caster influences weight distribution during turns, affecting grip and handling.
2. Identifying Caster Problems
Recognizing the signs of improper caster can prevent further issues and improve your vehicle’s handling. Ignoring these warning signs could lead to uneven tire wear and compromised safety.
2.1. Common Symptoms
- Wandering Steering: The car drifts or pulls to one side.
- Vague Steering Feel: Lack of feedback from the road.
- Difficulty Returning to Center: The steering wheel doesn’t straighten after a turn.
- High-Speed Instability: Shaky or unstable steering at higher speeds.
2.2. Factors Affecting Caster
Several factors can cause caster misalignment. Identifying these elements is vital for proper diagnosis and repair.
- Suspension Wear: Worn ball joints, bushings, and tie rod ends.
- Accidents: Impact damage to suspension components.
- Ride Height Changes: Lowering or lifting the vehicle without proper adjustments.
- Improper Installation: Suspension components not installed correctly.
- Road Conditions: Bumpy or uneven roads causing gradual misalignment.
3. Measuring Caster Angle
Before adjusting caster, accurately measuring the current angle is crucial. Two common methods are used for this purpose. This accurate measurement can then inform adjustments, leading to improved vehicle handling and stability.
3.1. Using Turning Plates and a Gauge
This method is quick and suitable for trackside adjustments.
- Set Up: Place the front wheels on turning plates set to 0 degrees.
- Initial Measurement: Set the caster gauge to 0 degrees.
- Turn Outward: Turn the wheels outward by 20 degrees.
- Turn Inward: Turn the wheels inward by 20 degrees.
- Read Gauge: The reading on the caster gauge indicates the caster angle.
- Repeat: Perform the same steps for the other wheel.
Measuring caster using turning plates and a digital gauge
3.2. Measuring Wishbone Mounting Points
This technique is primarily used during chassis design or when developing suspension components.
- Locate Mounting Points: Identify the upper and lower wishbone mounting points at the hub.
- Draw Points: Create a 2D side view drawing of these points.
- Draw Center Line: Draw the vertical center line of the wheel.
- Connect Wishbone Points: Connect the upper and lower wishbone mounting points with a straight line.
- Measure Angle: The angle between the line connecting the wishbone points and the vertical center line is the caster angle.
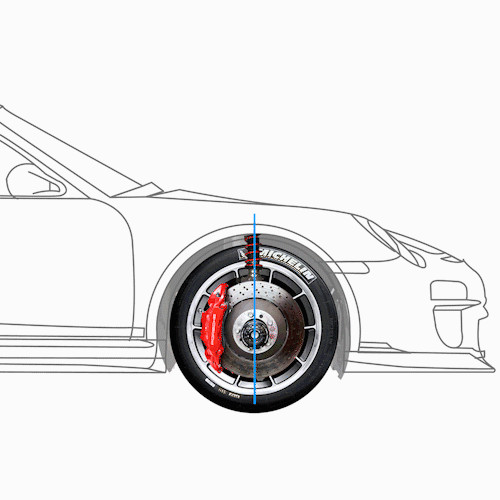 Diagram illustrating caster angle measurement using wishbone mounting points
3.3. Measuring MacPherson Strut Angle
For vehicles with MacPherson strut suspension, use this method.
- Draw Strut Line: Draw a line down the length of the coilover to the ground.
- Draw Center Line: Draw a vertical line down the center of the wheel.
- Measure Angle: The angle between these two lines is the caster angle.
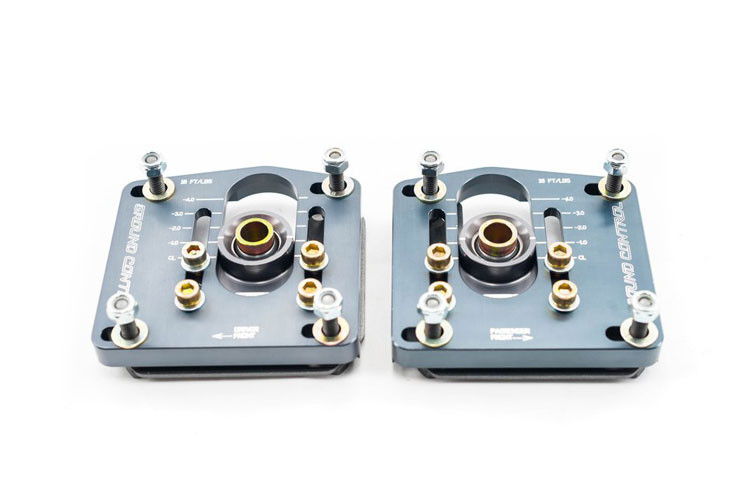
4. How to Adjust Caster
Adjusting caster typically requires aftermarket or motorsport parts. These adjustments can be pivotal in optimizing your vehicle’s handling and performance. For specialized adjustments, consider using tools and equipment from CARDIAGTECH.NET, ensuring precision and reliability in every adjustment.
4.1. Adjustable Arms
For MacPherson strut systems, adjustable tension rods can be used to move the lower arm forward or backward.
- Locate Tension Rod: Find the tension rod that holds the lower arm in the wheel arch.
- Adjust Screw: Adjust the screw to move the wheel forward or backward, changing the caster angle.
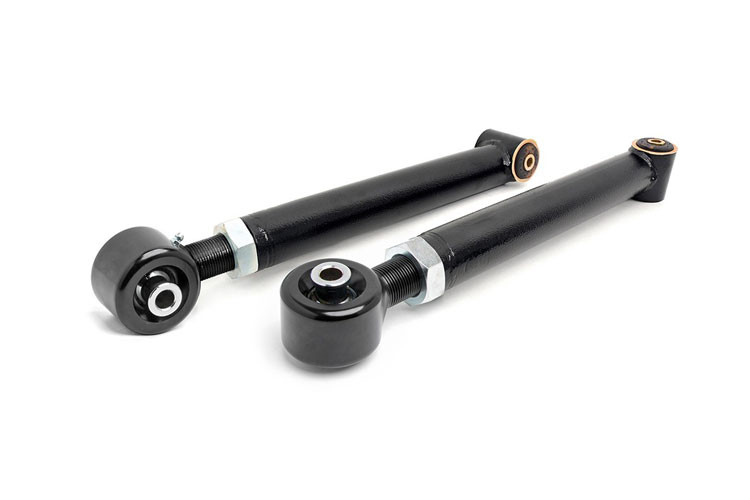 Adjustable tension rod for caster adjustment on a MacPherson strut system
4.2. Offset Bushes
Offset bushes mount the lower wishbone to the car and have an off-center bolt hole.
- Install Bush: Mount the offset bush at the front or back of the lower wishbone.
- Position Offset: Ensure the center bolt hole is offset in a forward direction.
- Arm Movement: The arm moves rearward, increasing positive caster.
Note: This method provides a fixed increase in caster and is not adjustable after installation.
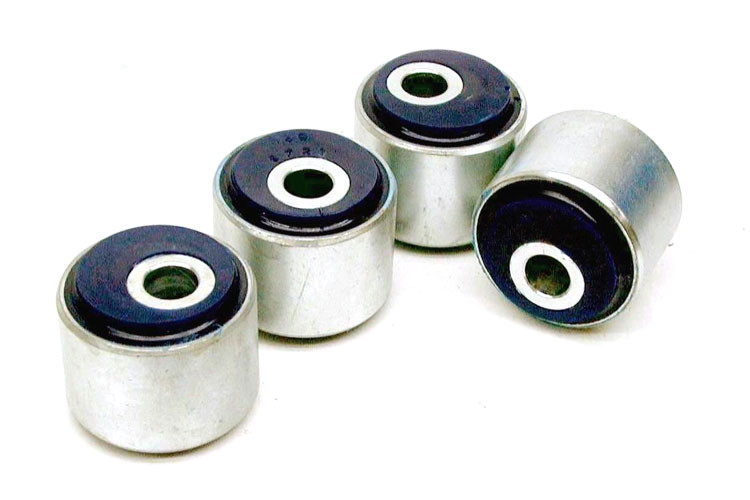 Offset caster bush installed on a lower wishbone
4.3. Offset Top Mounts
For MacPherson strut setups, offset top mounts on the coilover can adjust caster.
- Install Mounts: Install offset top mounts on the coilover.
- Position Damper: Ensure the damper location is offset rearward to increase caster.
Note: This position is fixed and not adjustable after installation.
 Offset top mounts installed on a coilover to adjust caster
4.4. Adjustable Hubs with Shims
In high-end motorsport, shims are often used on custom-made, adjustable suspension components.
- Place Shims: Insert shims between the wishbone and the hub on the hub’s side.
- Space Wishbone: This spaces the wishbone rearward, increasing caster in adjustable increments.
5. Effects of Caster Adjustment
Adjusting caster affects steering feel, stability, and cornering. Mastering these adjustments is essential for optimizing vehicle performance. By understanding these effects, you can fine-tune your vehicle’s handling to meet specific driving conditions and preferences.
5.1. Increasing Positive Caster
Increasing positive caster can provide several benefits. This adjustment can be pivotal in optimizing your vehicle’s handling and performance.
- Improved Steering Feel: Provides more feedback through the steering wheel, reducing vague steering.
- Increased Re-centering Speed: Helps the wheel return to center more quickly after a turn, reducing driver effort.
- Enhanced High-Speed Stability: Makes the car more stable at high speeds, increasing driver confidence.
- Increased Jacking Effect: Lifts the inside front wheel during cornering, aiding rotation and reducing understeer.
 Positive caster increasing steering feel
5.2. Reducing Positive Caster
Reducing positive caster can address issues caused by excessive caster.
- Reduced Steering Effort: Makes steering easier, which is beneficial if the driver experiences arm fatigue.
- Reduced Camber Gain: Decreases negative camber on the outside wheel during cornering, which can reduce understeer.
- Minimized Weight Jacking: Reduces the lifting of the rear wheel during cornering, improving traction and stability, especially in rear-wheel-drive cars.
 Positive caster reducing weight jacking effect
5.3. Counteracting Jacking Effects with KPI
King Pin Inclination (KPI) geometry can counteract the jacking effects of caster.
- Opposite Jacking Effect: KPI creates a jacking effect opposite to that of caster.
- High Caster Levels: Allows the use of high levels of caster while mitigating weight jacking issues.
5.4. Negative Caster
Using negative caster is generally not recommended due to its adverse effects.
- Unpredictable Steering: Makes steering less predictable.
- Instability: Causes instability, especially at high speeds, which can be dangerous.
6. Step-by-Step Guide to Adjusting Caster
Follow these steps to safely and effectively adjust caster on your vehicle. Adhering to these steps ensures the adjustments are made correctly, maximizing performance and safety.
6.1. Preparation
- Gather Tools: Collect necessary tools such as wrenches, sockets, turning plates, and a caster gauge.
- Safety First: Ensure the vehicle is on a level surface and properly secured with jack stands.
- Consult Manual: Refer to your vehicle’s service manual for specific instructions and torque specifications.
6.2. Measurement
- Set Up: Place the front wheels on turning plates set to 0 degrees.
- Attach Gauge: Attach the caster gauge to the wheel.
- Take Readings: Follow the gauge’s instructions to measure the current caster angle.
- Record Results: Note the caster angle for both front wheels.
6.3. Adjustment
- Locate Adjustment Points: Identify the caster adjustment points (adjustable arms, offset bushes, etc.).
- Loosen Fasteners: Loosen the fasteners on the adjustment mechanism.
- Make Adjustments: Adjust the caster angle according to your desired specifications.
- Tighten Fasteners: Tighten the fasteners to the specified torque.
- Re-Measure: Re-measure the caster angle to ensure it matches your desired setting.
- Repeat: Repeat the process for the other wheel.
6.4. Final Checks
- Test Drive: Take the vehicle for a test drive to assess the changes in handling and stability.
- Fine-Tune: Make any necessary fine-tuning adjustments based on the test drive results.
- Professional Alignment: Consider a professional wheel alignment to ensure all angles (camber, toe, and caster) are properly aligned.
7. Choosing the Right Caster Angle
Selecting the correct caster angle depends on your driving style and the intended use of your vehicle. This customization can significantly enhance your driving experience. Consulting with a professional at CARDIAGTECH.NET can provide personalized advice tailored to your specific needs.
7.1. Street Cars
- Slight Positive Caster: Provides a balance of stability and steering feel.
- Typical Range: +2 to +4 degrees.
7.2. Performance Cars
- Moderate Positive Caster: Enhances cornering and high-speed stability.
- Typical Range: +4 to +6 degrees.
7.3. Racing Cars
- High Positive Caster: Maximizes cornering grip and stability.
- Typical Range: +6 to +8 degrees or higher, depending on track conditions and vehicle setup.
7.4. Factors to Consider
- Tire Wear: Excessive caster can lead to uneven tire wear.
- Driving Conditions: Adjust caster based on typical driving conditions (street, track, etc.).
- Suspension Setup: Consider other suspension settings (camber, toe) for optimal performance.
8. Common Mistakes to Avoid
Avoiding these common mistakes ensures safety and effectiveness when adjusting caster. Steering clear of these pitfalls can save time and prevent potential damage to your vehicle.
8.1. Over-Adjusting
- Problem: Adjusting caster too much can lead to instability and uneven tire wear.
- Solution: Make small, incremental adjustments and test drive after each change.
8.2. Neglecting Other Angles
- Problem: Focusing solely on caster without considering camber and toe.
- Solution: Ensure all alignment angles are properly set for optimal performance.
8.3. Ignoring Wear and Tear
- Problem: Adjusting caster on worn suspension components.
- Solution: Replace worn parts before making adjustments.
8.4. Skipping Professional Alignment
- Problem: Relying solely on DIY adjustments without a professional alignment.
- Solution: Get a professional wheel alignment to ensure all angles are within spec.
9. Advanced Techniques for Caster Adjustment
For experienced mechanics, these advanced techniques can further optimize caster settings. These advanced methods can provide a competitive edge on the track.
9.1. Dynamic Caster
- Description: Adjusting caster to change dynamically during cornering.
- Application: Used in racing to optimize grip and handling through different phases of a turn.
9.2. Caster Split
- Description: Running different caster angles on each front wheel.
- Application: Can improve turn-in response and reduce torque steer.
9.3. Data Logging
- Description: Using data logging to monitor suspension behavior and caster angles during testing.
- Application: Allows for precise adjustments based on real-world performance data.
10. Tools and Equipment for Caster Adjustment at CARDIAGTECH.NET
CARDIAGTECH.NET offers a wide range of tools and equipment to assist with caster adjustment. Investing in high-quality tools ensures accuracy and efficiency.
- Digital Caster Camber Gauge: Provides precise angle measurements.
- Turning Plates: Allows for accurate wheel angle adjustments.
- Adjustable Arms and Bushes: Aftermarket parts for caster adjustment.
- Alignment Racks: Professional equipment for comprehensive wheel alignment.
| Tool | Description | Price |
|---|---|---|
| Digital Caster Camber Gauge | Measures caster, camber, and SAI (Steering Axis Inclination) accurately. | $200-$500 |
| Professional Turning Plates | Allows wheels to move freely during alignment, providing accurate measurements. | $300-$800 |
| Adjustable Control Arms | Provides a wide range of adjustability for camber and caster. | $200-$600 |
| Offset Ball Joints/Bushes | Corrects camber and caster by changing the pivot point of the suspension. | $50-$200 |
| Complete Alignment Rack Systems | Comprehensive systems for performing full vehicle alignments, including caster adjustments. | $5000+ |
| Angle Finders/Inclinometers | Affordable tools for measuring angles; useful for checking caster and camber. | $20-$100 |
| Suspension Adjustment Tools | Specialty wrenches and tools designed for adjusting suspension components, including those affecting caster. | $30-$150 |
| Wheel Alignment Software | Software that works with alignment equipment to guide technicians through the alignment process, including caster adjustments. | $500+ |
11. Maintaining Proper Caster
Regular maintenance ensures your caster settings remain accurate and effective. Consistent maintenance can prevent costly repairs and maintain optimal handling.
11.1. Regular Inspections
- Frequency: Inspect suspension components every 6 months or 12,000 miles.
- Check For: Worn bushings, ball joints, and tie rod ends.
11.2. Professional Alignments
- Frequency: Get a professional wheel alignment every 1-2 years or after significant suspension work.
- Benefits: Ensures all alignment angles are within spec.
11.3. Driving Habits
- Avoid Impacts: Minimize impacts with potholes and curbs.
- Smooth Driving: Practice smooth driving techniques to reduce stress on suspension components.
12. Real-World Examples of Caster Adjustment
Examining real-world examples provides practical insights into the benefits of caster adjustment. These case studies demonstrate the tangible improvements that can be achieved.
12.1. Case Study 1: Improved Steering Feel
- Vehicle: Street car with vague steering.
- Adjustment: Increased positive caster from +2 to +4 degrees.
- Result: Improved steering feedback and confidence.
12.2. Case Study 2: Enhanced Cornering
- Vehicle: Performance car used for track days.
- Adjustment: Increased positive caster from +4 to +6 degrees.
- Result: Enhanced cornering grip and reduced understeer.
12.3. Case Study 3: High-Speed Stability
- Vehicle: Racing car competing in high-speed events.
- Adjustment: Increased positive caster from +6 to +8 degrees.
- Result: Improved stability at high speeds and enhanced driver confidence.
13. The Importance of Professional Assistance
While DIY caster adjustment is possible, professional assistance offers significant benefits. Expert advice and precision can optimize your vehicle’s performance.
13.1. Expertise
- Knowledge: Professional technicians have the knowledge and experience to accurately diagnose and adjust caster.
- Precision: Use of specialized equipment ensures precise adjustments.
13.2. Equipment
- Advanced Tools: Access to advanced alignment racks and diagnostic tools.
- Accuracy: Ensures caster angles are within specified tolerances.
13.3. Warranty
- Protection: Professional services often come with a warranty.
- Assurance: Provides peace of mind knowing the work is guaranteed.
14. Why Choose CARDIAGTECH.NET for Your Automotive Needs?
CARDIAGTECH.NET stands out as a premier provider of automotive tools and equipment. Discover why CARDIAGTECH.NET is the preferred choice for automotive professionals and enthusiasts alike. Our commitment to quality and customer satisfaction ensures you get the best products and support.
14.1. Wide Range of Products
- Comprehensive Selection: Offers a comprehensive range of tools and equipment for all automotive needs.
- Quality Assurance: High-quality products from trusted brands.
14.2. Expert Support
- Knowledgeable Staff: Knowledgeable staff to assist with product selection and technical support.
- Customer Service: Excellent customer service and support.
14.3. Competitive Pricing
- Affordable Options: Competitive pricing on all products.
- Value: Provides excellent value for your investment.
14.4. Customer Satisfaction
- Positive Reviews: High customer satisfaction ratings.
- Reliability: Trusted by automotive professionals and enthusiasts.
15. How to Buy the Right Tools from CARDIAGTECH.NET
Purchasing the correct tools from CARDIAGTECH.NET is a straightforward process. Follow these steps to ensure you get the best tools for your specific needs. Our team is always ready to assist you with any questions or concerns.
15.1. Visit Our Website
- Browse Products: Visit CARDIAGTECH.NET to browse our extensive selection of tools and equipment.
- Detailed Descriptions: Read detailed product descriptions and specifications.
15.2. Contact Us
- Get Expert Advice: Contact our knowledgeable staff for expert advice and product recommendations.
- Discuss Your Needs: Discuss your specific needs and requirements.
15.3. Place Your Order
- Secure Checkout: Place your order through our secure online checkout.
- Multiple Payment Options: Choose from multiple payment options.
15.4. Enjoy Fast Shipping
- Fast Delivery: Enjoy fast and reliable shipping to your location.
- Track Your Order: Track your order online for delivery updates.
16. The Future of Caster Adjustment Technology
The technology behind caster adjustment is continually evolving. Staying informed about these advancements ensures you remain at the cutting edge of automotive care. These innovations promise to make caster adjustment more precise and efficient.
16.1. Smart Alignment Systems
- Description: Alignment systems with AI-powered diagnostics and automatic adjustments.
- Benefits: Enhanced accuracy and efficiency.
16.2. Wireless Measurement Tools
- Description: Wireless caster measurement tools with real-time data logging.
- Benefits: Improved convenience and data analysis.
16.3. Predictive Maintenance
- Description: Using sensors and data analysis to predict when caster adjustments are needed.
- Benefits: Proactive maintenance and reduced downtime.
17. Safety Precautions
Prioritizing safety is essential when performing any automotive work. These safety precautions protect you and your vehicle during caster adjustment. Always adhere to these guidelines to prevent accidents and injuries.
17.1. Use Jack Stands
- Importance: Always use jack stands to support the vehicle when working underneath.
- Prevention: Prevents the vehicle from falling and causing serious injury.
17.2. Wear Safety Gear
- Recommended Gear: Wear safety glasses, gloves, and appropriate clothing.
- Protection: Protects your eyes, hands, and body from injury.
17.3. Follow Instructions
- Reference Manuals: Always follow the instructions in your vehicle’s service manual.
- Proper Procedures: Ensures you perform the work correctly and safely.
18. Environmental Considerations
Practicing environmentally responsible automotive maintenance protects our planet. These considerations help minimize the environmental impact of caster adjustment.
18.1. Dispose of Waste Properly
- Recycle: Recycle used oil, fluids, and parts whenever possible.
- Avoid Contamination: Prevent fluids from contaminating the soil and water.
18.2. Use Eco-Friendly Products
- Environmentally Safe: Use eco-friendly cleaners and lubricants.
- Reduce Pollution: Helps reduce environmental pollution.
18.3. Conserve Resources
- Efficient Practices: Use efficient work practices to conserve resources.
- Minimize Waste: Minimize waste and reduce your environmental footprint.
19. Caster Adjustment for Different Vehicle Types
Caster adjustment varies depending on the type of vehicle. Understanding these differences ensures optimal settings for each vehicle. Tailoring adjustments to specific vehicle types ensures the best possible performance.
19.1. Sedans
- Typical Range: +2 to +4 degrees.
- Focus: Balance stability and steering feel.
19.2. Trucks and SUVs
- Typical Range: +3 to +5 degrees.
- Focus: Enhance stability and load-carrying capacity.
19.3. Sports Cars
- Typical Range: +4 to +6 degrees.
- Focus: Maximize cornering grip and handling.
19.4. Classic Cars
- Typical Range: Varies widely.
- Considerations: Consult historical specifications or experts for optimal settings.
20. Frequently Asked Questions (FAQ) About Caster Adjustment
Here are some frequently asked questions about caster adjustment to help you better understand the process. This section provides quick answers to common queries, helping you make informed decisions.
20.1. What is Caster Angle?
Caster angle is the angle of the steering axis relative to the vertical axis of a wheel, viewed from the side of the vehicle.
20.2. Why is Caster Important?
Caster affects straight-line stability, steering feel, and cornering performance.
20.3. What are the Symptoms of Bad Caster?
Symptoms include wandering steering, vague steering feel, and high-speed instability.
20.4. How is Caster Measured?
Caster can be measured using turning plates and a caster gauge or by measuring wishbone mounting points.
20.5. How is Caster Adjusted?
Caster can be adjusted using adjustable arms, offset bushes, or offset top mounts.
20.6. What is Positive Caster?
Positive caster means the steering axis is tilted towards the rear of the car.
20.7. What is Negative Caster?
Negative caster means the steering axis is tilted forward.
20.8. What is the Ideal Caster Angle?
The ideal caster angle varies depending on the vehicle type and driving conditions.
20.9. Can I Adjust Caster Myself?
While DIY adjustment is possible, professional assistance is recommended for accuracy.
20.10. How Often Should I Check My Caster?
Check your caster every 6 months or 12,000 miles during regular inspections.
Ready to Optimize Your Vehicle’s Performance?
Don’t let improper caster compromise your driving experience. Contact CARDIAGTECH.NET today at +1 (641) 206-8880 or visit us at 276 Reock St, City of Orange, NJ 07050, United States, to explore our range of tools and equipment. Our experts are ready to help you select the best products for your needs and provide the support you need to achieve optimal caster alignment. Elevate your vehicle’s handling, stability, and overall performance with CARDIAGTECH.NET. Connect with us on Whatsapp for immediate assistance and let us help you transform your driving experience. Visit CARDIAGTECH.NET today.