How to Fix Cloth Car Roof: A Comprehensive Guide

Are you dealing with a drooping cloth car roof? At CARDIAGTECH.NET, we understand the frustration of a sagging headliner. Our expert guide provides simple, effective methods to restore your car’s headliner, offering solutions and keeping your vehicle looking its best. Learn how to repair your vehicle’s headliner yourself, along with expert recommendations to prevent future sagging using headliner adhesive, twist pins and seam cleaner and paint roller combo.
1. Understanding Your Car’s Headliner
A headliner, also known as a cloth car roof, is the fabric lining the interior roof of your vehicle. It serves several important purposes:
- Aesthetics: Provides a finished, clean look to the car’s interior.
- Insulation: Helps regulate temperature by providing a barrier against heat and cold.
- Sound Dampening: Reduces noise levels inside the cabin, improving the driving experience.
Typically, a cloth car roof consists of several layers, including a foam backing (often polyurethane) that is glued to a headliner board. This board is then attached to the car’s roof. This multi-layered construction ensures that the headliner not only looks good but also contributes to the overall comfort and quietness of your ride. According to a study by the National Highway Traffic Safety Administration (NHTSA), interior noise levels can significantly impact driver fatigue and concentration, highlighting the importance of a well-maintained headliner.
Car headliner is a fabric that is secured to the roof framing
Image alt: Interior view of a car showcasing the cloth car roof (headliner) attached to the roof frame, enhancing aesthetics and comfort.
2. Why Does Your Cloth Car Roof Sag?
Several factors can cause your cloth car roof to sag over time. Understanding these causes is crucial for effective repair and prevention:
- Heat and Sunlight: Prolonged exposure to high temperatures and direct sunlight can break down the adhesive that holds the fabric to the headliner board. A study published in the “Journal of Applied Polymer Science” found that exposure to UV radiation can degrade polymers like those used in headliner adhesives, leading to bond failure.
- Moisture: Humidity, leaks, and condensation can seep into the headliner, causing the foam backing to deteriorate and lose its shape.
- Poor Installation: Inadequate adhesive application or improper techniques during the initial installation can lead to premature sagging.
- Physical Damage: Activities of children or pets can cause the cloth car roof to detach due to pulling or scratching.
Addressing these issues promptly can prevent further damage and maintain the integrity of your vehicle’s interior.
3. Identifying Your Sagging Headliner: Key Signs
Recognizing the early signs of a sagging headliner can help you take action before the problem worsens. Here are some common indicators:
- Visible Drooping: The most obvious sign is when the fabric begins to detach from the roof and hang down.
- Bubbling or Wrinkling: Look for areas where the fabric appears loose or uneven, forming bubbles or wrinkles.
- Discoloration: Moisture or prolonged exposure to sunlight can cause the fabric to fade or develop stains.
- Loose Edges: Check the edges of the headliner, especially around windows and lights, for detachment.
Regularly inspecting your cloth car roof can help you identify these issues early and take appropriate measures to address them.
4. Assessing the Damage: Is DIY Repair Possible?
Before attempting to fix your sagging cloth car roof, assess the extent of the damage. This will help you determine whether a DIY repair is feasible or if professional help is needed. Consider the following:
- Severity of Sagging: Is it a small area or a widespread problem?
- Condition of the Fabric: Is the fabric still in good condition, or is it torn or damaged?
- Your DIY Skills: Are you comfortable working on car interiors and using adhesives and tools?
If the sagging is minor and the fabric is intact, a DIY repair may be a cost-effective solution. However, for extensive damage or if you lack the necessary skills, consulting a professional is advisable. According to automotive repair experts at sites like Edmunds.com, attempting a DIY repair on a severely damaged headliner could lead to further damage and higher repair costs in the long run.
5. Essential Tools and Materials for Headliner Repair
Before you begin, gather the necessary tools and materials. Having everything on hand will make the repair process smoother and more efficient. Here’s a list of essentials:
| Tool/Material | Description | Estimated Cost |
|---|---|---|
| Headliner Adhesive Spray | Specifically designed for headliner repair; provides a strong, flexible bond. | $10 – $20 |
| Sequin Pins or Twist Pins | Used to secure the fabric temporarily or permanently. | $5 – $10 |
| Steam Cleaner | Helps to reactivate the old adhesive and soften the fabric. | $50 – $150 |
| Paint Roller | Used to smooth the fabric and ensure even adhesion. | $10 – $20 |
| Microfiber Cloths | For cleaning and wiping surfaces. | $5 – $10 |
| Safety Glasses | To protect your eyes from adhesive spray and debris. | $10 – $20 |
| Gloves | To protect your hands from adhesive and dirt. | $5 – $10 |
You can find these tools and materials at most auto parts stores or online retailers like CARDIAGTECH.NET, ensuring you have access to high-quality products for your repair.
6. Step-by-Step Guide: Fixing a Sagging Cloth Car Roof Without Removal
Follow these steps to repair your sagging headliner without removing it, saving time and money:
6.1. Prepare the Area
- Clean the Headliner: Use a microfiber cloth to gently wipe down the sagging area, removing any loose debris or dirt.
- Protect the Interior: Cover seats, carpets, and trim with drop cloths or plastic sheeting to prevent adhesive overspray.
- Ventilate the Car: Open windows and doors to ensure proper ventilation while working with adhesives.
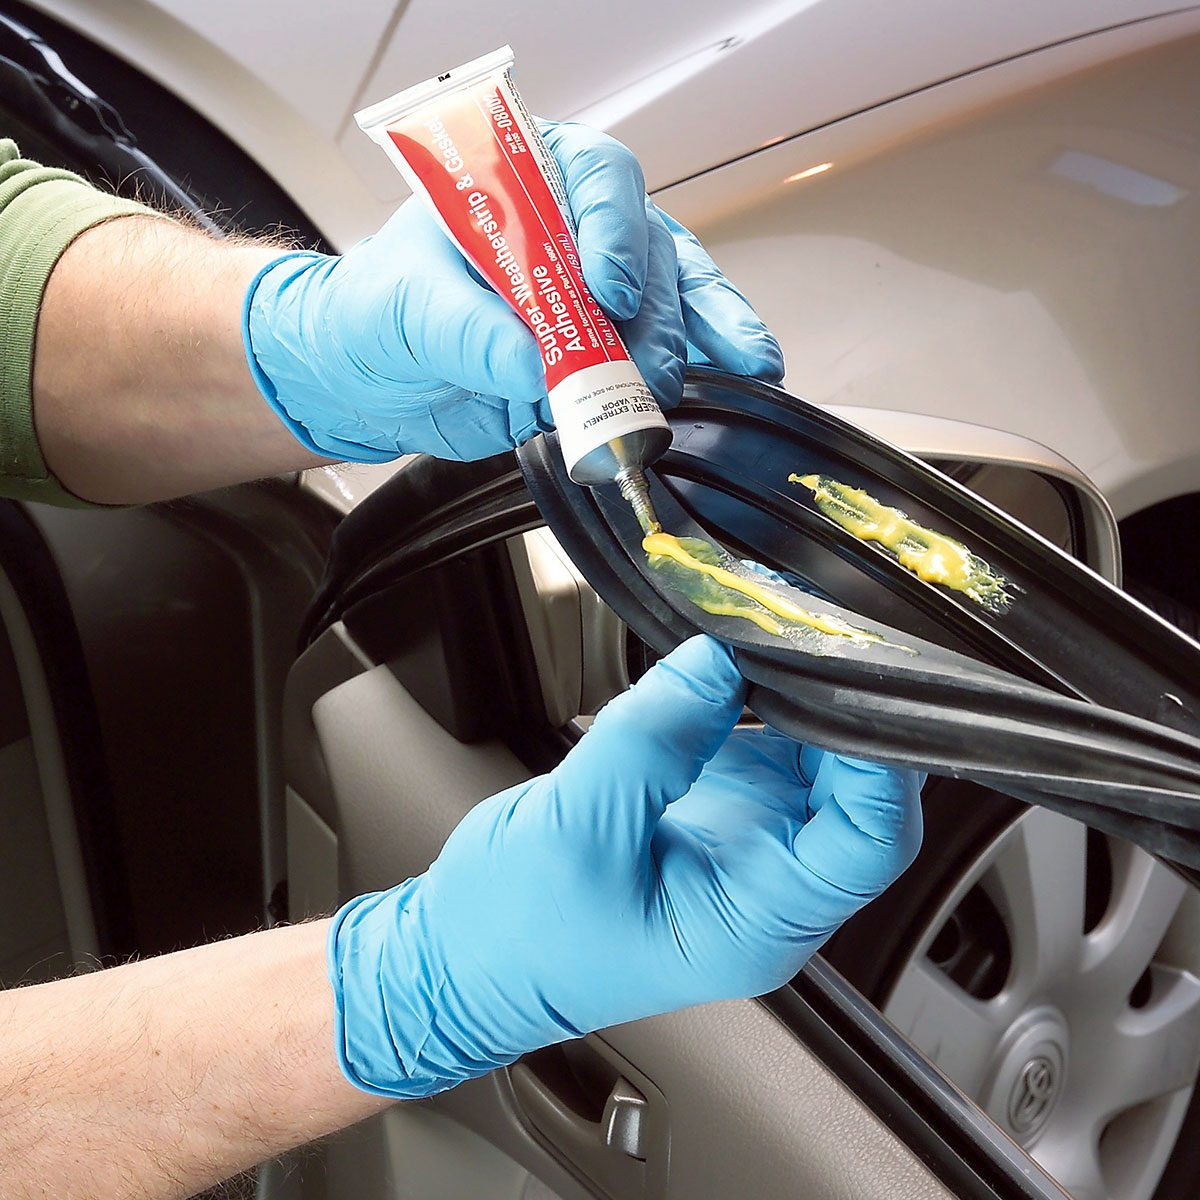
6.2. Applying Headliner Adhesive
- Shake the Adhesive: Vigorously shake the headliner adhesive spray can for at least two minutes to ensure proper mixing.
- Spray the Adhesive: Hold the can about 6-8 inches away from the sagging fabric and spray a light, even coat on both the fabric and the exposed headliner board.
- Wait for Tacking: Allow the adhesive to become tacky, usually about 2-5 minutes, depending on the product instructions.
6.3. Reattaching the Fabric
- Smooth the Fabric: Carefully press the fabric back onto the headliner board, starting from the center and working your way outwards.
- Use a Paint Roller: Use a paint roller to gently smooth the fabric, ensuring even contact and adhesion. This helps to eliminate any air pockets or wrinkles.
- Secure with Pins: If necessary, use sequin pins or twist pins to hold the fabric in place while the adhesive dries completely.
6.4. Using a Steam Cleaner (Optional)
- Steam the Area: If the fabric is heavily wrinkled or the adhesive is old, use a steam cleaner to gently heat the area. This can help reactivate the old adhesive and soften the fabric for better adhesion.
- Smooth with Roller: Immediately after steaming, use the paint roller to smooth the fabric and ensure it adheres properly.
6.5. Final Touches
- Remove Excess Adhesive: Use a clean microfiber cloth dampened with adhesive remover to wipe away any excess adhesive.
- Remove Protective Coverings: Once the adhesive is completely dry (usually after 24 hours), remove the protective coverings from the car’s interior.
- Inspect the Repair: Check the repaired area for any remaining sagging or imperfections and address them as needed.
By following these steps, you can effectively repair your sagging cloth car roof and restore the appearance of your vehicle’s interior.
7. Alternative Methods for Headliner Repair
Besides gluing, there are several alternative methods to fix a sagging cloth car roof. Each method has its advantages and disadvantages, depending on the severity of the sagging and your personal preferences.
7.1. Twist Pins (Saggy Stoppers)
- Description: These are clear-headed pins that twist into the headliner board, holding the fabric in place.
- Pros: Inexpensive, easy to install, and won’t damage the fabric.
- Cons: May not be suitable for large areas of sagging, and the pins may be visible.
7.2. Headliner Repair Tape
- Description: A double-sided adhesive tape specifically designed for headliner repair.
- Pros: Easy to apply, provides a strong bond, and leaves no residue.
- Cons: May not be suitable for heavily sagging areas or fabrics.
7.3. Fabric Glue
- Description: A strong, flexible glue designed for bonding fabrics.
- Pros: Provides a permanent bond, can be used on various fabrics, and is heat-resistant.
- Cons: Can be messy to apply, may require clamping or pinning while drying.
7.4. Professional Repair Kits
- Description: Comprehensive kits that include adhesive, fabric, and tools for a complete headliner repair.
- Pros: Provides everything needed for a professional-quality repair, with detailed instructions.
- Cons: Can be more expensive than individual materials, and may require some DIY experience.
Choose the method that best suits your needs and skill level, and always follow the product instructions for optimal results.
8. Preventing Future Sagging: Proactive Measures
Preventing your cloth car roof from sagging in the first place is always better than having to repair it. Here are some proactive measures you can take:
- Park in the Shade: Whenever possible, park your car in the shade to minimize exposure to direct sunlight and heat.
- Use a Sunshade: Use a sunshade when parking in direct sunlight to protect the interior from heat buildup.
- Ventilate Your Car: Open windows slightly to allow air circulation and prevent moisture buildup.
- Regular Cleaning: Periodically clean your headliner with a soft brush or vacuum to remove dust and debris.
- Avoid Harsh Chemicals: Do not use harsh chemicals or abrasive cleaners on the headliner, as they can damage the fabric and adhesive.
By following these simple tips, you can prolong the life of your headliner and keep your car’s interior looking its best.
9. When to Call a Professional: Knowing Your Limits
While DIY headliner repair can be a cost-effective solution, there are situations where it’s best to call a professional. Consider the following:
- Extensive Damage: If the sagging is widespread or the fabric is torn or severely damaged, professional repair may be necessary.
- Complex Installations: If your car has a complex headliner design with integrated electronics or sunroofs, professional expertise is recommended.
- Lack of Experience: If you are not comfortable working on car interiors or using adhesives and tools, it’s best to leave the repair to a professional.
- Warranty Concerns: If your car is still under warranty, DIY repairs may void the warranty, so consult with the dealership before attempting any repairs.
A professional headliner repair can range from $300 to $1000, depending on the car model and the extent of the damage, according to data from RepairPal.com. While this may seem expensive, it can ensure a high-quality repair and prevent further damage to your vehicle.
10. Cost Analysis: DIY vs. Professional Repair
Before making a decision, consider the cost implications of DIY versus professional repair. Here’s a breakdown of the estimated costs:
| Repair Option | Materials Cost | Labor Cost | Total Cost |
|---|---|---|---|
| DIY Repair | $20 – $50 | $0 | $20 – $50 |
| Professional Repair | $100 – $300 | $200-$700 | $300 – $1000 |
While DIY repair is significantly cheaper, it requires your time and effort and may not always yield professional-quality results. Professional repair, on the other hand, guarantees a high-quality repair but comes at a higher cost.
11. Product Recommendations from CARDIAGTECH.NET
At CARDIAGTECH.NET, we offer a range of high-quality products for your automotive repair needs. Here are some recommendations for headliner repair:
- Headliner Adhesive Spray: Our premium adhesive spray provides a strong, flexible bond for lasting repairs.
- Twist Pins (Saggy Stoppers): These clear-headed pins are perfect for securing sagging fabric without damaging the headliner.
- Microfiber Cloths: Our soft, lint-free cloths are ideal for cleaning and preparing surfaces.
- Steam Cleaners: Our range of steam cleaners can help reactivate old adhesive and soften fabric for better adhesion.
Visit our website at CARDIAGTECH.NET or contact us via WhatsApp at +1 (641) 206-8880 to learn more about our products and how they can help you with your headliner repair. Our address is 276 Reock St, City of Orange, NJ 07050, United States.
12. Maintaining Your Car’s Interior: Beyond the Headliner
Maintaining your car’s interior goes beyond just the headliner. Here are some additional tips for keeping your car’s interior in top condition:
- Regular Vacuuming: Vacuum carpets, seats, and upholstery regularly to remove dirt and debris.
- Upholstery Cleaning: Clean fabric and leather upholstery with appropriate cleaners to prevent stains and discoloration.
- Dashboard Care: Use a dashboard protectant to prevent cracking and fading from sunlight exposure.
- Air Fresheners: Use air fresheners to keep your car smelling fresh and clean.
- Floor Mats: Use floor mats to protect your carpets from dirt and wear.
Regular maintenance can help prolong the life of your car’s interior and keep it looking its best.
13. Customer Success Stories: Real-World Headliner Repairs
Many of our customers have successfully repaired their sagging headliners using our products and guides. Here are a few success stories:
- John D. from California: “I used the headliner adhesive spray from CARDIAGTECH.NET, and it worked perfectly. My headliner looks like new again!”
- Sarah L. from Texas: “The twist pins were a lifesaver! They were so easy to install, and they held the fabric in place perfectly.”
- Mike S. from Florida: “The steam cleaner helped reactivate the old adhesive, and the paint roller smoothed everything out. Great products!”
These success stories demonstrate that with the right tools and techniques, you can achieve professional-quality results with DIY headliner repair.
14. Understanding Adhesive Chemistry for Headliner Repair
The success of any headliner repair largely depends on the adhesive used. Understanding the chemistry behind these adhesives can help you make an informed choice and ensure a lasting repair.
- Types of Adhesives:
- Solvent-Based Adhesives: These adhesives offer high initial tack and strong bonding but may contain volatile organic compounds (VOCs).
- Water-Based Adhesives: These are environmentally friendly with low VOCs but may require longer drying times.
- Hot Melt Adhesives: These provide rapid bonding but may not be suitable for high-temperature environments.
- Key Properties:
- Tack: The initial stickiness of the adhesive.
- Bond Strength: The force required to separate the bonded materials.
- Heat Resistance: The ability of the adhesive to maintain its bond at high temperatures.
- Flexibility: The ability of the adhesive to flex without cracking or losing its bond.
For headliner repair, a solvent-based or high-quality water-based adhesive with good heat resistance and flexibility is typically recommended. Always check the adhesive’s specifications and suitability for automotive applications before use.
15. Addressing Common Headliner Repair Challenges
Even with the best tools and techniques, you may encounter challenges during headliner repair. Here are some common issues and how to address them:
- Uneven Adhesion: Ensure even adhesive application by holding the spray can at the correct distance and using smooth, overlapping strokes.
- Wrinkles and Bubbles: Use a paint roller to smooth the fabric and eliminate air pockets. If wrinkles persist, try using a steam cleaner to soften the fabric.
- Adhesive Residue: Remove excess adhesive with a clean microfiber cloth dampened with adhesive remover.
- Sagging Reoccurrence: If the headliner sags again after repair, consider using additional twist pins or reapplying adhesive for a stronger bond.
By addressing these challenges effectively, you can ensure a successful and long-lasting headliner repair.
16. The Future of Car Interior Materials: Innovations in Headliners
The automotive industry is constantly evolving, and innovations in car interior materials are leading to more durable and sustainable headliners. Some emerging trends include:
- Recycled Materials: Headliners made from recycled plastics and fabrics are becoming increasingly common, reducing environmental impact.
- Advanced Adhesives: New adhesive technologies offer improved heat resistance, flexibility, and bond strength.
- Self-Healing Materials: Some manufacturers are exploring self-healing polymers that can repair minor damage and extend the life of the headliner.
- Smart Fabrics: Integrated sensors and electronics in headliners can provide features like ambient lighting, temperature control, and noise cancellation.
These innovations promise to make headliners more durable, sustainable, and functional in the future.
17. How to Choose the Right Fabric for Headliner Replacement (If Necessary)
In some cases, the original headliner fabric may be too damaged to repair, requiring replacement. Here’s how to choose the right fabric for your headliner:
- Match the Original: Try to find a fabric that closely matches the color, texture, and weight of the original headliner.
- Consider Durability: Choose a fabric that is durable, stain-resistant, and easy to clean.
- Check for UV Resistance: Ensure the fabric is UV resistant to prevent fading and degradation from sunlight exposure.
- Look for Foam Backing: Choose a fabric with a foam backing for added insulation and sound dampening.
- Read Reviews: Check online reviews and ask for recommendations from other car owners or upholstery professionals.
Popular fabric choices for headliner replacement include suede, velour, and knit fabrics with foam backing.
18. Maximizing Your Car’s Resale Value with Interior Care
Maintaining your car’s interior, including the headliner, can significantly impact its resale value. Potential buyers often assess the condition of the interior as an indicator of how well the car has been cared for.
- Cleanliness: A clean, well-maintained interior makes a positive impression and can increase the perceived value of the car.
- Repairs: Addressing issues like a sagging headliner, torn upholstery, or damaged trim can show that you’ve taken good care of the car.
- Originality: Preserving the original features and materials of the interior can appeal to buyers looking for a classic or well-preserved vehicle.
- Documentation: Keep records of any repairs or maintenance performed on the interior to demonstrate your commitment to its upkeep.
According to Kelley Blue Book, a well-maintained interior can increase a car’s resale value by as much as 10-15%.
19. Addressing Mold and Mildew in Your Car Headliner
Moisture can lead to mold and mildew growth in your car headliner, which can cause unpleasant odors and potential health issues. Here’s how to address mold and mildew:
- Identify the Source: Find and fix any leaks or sources of moisture, such as a leaky sunroof or window seals.
- Clean the Affected Area: Use a mold and mildew cleaner specifically designed for automotive interiors. Follow the product instructions carefully.
- Ventilate the Car: Open windows and doors to allow the car to air out and dry completely.
- Use a Dehumidifier: Place a dehumidifier inside the car to remove excess moisture and prevent further mold growth.
- Replace the Headliner (If Necessary): If the mold growth is extensive or the headliner is severely damaged, consider replacing it.
Addressing mold and mildew promptly can prevent further damage and protect your health.
20. Ensuring Proper Ventilation During Headliner Repair
Working with adhesives and chemicals during headliner repair requires proper ventilation to protect your health. Follow these guidelines:
- Open Windows and Doors: Ensure adequate ventilation by opening windows and doors to allow fresh air to circulate.
- Use a Fan: Place a fan inside the car to help circulate air and remove fumes.
- Wear a Respirator: Use a respirator with organic vapor cartridges to protect your lungs from harmful fumes.
- Work Outdoors: If possible, perform the repair outdoors in a well-ventilated area.
- Take Breaks: Take frequent breaks to get fresh air and avoid prolonged exposure to fumes.
Proper ventilation can help minimize your exposure to harmful chemicals and ensure a safe and healthy repair process.
Ready to tackle that sagging headliner? Don’t let it detract from your driving experience. Contact CARDIAGTECH.NET today at +1 (641) 206-8880 or visit our website to explore our range of headliner repair products. Our team is ready to help you find the perfect solution to restore your car’s interior to its former glory. We’re located at 276 Reock St, City of Orange, NJ 07050, United States. Let’s get your car looking its best!
FAQs: Your Questions About Cloth Car Roofs Answered
How do you know if your cloth car roof is sagging?
Signs include visible drooping, bubbling or wrinkling, discoloration, and loose edges around windows and lights.
Is it OK to fix the headliner sagging myself?
Yes, for minor sagging and if you’re comfortable with DIY projects. For extensive damage, consider professional help.
Can I paint a headliner?
It’s not recommended due to temperature-related expansion and contraction within the car’s interior, which can cause the paint to crack.
Does car insurance cover the cost of cloth car roof replacement?
Most extended car insurance policies exclude coverage for interior upholstery, trim, and headliners.
What causes a cloth car roof to sag?
Heat, sunlight, moisture, poor installation, and physical damage can all contribute to sagging.
How can I prevent my cloth car roof from sagging?
Park in the shade, use a sunshade, ventilate your car, and regularly clean the headliner.
What’s the best adhesive for headliner repair?
A headliner adhesive spray specifically designed for automotive use, providing a strong, flexible bond.
Can I use twist pins to fix a sagging headliner?
Yes, twist pins (saggy stoppers) are an inexpensive and easy way to hold the headliner in place.
How much does it cost to replace a cloth car roof?
Replacement costs range from $300 to $1000 or more, depending on the car model and complexity of the job.
Where can I buy headliner repair materials?
You can find these tools and materials at most auto parts stores or online retailers like CARDIAGTECH.NET.