How To Fix Cloth Car Seats: A Comprehensive Guide
Fixing cloth car seats can restore your vehicle’s interior and increase its value. CARDIAGTECH.NET offers solutions to repair any damage with the right tools and techniques. Learn how to mend tears, remove stains, and maintain your car seats with our detailed guide, ensuring a fresh and inviting driving experience. Discover fabric repair, auto upholstery, and interior detailing for optimal results.
1. Identifying User Search Intent
Before diving into the techniques for fixing cloth car seats, it’s crucial to understand what users are looking for when they search for this information. Understanding these intentions allows us to tailor our content to meet their needs effectively. Here are five key search intents:
- DIY Repair Instructions: Users want step-by-step guides on how to repair minor damages like tears, stains, or burns on their own.
- Product Recommendations: They seek recommendations for the best cleaning products, repair kits, and tools needed for the job.
- Professional vs. DIY Advice: Users are trying to decide whether to hire a professional or tackle the repair themselves, looking for guidance on when DIY is appropriate and when professional help is necessary.
- Maintenance Tips: They want to learn how to maintain their cloth car seats to prevent future damage and keep them looking new.
- Cost Information: Users are interested in understanding the costs associated with both DIY repairs (materials, tools) and professional services.
2. Assessing the Damage to Your Cloth Car Seats
The first step in any repair process is a thorough assessment of the damage. Determining the extent of the damage will help you decide whether a DIY approach is feasible or if professional help is required.
-
Type of Damage:
- Tears: Small tears can often be sewn or patched, while larger tears may require professional attention.
- Stains: Evaluate the type of stain (e.g., coffee, grease, ink) to determine the appropriate cleaning method.
- Burns: Small cigarette burns can be repaired with patching kits, but extensive burns may necessitate seat replacement.
- Wear and Tear: General wear and fading can be addressed with cleaning and fabric dyes.
-
Location of Damage:
- Damage on the main seating areas is more visible and may require more meticulous repair.
- Damage on side panels or less visible areas might be easier to handle with DIY methods.
-
Material Condition:
- Check the overall condition of the fabric. If the material is old and brittle, it may be more prone to tearing during the repair process.
-
Safety Considerations:
- Ensure that the damage does not affect any safety equipment, such as seat belts or airbags. Repairs affecting these components should always be handled by professionals.
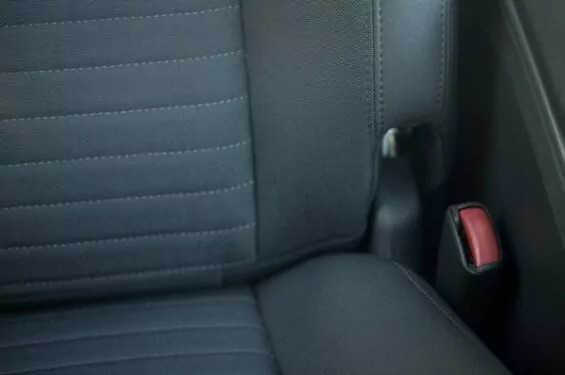
assessing car seat damage
Carefully evaluating the condition of your car seat is the first step in determining the best repair method.
3. Essential Tools and Materials for DIY Cloth Car Seat Repair
Having the right tools and materials is crucial for a successful DIY repair. Here’s a comprehensive list of what you might need, with a focus on quality and durability, traits that CARDIAGTECH.NET values in all its offerings:
3.1. Cleaning Supplies
-
Upholstery Cleaner:
- Purpose: To remove stains and dirt.
- Features: Look for pH-balanced, non-toxic options that are safe for your car’s interior.
- Recommendation: Consider brands like Chemical Guys or Meguiar’s, known for their effectiveness and safety.
-
Stain Remover:
- Purpose: To target specific stains like grease, ink, or coffee.
- Features: Choose a stain remover formulated for upholstery to avoid damaging the fabric.
- Recommendation: Products like Spot Shot or Folex are highly rated for their stain-lifting abilities.
-
Microfiber Towels:
- Purpose: For gentle cleaning and drying.
- Features: Opt for high-quality, lint-free towels to prevent scratches and streaks.
- Recommendation: Invest in a pack of microfiber towels specifically designed for automotive detailing.
-
Soft-Bristled Brush:
- Purpose: To agitate stains and loosen dirt.
- Features: Ensure the bristles are soft enough to avoid damaging the fabric.
- Recommendation: A dedicated upholstery brush will work best, but a soft toothbrush can also be used for small areas.
-
Vacuum Cleaner:
- Purpose: To remove loose dirt and debris.
- Features: A vacuum with a hose and upholstery attachment is ideal.
- Recommendation: A portable car vacuum is a convenient option for quick cleanups.
3.2. Repair Tools
-
Upholstery Needle and Thread:
- Purpose: For sewing tears and reinforcing seams.
- Features: A curved upholstery needle is best for working in tight spaces. Choose a strong, color-matched thread designed for upholstery.
- Recommendation: Purchase a kit that includes a variety of needle sizes and thread colors.
-
Fabric Patch:
- Purpose: To cover holes and tears.
- Features: Select a fabric patch that closely matches the color and texture of your car’s upholstery.
- Recommendation: Upholstery shops often sell small pieces of fabric that are perfect for patching.
-
Fabric Adhesive:
- Purpose: To bond fabric patches to the upholstery.
- Features: Choose a flexible, waterproof adhesive that is designed for fabric.
- Recommendation: 3M Super 77 is a popular choice for its strong bond and ease of use.
-
Scissors or Utility Knife:
- Purpose: For cutting fabric and trimming patches.
- Features: Ensure your cutting tools are sharp for clean, precise cuts.
- Recommendation: A utility knife with replaceable blades is versatile and safe.
-
Iron:
- Purpose: To activate fabric adhesive and bond patches.
- Features: A household iron with adjustable temperature settings will work well.
- Recommendation: Use a pressing cloth to protect the upholstery from direct heat.
-
Steamer:
- Purpose: To remove stubborn stains and refresh the fabric.
- Features: A handheld steamer is convenient for spot treatments and small areas.
- Recommendation: Consider a multi-purpose steamer that can also be used for other household cleaning tasks.
3.3. Safety Gear
-
Gloves:
- Purpose: To protect your hands from chemicals and dirt.
- Features: Choose gloves that are resistant to the cleaning and repair products you will be using.
- Recommendation: Nitrile gloves are a good all-around option.
-
Eye Protection:
- Purpose: To protect your eyes from splashes and debris.
- Features: Safety glasses or goggles will provide adequate protection.
- Recommendation: Wear eye protection whenever you are using cleaning chemicals or power tools.
-
Mask:
- Purpose: To avoid inhaling fumes from cleaning and repair products.
- Features: A respirator mask will provide the best protection, but a dust mask can also be used for light tasks.
- Recommendation: Ensure the mask fits properly and is rated for the types of fumes you will be exposed to.
3.4. Optional Tools
-
Seam Ripper:
- Purpose: For removing seams and stitching.
- Features: A sharp, pointed seam ripper will make quick work of removing old stitches.
-
Hog Ring Pliers and Hog Rings:
- Purpose: For attaching upholstery to the seat frame.
- Features: Hog ring pliers are designed to crimp hog rings, which securely fasten the fabric to the frame.
-
Foam Padding:
- Purpose: For replacing worn or damaged seat padding.
- Features: Choose high-density foam that is designed for automotive use.
Table: Essential Tools and Materials for Cloth Car Seat Repair
| Tool/Material | Purpose | Features | Recommendation |
|---|---|---|---|
| Upholstery Cleaner | Remove stains and dirt | pH-balanced, non-toxic | Chemical Guys, Meguiar’s |
| Stain Remover | Target specific stains | Formulated for upholstery | Spot Shot, Folex |
| Microfiber Towels | Gentle cleaning and drying | High-quality, lint-free | Automotive detailing microfiber towels |
| Soft-Bristled Brush | Agitate stains and loosen dirt | Soft bristles | Dedicated upholstery brush, soft toothbrush |
| Vacuum Cleaner | Remove loose dirt and debris | Hose and upholstery attachment | Portable car vacuum |
| Upholstery Needle | Sewing tears and reinforcing seams | Curved needle, strong thread | Kit with various needle sizes and thread colors |
| Fabric Patch | Cover holes and tears | Closely matches upholstery color and texture | Upholstery shop fabric pieces |
| Fabric Adhesive | Bond fabric patches | Flexible, waterproof | 3M Super 77 |
| Scissors/Utility Knife | Cutting fabric and trimming patches | Sharp blades | Utility knife with replaceable blades |
| Iron | Activate fabric adhesive and bond patches | Adjustable temperature settings | Household iron with pressing cloth |
| Steamer | Remove stubborn stains and refresh fabric | Handheld | Multi-purpose steamer |
| Gloves | Protect hands | Resistant to chemicals and dirt | Nitrile gloves |
| Eye Protection | Protect eyes | Safety glasses or goggles | Wear during chemical use |
| Mask | Avoid inhaling fumes | Respirator mask or dust mask | Ensure proper fit and rating |
| Seam Ripper | Removing seams and stitching | Sharp, pointed | |
| Hog Ring Pliers/Rings | Attaching upholstery to seat frame | Designed to crimp hog rings | |
| Foam Padding | Replacing worn seat padding | High-density, automotive-grade |
Equipping yourself with these tools and materials will set you up for success in your cloth car seat repair endeavors. Remember, the quality of your tools often reflects the quality of the final result.
4. Step-by-Step Guide to Fixing Tears in Cloth Car Seats
Tears in cloth car seats are a common issue, but they can often be repaired with the right tools and techniques. Here’s a detailed, step-by-step guide to help you mend those unsightly rips.
4.1. Preparing the Area
-
Clean the Area:
- Use a vacuum cleaner with an upholstery attachment to remove any loose dirt, dust, and debris around the tear.
- Wipe the area with a clean, damp microfiber towel to remove any remaining surface dirt.
-
Assess the Tear:
- Examine the tear to determine its size and shape.
- Check for any fraying or loose threads around the edges.
-
Trim Loose Threads:
- Use a pair of sharp scissors or a seam ripper to carefully trim any loose threads or frayed edges. This will create a cleaner edge for sewing.
4.2. Sewing the Tear
-
Thread the Needle:
- Select an upholstery thread that closely matches the color of your car seat fabric.
- Thread the curved upholstery needle with a length of thread that is long enough to cover the tear, plus a few extra inches.
- Tie a knot at the end of the thread.
-
Start Sewing:
- Insert the needle from the underside of the fabric, just behind one edge of the tear.
- Pull the thread through until the knot catches.
- Make small, even stitches along the tear, pulling the edges together as you go.
- Aim for stitches that are about 1/8 to 1/4 inch apart.
-
Continue Sewing:
- Continue stitching along the entire length of the tear, maintaining consistent tension on the thread.
- If the tear is long, you may need to stop and start with a new length of thread. Tie off the old thread securely before starting with the new thread.
-
Secure the End:
- When you reach the end of the tear, make a few small backstitches to secure the thread.
- Tie off the thread with a secure knot and trim any excess.
4.3. Reinforcing the Repair
-
Apply Fabric Sealant:
- Apply a thin layer of fabric sealant along both sides of the repaired tear.
- This will help prevent fraying and reinforce the stitches.
- Follow the manufacturer’s instructions for application and drying time.
-
Allow to Dry:
- Allow the fabric sealant to dry completely before using the repaired area.
- This may take several hours, depending on the product.
4.4. Patching Larger Tears
For larger tears, a patch may be necessary to provide additional support and coverage.
-
Cut the Patch:
- Measure the size of the tear and cut a fabric patch that is slightly larger than the tear on all sides (about 1/2 inch overlap).
- Round the corners of the patch to prevent them from catching or peeling up.
-
Apply Fabric Adhesive:
- Apply a thin, even layer of fabric adhesive to the back of the patch.
- Position the patch over the tear, centering it carefully.
-
Bond the Patch:
- Press the patch firmly onto the upholstery, ensuring that the edges are securely bonded.
- Use an iron on a low setting to heat the patch and activate the adhesive. Place a pressing cloth between the iron and the patch to protect the fabric.
- Follow the manufacturer’s instructions for bonding time.
-
Sew the Patch (Optional):
- For added security, you can sew around the edges of the patch using the same stitching technique described above.
- This will help prevent the patch from peeling up over time.
Table: Step-by-Step Guide to Fixing Tears in Cloth Car Seats
| Step | Action | Details |
|---|---|---|
| 1. Prepare the Area | Clean the area | Vacuum, wipe with a damp microfiber towel. |
| Assess the tear | Determine size, shape, and any fraying. | |
| Trim loose threads | Use sharp scissors or a seam ripper. | |
| 2. Sewing the Tear | Thread the needle | Use upholstery thread that matches the fabric color. |
| Start sewing | Insert the needle from the underside, make small stitches along the tear. | |
| Continue sewing | Maintain consistent tension, tie off old thread securely. | |
| Secure the end | Make backstitches, tie off the thread, and trim excess. | |
| 3. Reinforce Repair | Apply fabric sealant | Apply a thin layer along both sides of the repaired tear. |
| Allow to dry | Wait until the sealant is completely dry. | |
| 4. Patching Tears | Cut the patch | Measure the tear and cut a fabric patch slightly larger. |
| Apply fabric adhesive | Apply a thin layer to the back of the patch. | |
| Bond the patch | Press firmly onto the upholstery, use an iron on low setting with a pressing cloth. | |
| Sew the patch (optional) | For added security, sew around the edges of the patch. |
By following these steps, you can effectively repair tears in your cloth car seats, prolonging their life and maintaining the overall appearance of your vehicle’s interior.
5. Removing Stains from Cloth Car Seats: A Comprehensive Guide
Stains are inevitable in car interiors, but with the right approach, you can effectively remove them and keep your cloth car seats looking fresh. Here’s a comprehensive guide to tackling common types of stains.
5.1. General Stain Removal
-
Act Quickly:
- The sooner you address a stain, the easier it will be to remove. Fresh stains are less likely to set into the fabric.
-
Blot, Don’t Rub:
- Use a clean microfiber towel to blot the stain, working from the outside in to prevent it from spreading.
- Rubbing can push the stain deeper into the fibers and damage the fabric.
-
Vacuum the Area:
- Use a vacuum cleaner with an upholstery attachment to remove any loose dirt or debris before applying any cleaning products.
-
Test Cleaning Products:
- Before applying any cleaning product to the entire stain, test it on a small, inconspicuous area of the upholstery to ensure it doesn’t cause discoloration or damage.
-
Apply Upholstery Cleaner:
- Spray a small amount of upholstery cleaner onto the stain.
- Use a soft-bristled brush to gently agitate the cleaner into the fabric.
-
Blot Again:
- Use a clean, damp microfiber towel to blot the stain and remove the cleaning product.
- Repeat the process as needed until the stain is removed.
-
Dry the Area:
- Use a clean, dry microfiber towel to absorb any remaining moisture.
- Allow the area to air dry completely before using the seat.
5.2. Specific Stain Removal Techniques
-
Coffee Stains:
- Blot up as much of the coffee as possible with a clean towel.
- Mix a solution of warm water and a few drops of dish soap.
- Apply the solution to the stain and blot gently.
- Rinse with clean water and blot dry.
-
Grease Stains:
- Sprinkle baking soda or cornstarch onto the stain to absorb the grease.
- Let it sit for 15-20 minutes, then vacuum up the powder.
- Apply a solvent-based stain remover to the area and blot gently.
- Rinse with clean water and blot dry.
-
Ink Stains:
- Dab the stain with rubbing alcohol on a cotton ball.
- Blot gently with a clean towel to lift the ink.
- Repeat the process as needed until the ink is removed.
- Rinse with clean water and blot dry.
-
Blood Stains:
- Blot up as much of the blood as possible with a clean, damp cloth.
- Mix a solution of cold water and a small amount of hydrogen peroxide.
- Apply the solution to the stain and let it sit for a few minutes.
- Blot gently with a clean towel.
- Rinse with cold water and blot dry.
-
Pet Stains:
- Clean up any solid waste and blot up as much liquid as possible.
- Mix a solution of equal parts white vinegar and water.
- Apply the solution to the stain and let it sit for 5-10 minutes.
- Blot gently with a clean towel.
- Sprinkle baking soda onto the area to absorb odors.
- Let it sit for several hours, then vacuum up the baking soda.
5.3. Stubborn Stains
-
Steam Cleaning:
- For stubborn stains, consider using a steam cleaner to deep clean the upholstery.
- Follow the manufacturer’s instructions and use the appropriate attachment for car seats.
-
Professional Cleaning:
- If you are unable to remove a stain on your own, consider hiring a professional auto detailer to clean your car seats.
Table: Stain Removal Techniques for Cloth Car Seats
| Stain Type | Action | Details |
|---|---|---|
| Coffee | Blot, apply dish soap solution | Mix warm water and a few drops of dish soap, rinse with clean water. |
| Grease | Sprinkle baking soda, apply solvent-based remover | Let baking soda sit for 15-20 minutes, vacuum up, rinse with clean water. |
| Ink | Dab with rubbing alcohol | Use a cotton ball, blot gently, repeat as needed, rinse with clean water. |
| Blood | Blot, apply hydrogen peroxide solution | Mix cold water and hydrogen peroxide, let sit for a few minutes, rinse with cold water. |
| Pet Stains | Clean waste, apply vinegar and water solution, sprinkle baking soda | Mix equal parts vinegar and water, let sit for 5-10 minutes, sprinkle baking soda after cleaning, let sit for several hours, then vacuum. |
| General Stain | Act quickly, blot don’t rub, vacuum, test cleaning products, apply upholstery cleaner, blot, dry | Use clean microfiber towels, work from the outside in, test products on a small area first. |
By following these stain removal techniques, you can keep your cloth car seats looking clean and fresh, enhancing the overall appearance and comfort of your vehicle.
6. Maintaining Cloth Car Seats to Prevent Future Damage
Prevention is always better than cure. Regular maintenance can significantly extend the life of your cloth car seats and keep them looking their best. Here are some essential tips for maintaining your car seats.
6.1. Regular Cleaning
-
Vacuum Frequently:
- Vacuum your car seats at least once a month to remove loose dirt, dust, and debris.
- Use a vacuum cleaner with an upholstery attachment to reach crevices and seams.
-
Wipe Spills Immediately:
- Keep a pack of microfiber towels in your car to wipe up spills as soon as they happen.
- The quicker you address a spill, the less likely it is to stain.
-
Use Seat Covers:
- Consider using seat covers to protect your car seats from wear and tear, spills, and stains.
- Choose seat covers that are made from durable, easy-to-clean materials.
6.2. Deep Cleaning
-
Upholstery Cleaner:
- Deep clean your car seats with an upholstery cleaner every 3-6 months.
- Follow the manufacturer’s instructions and test the cleaner on a small, inconspicuous area first.
-
Steam Cleaning:
- Steam cleaning can help remove embedded dirt and stains.
- Use a steam cleaner with an upholstery attachment and follow the manufacturer’s instructions.
-
Professional Detailing:
- Consider hiring a professional auto detailer to deep clean your car seats once a year.
6.3. Protecting from the Sun
-
Park in the Shade:
- Whenever possible, park your car in the shade to protect the upholstery from the sun’s harmful UV rays.
-
Use a Sunshade:
- Use a sunshade to block sunlight from entering your car and fading the upholstery.
-
Window Tinting:
- Consider getting your car windows tinted to reduce the amount of UV light that enters the vehicle.
6.4. Preventing Wear and Tear
-
Avoid Sharp Objects:
- Be careful when placing sharp objects on your car seats, such as keys, tools, or pet claws.
-
Limit Food and Drink:
- Avoid eating and drinking in your car to minimize the risk of spills and stains.
-
Regular Inspection:
- Inspect your car seats regularly for signs of wear and tear, such as loose seams or frayed edges.
- Address these issues promptly to prevent them from becoming larger problems.
Table: Maintenance Tips for Cloth Car Seats
| Maintenance Task | Frequency | Details |
|---|---|---|
| Vacuuming | Monthly | Use upholstery attachment, reach crevices and seams. |
| Wiping Spills | Immediately | Keep microfiber towels in the car, act fast. |
| Seat Covers | Continuous | Choose durable, easy-to-clean materials. |
| Deep Cleaning | Every 3-6 Months | Use upholstery cleaner, test on a small area first. |
| Steam Cleaning | As Needed | Use upholstery attachment, follow instructions. |
| Professional Detailing | Yearly | Consider for deep cleaning. |
| Park in Shade | Whenever Possible | Protect from UV rays. |
| Use Sunshade | Daily | Block sunlight from entering the car. |
| Window Tinting | One-Time | Reduce UV light entering the vehicle. |
| Avoid Sharp Objects | Continuous | Be careful with keys, tools, pet claws. |
| Limit Food/Drink | Continuous | Minimize spills and stains. |
| Regular Inspection | Regularly | Check for loose seams, frayed edges, address issues promptly. |
By following these maintenance tips, you can keep your cloth car seats in excellent condition, prolonging their lifespan and maintaining the overall appearance of your vehicle.
7. Deciding Between DIY Repair and Professional Upholstery Services
One of the key decisions to make when dealing with damaged cloth car seats is whether to tackle the repair yourself or seek professional help. Here’s a breakdown to help you decide.
7.1. DIY Repair: Pros and Cons
-
Pros:
- Cost-Effective: DIY repairs are typically much cheaper than professional services, as you only pay for materials.
- Convenience: You can perform the repairs on your own schedule and at your own pace.
- Personal Satisfaction: Completing a repair yourself can be rewarding and provide a sense of accomplishment.
-
Cons:
- Time-Consuming: DIY repairs can take a significant amount of time, especially if you are not experienced.
- Requires Skill: Some repairs require specific skills and techniques to achieve a professional-looking result.
- Risk of Mistakes: If you make a mistake, you could potentially damage the upholstery further.
- Limited Results: DIY repairs may not always achieve the same level of quality as professional services.
7.2. Professional Upholstery Services: Pros and Cons
-
Pros:
- High-Quality Results: Professional upholsterers have the skills, experience, and tools to achieve a high-quality, seamless repair.
- Time-Saving: Professionals can complete repairs much faster than DIYers.
- Convenience: You can drop off your car and have the repairs done while you take care of other tasks.
- Guaranteed Work: Many professional services offer warranties or guarantees on their work.
-
Cons:
- Costly: Professional upholstery services can be expensive, especially for extensive repairs.
- Scheduling: You may need to schedule an appointment and wait for the repairs to be completed.
- Finding a Reputable Service: It’s important to find a reputable and experienced upholstery service to ensure a good result.
7.3. Factors to Consider
-
Extent of Damage:
- Small tears, stains, and minor wear and tear can often be handled with DIY methods.
- Large tears, extensive damage, and complex repairs are best left to professionals.
-
Skill Level:
- If you are comfortable with basic sewing, cleaning, and repair techniques, DIY may be a good option.
- If you lack experience or are unsure about your abilities, professional services are a safer choice.
-
Budget:
- Consider your budget and compare the cost of DIY materials with the cost of professional services.
- Factor in the value of your time and the potential cost of mistakes.
-
Time Availability:
- Assess how much time you have to dedicate to the repair.
- If you are short on time, professional services may be the best option.
Table: DIY vs. Professional Upholstery Services
| Factor | DIY Repair | Professional Upholstery Services |
|---|---|---|
| Cost | Lower | Higher |
| Time | More Time | Less Time |
| Skill Required | Basic Skills | Advanced Skills |
| Quality of Results | Varies, May Be Limited | High-Quality, Seamless |
| Convenience | Flexible Schedule | Requires Scheduling |
| Extent of Damage | Small Tears, Stains, Minor Wear | Large Tears, Extensive Damage, Complex Repairs |
| Warranty/Guarantee | None | Often Offered |
| Risk of Mistakes | Higher | Lower |
Ultimately, the decision between DIY repair and professional upholstery services depends on your individual circumstances, skill level, and preferences. Evaluate the pros and cons carefully to make the best choice for your needs.
8. Cost Considerations for Fixing Cloth Car Seats
Understanding the costs associated with fixing cloth car seats is essential for budgeting and making informed decisions. Here’s a breakdown of the potential expenses for both DIY repairs and professional services.
8.1. DIY Repair Costs
-
Cleaning Supplies:
- Upholstery Cleaner: $10 – $20
- Stain Remover: $5 – $15
- Microfiber Towels: $10 – $20 (pack of several)
- Soft-Bristled Brush: $5 – $10
-
Repair Tools:
- Upholstery Needle and Thread: $5 – $15
- Fabric Patch: $5 – $10
- Fabric Adhesive: $5 – $10
- Scissors or Utility Knife: $10 – $20
- Iron (if you don’t already own one): $20 – $50
-
Optional Tools:
- Seam Ripper: $5 – $10
- Steamer (if you don’t already own one): $50 – $150
-
Total Estimated DIY Cost:
- $50 – $300, depending on the extent of the repairs and the tools you need to purchase.
8.2. Professional Upholstery Service Costs
-
Minor Repairs (Small Tears, Stains):
- $50 – $150 per seat
-
Moderate Repairs (Larger Tears, Patching):
- $150 – $300 per seat
-
Extensive Repairs (Significant Damage, Reupholstering):
- $300 – $1000+ per seat
-
Full Reupholstering:
- $500 – $2000+ per seat, depending on the type of fabric and the complexity of the job.
8.3. Factors Affecting Professional Service Costs
- Extent of Damage: The more extensive the damage, the higher the cost.
- Type of Fabric: Some fabrics are more expensive to repair or replace than others.
- Complexity of the Job: Complex repairs that require removing the seat from the car or disassembling the upholstery will cost more.
- Labor Rates: Labor rates vary depending on the location and the experience of the upholsterer.
- Materials Used: The quality and type of materials used will affect the overall cost.
Table: Cost Comparison for DIY vs. Professional Repairs
| Repair Type | DIY Cost (Estimated) | Professional Service Cost (Estimated) |
|---|---|---|
| Cleaning Supplies | $50 – $100 | Included in Service Cost |
| Minor Repairs | $50 – $150 | $50 – $150 per seat |
| Moderate Repairs | $100 – $200 | $150 – $300 per seat |
| Extensive Repairs | $200 – $300 | $300 – $1000+ per seat |
| Full Reupholstering | N/A | $500 – $2000+ per seat |
8.4. Tips for Saving Money
- Get Multiple Quotes: If you opt for professional services, get quotes from several different upholsterers to compare prices.
- Ask About Discounts: Some upholstery services offer discounts for seniors, students, or military personnel.
- Consider Partial Repairs: If only a small area of the seat is damaged, consider a partial repair instead of reupholstering the entire seat.
- DIY What You Can: Tackle minor repairs and maintenance tasks yourself to prevent more significant damage that would require professional attention.
Understanding these cost considerations will help you make an informed decision about how to address the damage to your cloth car seats, balancing cost-effectiveness with the quality of the repair.
9. Sourcing Quality Tools and Materials from CARDIAGTECH.NET
When it comes to maintaining and repairing your vehicle, the quality of your tools and materials matters. CARDIAGTECH.NET offers a wide range of high-quality products designed to meet the needs of both DIY enthusiasts and professional technicians. Here’s how CARDIAGTECH.NET can assist you in sourcing the best tools and materials for fixing your cloth car seats.
9.1. Comprehensive Selection of Automotive Tools
CARDIAGTECH.NET provides a comprehensive selection of automotive tools, ranging from basic hand tools to advanced diagnostic equipment. Whether you need a simple upholstery needle or a professional-grade steamer, you can find it at CARDIAGTECH.NET.
- Hand Tools: Upholstery needles, scissors, seam rippers, and other essential hand tools for repairing cloth car seats.
- Cleaning Equipment: Vacuum cleaners, steamers, and brushes designed for automotive detailing.
- Diagnostic Tools: Advanced diagnostic tools to identify and address any underlying issues affecting your vehicle’s interior.
9.2. High-Quality Materials for Upholstery Repair
CARDIAGTECH.NET offers a variety of high-quality materials for upholstery repair, ensuring that your repairs are durable and long-lasting.
- Upholstery Fabric: A wide range of fabrics to match your car’s interior, including cloth, leather, and vinyl.
- **Thread and Adhes