How To Fix Cracked Paint On Car Hood Effectively

Cracked paint on your car hood is not only an eyesore but also a sign of potential underlying issues that could compromise your vehicle’s integrity. CARDIAGTECH.NET understands the frustration and concern this can cause, and we’re here to provide you with a comprehensive guide on how to address this problem effectively, helping you restore your car’s appearance and protect its value. Addressing paint cracks, automotive paint repair and auto body solutions are essential for maintaining vehicle’s aesthetic appeal and structural health.
1. Understanding Cracked Paint on Your Car Hood
1.1. Identifying the Problem
Cracked paint, often referred to as crazing or spider-webbing, appears as a network of fine lines or fractures on the surface of your car’s paint. This issue typically arises on horizontal panels like the hood, roof, and trunk due to increased exposure to sunlight, temperature variations, and environmental contaminants. Recognizing the type and extent of the cracking is crucial for determining the appropriate repair method.
1.2. Common Causes of Paint Cracking
Several factors can contribute to cracked paint on your car hood:
- Improper Paint Application: This includes using incompatible products, applying paint too thickly, or failing to properly prepare the surface.
- Environmental Factors: Prolonged exposure to UV rays, extreme temperature changes, and pollutants can degrade the paint over time.
- Substrate Issues: Problems with the underlying metal, such as rust or corrosion, can cause the paint to crack and peel.
- Accidents and Impacts: Even minor collisions or impacts can create stress points that lead to paint cracking.
- Age and Wear: Over time, the natural aging process can cause the paint to become brittle and prone to cracking.
1.3. Types of Paint Cracks
Understanding the different types of paint cracks can help you diagnose the underlying issue:
- Stress Cracks: These cracks are caused by physical stress or impact and often appear around edges or areas prone to flexing.
- Environmental Cracks: These are the result of prolonged exposure to sunlight, temperature changes, and pollutants. They typically appear as a network of fine lines.
- Solvent Popping: This occurs when solvents trapped beneath the paint film evaporate, creating small blisters that eventually crack.
- Alligatoring: This type of cracking resembles the scales of an alligator and is usually caused by applying a hard topcoat over a softer undercoat.
Alligator cracking on car paint, indicating a need for repair
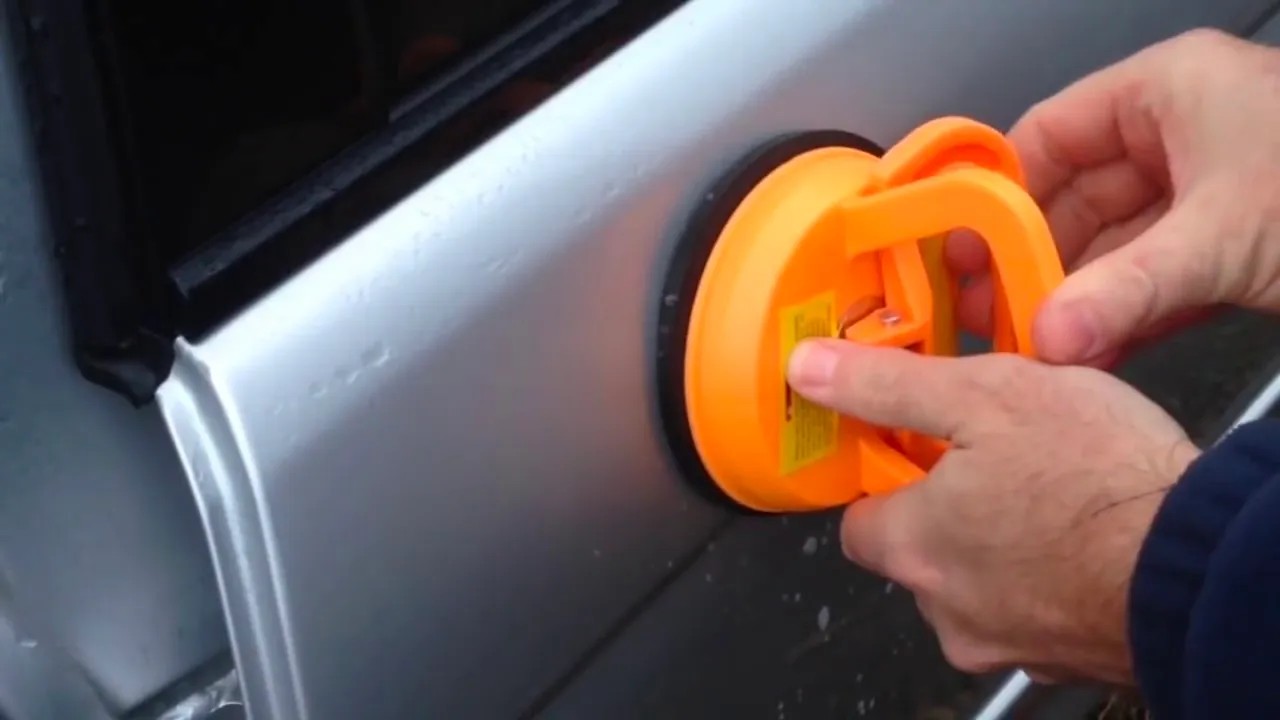
2. Essential Tools and Materials
Before you begin the repair process, gather the necessary tools and materials. Having everything on hand will make the job smoother and more efficient. CARDIAGTECH.NET offers a wide range of high-quality automotive repair tools to help you achieve professional results.
2.1. Sanding Supplies
- Sandpaper: A variety of grits, including P180, P320, P400, P600, P800, P1000, P1500, P2000, and P3000.
- Sanding Block: Provides a flat, even surface for sanding.
- Dual Action (DA) Sander: For larger areas and more aggressive sanding.
2.2. Body Filler and Primer
- Body Filler: To fill in deeper cracks and imperfections.
- Primer: To create a smooth, even surface for the topcoat.
2.3. Painting Equipment
- Automotive Paint: Matching your car’s original color code.
- Clear Coat: To protect the paint and add shine.
- Spray Gun: For applying paint and clear coat.
- Masking Tape and Paper: To protect surrounding areas from overspray.
2.4. Safety Gear
- Respirator: To protect your lungs from paint fumes.
- Gloves: To protect your hands from chemicals.
- Eye Protection: Safety glasses or goggles.
2.5. Cleaning and Preparation
- Wax and Grease Remover: To clean the surface before sanding.
- Tack Cloth: To remove dust and debris.
- Microfiber Cloths: For cleaning and polishing.
Table 1: Essential Tools and Materials for Fixing Cracked Paint
| Tool/Material | Description | Purpose |
|---|---|---|
| Sandpaper (Various) | Different grits for removing paint, smoothing surfaces, and feathering edges. | Surface preparation, paint removal, and blending. |
| Sanding Block | Provides a flat, even surface for sanding. | Ensuring uniform sanding pressure. |
| DA Sander | For larger areas and aggressive sanding. | Efficient paint removal and surface leveling. |
| Body Filler | Fills in deeper cracks and imperfections. | Repairing significant surface damage. |
| Primer | Creates a smooth, even surface for the topcoat. | Enhancing paint adhesion and finish quality. |
| Automotive Paint | Matching your car’s original color code. | Restoring the original color of the car hood. |
| Clear Coat | Protects the paint and adds shine. | Enhancing durability and appearance. |
| Spray Gun | For applying paint and clear coat. | Achieving a professional finish. |
| Masking Tape & Paper | Protects surrounding areas from overspray. | Preventing damage to adjacent panels. |
| Respirator | Protects your lungs from paint fumes. | Ensuring safety during painting. |
| Gloves | Protects your hands from chemicals. | Preventing skin irritation and chemical exposure. |
| Eye Protection | Safety glasses or goggles. | Protecting eyes from debris and chemicals. |
| Wax and Grease Remover | Cleans the surface before sanding. | Ensuring proper adhesion of paint. |
| Tack Cloth | Removes dust and debris. | Preventing contamination of the paint surface. |
| Microfiber Cloths | For cleaning and polishing. | Achieving a clean and smooth finish. |
3. Step-by-Step Guide to Fixing Cracked Paint
3.1. Preparation
- Clean the Area: Wash the car hood thoroughly with soap and water. Then, use a wax and grease remover to eliminate any remaining contaminants.
- Mask Off Surrounding Areas: Use masking tape and paper to protect the areas around the cracked paint. Ensure the tape is securely applied to prevent paint bleed.
3.2. Sanding
- Initial Sanding: Use P180 or P320 sandpaper to remove the cracked paint. If the cracks are deep, use a DA sander for faster removal.
- Feathering the Edges: Switch to P400 sandpaper to feather the edges of the sanded area. This will help blend the repair with the surrounding paint.
- Smoothing the Surface: Use P600 or P800 sandpaper to smooth the surface and remove any scratches from the previous sanding steps.
3.3. Applying Body Filler (If Necessary)
- Mix the Filler: Follow the manufacturer’s instructions to mix the body filler with the hardener.
- Apply the Filler: Use a plastic spreader to apply a thin, even layer of filler over the damaged area.
- Let it Cure: Allow the filler to cure completely, as per the manufacturer’s instructions.
- Sand the Filler: Use P320 sandpaper to sand the filler down to the level of the surrounding paint. Then, switch to P400 and P600 sandpaper to smooth the surface.
3.4. Priming
- Clean the Surface: Use a tack cloth to remove any dust or debris from the sanded area.
- Apply Primer: Apply two to three thin coats of automotive primer, allowing each coat to dry before applying the next.
- Sand the Primer: Use P800 sandpaper to smooth the primer and remove any imperfections.
3.5. Painting
- Prepare the Paint: Follow the manufacturer’s instructions to mix the automotive paint with the reducer.
- Apply the Paint: Use a spray gun to apply two to three thin coats of paint, allowing each coat to dry before applying the next. Maintain a consistent distance and speed to ensure even coverage.
- Apply Clear Coat: After the paint has dried, apply two to three thin coats of clear coat to protect the paint and add shine.
3.6. Finishing
- Wet Sanding: Use P1500 or P2000 sandpaper to wet sand any imperfections in the clear coat.
- Polishing: Use a polishing compound and a polishing pad to remove any sanding marks and restore the shine.
- Waxing: Apply a coat of wax to protect the paint and enhance the shine.
Table 2: Step-by-Step Guide to Fixing Cracked Paint
| Step | Description | Sandpaper Grit (if applicable) |
|---|---|---|
| 1. Preparation | Clean the area, mask off surrounding areas. | N/A |
| 2. Initial Sanding | Remove cracked paint. Use DA sander for faster removal. | P180/P320 |
| 3. Feathering Edges | Blend the repair with surrounding paint. | P400 |
| 4. Smoothing Surface | Remove scratches from previous sanding. | P600/P800 |
| 5. Apply Body Filler | Mix and apply filler to deep cracks, let it cure, then sand. | P320/P400/P600 |
| 6. Priming | Clean surface, apply 2-3 thin coats of primer, let dry, then sand. | P800 |
| 7. Painting | Prepare paint, apply 2-3 thin coats, let dry between coats. | N/A |
| 8. Clear Coat | Apply 2-3 thin coats of clear coat after paint is dry. | N/A |
| 9. Wet Sanding | Wet sand imperfections in clear coat. | P1500/P2000 |
| 10. Polishing | Remove sanding marks and restore shine. | N/A |
| 11. Waxing | Protect paint and enhance shine. | N/A |
4. Advanced Techniques for Severe Cracking
In cases of severe cracking, more advanced techniques may be necessary to restore the car hood to its original condition. These techniques often involve more extensive sanding, bodywork, and painting.
4.1. Complete Paint Removal
If the cracking is widespread and deep, the best approach may be to remove all of the existing paint. This can be done using a combination of chemical strippers and mechanical sanding.
- Apply Chemical Stripper: Follow the manufacturer’s instructions to apply a chemical stripper to the car hood. Allow it to sit for the recommended time, then scrape off the softened paint.
- Sand the Surface: Use P180 or P320 sandpaper to remove any remaining paint and smooth the surface.
- Inspect for Rust: Check for any signs of rust or corrosion. If present, treat the affected areas with a rust converter before proceeding.
4.2. Panel Replacement
In extreme cases, where the underlying metal is severely damaged or corroded, it may be necessary to replace the entire car hood.
- Remove the Old Hood: Disconnect any wiring or hoses attached to the hood. Then, unbolt the hinges and remove the hood.
- Install the New Hood: Align the new hood and bolt it into place. Reconnect any wiring or hoses.
- Paint the New Hood: Follow the steps outlined in Section 3 to prime, paint, and clear coat the new hood.
4.3. Professional Assistance
If you are not comfortable performing these advanced techniques yourself, it is best to seek professional assistance from a reputable auto body shop. CARDIAGTECH.NET can connect you with qualified professionals in your area.
Table 3: Advanced Techniques for Severe Cracking
| Technique | Description | When to Use |
|---|---|---|
| Complete Paint Removal | Remove all existing paint using chemical strippers and mechanical sanding. | Widespread and deep cracking, significant surface damage. |
| Panel Replacement | Replace the entire car hood. | Severe metal damage or corrosion. |
| Professional Assistance | Seek help from a qualified auto body shop. | Uncomfortable performing advanced techniques, complex repairs. |
5. Preventing Future Paint Cracking
Once you have repaired the cracked paint on your car hood, it is important to take steps to prevent future occurrences.
5.1. Proper Maintenance
- Regular Washing: Wash your car regularly to remove dirt, grime, and pollutants.
- Waxing: Apply a coat of wax every few months to protect the paint from UV rays and environmental contaminants.
- Covering: Use a car cover when parking outdoors to shield the paint from sunlight and extreme temperatures.
5.2. Careful Driving
- Avoid Impacts: Drive carefully to avoid collisions and impacts that can damage the paint.
- Park Wisely: Park in shaded areas or covered garages to protect the paint from sunlight and extreme temperatures.
5.3. Quality Products
- Use High-Quality Paint: When repainting your car, use high-quality automotive paint and clear coat.
- Follow Instructions: Always follow the manufacturer’s instructions when applying paint and other products.
Table 4: Tips for Preventing Future Paint Cracking
| Prevention Method | Description | Benefits |
|---|---|---|
| Regular Washing | Wash your car regularly to remove dirt, grime, and pollutants. | Prevents buildup of contaminants that can degrade paint. |
| Waxing | Apply wax every few months to protect paint from UV rays and environmental factors. | Provides a protective layer, reduces fading and cracking. |
| Covering | Use a car cover when parking outdoors. | Shields paint from sunlight and extreme temperatures, minimizing wear and tear. |
| Careful Driving | Avoid collisions and impacts. | Prevents physical damage that leads to stress cracks. |
| Park Wisely | Park in shaded areas or covered garages. | Reduces exposure to harmful UV rays and extreme temperature fluctuations. |
| Quality Products | Use high-quality automotive paint and clear coat. | Ensures a durable and long-lasting finish. |
| Follow Instructions | Always follow manufacturer’s instructions when applying paint and products. | Proper application prevents issues like solvent popping and alligatoring. |
6. Cost Considerations
The cost of fixing cracked paint on your car hood can vary depending on the extent of the damage, the type of paint, and whether you choose to do it yourself or hire a professional.
6.1. DIY Costs
If you choose to fix the cracked paint yourself, you will need to purchase the necessary tools and materials. Here is a breakdown of the typical costs:
- Sandpaper: $10 – $20
- Body Filler: $20 – $30
- Primer: $15 – $25
- Automotive Paint: $50 – $100 per pint
- Clear Coat: $30 – $50 per quart
- Spray Gun: $50 – $200
- Masking Tape and Paper: $10 – $20
- Safety Gear: $20 – $50
Total DIY Cost: $205 – $695
6.2. Professional Costs
Hiring a professional auto body shop to fix cracked paint can be more expensive, but it also ensures a high-quality repair. The cost will depend on the shop’s labor rates and the complexity of the job.
- Minor Cracking: $200 – $500
- Moderate Cracking: $500 – $1000
- Severe Cracking: $1000 – $2000+
Table 5: Cost Considerations for Fixing Cracked Paint
| Repair Option | Estimated Cost | Pros | Cons |
|---|---|---|---|
| DIY | $205 – $695 | Lower cost, control over the process. | Requires skill, time, and proper equipment; potential for mistakes. |
| Professional (Minor) | $200 – $500 | High-quality repair, professional finish. | Higher cost than DIY. |
| Professional (Mod) | $500 – $1000 | Addresses more extensive damage, ensures proper repair. | More expensive, requires finding a reputable shop. |
| Professional (Severe) | $1000 – $2000+ | Handles significant damage, restores the car’s appearance. | Highest cost, may require insurance claims. |
7. Choosing the Right Products from CARDIAGTECH.NET
CARDIAGTECH.NET offers a wide range of high-quality automotive repair tools and products to help you fix cracked paint on your car hood. Here are some of our top recommendations:
7.1. Sanding Tools
- DA Sanders: Our dual-action sanders provide efficient and even sanding for removing paint and smoothing surfaces.
- Sanding Blocks: Our sanding blocks ensure a flat, even surface for sanding, resulting in a professional finish.
- Sandpaper Sets: We offer a variety of sandpaper sets with different grits to meet your specific needs.
7.2. Painting Equipment
- Spray Guns: Our spray guns provide precise and consistent paint application, ensuring a flawless finish.
- Paint Mixing Cups: Our paint mixing cups make it easy to mix paint and clear coat according to the manufacturer’s instructions.
- Masking Tape and Paper: Our masking tape and paper provide excellent protection against overspray.
7.3. Safety Gear
- Respirators: Our respirators protect your lungs from harmful paint fumes.
- Gloves: Our gloves protect your hands from chemicals and solvents.
- Eye Protection: Our safety glasses and goggles provide excellent eye protection.
7.4. Why Choose CARDIAGTECH.NET?
- High-Quality Products: We offer only the highest quality automotive repair tools and products.
- Competitive Prices: Our prices are competitive and affordable.
- Expert Advice: Our team of experts can provide you with the advice and support you need to get the job done right.
8. Real-World Examples and Case Studies
8.1. Case Study 1: Minor Cracking Repair
Problem: A 2015 Honda Civic had minor cracking on the hood due to prolonged sun exposure.
Solution: The owner used P400 sandpaper to feather the edges of the cracked paint, then applied primer, paint, and clear coat. The total cost was around $150, and the repair took about 8 hours.
Result: The car hood looked as good as new, and the owner saved money by doing the repair themselves.
8.2. Case Study 2: Severe Cracking Repair
Problem: A 2008 Ford F-150 had severe cracking and rust on the hood due to years of neglect.
Solution: The owner removed the old hood and replaced it with a new one. They then primed, painted, and clear coated the new hood. The total cost was around $800, and the repair took about 16 hours.
Result: The truck looked much better, and the new hood provided better protection against the elements.
8.3. Expert Insight from CARDIAGTECH.NET Technician
“Cracked paint is a common problem, but it doesn’t have to be a major headache. With the right tools and techniques, you can restore your car’s appearance and protect its value. At CARDIAGTECH.NET, we’re committed to providing you with the best products and support to get the job done right.”
9. The Science Behind Paint Cracking
Understanding the science behind paint cracking can help you prevent future occurrences and make informed decisions about repair methods.
9.1. Paint Composition
Automotive paint consists of several layers, each with its own purpose:
- Primer: Provides a base for the paint and helps it adhere to the metal.
- Basecoat: Provides the color and appearance of the paint.
- Clear Coat: Protects the basecoat from UV rays, scratches, and other damage.
9.2. UV Degradation
UV rays can break down the chemical bonds in the paint, causing it to become brittle and prone to cracking. Clear coat helps protect the basecoat from UV degradation, but it can also be damaged over time.
9.3. Thermal Expansion and Contraction
Extreme temperature changes can cause the metal and paint to expand and contract at different rates. This can create stress on the paint, leading to cracking.
9.4. Chemical Reactions
Pollutants and chemicals can react with the paint, causing it to degrade and crack. Regular washing and waxing can help prevent these reactions.
10. Frequently Asked Questions (FAQs)
Q1: What causes paint to crack on a car hood?
A1: Paint cracking can be caused by improper paint application, environmental factors, substrate issues, accidents, and age.
Q2: Can I fix cracked paint myself?
A2: Yes, you can fix cracked paint yourself if the damage is minor. However, severe cracking may require professional assistance.
Q3: How much does it cost to fix cracked paint on a car hood?
A3: The cost can range from $200 for minor DIY repairs to $2000+ for severe professional repairs.
Q4: What tools do I need to fix cracked paint?
A4: You will need sandpaper, body filler, primer, automotive paint, clear coat, a spray gun, masking tape, and safety gear.
Q5: How can I prevent paint from cracking in the future?
A5: You can prevent paint from cracking by washing your car regularly, waxing it, using a car cover, driving carefully, and using high-quality products.
Q6: Is it better to replace the hood or repair the paint?
A6: It depends on the extent of the damage. If the underlying metal is severely damaged or corroded, it may be better to replace the hood.
Q7: What is the best type of paint to use on a car hood?
A7: Use high-quality automotive paint that matches your car’s original color code.
Q8: How long does it take to fix cracked paint on a car hood?
A8: It can take anywhere from 8 hours for minor repairs to 16+ hours for severe repairs.
Q9: Can extreme weather cause paint to crack?
A9: Yes, extreme temperature changes and UV rays can cause paint to crack.
Q10: What is the best way to protect my car’s paint from the sun?
A10: The best way to protect your car’s paint from the sun is to park in shaded areas, use a car cover, and apply wax regularly.
Conclusion: Act Now to Restore Your Car’s Beauty
Cracked paint on your car hood is a problem that should be addressed promptly to prevent further damage and maintain your vehicle’s value. Whether you choose to tackle the repair yourself or seek professional assistance, CARDIAGTECH.NET is here to provide you with the tools, products, and expertise you need to achieve a flawless finish.
Don’t let cracked paint detract from your car’s beauty and value. Contact CARDIAGTECH.NET today at Whatsapp: +1 (641) 206-8880 or visit our website at CARDIAGTECH.NET for expert advice and high-quality automotive repair solutions. Our address is 276 Reock St, City of Orange, NJ 07050, United States. Let us help you restore your car’s appearance and protect your investment!