How to Fix Deep Scratches in Car Paint Like a Pro
Fixing deep scratches in car paint can restore your vehicle’s appearance and protect it from rust. CARDIAGTECH.NET offers the right tools and equipment to professionally repair those unsightly blemishes, ensuring a smooth, flawless finish. Learn the secrets to automotive paint repair, clear coat application, and scratch removal today.
1. Understanding Deep Scratches and When to DIY
Deep scratches are more than just surface imperfections; they penetrate the clear coat and color coat, potentially exposing the metal underneath. Identifying the type of scratch is crucial before attempting any repair. According to the International Car Wash Association, addressing scratches promptly prevents further damage, such as rust and corrosion, which can significantly devalue your car.
- Clear Coat Scratches: Only affect the top clear coat layer.
- Paint Scratches: Extend through the clear coat and into the paint layer.
- Deep Scratches: Penetrate to the metal, requiring immediate attention to prevent rust.
When to DIY:
- Clear Coat Scratches: Minor scratches and swirl marks can often be fixed with DIY kits.
- Paint Scratches: Small, isolated scratches can be managed with touch-up paint and clear coat.
When to Seek Professional Help:
- Deep Scratches: If the scratch exposes bare metal or covers a large area, professional repair is recommended.
- Extensive Damage: Multiple scratches or damage affecting several panels should be handled by experts.
Seeking professional help ensures a flawless finish and prevents potential complications from improper repairs. However, for those minor blemishes, CARDIAGTECH.NET provides all the necessary tools to carry out effective DIY repairs. Contact us at +1 (641) 206-8880 for advice on the right equipment for your specific needs.
2. Essential Tools and Materials for Deep Scratch Repair
Having the right tools and materials is essential for achieving professional-quality results when fixing deep scratches in your car’s paint. Investing in quality equipment from CARDIAGTECH.NET ensures that the job is done right the first time.
Here’s a list of essential tools and materials:
| Tool/Material | Description | Benefit |
|---|---|---|
| Automotive Sandpaper Kit | Includes various grits (180, 320, 400, 600, 1000, 2000, 2500) for leveling and smoothing. | Ensures a seamless blend between the repair area and the surrounding paint. |
| Body Filler (Putty) | Fills in deep scratches and gouges, creating a smooth surface for painting. | Provides a solid foundation for the new paint layer, preventing imperfections from showing through. |
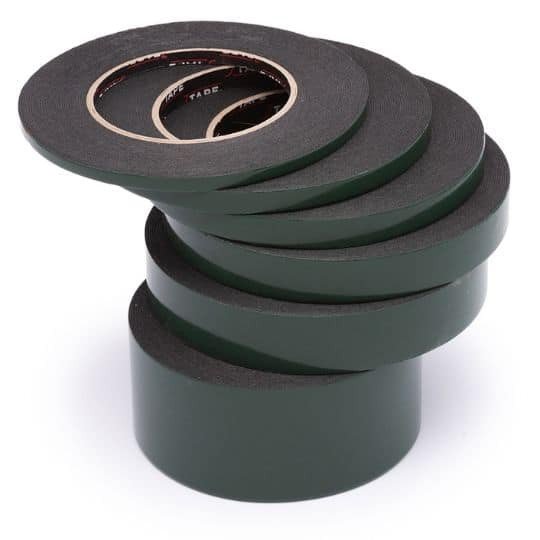
| Masking Tape and Paper | Protects surrounding areas from overspray during priming and painting. | Prevents unwanted paint or primer from damaging other parts of the car. |
| Automotive Primer | Prepares the surface for painting, ensuring proper adhesion and a uniform finish. | Enhances paint adhesion and provides a smooth base for the color coat. |
| Color-Matched Car Paint | Exactly matches your car’s original color for a seamless repair. | Ensures the repaired area blends perfectly with the rest of the car’s paint. |
| Clear Coat | Protects the paint and provides a glossy finish. | Adds durability and shine to the repaired area, protecting it from the elements. |
| Rubbing Compound | Removes imperfections and oxidation, restoring the paint’s shine. | Smooths out any minor imperfections and restores the paint’s luster. |
| Polishing Compound | Refines the paint surface, enhancing gloss and clarity. | Creates a deep, glossy shine that makes the repair virtually invisible. |
| Microfiber Cloths | For cleaning, polishing, and applying compounds without scratching the paint. | Ensures a clean and scratch-free finish during each step of the repair process. |
| Tack Cloth | Removes dust and contaminants from the surface before painting. | Prevents dust particles from getting trapped under the paint, ensuring a flawless finish. |
| Safety Gear (Gloves, Mask) | Protects your skin and respiratory system from chemicals and dust. | Ensures your safety and health while working with potentially hazardous materials. |
| Spray Gun (Optional) | Provides a professional-quality paint application. | Delivers an even and consistent paint coat, resulting in a smoother and more durable finish. |
| Sanding Block | Provides a flat, even surface for sanding, ensuring consistent results. | Prevents uneven sanding and ensures a smooth, level surface. |
| Dual Action (DA) Polisher | For buffing and polishing the repaired area. | Ensures a professional-quality finish. |
Investing in these tools from CARDIAGTECH.NET not only guarantees a high-quality repair but also enhances your ability to maintain your vehicle’s appearance. Our experts can guide you in selecting the best equipment for your needs. Contact us today at 276 Reock St, City of Orange, NJ 07050, United States, or call +1 (641) 206-8880 for personalized assistance.
Alt: Assortment of automotive sandpaper in various grits, essential for car paint scratch repair.
3. Step-by-Step Guide to Fixing Deep Scratches
Repairing deep scratches in your car’s paint requires patience and precision. Follow this comprehensive guide to achieve professional-looking results. This process integrates the best practices and tools available at CARDIAGTECH.NET, ensuring a flawless finish.
3.1. Preparation and Cleaning
1. Wash the Area:
Begin by thoroughly washing the area around the scratch with soap and water. This removes dirt, grease, and debris that could interfere with the repair process.
2. Dry the Surface:
Use a clean microfiber cloth to dry the area completely. Ensure there is no moisture left, as this can affect the adhesion of the body filler and paint.
3. Inspect the Damage:
Carefully inspect the scratch to determine its depth and extent. Use a magnifying glass if necessary. Identify any jagged edges or loose paint chips that need to be removed.
3.2. Sanding the Scratch
1. Initial Sanding:
Use 320-grit sandpaper to gently sand the scratch and the surrounding area. This step helps to smooth out the edges of the scratch and prepare the surface for the body filler. According to Popular Mechanics, sanding should be done in a circular motion to avoid creating additional scratches.
2. Wet Sanding (Optional):
Wet sanding can help to minimize scratches and create a smoother surface. Dip the sandpaper in water and continue sanding in a circular motion.
3. Clean the Area:
Wipe away any sanding residue with a clean, damp microfiber cloth. Allow the area to dry completely before moving on to the next step.
3.3. Applying Body Filler
1. Mix the Body Filler:
Follow the manufacturer’s instructions to mix the body filler with the hardener. Use a clean mixing board and applicator to ensure a smooth, consistent mixture.
2. Apply the Filler:
Apply the body filler to the scratch, making sure to fill it completely. Use the applicator to spread the filler evenly and smoothly over the surface. Overfill slightly to allow for sanding later.
3. Drying Time:
Allow the body filler to dry completely. This usually takes about 2-3 hours, depending on the product and environmental conditions.
3.4. Sanding the Body Filler
1. Initial Sanding:
Use 400-grit sandpaper to sand down the excess body filler. The goal is to level the filler with the surrounding paint surface. Sand in a circular motion, being careful not to remove too much material.
2. Fine Sanding:
Switch to 600-grit sandpaper for the second round of sanding. This will further smooth the surface and remove any remaining imperfections.
3. Final Sanding:
Finish with 800-grit sandpaper to create a smooth, even surface that is ready for priming.
3.5. Priming the Area
1. Masking:
Use masking tape and paper to protect the surrounding areas from overspray. Cover any parts of the car that you don’t want to be painted.
2. Apply Primer:
Apply 2-3 light coats of automotive primer to the sanded area, allowing each coat to dry for about 10-15 minutes before applying the next. Primer helps to create a uniform surface for the paint to adhere to.
3. Drying Time:
Allow the primer to dry completely, usually overnight, before moving on to the next step.
Alt: Application of body filler to a car scratch to fill in the deep gouge.
3.6. Painting the Repaired Area
1. Prepare the Paint:
Ensure that the color-matched car paint is properly mixed and ready to use. If using a spray gun, adjust the settings to achieve a fine, even spray.
2. Apply the Paint:
Apply 2-3 light coats of paint to the primed area, allowing each coat to dry for about 10-15 minutes before applying the next. Hold the spray gun or can about 8-10 inches away from the surface and move in a smooth, even motion.
3. Blending:
To blend the new paint with the surrounding area, feather the edges of the spray pattern. This will help to create a seamless transition between the repaired area and the original paint.
3.7. Applying Clear Coat
1. Apply Clear Coat:
Once the paint is dry, apply 2-3 light coats of clear coat to protect the paint and provide a glossy finish. Allow each coat to dry for about 10-15 minutes before applying the next.
2. Drying Time:
Allow the clear coat to dry completely, usually overnight, before moving on to the final polishing steps.
3.8. Polishing and Buffing
1. Wet Sanding (Optional):
If there are any imperfections in the clear coat, wet sand the area with 2000-grit sandpaper. This will help to smooth out the surface and prepare it for polishing.
2. Apply Rubbing Compound:
Apply a small amount of rubbing compound to a microfiber cloth and gently rub the repaired area in a circular motion. This will remove any imperfections and oxidation from the clear coat.
3. Apply Polishing Compound:
Apply a small amount of polishing compound to a clean microfiber cloth and gently rub the repaired area in a circular motion. This will further refine the paint surface and enhance the gloss and clarity.
4. Buffing:
Use a clean microfiber cloth to buff the repaired area until it is smooth and shiny. A dual-action (DA) polisher can be used for professional-quality results.
3.9. Waxing and Sealing
1. Apply Wax:
Apply a coat of high-quality car wax to protect the paint and provide a long-lasting shine. Follow the manufacturer’s instructions for application and buffing.
2. Seal the Paint:
Apply a paint sealant to further protect the paint from the elements. This will help to prevent fading, oxidation, and other types of damage.
By following these steps and using the quality tools and materials available at CARDIAGTECH.NET, you can effectively repair deep scratches in your car’s paint and restore its original appearance.
Alt: Close-up of freshly applied clear coat on a car bumper, enhancing shine and protection.
4. Advanced Techniques for Perfecting Your Repair
To achieve a truly flawless repair, consider incorporating these advanced techniques. These methods, combined with the right equipment from CARDIAGTECH.NET, can elevate your DIY repair to a professional level.
4.1. Color Matching Like a Pro
1. Use the Right Tools:
A spectrophotometer is a device that reads the exact color of your car’s paint. While typically used by professionals, some auto parts stores offer this service.
2. Blend the Paint:
When applying the new paint, feather the edges to blend it seamlessly with the surrounding area. This technique involves gradually reducing the amount of paint applied at the edges of the repair.
3. Check in Different Lighting:
Examine the repaired area under different lighting conditions (sunlight, shade, fluorescent light) to ensure the color match is accurate.
4.2. Mastering Wet Sanding
1. Use the Right Grit:
Start with 2000-grit sandpaper and gradually move to finer grits (2500, 3000) for a super-smooth finish.
2. Keep it Wet:
Always keep the sandpaper and the surface wet to prevent clogging and reduce the risk of scratching.
3. Sand Evenly:
Apply even pressure and use a sanding block to distribute the pressure evenly. This prevents creating uneven spots or swirl marks.
4.3. Optimizing Clear Coat Application
1. Temperature and Humidity:
Apply clear coat in a well-ventilated area with moderate temperature and low humidity. Extreme conditions can affect the drying and curing process.
2. Multiple Thin Coats:
Apply several thin coats of clear coat rather than one thick coat. This prevents runs and drips and allows for better leveling.
3. Flash Time:
Allow sufficient flash time (the time between coats) for the solvents to evaporate. This typically ranges from 10-20 minutes, depending on the product and environmental conditions.
4.4. Using a Dual Action (DA) Polisher
1. Choose the Right Pad:
Use a foam polishing pad for applying polishing compound and a foam finishing pad for buffing.
2. Speed Control:
Start with a low speed setting and gradually increase as needed. Avoid applying too much pressure, which can cause swirl marks.
3. Overlap Passes:
Overlap each pass by about 50% to ensure even coverage and prevent missed spots.
By incorporating these advanced techniques and using the high-quality tools and materials from CARDIAGTECH.NET, you can achieve a professional-quality repair that will leave your car looking its best.
Contact CARDIAGTECH.NET at +1 (641) 206-8880 for expert advice and support on selecting the right tools and materials for your automotive repair needs. Visit us at 276 Reock St, City of Orange, NJ 07050, United States, or browse our website, CARDIAGTECH.NET, for a comprehensive selection of automotive repair equipment.
Alt: Hand sanding a car bumper with wet sandpaper during scratch repair.
5. Common Mistakes to Avoid When Fixing Scratches
Even with the best intentions, certain mistakes can undermine your efforts to fix deep scratches. Avoiding these pitfalls and using quality tools from CARDIAGTECH.NET can ensure a successful repair.
5.1. Inadequate Surface Preparation
Mistake: Neglecting to thoroughly clean and sand the area before applying body filler or paint.
Solution: Always start with a clean surface. Use soap and water to remove dirt and grease, followed by a wax and grease remover. Sand the area with the appropriate grit sandpaper to create a smooth, even surface for the repair materials to adhere to.
5.2. Using the Wrong Type of Body Filler
Mistake: Choosing a body filler that is not suitable for the type of damage being repaired.
Solution: Use a lightweight body filler for shallow scratches and a heavy-duty filler for deep gouges. Ensure the filler is compatible with your car’s paint system.
5.3. Applying Too Much Body Filler at Once
Mistake: Applying a thick layer of body filler in an attempt to fill the scratch quickly.
Solution: Apply body filler in thin, even layers, allowing each layer to dry completely before applying the next. This prevents cracking and ensures a more durable repair.
5.4. Improper Sanding Techniques
Mistake: Using the wrong grit sandpaper or applying too much pressure while sanding.
Solution: Start with a coarser grit sandpaper (e.g., 320-grit) to remove excess body filler, then gradually move to finer grits (e.g., 400-grit, 600-grit, 800-grit) to smooth the surface. Use a sanding block to distribute pressure evenly and prevent creating uneven spots or swirl marks.
5.5. Inconsistent Paint Application
Mistake: Applying paint unevenly, resulting in streaks, runs, or orange peel texture.
Solution: Hold the spray gun or can about 8-10 inches away from the surface and move in a smooth, even motion. Apply multiple thin coats, allowing each coat to dry for about 10-15 minutes before applying the next. Overlap each pass by about 50% to ensure even coverage.
5.6. Ignoring Environmental Conditions
Mistake: Painting in direct sunlight, high humidity, or extreme temperatures.
Solution: Paint in a well-ventilated area with moderate temperature and low humidity. Avoid painting in direct sunlight, as this can cause the paint to dry too quickly and result in an uneven finish.
5.7. Neglecting Safety Precautions
Mistake: Failing to wear appropriate safety gear, such as gloves and a respirator.
Solution: Always wear gloves to protect your skin from chemicals and dust. Use a respirator to avoid inhaling harmful fumes. Work in a well-ventilated area to minimize exposure to vapors.
By avoiding these common mistakes and using the high-quality tools and materials available at CARDIAGTECH.NET, you can achieve a professional-quality repair that will leave your car looking its best.
Contact CARDIAGTECH.NET today at +1 (641) 206-8880 for expert advice and support. Visit us at 276 Reock St, City of Orange, NJ 07050, United States, or browse our website, CARDIAGTECH.NET, for a comprehensive selection of automotive repair equipment. Let us help you make your repair process as efficient and effective as possible.
Alt: Finished car paint scratch repair, showcasing a smooth, glossy bumper.
6. Maintaining Your Car’s Paint After Scratch Repair
Once you’ve successfully repaired deep scratches, maintaining your car’s paint is crucial to prevent future damage and keep it looking its best. Follow these maintenance tips, and consider using products from CARDIAGTECH.NET to protect your investment.
6.1. Regular Washing
Frequency: Wash your car at least every two weeks, or more often if you live in an area with harsh weather conditions or heavy pollution.
Technique: Use a pH-balanced car wash soap and a soft microfiber wash mitt. Wash the car in a shaded area to prevent the soap from drying too quickly. Rinse thoroughly with clean water and dry with a clean microfiber towel.
6.2. Waxing and Sealing
Frequency: Wax your car every 3-6 months to protect the paint from UV rays, oxidation, and environmental contaminants.
Products: Use a high-quality car wax or paint sealant. Apply the wax or sealant according to the manufacturer’s instructions, using a clean foam applicator pad. Buff the surface with a clean microfiber towel to remove excess wax and reveal a glossy shine.
6.3. Prompt Scratch Repair
Action: Address minor scratches and imperfections as soon as they appear to prevent them from worsening.
Products: Keep a touch-up paint kit on hand for quick repairs. Use a scratch repair kit for removing minor scratches and swirl marks.
6.4. Avoiding Harsh Chemicals
Guidance: Avoid using harsh chemicals or abrasive cleaners on your car’s paint. These products can damage the clear coat and cause fading or discoloration.
Alternatives: Use only products that are specifically designed for automotive paint. Always test new products in an inconspicuous area before applying them to the entire car.
6.5. Parking Smart
Practice: Park your car in a garage or carport whenever possible to protect it from the elements.
Consideration: If you must park outdoors, choose a shaded area to minimize exposure to sunlight. Avoid parking under trees that may drop sap, leaves, or bird droppings on your car.
6.6. Professional Detailing
Service: Consider having your car professionally detailed at least once a year. Professional detailers have the expertise and equipment to thoroughly clean, polish, and protect your car’s paint.
Benefit: Professional detailing can remove stubborn stains, correct paint imperfections, and restore your car’s shine to like-new condition.
By following these maintenance tips, you can protect your car’s paint and keep it looking its best for years to come. For high-quality car care products and equipment, trust CARDIAGTECH.NET to provide everything you need to keep your car looking showroom-ready.
Contact CARDIAGTECH.NET today at +1 (641) 206-8880 for expert advice and support. Visit us at 276 Reock St, City of Orange, NJ 07050, United States, or browse our website, CARDIAGTECH.NET, for a comprehensive selection of automotive repair and maintenance equipment.
Alt: Polishing a car panel by hand, enhancing gloss and removing imperfections.
7. The Science Behind Car Paint and Scratch Formation
Understanding the composition of car paint and how scratches form can help you better prevent and repair them. This knowledge, combined with the right tools from CARDIAGTECH.NET, empowers you to maintain your car’s finish effectively.
7.1. Car Paint Layers
Modern car paint typically consists of several layers, each serving a specific purpose:
- Electrocoat (E-coat): The first layer applied to the bare metal body. It provides corrosion protection and a base for subsequent layers.
- Primer: This layer promotes adhesion between the E-coat and the color coat. It also helps to smooth out imperfections and provide a uniform surface for painting.
- Basecoat (Color Coat): This layer contains the pigments that give the car its color. It can be a solid color, metallic, or pearlescent.
- Clear Coat: The final layer, which protects the basecoat from UV rays, scratches, and environmental contaminants. It also provides a glossy, durable finish.
7.2. Types of Car Paint
- Single-Stage Paint: Combines the color and clear coat into one layer. It is less durable and less glossy than two-stage paint.
- Two-Stage Paint: Consists of a separate basecoat and clear coat. It provides better color depth, gloss, and durability.
- Three-Stage Paint: Includes an additional mid-coat layer, such as a pearl or metallic coat, to enhance the color and depth.
7.3. How Scratches Form
Scratches can occur due to various factors, including:
- Abrasion: Contact with abrasive materials, such as dirt, gravel, or rough cloths.
- Impact: Direct impact from objects, such as rocks, keys, or other vehicles.
- Environmental Factors: Exposure to UV rays, acid rain, bird droppings, and other environmental contaminants can weaken the paint and make it more susceptible to scratches.
The depth and severity of a scratch depend on the force of the impact and the type of material involved. Minor scratches typically only affect the clear coat, while deeper scratches can penetrate the basecoat and even the primer or E-coat.
7.4. Understanding the Mohs Hardness Scale
The Mohs hardness scale measures the resistance of a mineral to scratching. While not directly applicable to car paint, it provides a useful reference for understanding how different materials can cause scratches. For example:
- Talc: 1 (very soft)
- Gypsum: 2
- Calcite: 3
- Fluorite: 4
- Apatite: 5
- Orthoclase: 6
- Quartz: 7 (can scratch glass)
- Topaz: 8
- Corundum: 9
- Diamond: 10 (hardest mineral)
Materials with a higher Mohs hardness rating can scratch materials with a lower rating. This is why it’s important to use soft, non-abrasive materials when washing and polishing your car.
7.5. Prevention Techniques
- Regular Washing and Waxing: Remove abrasive particles and protect the paint from environmental contaminants.
- Paint Protection Film (PPF): A transparent film that is applied to the car’s paint to protect it from scratches, chips, and other damage.
- Ceramic Coating: A liquid polymer that bonds to the paint and provides a durable, hydrophobic layer of protection.
By understanding the science behind car paint and scratch formation, you can take proactive steps to protect your car’s finish and address any damage that does occur.
CARDIAGTECH.NET offers a range of products designed to help you maintain your car’s paint and repair scratches effectively. Contact us at +1 (641) 206-8880 for expert advice and support. Visit us at 276 Reock St, City of Orange, NJ 07050, United States, or browse our website, CARDIAGTECH.NET, for a comprehensive selection of automotive repair and maintenance equipment.
Alt: Car bumper after multiple coats of paint, demonstrating a color-matched finish.
8. Cost-Effective Solutions for Minor Scratch Repair
While deep scratches often require extensive repair, minor scratches can be addressed with cost-effective solutions. Using the right products and techniques from CARDIAGTECH.NET can help you save money while maintaining your car’s appearance.
8.1. Touch-Up Paint
Application: Touch-up paint is ideal for filling small chips and scratches that only affect the clear coat or basecoat.
Procedure:
- Clean the damaged area with soap and water.
- Apply a small amount of touch-up paint to the scratch using a fine-tipped brush or applicator.
- Allow the paint to dry completely.
- Apply a clear coat touch-up to protect the paint and provide a glossy finish.
- Buff the area with a clean microfiber cloth to blend the repair with the surrounding paint.
8.2. Scratch Repair Kits
Application: Scratch repair kits are designed to remove minor scratches and swirl marks from the clear coat.
Procedure:
- Clean the damaged area with soap and water.
- Apply the scratch repair compound to a foam applicator pad.
- Rub the compound onto the scratch using a circular motion.
- Buff the area with a clean microfiber cloth to remove excess compound and reveal a glossy finish.
- Repeat the process as needed to remove the scratch completely.
8.3. DIY Polishing
Application: Polishing can help to remove minor scratches and swirl marks from the clear coat and restore the paint’s shine.
Procedure:
- Wash and dry the car thoroughly.
- Apply a small amount of polishing compound to a foam applicator pad.
- Rub the compound onto the scratched area using a circular motion.
- Buff the area with a clean microfiber cloth to remove excess compound and reveal a glossy finish.
- Repeat the process as needed to remove the scratches and restore the paint’s shine.
8.4. Using Household Items (with Caution)
Application: In some cases, household items can be used to address minor scratches, but proceed with caution.
Examples:
- Toothpaste: Non-gel toothpaste can be used as a mild abrasive to polish minor scratches.
- Baking Soda: A paste made from baking soda and water can be used to remove light scratches and stains.
Caution: Always test these methods in an inconspicuous area first to ensure they do not damage the paint.
By using these cost-effective solutions and high-quality products from CARDIAGTECH.NET, you can maintain your car’s appearance without breaking the bank.
Contact CARDIAGTECH.NET today at +1 (641) 206-8880 for expert advice and support. Visit us at 276 Reock St, City of Orange, NJ 07050, United States, or browse our website, CARDIAGTECH.NET, for a comprehensive selection of automotive repair and maintenance equipment.
Alt: Close-up of polished car paint, highlighting a smooth, reflective surface.
9. Protecting Your Car’s Value Through Paint Maintenance
Maintaining your car’s paint isn’t just about aesthetics; it’s also about preserving its value. Regular maintenance and timely scratch repair, using equipment from CARDIAGTECH.NET, can significantly impact your car’s resale value.
9.1. First Impressions Matter
Principle: A well-maintained exterior creates a positive first impression, which can influence potential buyers.
Explanation: According to Kelley Blue Book, a car’s exterior condition is one of the most important factors that buyers consider. A clean, scratch-free paint job can make your car more appealing and increase its perceived value.
9.2. Preventing Rust and Corrosion
Benefit: Addressing scratches promptly prevents rust and corrosion, which can cause extensive damage and reduce your car’s value.
Action: Deep scratches that expose bare metal should be repaired immediately to prevent rust from forming. Regular washing and waxing can also help to protect the paint from environmental contaminants that can cause corrosion.
9.3. Maintaining a Consistent Appearance
Importance: Maintaining a consistent appearance across all panels of your car can help to preserve its value.
Technique: When repairing scratches, make sure to match the paint color and finish as closely as possible to the surrounding areas. Blending the repaired area with the original paint can help to create a seamless transition and maintain a uniform appearance.
9.4. Documenting Repairs
Practice: Keep records of all repairs and maintenance performed on your car, including paint repairs.
Advantage: This documentation can demonstrate to potential buyers that you have taken good care of the car and that it has been properly maintained.
9.5. Investing in Quality Products
Guideline: Use high-quality car care products and repair materials to ensure the best possible results.
Recommendation: Cheaper products may save you money in the short term, but they can damage your car’s paint and reduce its value in the long run. Investing in quality products from CARDIAGTECH.NET can help you protect your car’s paint and maintain its value.
9.6. Professional Appraisal
Service: Consider having your car professionally appraised before selling it.
Insight: An appraisal can provide you with an accurate assessment of your car’s value and help you to negotiate a fair price with potential buyers.
By following these tips and investing in quality paint maintenance products from CARDIAGTECH.NET, you can protect your car’s value and ensure that it looks its best for years to come.
Contact CARDIAGTECH.NET today at +1 (641) 206-8880 for expert advice and support. Visit us at 276 Reock St, City of Orange, NJ 07050, United States, or browse our website, CARDIAGTECH.NET, for a comprehensive selection of automotive repair and maintenance equipment.
Alt: Waxing a car to provide paint protection and enhance shine after scratch repair.
10. FAQ: How to Fix Deep Scratches in Car Paint
Here are some frequently asked questions about fixing deep scratches in car paint:
1. What are the different types of car paint scratches?
Car paint scratches can be classified into three types: clear coat scratches, paint scratches, and deep scratches. Clear coat scratches only affect the top layer of the paint, while paint scratches penetrate through the clear coat and into the color coat. Deep scratches, on the other hand, go all the way down to the metal.
2. Can I fix deep scratches in my car paint myself?
Yes, you can fix deep scratches in your car paint yourself, but it requires patience, attention to detail, and the right tools and materials. For extensive damage, professional repair is recommended.
3. What tools and materials do I need to fix deep scratches?
You’ll need automotive sandpaper, body filler, masking tape, automotive primer, color-matched car paint, clear coat, rubbing compound, polishing compound, microfiber cloths, and safety gear.
4. How do I prepare the surface for scratch repair?
Start by cleaning the area with soap and water. Then, sand the scratch and the surrounding area to smooth out the edges and prepare the surface for the body filler.
5. How do I apply body filler to a deep scratch?
Mix the body filler with the hardener according to the manufacturer’s instructions. Apply the filler to the scratch, making sure to fill it completely. Allow the filler to dry completely before sanding.
6. What grit sandpaper should I use for sanding body filler?
Start with 400-grit sandpaper to sand down the excess body filler. Then, switch to 600-grit sandpaper to further smooth the surface and remove any remaining imperfections. Finish with 800-grit sandpaper to create a smooth, even surface that is ready for priming.
7. How many coats of primer and paint should I apply?
Apply 2-3 light coats of primer to the sanded area, allowing each coat to dry for about 10-15 minutes before applying the next. Then, apply 2-3 light coats of paint to the primed area, allowing each coat to dry for about 10-15 minutes before applying the next.
8. How do I blend the new paint with the surrounding area?
To blend the new paint with the surrounding area, feather the edges of the spray pattern. This will help to create a seamless transition between the repaired area and the original paint.
9. How do I protect the paint after repairing a scratch?
Apply a coat of high-quality car wax to protect the paint and provide a long-lasting shine. You can also apply a paint sealant to further protect the paint from the elements.
10. Where can I find quality tools and materials for fixing car paint scratches?
CARDIAGTECH.NET offers a