How to Fix Dragging Plastic Under Car: Expert Guide
Fixing a dragging plastic shield under your car is crucial for vehicle maintenance. At CARDIAGTECH.NET, we provide comprehensive guidance and premium tools to resolve this issue effectively, ensuring your car’s protection and performance are maintained. Addressing this promptly prevents further damage and enhances driving safety with our high-quality auto repair equipment and accessories.
1. Understanding the Dragging Plastic Under Your Car
The dragging plastic under your car, often referred to as the splash shield or undercarriage cover, serves several critical functions. Recognizing its importance helps you understand why fixing it promptly is essential.
1.1. What is a Splash Shield?
A splash shield is a protective panel typically made of plastic or metal located beneath the engine and sometimes the entire undercarriage of a vehicle. Its primary roles include:
- Protecting the Engine Compartment: Shields the engine, transmission, and other vital components from water, road debris, salt, and other contaminants.
- Improving Aerodynamics: Contributes to the vehicle’s aerodynamics by smoothing airflow under the car, which can improve fuel efficiency.
- Reducing Noise: Dampens road noise and engine noise, enhancing the driving experience.
According to the U.S. Department of Energy, proper vehicle aerodynamics can improve fuel efficiency by up to 10%.
1.2. Common Causes of a Dragging Splash Shield
Several factors can cause a splash shield to come loose and start dragging:
- Impact Damage: Hitting road debris, potholes, or high curbs can crack or break the shield.
- Worn Fasteners: Over time, the clips, screws, or bolts that hold the shield in place can become loose, corroded, or break.
- Improper Installation: If the shield was not correctly installed after a repair or maintenance service, it might come loose.
- Material Degradation: Plastic shields can become brittle and crack due to exposure to extreme temperatures and UV radiation.
Understanding these causes helps in diagnosing the problem accurately.
1.3. Identifying the Signs of a Dragging Splash Shield
Recognizing the symptoms of a dragging splash shield early can prevent further damage. Common signs include:
- Scraping Noises: A noticeable scraping sound coming from under the car, especially when driving at low speeds.
- Visible Sagging: The plastic shield is visibly hanging down or dragging along the road.
- Loose Plastic Pieces: Finding fragments of plastic under the car or in your garage.
Prompt identification of these signs ensures timely intervention.
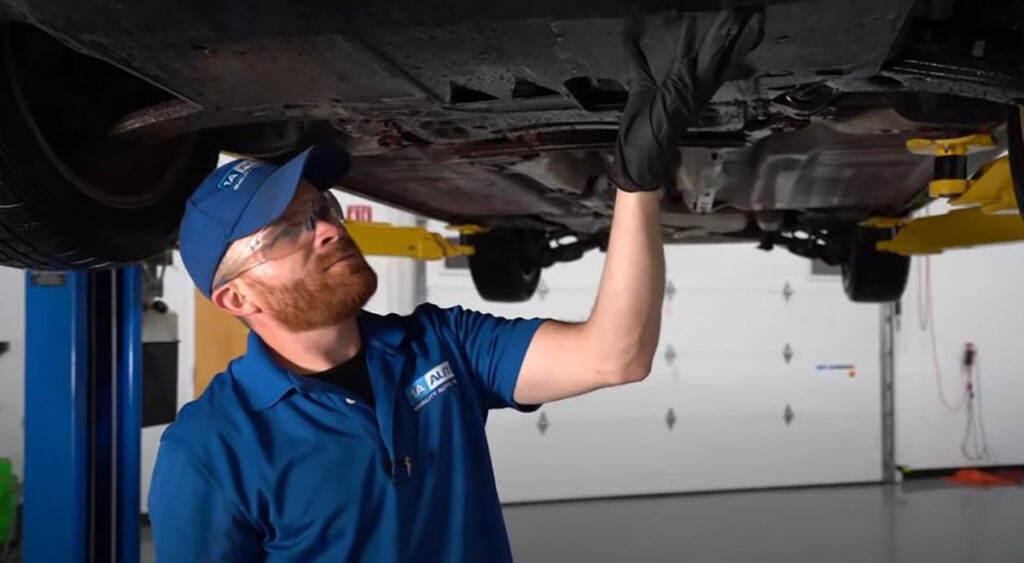
Mechanic inspecting undercarriage damage and assessing the condition of the splash shield
2. The Importance of Fixing a Dragging Splash Shield
Ignoring a dragging splash shield can lead to significant problems. Addressing it promptly is crucial for maintaining your vehicle’s health and performance.
2.1. Protecting Essential Components
The splash shield’s primary function is to protect vital engine and undercarriage components from damage. When it’s dragging, it compromises this protection, exposing these parts to:
- Water and Moisture: Can cause corrosion, electrical shorts, and damage to sensitive electronic components.
- Road Debris: Rocks, salt, and other debris can damage wiring, hoses, and other parts.
- Extreme Temperatures: Exposure to extreme heat or cold can cause components to fail prematurely.
2.2. Preventing Further Damage
A dragging splash shield can cause additional damage to your vehicle:
- Damage to the Shield Itself: Continual dragging can further tear and damage the shield, making it irreparable.
- Damage to Other Components: The dragging shield can catch on other parts of the car, causing damage to brake lines, fuel lines, or exhaust components.
2.3. Maintaining Aerodynamics and Fuel Efficiency
The splash shield contributes to the vehicle’s aerodynamics. When it’s dragging, it disrupts airflow, leading to:
- Reduced Fuel Efficiency: Increased drag can reduce fuel economy by as much as 5-10%, according to studies by the Society of Automotive Engineers.
- Increased Noise: Disrupted airflow can create additional wind noise, reducing driving comfort.
2.4. Ensuring Safety
A severely damaged and dragging splash shield can pose safety risks:
- Road Hazard: A large piece of the shield can break off and become a hazard to other drivers.
- Component Damage: Damage to critical components like brake lines can compromise vehicle safety.
3. Tools and Materials Needed for the Repair
Before starting the repair, gather the necessary tools and materials. Having everything on hand will make the job smoother and more efficient. CARDIAGTECH.NET offers a wide range of high-quality tools perfect for this task.
3.1. Essential Tools
- Jack and Jack Stands: To safely lift and support the vehicle.
- Socket Set and Wrenches: For removing and installing fasteners.
- Screwdrivers: Both Phillips head and flathead screwdrivers may be needed.
- Drill with Drill Bits: For creating new mounting holes if necessary.
- Pliers: For removing and installing clips and fasteners.
- Safety Glasses and Gloves: To protect yourself during the repair.
3.2. Repair Materials
- Replacement Fasteners: New clips, screws, or bolts to replace damaged or missing ones.
- Wire Ties (Zip Ties): For temporarily securing the shield or reinforcing damaged areas.
- Duct Tape: For temporary repairs or reinforcing weak spots.
- Replacement Splash Shield (if necessary): If the existing shield is too damaged to repair.
3.3. Recommended Products from CARDIAGTECH.NET
- Professional Socket Set: High-quality socket set with various sizes for different fasteners.
- Price: $79.99
- Features: Durable construction, comprehensive range of sizes, ergonomic design.
- Heavy-Duty Jack Stands: Ensure your vehicle is safely supported during the repair.
- Price: $49.99 per pair
- Features: High weight capacity, sturdy construction, adjustable height.
- Multi-Purpose Pliers Set: Versatile pliers set for various tasks.
- Price: $39.99
- Features: Comfortable grip, durable construction, multiple plier types.
These tools from CARDIAGTECH.NET ensure you have everything you need for a successful repair.
4. Step-by-Step Guide to Fixing a Dragging Splash Shield
Follow these detailed steps to safely and effectively repair a dragging splash shield.
4.1. Safety First: Preparing the Vehicle
- Park on a Level Surface: Ensure the vehicle is parked on a flat, stable surface.
- Engage the Parking Brake: Set the parking brake to prevent the car from rolling.
- Loosen the Lug Nuts: Use a lug wrench to slightly loosen the lug nuts on the wheels you’ll be lifting.
- Position the Jack: Place the jack under the vehicle’s frame near the wheel you’ll be lifting. Refer to your vehicle’s manual for the correct jacking points.
- Lift the Vehicle: Raise the vehicle with the jack until the wheel is off the ground.
- Place Jack Stands: Position jack stands under the frame near the jack. Ensure they are securely in place.
- Lower the Vehicle onto the Jack Stands: Carefully lower the vehicle onto the jack stands.
- Double-Check Stability: Give the car a gentle shake to ensure it’s stable on the jack stands.
- Wear Safety Gear: Put on safety glasses and gloves to protect yourself.
4.2. Inspecting the Damage
- Locate the Damage: Identify the areas of the splash shield that are damaged or loose.
- Check Fasteners: Inspect the clips, screws, and bolts holding the shield in place. Look for broken, corroded, or missing fasteners.
- Assess the Shield: Determine the extent of the damage to the shield itself. Check for cracks, holes, or tears.
4.3. Minor Repairs: Reattaching the Shield
If the damage is minor, you may be able to reattach the shield using the existing mounting points.
- Clean the Mounting Area: Clean the area around the mounting points on both the shield and the vehicle.
- Replace Damaged Fasteners: Replace any broken or corroded clips, screws, or bolts with new ones from CARDIAGTECH.NET.
- Align the Shield: Carefully align the shield with the mounting points.
- Attach the Shield: Secure the shield using the new fasteners. Ensure they are snug but not overtightened.
- Test the Repair: Gently tug on the shield to ensure it is securely attached.
4.4. Moderate Repairs: Using Wire Ties and Duct Tape
For moderate damage, such as cracks or small tears, you can use wire ties and duct tape to reinforce the shield.
- Clean the Area: Clean the area around the crack or tear.
- Drill Holes: Use a drill with a small drill bit to create small holes on either side of the crack or tear. Space the holes about 1-2 inches apart.
- Secure with Wire Ties: Thread wire ties through the holes and tighten them to pull the edges of the crack or tear together. Trim the excess wire tie.
- Reinforce with Duct Tape: Apply a layer of duct tape over the wire ties to provide additional reinforcement.
4.5. Major Repairs: Replacing the Splash Shield
If the splash shield is severely damaged, it may need to be replaced entirely.
- Remove the Old Shield: Remove all fasteners holding the old shield in place.
- Detach the Old Shield: Carefully detach the old shield from the vehicle.
- Clean the Mounting Area: Clean the area where the new shield will be installed.
- Position the New Shield: Align the new shield with the mounting points.
- Attach the New Shield: Secure the new shield using new fasteners. Ensure they are snug but not overtightened.
4.6. Final Steps
- Double-Check the Repair: Ensure all fasteners are securely in place and the shield is properly aligned.
- Lower the Vehicle: Carefully lower the vehicle from the jack stands.
- Tighten Lug Nuts: Tighten the lug nuts in a star pattern to ensure even pressure.
- Test Drive: Take the vehicle for a short test drive to ensure the scraping noise is gone and the repair is successful.
By following these steps and using quality tools from CARDIAGTECH.NET, you can effectively repair a dragging splash shield and protect your vehicle.
 Tools needed for splash shield replacement including socket set, wrenches, and replacement fasteners
5. Advanced Techniques for Securing the Splash Shield
For those looking for more robust solutions, here are some advanced techniques to secure the splash shield.
5.1. Using Metal Reinforcement Plates
For areas prone to repeated damage, consider using metal reinforcement plates.
- Cut Metal Plates: Cut thin metal plates (aluminum or steel) to fit over the damaged area.
- Drill Through Plates and Shield: Drill holes through the metal plates and the splash shield.
- Secure with Bolts and Nuts: Use bolts and nuts to secure the metal plates to the shield, providing a strong, durable repair.
5.2. Applying Fiberglass Resin
Fiberglass resin can be used to repair large cracks or holes in the splash shield.
- Clean the Area: Clean the area around the damage.
- Apply Fiberglass Resin: Apply fiberglass resin to the damaged area, following the manufacturer’s instructions.
- Allow to Cure: Allow the resin to cure completely before reinstalling the shield.
5.3. Custom Mounting Solutions
If the original mounting points are damaged or unreliable, create custom mounting solutions.
- Fabricate Brackets: Fabricate metal brackets that attach to the vehicle’s frame.
- Attach Shield to Brackets: Attach the splash shield to the brackets using bolts and nuts.
6. Maintaining Your Splash Shield
Preventing future problems with your splash shield involves regular maintenance and care.
6.1. Regular Inspections
Inspect the splash shield regularly, especially after driving on rough roads or encountering road debris.
6.2. Tightening Fasteners
Periodically check and tighten the fasteners holding the shield in place.
6.3. Avoiding Impacts
Be mindful of road hazards and avoid hitting potholes, curbs, or other obstacles that could damage the shield.
6.4. Protective Coatings
Apply protective coatings to the shield to prevent corrosion and degradation from exposure to the elements.
7. Cost Analysis: Repair vs. Replacement
Deciding whether to repair or replace a dragging splash shield depends on the extent of the damage and the cost of each option.
7.1. Cost of Repair
- DIY Repair: The cost of DIY repair is typically low, involving the cost of fasteners, wire ties, duct tape, and basic tools.
- Professional Repair: The cost of professional repair can range from $50 to $200, depending on the extent of the damage and the labor rate.
7.2. Cost of Replacement
- DIY Replacement: The cost of DIY replacement includes the cost of a new splash shield (typically $50 to $200) and any necessary tools.
- Professional Replacement: The cost of professional replacement can range from $150 to $500, including the cost of the new shield and labor.
7.3. Factors to Consider
- Extent of Damage: If the shield is severely damaged, replacement is usually the best option.
- Cost of Parts: Compare the cost of replacement parts with the cost of repair materials.
- Labor Costs: Consider the cost of professional labor if you are not comfortable doing the repair yourself.
8. Choosing the Right Replacement Splash Shield
If replacement is necessary, selecting the right splash shield is crucial. CARDIAGTECH.NET offers a variety of high-quality replacement shields.
8.1. OEM vs. Aftermarket
- OEM (Original Equipment Manufacturer): OEM shields are made by the vehicle manufacturer and are designed to fit perfectly. They are typically more expensive but offer the best quality and fit.
- Aftermarket: Aftermarket shields are made by third-party manufacturers and are often more affordable. Ensure they are made from high-quality materials and are designed to fit your specific vehicle.
8.2. Material Quality
- Plastic: Most splash shields are made of plastic. Look for shields made from durable, high-quality plastic that can withstand impacts and exposure to the elements.
- Metal: Metal shields offer superior protection but are typically found on off-road vehicles.
8.3. Fit and Compatibility
Ensure the replacement shield is designed to fit your specific vehicle make, model, and year. Check the product description and customer reviews to verify fit and compatibility.
8.4. Recommended Products from CARDIAGTECH.NET
- Universal Fit Splash Shield: A versatile shield that can be trimmed to fit a variety of vehicles.
- Price: $69.99
- Features: Durable plastic construction, easy to trim, universal fit.
- Custom Fit Splash Shield: Designed to fit specific vehicle makes and models.
- Price: $89.99
- Features: Precise fit, high-quality materials, easy installation.
9. The Role of CARDIAGTECH.NET in Your Auto Repair Journey
CARDIAGTECH.NET is committed to providing high-quality tools and expert advice to help you with all your auto repair needs.
9.1. Wide Range of Tools and Equipment
CARDIAGTECH.NET offers a comprehensive selection of tools and equipment, from basic hand tools to advanced diagnostic equipment.
9.2. Expert Advice and Support
Our team of experienced technicians is available to provide expert advice and support, helping you diagnose and repair your vehicle.
9.3. Quality Products at Competitive Prices
We offer quality products at competitive prices, ensuring you get the best value for your money.
9.4. Customer Satisfaction
At CARDIAGTECH.NET, customer satisfaction is our top priority. We are committed to providing excellent service and support to ensure you are completely satisfied with your purchase.
10. Frequently Asked Questions (FAQ)
1. What is the purpose of the plastic shield under my car?
The plastic shield, or splash shield, protects the engine and undercarriage from water, debris, and other contaminants. It also improves aerodynamics and reduces noise.
2. Can I drive without a splash shield?
While it’s possible to drive without a splash shield, it’s not recommended. It can expose your engine and undercarriage to damage from water and debris.
3. How much does it cost to replace a splash shield?
The cost to replace a splash shield can range from $50 to $500, depending on the type of shield and whether you do it yourself or hire a professional.
4. Can I repair a damaged splash shield?
Yes, minor damage can often be repaired with wire ties, duct tape, or fiberglass resin. However, severe damage may require replacement.
5. How do I know if my splash shield is dragging?
Signs of a dragging splash shield include scraping noises, visible sagging, and loose plastic pieces under the car.
6. What tools do I need to replace a splash shield?
You will need a jack and jack stands, a socket set, screwdrivers, pliers, and replacement fasteners.
7. Where can I buy a replacement splash shield?
You can purchase a replacement splash shield from CARDIAGTECH.NET or other auto parts retailers.
8. How do I prevent my splash shield from dragging in the future?
Regularly inspect the shield, tighten fasteners, avoid impacts, and apply protective coatings.
9. Is it safe to drive with a dragging splash shield?
It’s not recommended to drive with a dragging splash shield, as it can cause further damage to the shield and other components.
10. What are the benefits of using OEM parts?
OEM parts are made by the vehicle manufacturer and are designed to fit perfectly, ensuring the best quality and performance.
Conclusion
Fixing a dragging plastic shield under your car is essential for protecting your vehicle and maintaining its performance. By following this comprehensive guide and using high-quality tools and parts from CARDIAGTECH.NET, you can effectively address this issue and ensure your car remains in top condition. Whether you choose to repair or replace the shield, remember that prompt action can prevent further damage and save you money in the long run. Trust CARDIAGTECH.NET to provide the tools and expertise you need for a successful auto repair journey.
Are you experiencing issues with a dragging plastic shield under your car? Don’t wait until it causes more damage. Contact CARDIAGTECH.NET today at +1 (641) 206-8880 or visit our website CARDIAGTECH.NET for expert advice and the best tools and parts to get the job done right. Our team is ready to help you find the perfect solution for your auto repair needs. Located at 276 Reock St, City of Orange, NJ 07050, United States, we’re here to support you every step of the way. Reach out now and let us help you keep your vehicle in top shape.