How to Fix a Drooping Car Ceiling: The Ultimate Guide

Is your car’s headliner starting to sag and ruin the interior’s look? Don’t worry, CARDIAGTECH.NET is here to help you restore your car’s ceiling to its former glory! Our guide provides easy and effective methods to fix a sagging car ceiling without removing it, saving you time and money. Explore proven techniques, preventative measures, and expert tips to maintain a pristine interior. Discover solutions for headliner repair, fabric adhesives, and interior car care to revitalize your vehicle’s aesthetic appeal. BMW Car Diagnostic Tool
Table of Contents
- Understanding the Car Headliner
- Key Reasons for a Sagging Car Headliner
- Step-by-Step Guide: Fixing a Sagging Headliner Without Removal
- Preventative Measures to Avoid Headliner Sagging
- Cost Analysis: Headliner Replacement vs. Repair
- CARDIAGTECH.NET: Your Partner in Auto Repair Solutions
- Frequently Asked Questions (FAQs)
1. Understanding the Car Headliner
What exactly is a headliner in a car? The headliner, also known as the headlining, is the fabric material affixed to the interior roof of your vehicle. It serves multiple purposes: it provides a smooth, finished look, absorbs noise to enhance cabin acoustics, and insulates the interior, helping to maintain a comfortable temperature by buffering against external heat and cold.
Typically, a car headliner consists of several layers. The most common construction involves a layer of foam, often polyurethane, which is either sprayed or adhered to a headliner board. This board is then attached to the inside of the car’s roof. The foam padding softens the headliner and provides thermal and acoustic insulation.
The headliner’s role extends beyond aesthetics. Without this layer, the interior of a car parked in direct sunlight can become significantly hotter. Furthermore, the headliner reduces wind noise, especially at high speeds, and enhances the sound quality of your car’s audio system by optimizing the interior acoustics.
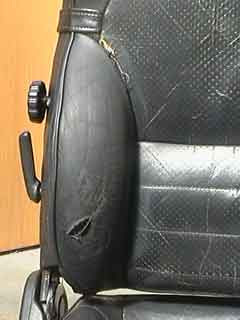
Car Headliner Construction
The car headliner is a fabric that is secured to the roof framing, enhancing aesthetics and providing insulation.
2. Key Reasons for a Sagging Car Headliner
What causes a car headliner to sag? Over time, the adhesive securing the headliner fabric to its backing board can degrade, causing the fabric to detach. This condition, known as a sagging headliner, often requires repair to maintain the vehicle’s interior appearance and comfort.
Several factors can contribute to this issue:
- Heat and Sunlight: Prolonged exposure to high temperatures can melt the adhesive, causing the fabric to loosen and sag. According to a study by the National Renewable Energy Laboratory, surface temperatures inside a car parked in the sun can reach as high as 192°F (89°C).
- Moisture: Humidity and leaks can seep into the headliner, causing the foam backing to absorb moisture and lose its structural integrity, leading to warping and sagging. A report by the Environmental Protection Agency (EPA) highlights that maintaining low humidity levels inside a vehicle can prevent mold growth and material degradation.
- Poor Installation: Insufficient adhesive or improper installation techniques can result in premature sagging. The Adhesive and Sealant Council (ASC) emphasizes the importance of using appropriate adhesives and following recommended application procedures to ensure long-lasting bonding.
- Physical Stress: Passengers, especially children and pets, may pull or scratch at the headliner, causing physical strain that accelerates the degradation process. A survey by the American Automobile Association (AAA) found that vehicle interiors are frequently damaged by accidental or intentional actions of passengers.
Addressing these causes proactively can extend the life of your car’s headliner.
3. Step-by-Step Guide: Fixing a Sagging Headliner Without Removal
How can you fix a sagging headliner without the hassle of removing it? Replacing the entire headliner can be costly, especially for older vehicles. Fortunately, several methods allow you to repair a sagging headliner in place, saving both time and money.
Here are some effective techniques:
3.1. Applying Fabric Adhesive
Using fabric adhesive is a straightforward method for reattaching sagging headliner fabric. This approach works best for localized sagging, such as corners or edges.
- Preparation: Start by cleaning the sagging area with a soft brush or vacuum to remove any loose debris or dust. This ensures a clean surface for the adhesive to bond to.
- Application: Apply a specialized headliner adhesive, preferably in a spray can, to both the back of the fabric and the headliner board. Spray adhesives provide even coverage, preventing clumps that can cause unevenness.
- Bonding: Gently press the fabric back into place, ensuring it adheres smoothly to the board. Use a clean cloth or roller to apply even pressure and eliminate any air pockets.
- Drying: Allow the adhesive to dry completely, following the manufacturer’s instructions. This may take several hours, so it’s best to leave your car undisturbed during this time.
Tip: For larger areas, work in sections to prevent the adhesive from drying before you can attach the fabric.
3.2. Using Twist Pins
Twist pins, also known as saggy stoppers, are an inexpensive and easy-to-use solution for sagging headliners. These pins hold the fabric in place without causing significant damage.
- Insertion: Gently push the twist pins through the fabric and into the foam backing board.
- Distribution: Distribute the pins evenly across the sagging area, spacing them a few inches apart.
- Securing: Twist the pins to secure the fabric in place. The clear heads of the pins make them less noticeable, blending with the headliner fabric.
Tip: Arrange the pins in a pattern to enhance the visual appeal and create a uniform look.
3.3. Employing Steam Cleaning
Steam cleaning can help reactivate the original adhesive, allowing you to reattach the fabric. This method works best for minor sagging around the edges.
- Steaming: Use a car steam cleaner to gently steam the sagging area. The steam will soften the old adhesive, making it pliable.
- Reattaching: Immediately after steaming, use a paint roller or clean cloth to press the fabric back into place. Apply even pressure to ensure the fabric adheres smoothly.
- Drying: Allow the area to dry completely. The reactivated adhesive should bond the fabric back to the board.
Tip: Avoid using excessive steam, as too much moisture can damage the headliner board and cause further sagging.
3.4. Detailed Comparison Table
| Method | Description | Pros | Cons | Best For | Estimated Cost |
|---|---|---|---|---|---|
| Fabric Adhesive | Applying spray adhesive to reattach fabric. | Effective for localized sagging, even coverage. | Can be messy, requires proper ventilation. | Corners and edges | $10 – $20 |
| Twist Pins | Using clear-headed pins to secure fabric. | Inexpensive, easy to install, minimal damage. | May be visible, not suitable for large areas. | Minor to moderate sagging | $5 – $15 |
| Steam Cleaning | Reactivating adhesive with steam and pressing fabric back. | Can reactivate original adhesive, works for edges. | Risk of over-saturation, may not work for severe sagging. | Edges and minor sagging | $30 – $50 |
3.5. Step-by-Step Table
| Step | Task | Description | Tools Needed |
|---|---|---|---|
| 1 | Preparation | Clean the sagging area with a soft brush or vacuum to remove debris and dust. | Soft brush, vacuum |
| 2 | Adhesive Application (Glue) | Apply specialized headliner adhesive to both the fabric and headliner board. | Spray adhesive, clean cloth or roller |
| 2 | Pin Insertion (Twist Pins) | Gently push the twist pins through the fabric and into the foam backing board, spacing them evenly. | Twist pins |
| 2 | Steaming (Steam Cleaning) | Use a car steam cleaner to gently steam the sagging area to soften the old adhesive. | Car steam cleaner, clean cloth or roller |
| 3 | Bonding (Glue) | Gently press the fabric back into place, ensuring it adheres smoothly and eliminating air pockets. | Clean cloth or roller |
| 3 | Securing (Twist Pins) | Twist the pins to secure the fabric in place, arranging them in a pattern for visual appeal. | Twist pins |
| 3 | Reattaching (Steam Cleaning) | Immediately after steaming, use a paint roller or clean cloth to press the fabric back into place, applying even pressure. | Paint roller or clean cloth |
| 4 | Drying | Allow the area to dry completely, following the manufacturer’s instructions for adhesive or letting the reactivated adhesive bond. | Time |
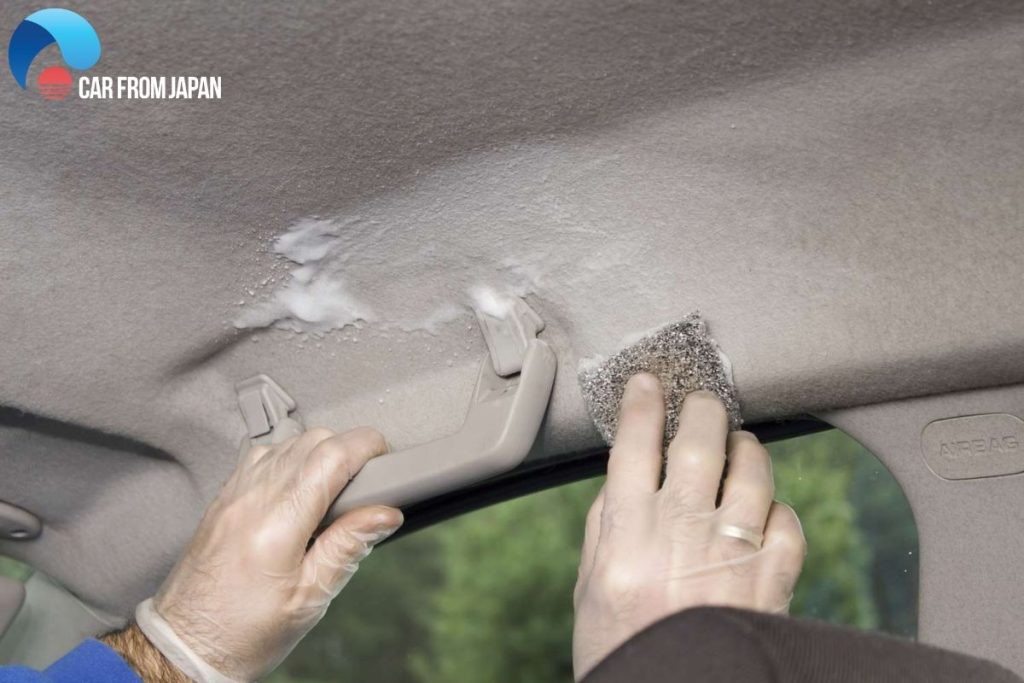 Fix Sagging Headliner
Sagging headliner is often caused by poor maintenance and neglected actions of the owners, but simple fixes can restore its appearance.
4. Preventative Measures to Avoid Headliner Sagging
What can you do to prevent your car’s headliner from sagging in the first place? Prevention is key to maintaining your car’s interior in top condition. By taking proactive measures, you can significantly extend the life of your headliner and avoid costly repairs.
Here are some valuable tips:
- Park in the Shade: Whenever possible, park your vehicle in shaded areas or use a car cover. Direct sunlight can cause the adhesive to break down, leading to sagging. A study by the Lawrence Berkeley National Laboratory found that parking in the shade can reduce interior car temperatures by up to 40°F (22°C).
- Control Interior Humidity: Use a dehumidifier or moisture absorber inside your car to reduce humidity levels. High humidity can weaken the foam backing and adhesive. According to the Indoor Air Quality Association (IAQA), maintaining humidity levels between 30% and 50% can prevent mold growth and material degradation.
- Regularly Inspect and Maintain Seals: Check your car’s rubber seals around windows and doors to ensure they are intact and prevent water leaks. Water intrusion can saturate the headliner and cause it to sag. The National Institute for Automotive Service Excellence (ASE) recommends inspecting seals at least twice a year.
- Gentle Cleaning: When cleaning your headliner, use a soft brush or vacuum with a gentle setting. Avoid using harsh chemicals or excessive pressure, as these can damage the fabric and adhesive. A guide by the International Detailing Association (IDA) suggests using pH-neutral cleaners and microfiber cloths for interior cleaning.
- Limit Physical Stress: Keep children and pets from pulling or scratching at the headliner. Consider using seat covers and pet barriers to protect the interior surfaces. A survey by the Insurance Institute for Highway Safety (IIHS) found that securing pets in vehicles reduces the risk of interior damage and driver distraction.
By following these preventative measures, you can maintain your car’s headliner and preserve its aesthetic appeal for years to come.
5. Cost Analysis: Headliner Replacement vs. Repair
How much does it cost to replace a sagging headliner compared to repairing it? Understanding the cost implications can help you make an informed decision about how to address a sagging headliner.
Replacing the headliner can be a significant expense, especially for luxury vehicles or those with complex interior designs. The cost typically includes the price of the new headliner material, adhesive, and labor.
Repairing the headliner, on the other hand, is generally more affordable, especially if you can perform the work yourself. The cost mainly involves purchasing adhesive, twist pins, or other repair materials.
Here’s a detailed breakdown of the costs associated with each option:
| Service | Description | Average Cost | Factors Affecting Cost |
|---|---|---|---|
| Headliner Replacement | Replacing the entire headliner with new material and adhesive. | $500 – $1,000+ | Vehicle make and model, complexity of the headliner design (e.g., sunroof, embedded electronics), quality of materials used, and labor rates in your area. |
| DIY Headliner Repair | Repairing the sagging headliner using adhesive, twist pins, or steam cleaning. | $10 – $50 | Cost of adhesive, twist pins, steam cleaner rental (if needed), and other supplies. |
| Professional Headliner Repair | Hiring a professional to repair the sagging headliner in place. | $150 – $400 | Labor rates, extent of the damage, and type of repair method used. |
5.1. Cost-Summary Table
| Vehicle Type | Simple Design (Sedan/Hatchback/Coupe) | Typical SUV/Crossover (Sunroof/Moonroof) | Luxury Vehicle (High-Quality Ceiling) |
|---|---|---|---|
| Examples | Accord/Corolla | RAV 4/X-Trail | BMW |
| Average Replacement Cost | $300 – $750 | $500 – $900 | $1,000 – $6,000 |
As demonstrated, repairing a sagging headliner can save you a significant amount of money compared to a full replacement. By using the methods outlined in this guide, you can restore your car’s interior without breaking the bank.
6. CARDIAGTECH.NET: Your Partner in Auto Repair Solutions
Are you looking for high-quality tools and equipment to tackle your auto repair projects? CARDIAGTECH.NET is your trusted partner for all your automotive diagnostic and repair needs. We offer a wide range of products designed to help you maintain and repair your vehicle efficiently and effectively.
6.1. Why Choose CARDIAGTECH.NET?
- Extensive Product Range: From diagnostic scanners and headliner adhesives to steam cleaners and specialized tools, we have everything you need to keep your car in top condition.
- High-Quality Products: We source our products from leading manufacturers, ensuring durability, reliability, and performance.
- Expert Support: Our team of experienced technicians is available to provide expert advice and support, helping you choose the right tools and techniques for your specific needs.
- Competitive Prices: We offer competitive prices on all our products, making professional-grade tools accessible to everyone.
6.2. Featured Products for Headliner Repair
- Headliner Adhesive Spray: Specially formulated for automotive headliners, our adhesive spray provides a strong, long-lasting bond without damaging the fabric or foam.
- Twist Pin Sets: Our twist pin sets include a variety of sizes and colors to match your headliner fabric, providing a discreet and effective solution for sagging.
- Car Steam Cleaners: Our car steam cleaners are designed to deliver powerful, consistent steam without over-saturating surfaces, making them ideal for headliner repair and interior detailing.
6.3. Call to Action
Ready to take control of your auto repairs? Contact CARDIAGTECH.NET today for expert advice and high-quality products. Whether you’re a professional mechanic or a DIY enthusiast, we have the tools and knowledge to help you succeed.
Address: 276 Reock St, City of Orange, NJ 07050, United States
WhatsApp: +1 (641) 206-8880
Website: CARDIAGTECH.NET
Don’t let a sagging headliner detract from your car’s appearance. Let CARDIAGTECH.NET provide you with the solutions you need to restore your vehicle’s interior to its former glory.
7. Frequently Asked Questions (FAQs)
7.1. How Do You Know If Your Ceiling Is Sagging?
Several signs indicate that your car ceiling is sagging, weakening, or under stress:
- A cracking sound when the car shakes or when slamming the doors.
- Drooping plasterboard sheeting or cornice.
- Visible cracking that you can notice right away.
- Tiny circles or blisters forming as lines produced by nails or screws.
7.2. Is It OK to Fix the Headliner Sagging Myself?
Yes, you can fix several not-so-severe issues with car headliners yourself. Replacement kits are easily accessible online and at auto parts retailers. A kit typically includes small screws that you can screen up into the foam backing to maintain the inner layer of a sinking headliner.
7.3. Can I Paint a Headliner?
While painting your car’s headliner might seem appealing, it is generally not recommended. Doing so without getting paint all over the trim and glass requires significant preparation. The time, effort, and money would be better spent on a proper replacement. Furthermore, paint is unlikely to withstand the temperature-related expansion and contraction inside a car.
7.4. Does Car Insurance Cover the Cost of Car Headliner Replacement?
Unfortunately, most standard car insurance policies do not cover the cost of car headliner replacement, as they typically exclude coverage for vehicle interior upholstery, trim, and headliners.
7.5. What Are the Best Adhesives for Fixing a Sagging Headliner?
The best adhesives for fixing a sagging headliner are those specifically designed for automotive headliners. These adhesives offer high heat resistance and strong bonding properties. Popular options include 3M Headliner Adhesive, Loctite High Strength Spray Adhesive, and Permatex Heavy Duty Headliner Adhesive.
7.6. How Long Does It Take to Fix a Sagging Headliner?
The time it takes to fix a sagging headliner depends on the method used and the extent of the damage. Using twist pins or applying adhesive to small areas can take as little as 30 minutes to an hour. Steam cleaning and reattaching larger sections may take several hours, including drying time.
7.7. Can Extreme Weather Conditions Affect the Headliner?
Yes, extreme weather conditions, such as high heat and humidity, can significantly affect the headliner. High temperatures can cause the adhesive to break down, leading to sagging, while high humidity can weaken the foam backing and promote mold growth.
7.8. Are There Any Special Tools Needed to Fix a Sagging Headliner?
While some methods require minimal tools, others may benefit from specialized equipment. Essential tools include a soft brush or vacuum for cleaning, spray adhesive, twist pins, a car steam cleaner, a paint roller or clean cloth for applying pressure, and safety glasses and gloves for protection.
7.9. How Can I Prevent Moisture Buildup in My Car?
Preventing moisture buildup in your car can help protect the headliner and other interior components. Tips include parking in shaded areas, using a dehumidifier or moisture absorber, regularly inspecting and maintaining rubber seals, and avoiding leaving wet items inside the car.
7.10. What Are the Benefits of Using a Professional for Headliner Repair?
Using a professional for headliner repair ensures a high-quality, long-lasting result. Professionals have the expertise, tools, and materials to properly diagnose and address the issue, providing a seamless finish and preventing further damage. While it may be more expensive than DIY methods, professional repair offers peace of mind and a restored interior appearance.