How To Fix Drooping Car Ceiling Fabric: A Comprehensive Guide

Drooping car ceiling fabric, also known as a sagging headliner, can be an eyesore and detract from your car’s interior appeal. If you’re dealing with this issue, CARDIAGTECH.NET offers expert advice and solutions. Discover effective methods to restore your car’s headliner without complete removal, saving you time and money, and explore long-term solutions with our specialized tools and equipment for the job, ultimately ensuring a pristine interior for years to come. Learn about headliner repair, fabric adhesion, and interior restoration techniques.
1. Understanding Car Headliners
A car headliner is the fabric attached to the interior roof, providing a smooth, finished look. It also insulates against noise and temperature extremes. Typically composed of layers, including a foam backing (often polyurethane), the headliner board attaches to the roof’s interior. This construction softens the roof’s surface, reduces noise, and helps maintain a comfortable cabin temperature.
The headliner does more than just look good. It provides a crucial layer of insulation. Without it, a car parked in direct sunlight heats up faster, and wind noise becomes more noticeable, especially at high speeds. A well-maintained headliner also improves the acoustics inside the vehicle, enhancing the performance of custom audio systems.
Car headliner is a fabric that is secured to the roof framing
2. Common Causes of Sagging Headliners
Over time, the headliner fabric can detach from its backing board, leading to a “sagging” condition that requires repair. Several factors contribute to this problem:
- Heat and Sunlight: Prolonged exposure to high temperatures melts the adhesive, causing the fabric to loosen and sag.
- Moisture: Humidity and leaks can saturate the foam backing, causing it to lose shape and adhesion.
- Poor Installation: Inadequate glue or improper installation techniques can lead to premature sagging.
- Inadequate Waterproofing: Some vehicles lack proper waterproofing, allowing water to penetrate the roof liner and deteriorate the adhesive.
- Physical Strain: Children or pets can pull, scratch, or otherwise damage the headliner, accelerating its deterioration.
3. Quick Fixes: How To Fix Sagging Car Ceiling Fabric Without Removal
Replacing the entire headliner can be expensive, particularly in older vehicles. Here are some budget-friendly ways to address a sagging headliner without removing it:
3.1. Re-gluing the Fabric
Re-gluing is most effective for minor sagging, such as in corners or around edges. Use a specialized headlining adhesive spray for even application. Ordinary glue is not suitable for this purpose. You can purchase specialized adhesive sprays designed for headliners at CARDIAGTECH.NET. Our products ensure a strong, lasting bond without damaging the fabric or underlying materials.
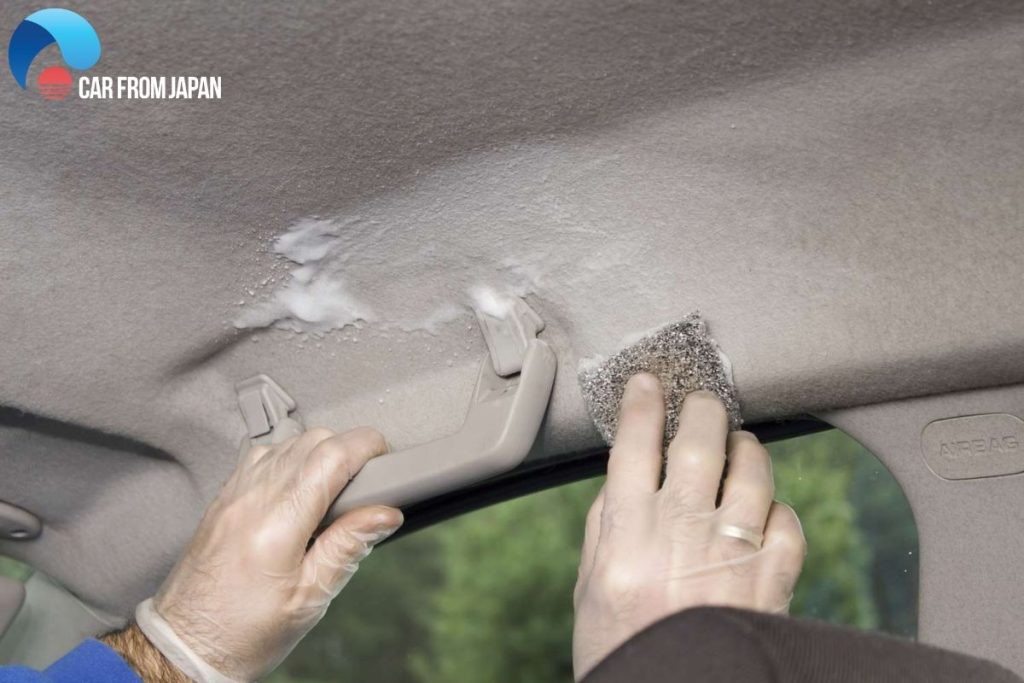 How to fix sagging headliner
3.2. Using Pins
This quick and inexpensive method involves using sequin pins or similar to reattach the headliner to the foam backing board. Push the pins through the fabric in a visually appealing pattern. While this is a temporary fix, it can provide immediate relief.
3.3. Installing Twist Pins
Clear-headed twist pins, also known as “saggy stoppers,” are an affordable and easy-to-use solution. These pins hold the headliner in place without causing significant damage. They are suitable even for extensive sagging. Unlike glue or tacks, twist pins are less likely to cause further complications.
3.4. Steam Cleaner and Paint Roller Method
The steam cleaner melts the old adhesive, allowing it to re-bond to the frame. Use a paint roller to smooth the fabric evenly, eliminating creases and wrinkles. This method works best for sagging around the edges. Ensure you use a car steam cleaner designed for interior use to avoid damage.
4. Step-by-Step Guide: Re-gluing Method in Detail
Re-gluing is a straightforward process that can significantly improve the appearance of your car’s interior. Here’s how to do it:
4.1. Gather Your Supplies
- Headliner adhesive spray (available at CARDIAGTECH.NET)
- Clean cloth or microfiber towel
- Masking tape
- Scissors or utility knife
- Cardboard or plastic sheets to protect surrounding areas
4.2. Prepare the Area
- Clean the Headliner: Use a clean, dry cloth to remove any loose debris or dust from the sagging area.
- Protect Surrounding Areas: Use masking tape and cardboard or plastic sheets to protect the surrounding trim, windows, and seats from overspray.
- Ventilate the Car: Open the car doors and windows to ensure adequate ventilation.
4.3. Apply the Adhesive
- Spray the Adhesive: Hold the adhesive spray can about 6-8 inches away from the sagging fabric and apply an even coat to both the fabric and the exposed backing board. Follow the manufacturer’s instructions for drying time.
- Allow to Tack: Let the adhesive sit for the recommended time, usually a few minutes, until it becomes tacky.
- Reattach the Fabric: Carefully press the fabric back onto the backing board, working from the center outwards to avoid wrinkles and air pockets. Use a clean cloth to smooth the fabric and ensure a strong bond.
4.4. Final Touches
- Remove Excess Adhesive: Wipe away any excess adhesive with a clean cloth.
- Allow to Dry: Allow the adhesive to dry completely, usually several hours or overnight, before using the car.
- Inspect and Reapply: Check the repaired area and reapply adhesive if necessary.
5. Step-by-Step Guide: Pinning Method in Detail
Pinning is a simple, non-intrusive method to secure the headliner. Here’s how to do it effectively:
5.1. Gather Your Supplies
- Sequin pins or clear-headed twist pins
- Measuring tape (optional, for pattern spacing)
- Clean cloth
5.2. Prepare the Area
- Clean the Headliner: Wipe the sagging area with a clean cloth to remove any loose dirt or debris.
- Plan Your Pattern: Decide on a pattern for the pins. Uniform spacing typically looks best. Use a measuring tape to mark the pin locations if desired.
5.3. Insert the Pins
- Push the Pins: Gently push the pins through the fabric and into the foam backing board. Be careful not to push too hard, which could damage the headliner.
- Space the Pins: Space the pins evenly, following your planned pattern. A spacing of 2-4 inches apart is usually sufficient.
- Check for Secure Hold: Ensure each pin is securely holding the fabric against the backing board.
5.4. Final Touches
- Adjust Pins: If any pins are loose, reposition them for a better hold.
- Inspect the Area: Check the entire area to ensure the fabric is securely attached.
- Monitor Over Time: Periodically check the pins to ensure they remain in place.
6. Step-by-Step Guide: Steam Cleaner Method in Detail
Using a steam cleaner can rejuvenate the adhesive and restore the headliner. Here’s how to do it safely and effectively:
6.1. Gather Your Supplies
- Car steam cleaner
- Paint roller (soft foam)
- Clean microfiber towels
- Spray bottle with water (optional)
- Masking tape
6.2. Prepare the Area
- Clean the Headliner: Gently clean the sagging area with a dry microfiber towel to remove any loose dirt or debris.
- Protect Surrounding Areas: Use masking tape to protect any trim or edges that might be sensitive to steam.
- Ventilate the Car: Open the car doors and windows to provide adequate ventilation.
6.3. Apply Steam
- Fill the Steam Cleaner: Fill the steam cleaner with distilled water according to the manufacturer’s instructions.
- Test the Steam: Test the steam on an inconspicuous area of the headliner to ensure it does not damage the fabric.
- Apply Steam Evenly: Hold the steam cleaner nozzle a few inches away from the fabric and apply steam in slow, even strokes. Avoid concentrating the steam in one area for too long.
- Use a Spray Bottle (Optional): If the fabric is very dry, lightly mist it with water before applying steam.
6.4. Roll the Fabric
- Roll Immediately: Immediately after steaming an area, use the soft foam paint roller to gently press the fabric back onto the backing board.
- Apply Even Pressure: Use even pressure to smooth the fabric and eliminate wrinkles or air pockets.
- Overlap Strokes: Overlap each stroke slightly to ensure complete coverage.
6.5. Final Touches
- Allow to Dry: Allow the headliner to dry completely. This may take several hours or overnight. Keep the car windows open to promote drying.
- Inspect the Area: Check the repaired area and repeat the process if necessary.
- Remove Masking Tape: Once the headliner is dry, carefully remove the masking tape.
7. Preventing Future Sagging
Preventing a sagging headliner is better than fixing one. Here are some tips:
- Park in the Shade: Whenever possible, park your vehicle in the shade to minimize exposure to direct sunlight and heat.
- Use Window Tint: Install window tint to reduce the amount of heat entering the car.
- Regular Cleaning: Clean the headliner regularly to remove dust and debris that can contribute to deterioration. Use a soft brush or vacuum with an upholstery attachment.
- Avoid Harsh Chemicals: Do not use harsh chemicals or abrasive cleaners on the headliner, as they can damage the fabric and adhesive.
- Monitor Humidity: Keep an eye on humidity levels inside the car. Use a dehumidifier if necessary.
- Maintain Seals: Regularly inspect and maintain the rubber seals around windows and doors to prevent water leaks.
- Be Mindful of Passengers: Ensure that children and pets do not pull or scratch at the headliner.
8. When to Consider Professional Replacement
While DIY methods can address minor sagging, severe cases may require professional replacement. Consider professional help if:
- The fabric is extensively damaged or torn.
- The foam backing is severely deteriorated.
- You are uncomfortable performing the repair yourself.
Professional headliner replacement typically costs between $300 and $1,000, depending on the vehicle and the complexity of the job, according to automotive repair sources.
9. Tools and Equipment from CARDIAGTECH.NET
CARDIAGTECH.NET offers a variety of tools and equipment to assist with headliner repair and replacement:
- Headliner Adhesive Sprays: High-quality adhesives designed for automotive headliners, ensuring a strong and lasting bond.
- Steam Cleaners: Car steam cleaners with adjustable settings for safe and effective interior cleaning.
- Upholstery Tools: Tool sets including seam rippers, hog ring pliers, and fabric cutters for professional-quality upholstery work.
- Protective Gear: Gloves, masks, and protective eyewear to ensure safety during repair work.
Using the right tools can make the job easier and more effective. Explore CARDIAGTECH.NET for all your automotive repair needs.
10. Cost Comparison: DIY vs. Professional Repair
Choosing between DIY repair and professional replacement depends on the severity of the damage and your comfort level. Here’s a cost comparison:
| Repair Method | Estimated Cost | Pros | Cons |
|---|---|---|---|
| DIY Re-gluing | $20 – $50 | Inexpensive, quick, easy to do at home | Only suitable for minor sagging, may not last long |
| DIY Pinning | $10 – $30 | Very inexpensive, quick | Temporary fix, may not look aesthetically pleasing |
| DIY Steam Cleaning | $50 – $150 | Can rejuvenate the fabric, relatively inexpensive | Requires a steam cleaner, may not work on severely damaged headliners |
| Professional Replacement | $300 – $1000 | High-quality results, durable, professional finish | Expensive, requires taking the car to a shop |
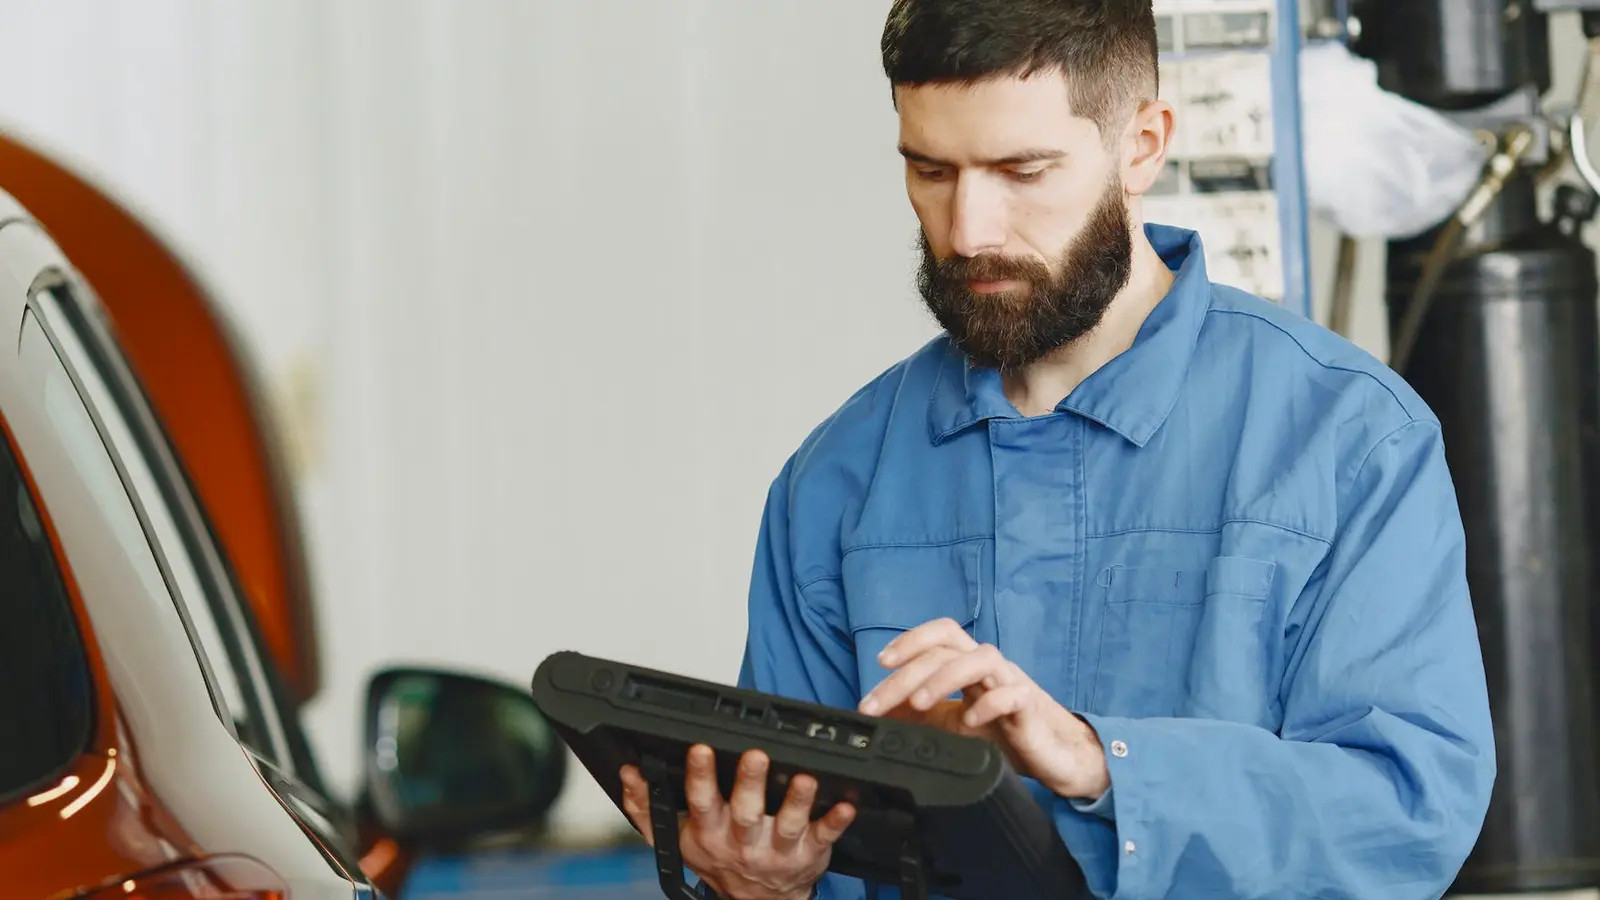
11. Why Choose CARDIAGTECH.NET for Your Automotive Needs?
At CARDIAGTECH.NET, we understand the challenges faced by automotive technicians and DIY enthusiasts. We provide high-quality tools and equipment that enhance efficiency, accuracy, and safety. Our products help you save time and money, increase productivity, and improve customer satisfaction.
Our commitment to quality and customer service sets us apart. We offer expert advice and support to help you choose the right tools for your specific needs. Contact us today at +1 (641) 206-8880 or visit our website CARDIAGTECH.NET to explore our extensive product range.
Is a sagging car ceiling fabric bringing down the look of your vehicle? Don’t let it get you down! Contact CARDIAGTECH.NET today at +1 (641) 206-8880 for expert advice and the best tools to fix it yourself. Located at 276 Reock St, City of Orange, NJ 07050, United States, we are ready to help you restore your car’s interior to its former glory. Let’s get that headliner looking like new again!
12. Frequently Asked Questions (FAQs)
12.1. How do I know if my ceiling is sagging?
Signs of a sagging car ceiling include:
- Visible drooping of the fabric
- Cracking or peeling of the fabric
- Fabric that is loose and easily pulls away from the backing board
12.2. Is it OK to fix the headliner sagging myself?
Yes, you can fix minor sagging yourself using the methods described above. However, for extensive damage, professional replacement is recommended.
12.3. Can I paint a headliner?
Painting a headliner is not recommended, as it can be difficult to achieve a uniform finish and the paint may crack or peel over time.
12.4. Does car insurance cover the cost of car headliner replacement?
Most car insurance policies do not cover headliner replacement due to wear and tear.
12.5. What is the best adhesive to use for headliner repair?
Use a specialized headliner adhesive spray designed for automotive interiors. These adhesives are formulated to withstand high temperatures and provide a strong, lasting bond.
12.6. How long does it take for the adhesive to dry?
Drying time varies depending on the adhesive. Follow the manufacturer’s instructions, but generally, allow several hours or overnight for complete drying.
12.7. Can I use a household steam cleaner for headliner repair?
Yes, but use caution. Ensure the steam cleaner has adjustable settings and test it on an inconspicuous area first to avoid damage.
12.8. How do I clean my car headliner without causing it to sag?
Use a soft brush or vacuum with an upholstery attachment to gently remove dust and debris. Avoid using harsh chemicals or abrasive cleaners.
12.9. What are the benefits of replacing a sagging headliner?
Replacing a sagging headliner improves the appearance of your car’s interior, enhances insulation, and can increase the vehicle’s resale value.
12.10. Where can I buy headliner repair supplies?
You can purchase headliner repair supplies at CARDIAGTECH.NET. We offer a wide range of adhesives, tools, and equipment for all your automotive repair needs.