How To Fix Falling Headliner In A Car: A Comprehensive Guide

Is your car’s headliner drooping, detracting from your vehicle’s interior? Learn how to address and repair a falling headliner efficiently with insights from CARDIAGTECH.NET, ensuring a professional finish. Discover preventative measures and repair options using headliner adhesive spray to revitalize your car’s interior.
The target audience of this article will be automotive technicians and garage owners, so the focus will be shifted towards the technical aspects of headliner repair.
1. Understanding the Car Headliner
The headliner, also known as the headlining, is a crucial element of a car’s interior. It is the fabric attached to the roof’s interior, providing a smooth finish, sound dampening, and thermal insulation. Typically made of layered materials, including a foam layer (often polyurethane) bonded to a headliner board, it is essential for both comfort and aesthetics. This insulation helps regulate interior temperature and improves the acoustics within the vehicle. According to automotive experts at Edmunds, a well-maintained headliner can also contribute to a vehicle’s resale value.
what is a headliner in a car
A car headliner is a fabric that is secured to the roof framing for both aesthetics and functional benefits.
2. Common Causes of a Falling Headliner
Understanding why headliners fail is the first step in preventing and addressing the issue. Several factors contribute to a falling headliner:
- Heat and Sunlight: Prolonged exposure to high temperatures can melt the adhesive bonding the fabric to the backing board.
- Moisture: Humidity and leaks can cause the foam backing to absorb moisture, leading to delamination and sagging.
- Poor Installation: Inadequate adhesive or improper installation techniques can lead to premature failure.
- Physical Damage: Activities of children or pets can physically damage the headliner, causing it to detach.
3. Identifying User Search Intent
Before diving into the repair process, let’s clarify the search intentions of users looking for solutions to fix a falling headliner:
- DIY Repair Instructions: Users seeking step-by-step guides for repairing the headliner themselves.
- Professional Repair Costs: Individuals researching the cost of professional headliner replacement.
- Causes of Headliner Sagging: Users wanting to understand why headliners fail.
- Preventative Measures: Car owners looking for tips to prevent headliner sagging.
- Product Recommendations: Those seeking recommendations for adhesives and tools for headliner repair.
4. Tools and Materials Required
Before starting any repair, gather the necessary tools and materials. CARDIAGTECH.NET offers a wide array of automotive tools and equipment to ensure a professional-grade repair. Here’s what you’ll need:
- Headliner Adhesive Spray: Specifically designed for automotive headliners to withstand temperature variations.
- Foam Roller or Brush: For even application of the adhesive.
- Scissors or Utility Knife: For trimming excess fabric.
- Screwdriver Set: Various sizes to remove trim pieces.
- Cleaning Supplies: For preparing the surface.
- Sequin Pins or Headliner Retainers: To hold the fabric in place while the adhesive dries.
- Steam Cleaner (Optional): For softening the old adhesive.
CARDIAGTECH.NET provides high-quality tools that enhance the efficiency and precision of your work. Contact us via WhatsApp at +1 (641) 206-8880 for expert advice on selecting the best tools for your needs. Our address is 276 Reock St, City of Orange, NJ 07050, United States.
5. Step-by-Step Guide: How To Fix Falling Headliner in a Car
Follow these detailed steps to repair your car’s falling headliner without removing it entirely. This method is ideal for addressing localized sagging and minor damage.
Step 1: Preparation
Begin by protecting the interior of your car. Cover seats, dashboards, and other surfaces to prevent overspray of the adhesive. Ensure adequate ventilation by opening windows and doors. According to the National Institute for Occupational Safety and Health (NIOSH), proper ventilation is crucial when working with adhesives to avoid inhaling harmful fumes.
Step 2: Cleaning the Headliner
Use a soft brush or vacuum to remove any loose debris from the headliner surface. Clean the area with a mild detergent to remove any dirt or grease that could affect the adhesive bond. Allow the headliner to dry completely before proceeding.
Step 3: Applying Adhesive
Shake the headliner adhesive spray can thoroughly. Apply an even coat of adhesive to both the headliner fabric and the backing board. Work in small sections to prevent the adhesive from drying out before you can attach the fabric. According to 3M, a leading adhesive manufacturer, applying adhesive in multiple light coats ensures better bonding than a single heavy coat.
Step 4: Reattaching the Fabric
Carefully align the fabric with the backing board and gently press it into place. Use a foam roller or brush to smooth out any wrinkles or bubbles. Ensure the fabric is firmly attached to the board.
Step 5: Securing the Fabric
Use sequin pins or headliner retainers to hold the fabric in place while the adhesive dries. Insert the pins at regular intervals, ensuring they penetrate both the fabric and the backing board. These will provide additional support during the drying process.
Step 6: Trimming Excess Fabric
Once the adhesive is dry (usually after 24 hours), remove the pins and trim any excess fabric using scissors or a utility knife. Be careful not to damage the surrounding trim or upholstery.
Step 7: Final Inspection
Inspect the repaired area for any imperfections. If necessary, apply additional adhesive to any loose spots. Clean up any adhesive residue with a suitable solvent.
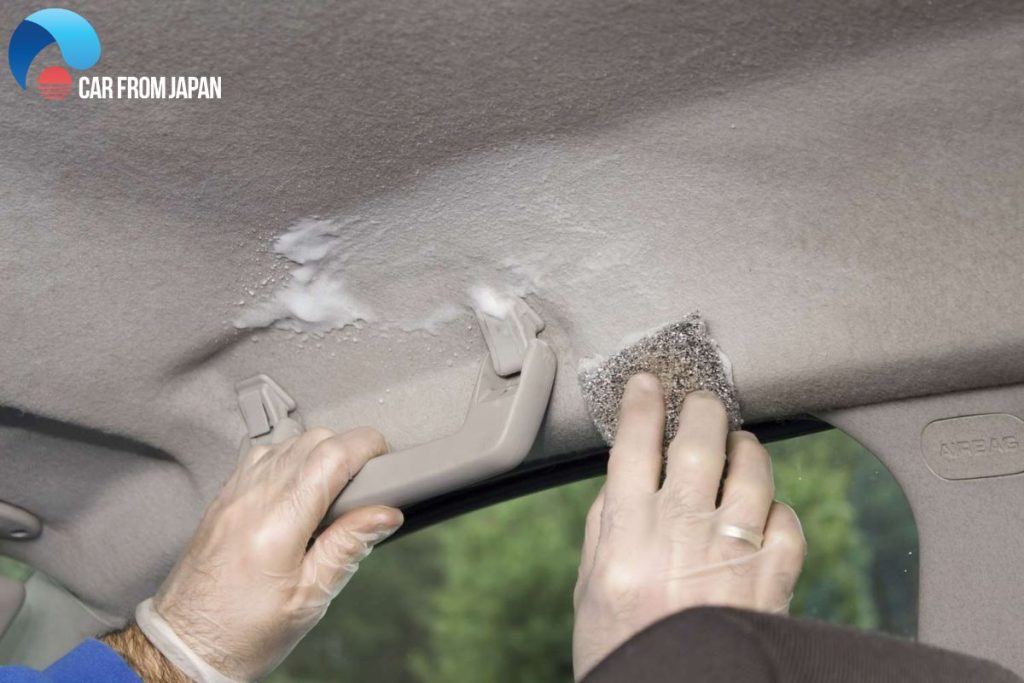 How to fix sagging headliner
Sagging headliner is often the result of poor maintenance and neglect, but can be remedied with proper techniques and tools.
6. Advanced Techniques for Extensive Damage
For more extensive damage, consider these advanced techniques:
- Steam Cleaning: Use a steam cleaner to soften the old adhesive before reattaching the fabric. This can help improve the bond and prevent wrinkles.
- Headliner Replacement: If the damage is too severe, consider replacing the entire headliner. CARDIAGTECH.NET offers a range of tools and equipment for headliner removal and installation.
7. Preventative Measures to Avoid Headliner Sagging
Prevention is always better than cure. Here are some tips to prevent headliner sagging:
- Park in the Shade: Avoid parking your car in direct sunlight for extended periods.
- Maintain Interior Temperature: Use window shades to reduce heat buildup inside the car.
- Regular Cleaning: Clean the headliner regularly to remove dirt and debris.
- Check for Leaks: Address any leaks promptly to prevent moisture damage.
8. Cost Analysis: DIY vs. Professional Repair
The cost of repairing a falling headliner can vary depending on whether you choose to do it yourself or hire a professional. Here’s a cost breakdown:
| Repair Type | Materials Cost | Labor Cost | Total Cost |
|---|---|---|---|
| DIY Repair | $20 – $50 | $0 | $20 – $50 |
| Professional Repair | $50 – $150 | $200 – $500 | $250 – $650 |
9. The Advantages of Using CARDIAGTECH.NET Tools
Choosing the right tools is essential for a successful headliner repair. CARDIAGTECH.NET offers high-quality automotive tools designed to enhance efficiency and precision. Here are some key advantages:
- Durability: Our tools are made from high-quality materials, ensuring long-lasting performance.
- Precision: Designed for accurate and efficient repairs.
- Versatility: Suitable for a wide range of automotive repair tasks.
- Expert Support: CARDIAGTECH.NET provides expert advice and support to help you choose the right tools for your needs. Contact us via WhatsApp at +1 (641) 206-8880 for personalized assistance.
10. Call to Action: Contact CARDIAGTECH.NET for Expert Advice
Facing challenges with your car’s falling headliner? Need professional-grade tools to get the job done right? Contact CARDIAGTECH.NET today for expert advice and the best selection of automotive repair tools. Our team is ready to assist you with your specific needs.
- Address: 276 Reock St, City of Orange, NJ 07050, United States
- WhatsApp: +1 (641) 206-8880
- Website: CARDIAGTECH.NET
Don’t let a sagging headliner detract from your car’s appearance and value. Reach out to CARDIAGTECH.NET and restore your vehicle’s interior to its former glory.
11. Understanding Automotive Adhesives: A Technical Overview
The success of any headliner repair heavily relies on the quality and type of adhesive used. Automotive adhesives are specifically formulated to withstand extreme temperatures, vibrations, and environmental conditions. Here’s a technical overview:
-
Types of Adhesives:
- Solvent-Based Adhesives: These offer high initial tack and strong bonding. However, they contain volatile organic compounds (VOCs) and require proper ventilation.
- Water-Based Adhesives: Environmentally friendly with low VOC content. They are less aggressive but suitable for many headliner applications.
- Hot Melt Adhesives: Applied in a molten state and solidify upon cooling. Ideal for quick bonding but may not withstand high temperatures.
- Spray Adhesives: Convenient for even application, providing a consistent bond across large surfaces.
-
Adhesive Properties:
- Tensile Strength: Measures the adhesive’s resistance to being pulled apart.
- Shear Strength: Measures the adhesive’s resistance to forces applied parallel to the bond.
- Temperature Resistance: Indicates the adhesive’s ability to maintain bond strength at high and low temperatures.
- Flexibility: Measures the adhesive’s ability to bend without breaking the bond.
According to a study by the Society of Automotive Engineers (SAE), the ideal automotive adhesive should exhibit high tensile and shear strength, excellent temperature resistance, and good flexibility to accommodate vibrations and thermal expansion.
12. Choosing the Right Adhesive for Headliner Repair
Selecting the right adhesive is crucial for a durable and long-lasting repair. Consider these factors when choosing an adhesive for your car’s headliner:
- Material Compatibility: Ensure the adhesive is compatible with both the headliner fabric and the backing board material.
- Temperature Resistance: Opt for an adhesive that can withstand the high temperatures inside a car during summer.
- Application Method: Choose an adhesive that is easy to apply and provides even coverage.
- VOC Content: Consider water-based adhesives for better environmental compliance and reduced health risks.
CARDIAGTECH.NET recommends using headliner-specific spray adhesives with high-temperature resistance for optimal results. Our expert team can guide you in selecting the best adhesive for your specific vehicle and headliner material.
13. Detailed Guide: Removing and Replacing a Car Headliner
For severely damaged headliners, a complete replacement might be necessary. Here’s a detailed guide:
Step 1: Preparation
Gather all necessary tools and materials, including a new headliner, adhesive, screwdriver set, pliers, and safety glasses. Disconnect the car battery to prevent electrical shorts.
Step 2: Removing Interior Trim
Carefully remove all interior trim pieces, including visors, dome lights, grab handles, and pillar covers. Use a screwdriver or trim removal tool to avoid damaging the trim.
Step 3: Detaching the Old Headliner
Gently detach the old headliner from the car roof. It may be held in place by clips, screws, or adhesive. Be careful not to damage the roof or any wiring.
Step 4: Removing the Headliner Board
Carefully remove the headliner board from the car. It may be necessary to fold or bend the board slightly to get it out of the car.
Step 5: Cleaning the Headliner Board
Remove the old fabric and adhesive from the headliner board. Use a wire brush or scraper to remove any stubborn residue. Clean the board with a solvent to prepare it for the new fabric.
Step 6: Applying the New Fabric
Lay the new headliner fabric over the board and trim it to size, leaving a few extra inches around the edges. Apply adhesive to both the board and the fabric, and carefully attach the fabric to the board. Smooth out any wrinkles or bubbles.
Step 7: Trimming and Finishing
Trim the excess fabric and fold it over the edges of the board. Secure the fabric with adhesive or staples. Reinstall the headliner board into the car.
Step 8: Reinstalling Trim Pieces
Reinstall all interior trim pieces, including visors, dome lights, grab handles, and pillar covers. Ensure all pieces are securely attached.
Step 9: Final Inspection
Inspect the new headliner for any imperfections. Clean up any adhesive residue and reconnect the car battery.
14. Troubleshooting Common Headliner Repair Issues
Even with careful preparation, some issues may arise during headliner repair:
- Wrinkles and Bubbles: Ensure the adhesive is evenly applied and smooth out any wrinkles or bubbles with a foam roller.
- Adhesive Failure: Use a high-quality, temperature-resistant adhesive and allow it to dry completely before reinstalling the headliner.
- Trim Damage: Use proper trim removal tools and proceed carefully to avoid damaging interior trim pieces.
- Sagging After Repair: Apply additional adhesive to any loose spots and use headliner retainers for extra support.
15. Headliner Fabrics: Types and Characteristics
The choice of headliner fabric can significantly impact the appearance and durability of the repair. Here are some common types of headliner fabrics:
| Fabric Type | Characteristics | Advantages | Disadvantages |
|---|---|---|---|
| Knit Fabric | Soft, flexible, and available in various colors and patterns. | Easy to work with, good elasticity, and comfortable texture. | Can be prone to snagging and may not be as durable as other options. |
| Woven Fabric | More durable and resistant to wear and tear. | Higher durability, better resistance to abrasion, and a more structured appearance. | Less flexible and may be more difficult to work with. |
| Suede Fabric | Luxurious appearance and soft feel. | Adds a premium touch to the interior, excellent sound absorption. | More expensive and requires special cleaning and maintenance. |
| Vinyl Fabric | Water-resistant and easy to clean. | Good for vehicles exposed to moisture, easy to wipe down, and resistant to stains. | Can be less comfortable and may not breathe as well as other fabrics. |
| Perforated Vinyl | Vinyl with small holes for improved ventilation. | Combines the durability of vinyl with improved airflow, reducing moisture buildup. | May not be as aesthetically pleasing as other options and can be more difficult to clean if dirt gets into the perforations. |
16. Maximizing the Lifespan of Your Car’s Headliner
Extending the lifespan of your car’s headliner involves consistent care and proactive measures. Here are key strategies to implement:
- Regular Cleaning: Dust and debris accumulation can degrade the fabric and adhesive over time. Use a soft brush or vacuum cleaner with an upholstery attachment to gently clean the headliner regularly.
- Avoid Direct Sunlight: Prolonged exposure to direct sunlight can cause the adhesive to break down and the fabric to fade. Whenever possible, park your car in shaded areas or use window shades to minimize sun exposure.
- Control Interior Humidity: High humidity levels can lead to moisture absorption, causing the headliner to sag. Use a dehumidifier inside the car or ensure proper ventilation to keep humidity levels low.
- Prompt Leak Repair: Water leaks from the sunroof, windows, or roof can saturate the headliner, leading to adhesive failure and fabric damage. Address any leaks immediately to prevent further damage.
- Gentle Handling: Avoid touching or pulling on the headliner, as this can weaken the adhesive and cause the fabric to detach.
17. Eco-Friendly Headliner Repair Options
For environmentally conscious car owners, there are several eco-friendly options for headliner repair:
- Water-Based Adhesives: These adhesives have low VOC content and are safer for both the environment and your health.
- Recycled Fabrics: Consider using recycled fabrics for headliner replacement. These fabrics are made from recycled materials and help reduce waste.
- Professional Recycling Services: Dispose of old headliners and materials responsibly by using professional recycling services.
18. The Role of Headliners in Vehicle Acoustics
Headliners play a crucial role in managing the acoustic environment inside a vehicle. Here’s how they contribute to better sound quality:
- Sound Absorption: The foam layer in the headliner absorbs sound waves, reducing echo and reverberation inside the car.
- Noise Reduction: Headliners help block external noise from entering the car, creating a quieter and more comfortable cabin.
- Vibration Dampening: The headliner can dampen vibrations from the roof, reducing noise caused by wind, rain, or road conditions.
19. The Impact of a Well-Maintained Headliner on Vehicle Value
A well-maintained headliner can significantly enhance the resale value of your car. Here’s why:
- Aesthetic Appeal: A clean and intact headliner improves the overall appearance of the car’s interior, making it more attractive to potential buyers.
- Perception of Care: A well-maintained headliner indicates that the car has been cared for, increasing buyer confidence.
- Functionality: A functional headliner provides better insulation and sound dampening, enhancing the driving experience.
According to Kelley Blue Book (KBB), maintaining the interior of your car, including the headliner, is essential for maximizing its resale value.
20. Headliner Repair for Classic and Vintage Cars
Repairing headliners in classic and vintage cars requires special care and attention to detail. Here are some tips:
- Original Materials: Use original or reproduction materials to maintain the car’s authenticity.
- Professional Restoration: Consider hiring a professional restorer experienced in working with classic car interiors.
- Preservation Techniques: Use preservation techniques to protect the original headliner from further damage.
21. Addressing Sunroof and Moonroof-Related Headliner Issues
Sunroofs and moonroofs can be a common source of headliner problems. Here’s how to address them:
- Leak Prevention: Regularly inspect and maintain sunroof and moonroof seals to prevent water leaks.
- Drain Cleaning: Clean the sunroof and moonroof drain tubes to ensure proper water drainage.
- Fabric Compatibility: Use headliner fabrics that are water-resistant and easy to clean.
22. The Importance of Proper Ventilation During Headliner Repair
Proper ventilation is crucial during headliner repair to minimize exposure to harmful fumes from adhesives and solvents. Here are some tips:
- Open Windows and Doors: Ensure adequate airflow by opening windows and doors.
- Use a Fan: Use a fan to circulate air and remove fumes from the work area.
- Wear a Respirator: Wear a respirator to protect yourself from inhaling harmful fumes.
According to the Occupational Safety and Health Administration (OSHA), proper ventilation is essential when working with chemicals and adhesives to prevent health hazards.
23. Headliner Repair Tools and Equipment: A Comprehensive Guide
Having the right tools and equipment is essential for a successful headliner repair. Here’s a comprehensive guide:
- Trim Removal Tools: Use specialized trim removal tools to avoid damaging interior trim pieces.
- Adhesive Sprayers: Use a high-quality adhesive sprayer for even and consistent adhesive application.
- Foam Rollers: Use foam rollers to smooth out wrinkles and bubbles in the headliner fabric.
- Headliner Retainers: Use headliner retainers to secure the fabric in place while the adhesive dries.
- Steam Cleaners: Use a steam cleaner to soften old adhesive and clean the headliner board.
24. How to Prevent Animal Damage to Your Car’s Headliner
Pets can sometimes cause damage to your car’s headliner. Here’s how to prevent it:
- Pet Barriers: Use pet barriers to keep animals away from the headliner.
- Seat Covers: Use seat covers to protect the seats and prevent pets from climbing onto the headliner.
- Training: Train your pets to stay off the car seats and headliner.
25. Maintaining a Clean and Fresh Car Interior: The Headliner’s Role
A clean and fresh car interior contributes to a more enjoyable driving experience. The headliner plays a significant role in maintaining this environment:
- Odor Absorption: The headliner can absorb odors from smoke, food, and other sources. Regular cleaning can help eliminate these odors.
- Air Quality: A clean headliner can improve air quality inside the car by reducing dust and allergens.
- Overall Appearance: A clean and well-maintained headliner enhances the overall appearance of the car’s interior, making it more inviting and comfortable.
26. The Future of Headliner Materials and Technology
The automotive industry is continuously innovating in the field of headliner materials and technology. Here are some emerging trends:
- Sustainable Materials: The use of sustainable and eco-friendly materials, such as recycled fabrics and plant-based foams.
- Smart Headliners: The integration of sensors and electronics into headliners for features such as ambient lighting, climate control, and sound management.
- Advanced Adhesives: The development of high-performance adhesives with improved temperature resistance, flexibility, and durability.
27. Headliner Repair as a Business Opportunity
Offering headliner repair services can be a lucrative business opportunity for automotive technicians and repair shops. Here’s why:
- High Demand: Headliner repair is a common issue, creating a consistent demand for repair services.
- Low Startup Costs: The initial investment in tools and equipment is relatively low.
- High Profit Margins: Headliner repair services can generate high profit margins.
- Customer Loyalty: Providing quality headliner repair services can build customer loyalty and generate repeat business.
CARDIAGTECH.NET supports automotive professionals by providing high-quality tools and equipment at competitive prices, helping them succeed in the headliner repair business. Contact us via WhatsApp at +1 (641) 206-8880 to learn more about our products and services.
28. Expert Tips for a Flawless Headliner Repair
To achieve a flawless headliner repair, consider these expert tips:
- Preparation is Key: Thoroughly clean and prepare the headliner surface before applying adhesive.
- Use the Right Adhesive: Choose a high-quality, temperature-resistant adhesive specifically designed for headliners.
- Apply Evenly: Apply adhesive evenly to both the fabric and the headliner board.
- Smooth Out Wrinkles: Use a foam roller to smooth out wrinkles and bubbles in the fabric.
- Secure the Fabric: Use headliner retainers to secure the fabric in place while the adhesive dries.
- Take Your Time: Avoid rushing the repair process to ensure a professional-quality result.
29. Headliner Customization: Adding a Personal Touch to Your Car’s Interior
Customizing your car’s headliner is a great way to add a personal touch to your vehicle’s interior. Here are some ideas:
- Unique Fabrics: Use unique and stylish fabrics to create a custom look.
- Patterns and Designs: Add patterns and designs to the headliner using paint, stencils, or embroidery.
- Lighting: Integrate LED lighting into the headliner for a modern and stylish look.
30. Frequently Asked Questions (FAQs) About Headliner Repair
Q1: How do I know if my headliner is sagging?
A1: Common signs include the fabric detaching from the roof, drooping, or having a bubbled appearance.
Q2: Can I fix a sagging headliner myself?
A2: Yes, with the right tools, materials, and instructions, you can repair a sagging headliner yourself.
Q3: How much does it cost to replace a headliner?
A3: The cost can vary from $250 to $650 depending on the car model and labor costs.
Q4: What type of adhesive should I use for headliner repair?
A4: Use a high-temperature-resistant spray adhesive specifically designed for automotive headliners.
Q5: How do I prevent my headliner from sagging again?
A5: Park in the shade, maintain interior temperature, clean regularly, and check for leaks.
Q6: Can I paint my car’s headliner?
A6: While possible, it’s not recommended due to temperature-related expansion and contraction within the car’s interior, which can cause the paint to crack.
Q7: Does car insurance cover headliner replacement?
A7: Unfortunately, most car insurance policies do not cover interior upholstery, trim, and headliner damage.
Q8: What are some eco-friendly options for headliner repair?
A8: Use water-based adhesives and recycled fabrics for an environmentally friendly repair.
Q9: How does the headliner affect the acoustics of my car?
A9: The headliner absorbs sound waves, reduces echo, and blocks external noise, creating a quieter and more comfortable cabin.
Q10: Can I customize my car’s headliner?
A10: Yes, you can use unique fabrics, patterns, and designs to add a personal touch to your car’s interior.
By following this comprehensive guide and utilizing high-quality tools from CARDIAGTECH.NET, you can effectively repair a falling headliner and maintain the value and comfort of your vehicle. Contact CARDIAGTECH.NET today for expert advice and the best selection of automotive repair tools. Our address is 276 Reock St, City of Orange, NJ 07050, United States. Reach us via WhatsApp at +1 (641) 206-8880 or visit our website at CARDIAGTECH.NET.