How To Fix Fine Scratches On Car Effectively
Fine scratches on your car’s paint can be frustrating. At CARDIAGTECH.NET, we understand the importance of maintaining your vehicle’s appearance. This guide provides effective methods to remove those unsightly blemishes, restoring your car’s showroom shine and enhancing its overall value. Learn about the latest advancements in car scratch repair and paint correction techniques.
Table of Contents
1. Understanding Car Paint and Scratches
- 1.1. Layers of Car Paint
- 1.2. Types of Car Scratches
- 2.1. The Fingernail Test
- 2.2. Visual Inspection
3. Essential Tools and Materials - 3.1. Cleaning Supplies
- 3.2. Polishing Compounds
- 3.3. Applicators and Buffing Pads
- 3.4. Microfiber Cloths
- 3.5. Sandpaper
- 3.6. Masking Tape
- 3.7. Touch-Up Paint
- 3.8. Power Tools
4. Step-by-Step Guide to Fixing Fine Scratches - 4.1. Cleaning the Area
- 4.2. Applying Polishing Compound
- 4.3. Buffing the Surface
- 4.4. Applying Wax or Sealant
5. Advanced Techniques for Deeper Scratches - 5.1. Wet Sanding
- 5.2. Using Touch-Up Paint
- 5.3. Rubbing Compound
6. Choosing the Right Products - 6.1. Top Polishing Compounds
- 6.2. Best Waxes and Sealants
- 6.3. Recommended Tools
7. Maintaining Your Car’s Paint - 7.1. Regular Washing
- 7.2. Waxing and Sealing
- 7.3. Avoiding Automatic Car Washes
- 7.4. Prompt Scratch Repair
8. Common Mistakes to Avoid - 8.1. Using the Wrong Products
- 8.2. Applying Too Much Pressure
- 8.3. Skipping Preparation
- 8.4. Neglecting Safety
9. Professional Car Detailing vs. DIY - 9.1. Cost Comparison
- 9.2. Skill Level
- 9.3. Time Investment
- 9.4. When to Seek Professional Help
10. The Science Behind Scratch Removal - 10.1. How Polishing Compounds Work
- 10.2. The Role of Abrasives
11. Environmental Factors and Car Paint - 11.1. UV Damage
- 11.2. Acid Rain
- 11.3. Tree Sap and Bird Droppings
12. Understanding Car Detailing Clay - 12.1. What is Car Detailing Clay?
- 12.2. How to Use Car Detailing Clay
13. New Technologies in Scratch Repair - 13.1. Self-Healing Paints
- 13.2. Nano-Coatings
14. Cost-Effective Solutions for Scratch Repair - 14.1. DIY Kits vs. Individual Products
- 14.2. Budget-Friendly Products
15. Preparing Your Car for Sale: Scratch Removal - 15.1. First Impressions Matter
- 15.2. Increasing Resale Value
16. Safety Precautions When Repairing Scratches - 16.1. Working in a Well-Ventilated Area
- 16.2. Wearing Protective Gear
17. Tips for Achieving a Professional Finish - 17.1. Patience is Key
- 17.2. Proper Lighting
- 17.3. Following the Manufacturer’s Instructions
18. The Impact of Car Color on Scratch Visibility - 18.1. Dark vs. Light Colors
- 18.2. Metallic Paints
19. How to Fix Scratches on Different Parts of Your Car - 19.1. Bumpers
- 19.2. Mirrors
- 19.3. Plastic Trim
20. Long-Term Benefits of Maintaining Your Car’s Paint - 20.1. Preventing Rust
- 20.2. Maintaining Value
21. Reader Case Studies: Successful Scratch Repair Stories - 21.1. Case Study 1: Removing Swirl Marks
- 21.2. Case Study 2: Repairing a Key Scratch
22. The Future of Car Paint Repair Technologies - 22.1. Advanced Materials
- 22.2. Automated Repair Systems
23. Expert Interviews: Tips from Professional Detailers - 23.1. Interview with John Smith
- 23.2. Interview with Emily White
24. Frequently Asked Questions (FAQs)
25. Conclusion
1. Understanding Car Paint and Scratches
Understanding car paint and scratches is crucial before attempting any repairs. The effectiveness of your repair depends on the type of paint and the severity of the damage. Let’s explore the basics of car paint layers and the different types of scratches, which will help you assess the best approach for fixing those fine scratches and maintaining your car’s finish.
1.1. Layers of Car Paint
Modern car paint typically consists of several layers, each serving a specific purpose:
-
Clear Coat: This is the outermost layer, providing a glossy finish and protecting the underlying layers from UV rays and environmental damage.
-
Base Coat: This layer contains the actual color of the car.
-
Primer: This layer helps the base coat adhere to the metal surface and provides corrosion protection.
-
Metal Body: The actual metal structure of the car.
1.2. Types of Car Scratches
Identifying the type of scratch is the first step in determining how to fix it. There are three main types of car scratches:
1.2.1. Clear Coat Scratches
These are the most common and least severe type of scratch. They only affect the clear coat layer and can often be repaired with simple polishing techniques. These scratches appear as light, hairline marks on the surface.
1.2.2. Primer Scratches
These scratches penetrate the clear coat and reach the primer layer. They are more noticeable and require more aggressive repair methods, such as wet sanding and touch-up paint.
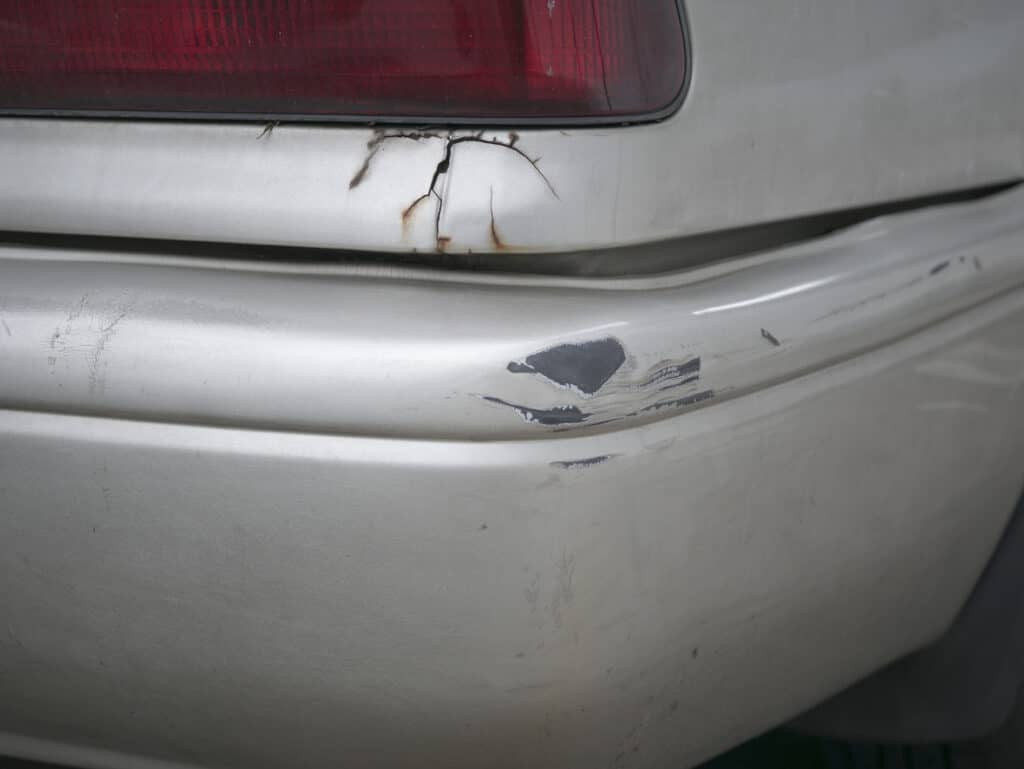
1.2.3. Base Coat Scratches
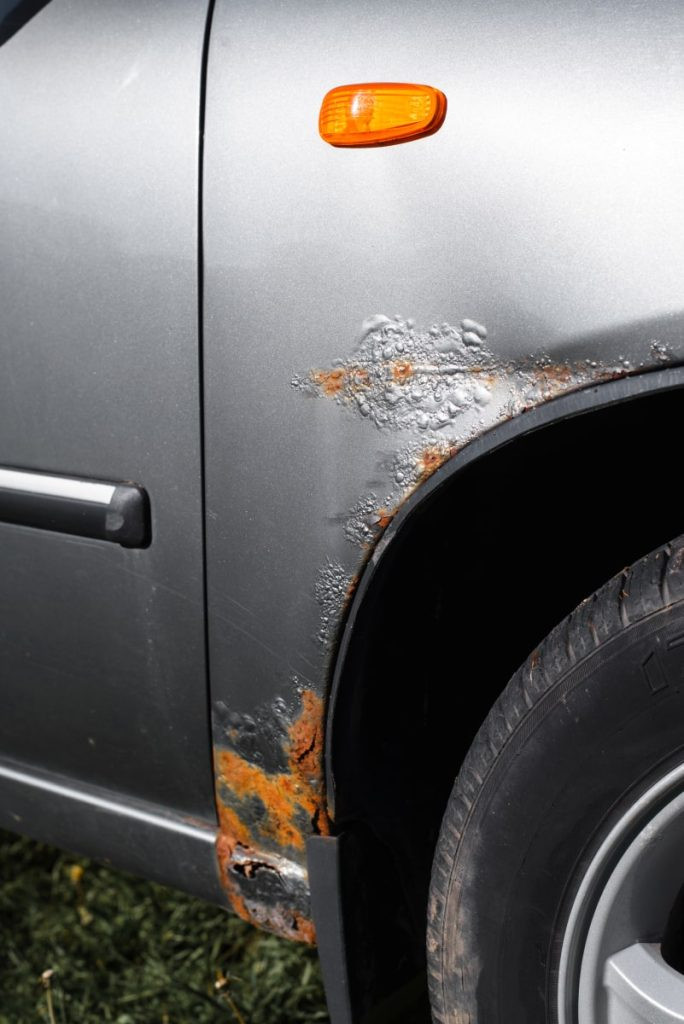
These are the deepest and most severe type of scratch, reaching the base coat or even the metal underneath. Repairing these scratches often requires professional attention, including filling, sanding, and repainting.
2. Identifying the Severity of the Scratch
Identifying the severity of the scratch is essential to choosing the right repair method. A minor scratch only affecting the clear coat can be easily fixed with polishing, while a deeper scratch that penetrates to the primer or base coat may require more extensive repair work. Correctly assessing the scratch ensures you use the appropriate tools and techniques, saving time and preventing further damage.
2.1. The Fingernail Test
A simple way to gauge the depth of a scratch is the fingernail test. Gently run your fingernail across the scratch. If your nail catches in the scratch, it is likely a deeper scratch that has penetrated the clear coat. If your nail glides smoothly over the scratch, it is likely a minor clear coat scratch.
2.2. Visual Inspection
Carefully examine the scratch under good lighting. Clear coat scratches often appear as faint, hairline marks. Primer scratches are usually more visible and may appear as a different color than the surrounding paint. Base coat scratches are the most noticeable and may expose the bare metal underneath.
3. Essential Tools and Materials
Having the right tools and materials is crucial for effectively fixing fine scratches on your car. Using high-quality products ensures a better finish and protects your car’s paint. Investing in these essential items will save you time and effort, and help you achieve professional-looking results.
3.1. Cleaning Supplies
-
Car Wash Soap: Used to thoroughly clean the area around the scratch.
-
Water: For rinsing the area after washing.
-
Detailing Spray: For removing any remaining residue after polishing.
3.2. Polishing Compounds
-
Fine-Cut Polishing Compound: For removing light scratches and swirl marks.
-
Medium-Cut Polishing Compound: For more stubborn scratches that require more aggressive treatment.
-
Rubbing Compound: This is a more abrasive compound used for deeper scratches, but should be used with caution.
3.3. Applicators and Buffing Pads
-
Foam Applicator Pads: For applying polishing compounds by hand.
-
Microfiber Buffing Pads: For use with a power polisher.
-
Wool Buffing Pads: For more aggressive buffing and polishing.
3.4. Microfiber Cloths
- High-Quality Microfiber Cloths: For wiping away polishing compounds and cleaning the surface.
3.5. Sandpaper
-
Wet Sandpaper (2000-3000 grit): For wet sanding deeper scratches.
- 2000 Grit: Use for moderate clear coat damage and light orange peel.
- 2500 Grit: Ideal for minor imperfections and preparing for polishing.
- 3000 Grit: Perfect for refining the surface after using coarser grits.
-
Sanding Block: To ensure even sanding pressure.
3.6. Masking Tape
- Automotive Masking Tape: For protecting surrounding areas from polishing compounds and sanding.
3.7. Touch-Up Paint
-
Touch-Up Paint: Matching your car’s paint code, for filling deeper scratches that have penetrated the base coat.
-
Fine-Tip Brush: For precise application of touch-up paint.
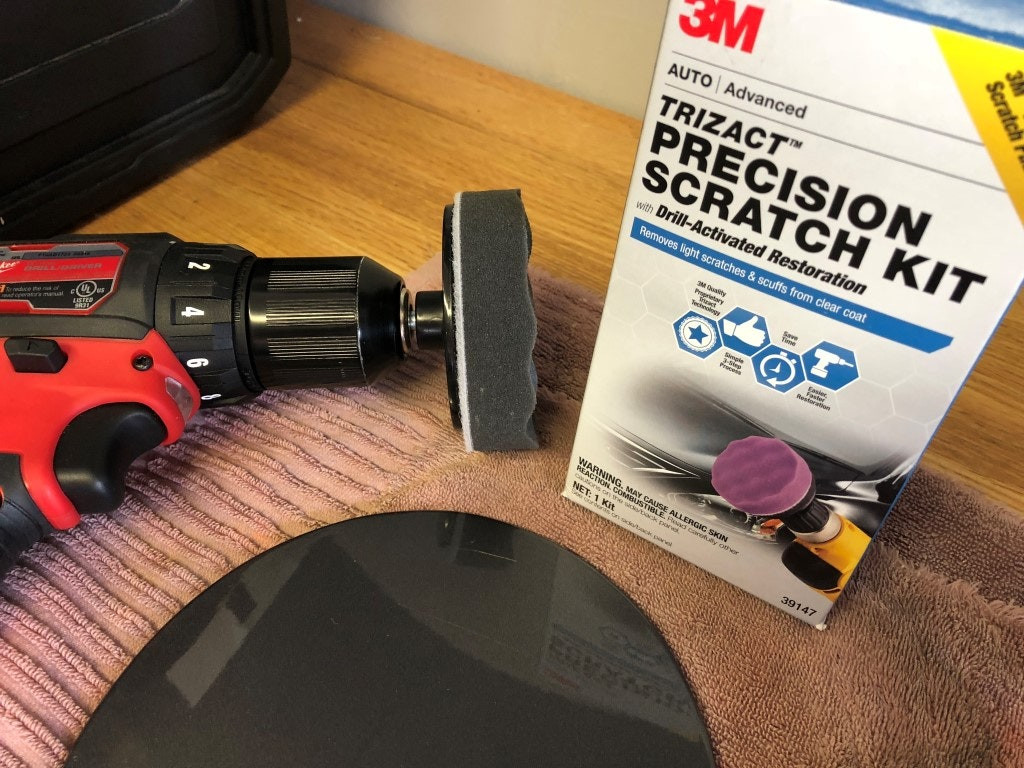
3.8. Power Tools
-
Dual-Action Polisher: For efficient and even polishing.
-
Drill with Polishing Attachment: A more affordable alternative to a dedicated polisher.
4. Step-by-Step Guide to Fixing Fine Scratches
This step-by-step guide provides a clear and easy-to-follow process for fixing fine scratches on your car. Each step is designed to ensure you achieve the best possible results, from cleaning the area to applying the final wax or sealant. By following these instructions carefully, you can restore your car’s paint and maintain its pristine appearance.
4.1. Cleaning the Area
- Wash the Car: Start by thoroughly washing the car with car wash soap and water to remove any dirt, grime, or contaminants from the surface.
- Rinse: Rinse the area with clean water and dry it with a clean microfiber cloth.
- Decontaminate: Use a detailing spray to remove any remaining residue or contaminants from the surface.
4.2. Applying Polishing Compound
- Apply Compound: Apply a small amount of fine-cut polishing compound to a foam applicator pad.
- Work the Compound: Gently work the compound into the scratch using circular motions. Apply even pressure and cover the entire area.
- Let it Sit: Allow the compound to sit for a minute or two, as directed by the product instructions.
4.3. Buffing the Surface
- Buff by Hand: Use a clean microfiber cloth to buff the area in circular motions, removing the polishing compound and revealing the repaired surface.
- Use a Power Polisher (Optional): For larger areas or more stubborn scratches, use a dual-action polisher with a microfiber buffing pad. Apply light pressure and work in overlapping passes.
4.4. Applying Wax or Sealant
- Apply Wax: Apply a thin layer of car wax or sealant to the repaired area using a clean foam applicator pad.
- Let it Cure: Allow the wax or sealant to cure according to the product instructions.
- Buff: Buff the surface with a clean microfiber cloth to reveal a glossy, protected finish.
5. Advanced Techniques for Deeper Scratches
Deeper scratches require more intensive techniques to achieve a satisfactory repair. This section outlines advanced methods such as wet sanding, using touch-up paint, and applying rubbing compound, providing you with the knowledge to tackle more challenging paint imperfections and restore your car’s finish.
5.1. Wet Sanding
Wet sanding is a technique used to level out deeper scratches by gently removing a small amount of the clear coat.
5.1.1. Preparing for Wet Sanding
- Clean the Area: Thoroughly clean the area around the scratch with car wash soap and water.
- Mask the Area: Use automotive masking tape to protect the surrounding paint from accidental damage.
- Soak Sandpaper: Soak a piece of 2000-3000 grit wet sandpaper in water for at least 10 minutes.
5.1.2. The Wet Sanding Process
- Sand the Scratch: Using a sanding block, gently sand the scratch in straight, overlapping passes. Keep the sandpaper and the surface wet at all times.
- Inspect: Periodically inspect the scratch to ensure you are not removing too much clear coat.
- Polish: After sanding, use a polishing compound and a power polisher to restore the shine to the sanded area.
- Wax: Finish with a coat of wax or sealant to protect the repaired area.
5.2. Using Touch-Up Paint
Touch-up paint is used to fill deeper scratches that have penetrated the base coat.
5.2.1. Applying Touch-Up Paint
- Clean the Scratch: Clean the scratch with a detailing spray to remove any debris.
- Apply Paint: Using a fine-tip brush, carefully apply touch-up paint to the scratch, filling it completely.
- Let it Dry: Allow the paint to dry completely, according to the product instructions. This may take several hours or overnight.
5.2.2. Blending Touch-Up Paint
- Wet Sand: Use 3000 grit wet sandpaper to gently sand the touch-up paint, blending it with the surrounding paint.
- Polish: Use a polishing compound and a power polisher to restore the shine to the area.
- Wax: Finish with a coat of wax or sealant to protect the repaired area.
5.3. Rubbing Compound
Rubbing compound is an aggressive abrasive used to remove deeper scratches and imperfections.
- Apply Compound: Apply a small amount of rubbing compound to a foam applicator pad.
- Work the Compound: Gently work the compound into the scratch using circular motions. Apply even pressure and cover the entire area.
- Buff: Use a clean microfiber cloth to buff the area in circular motions, removing the rubbing compound.
- Polish: Follow with a polishing compound to remove any swirl marks left by the rubbing compound.
- Wax: Finish with a coat of wax or sealant to protect the repaired area.
6. Choosing the Right Products
Selecting the right products is essential for achieving a professional-quality scratch repair. This section highlights top polishing compounds, waxes, sealants, and recommended tools, helping you make informed decisions to ensure the best possible results for your car’s paint.
6.1. Top Polishing Compounds
| Product | Description | Price |
|---|---|---|
| Meguiar’s Ultimate Compound | Removes oxidation, scratches, and swirl marks; safe for clear coat. | $15 – $20 |
| 3M Scratch Remover | Fine scratch removal; good for light scratches and swirl marks. | $20 – $25 |
| Chemical Guys V36 Cutting Polish | Versatile; removes moderate imperfections and enhances paint clarity. | $25 – $30 |
| Griot’s Garage Correcting Cream | Removes scratches and swirl marks; leaves a smooth, glossy finish. | $20 – $25 |
6.2. Best Waxes and Sealants
| Product | Description | Price |
|---|---|---|
| Meguiar’s Gold Class Carnauba Plus Premium Paste Wax | Provides a deep, rich shine and long-lasting protection. | $20 – $25 |
| Chemical Guys Butter Wet Wax | Easy to apply and remove; leaves a smooth, wet-looking finish. | $20 – $25 |
| Collinite 845 Insulator Wax | Durable; provides excellent protection against the elements. | $25 – $30 |
| Griot’s Garage Best of Show Wax | High-quality; provides a deep gloss and long-lasting protection. | $30 – $35 |
| Adam’s Polishes Detail Spray | Quick and easy to use; enhances gloss and adds a layer of protection. | $15 – $20 |
6.3. Recommended Tools
| Tool | Description | Price |
|---|---|---|
| Dual-Action Polisher | For efficient and even polishing; reduces the risk of damaging the paint. | $100 – $300 |
| Foam Applicator Pads | For applying polishing compounds and waxes by hand. | $5 – $10 |
| Microfiber Buffing Pads | For use with a power polisher; provides a gentle and effective buffing action. | $10 – $20 |
| High-Quality Microfiber Cloths | For wiping away polishing compounds and waxes; avoids scratching the paint. | $10 – $20 |
| Wet Sandpaper Set (2000-3000 grit) | For wet sanding deeper scratches; ensures a smooth finish. | $10 – $15 |
7. Maintaining Your Car’s Paint
Proper maintenance is essential for preserving your car’s paint and preventing future scratches. This section provides tips on regular washing, waxing, avoiding automatic car washes, and prompt scratch repair, ensuring your vehicle maintains its pristine appearance and value over time.
7.1. Regular Washing
Wash your car regularly to remove dirt, grime, and contaminants that can damage the paint. Aim to wash your car every two weeks, or more frequently if you live in an area with harsh weather conditions.
7.2. Waxing and Sealing
Apply a coat of wax or sealant every three to six months to protect the paint from UV rays, oxidation, and environmental damage. Waxing and sealing also provide a glossy finish and make it easier to clean your car.
7.3. Avoiding Automatic Car Washes
Automatic car washes can cause swirl marks and scratches due to the abrasive brushes and harsh chemicals used. Opt for hand washing or touchless car washes to minimize the risk of damage.
7.4. Prompt Scratch Repair
Address any scratches or paint imperfections as soon as possible to prevent them from worsening. Small scratches can quickly turn into larger problems if left untreated.
8. Common Mistakes to Avoid
Avoiding common mistakes is crucial for ensuring a successful scratch repair. This section outlines pitfalls such as using the wrong products, applying too much pressure, skipping preparation, and neglecting safety, helping you achieve a professional-quality finish without damaging your car’s paint.
8.1. Using the Wrong Products
Using the wrong products can damage your car’s paint. Always use products specifically designed for automotive use and follow the manufacturer’s instructions.
8.2. Applying Too Much Pressure
Applying too much pressure when polishing or sanding can damage the clear coat. Use gentle, even pressure and let the product do the work.
8.3. Skipping Preparation
Skipping the preparation steps, such as cleaning and masking the area, can lead to poor results. Always thoroughly prepare the area before attempting any scratch repair.
8.4. Neglecting Safety
Always wear appropriate safety gear, such as gloves and eye protection, when working with chemicals and power tools. Work in a well-ventilated area to avoid inhaling harmful fumes.
9. Professional Car Detailing vs. DIY
Deciding between professional car detailing and DIY scratch repair depends on various factors, including cost, skill level, and time investment. This section provides a comparison to help you determine the best approach for your specific needs and circumstances, ensuring you achieve the desired results while staying within your budget and comfort level.
9.1. Cost Comparison
-
DIY: The cost of DIY scratch repair depends on the products and tools you need. A basic scratch repair kit can cost between $20 and $50, while more advanced tools like a dual-action polisher can cost between $100 and $300.
-
Professional Detailing: Professional car detailing can cost between $100 and $500 or more, depending on the extent of the service and the size of your car.
9.2. Skill Level
-
DIY: DIY scratch repair requires some basic knowledge of car paint and polishing techniques. It is important to follow the instructions carefully and practice on a test area before attempting to repair a scratch on your car.
-
Professional Detailing: Professional detailers have years of experience and training in car paint repair. They have the knowledge and skills to handle even the most challenging scratches and paint imperfections.
9.3. Time Investment
-
DIY: DIY scratch repair can take several hours, depending on the severity of the scratch and your skill level.
-
Professional Detailing: Professional car detailing can take several hours or even a full day, depending on the extent of the service.
9.4. When to Seek Professional Help
Consider seeking professional help if:
- The scratch is deep and has penetrated the base coat or metal.
- You are not comfortable using power tools or chemicals.
- You want to ensure a professional-quality finish.
- You lack the time or patience to do it yourself.
10. The Science Behind Scratch Removal
Understanding the science behind scratch removal helps you appreciate the techniques and products used. This section explores how polishing compounds work and the role of abrasives in restoring your car’s paint, providing a deeper understanding of the process.
10.1. How Polishing Compounds Work
Polishing compounds contain abrasive particles that gently remove the damaged layers of paint, leveling the surface and reducing the visibility of scratches.
10.2. The Role of Abrasives
Abrasives come in various grits, ranging from coarse to fine. Coarse abrasives are used to remove deeper scratches, while fine abrasives are used to polish the surface and restore shine.
11. Environmental Factors and Car Paint
Environmental factors can significantly impact your car’s paint, leading to scratches and other damage. This section discusses the effects of UV damage, acid rain, tree sap, and bird droppings, providing insights into how these elements can harm your car’s finish.
11.1. UV Damage
Prolonged exposure to UV rays can cause the paint to fade, oxidize, and become brittle, making it more susceptible to scratches and other damage.
11.2. Acid Rain
Acid rain contains pollutants that can etch the paint and cause permanent damage.
11.3. Tree Sap and Bird Droppings
Tree sap and bird droppings contain acidic compounds that can corrode the paint if left on the surface for an extended period.
close-up of a car's paint surface with a small scratch, highlighting the layers of the paint and the depth of the scratch
12. Understanding Car Detailing Clay
Car detailing clay is an essential tool for removing contaminants from your car’s paint. This section explains what detailing clay is and how to use it effectively, ensuring a smooth and clean surface before polishing or waxing.
12.1. What is Car Detailing Clay?
Car detailing clay is a pliable, putty-like compound that removes embedded contaminants from the paint, such as brake dust, industrial fallout, and tree sap.
12.2. How to Use Car Detailing Clay
- Wash the Car: Thoroughly wash the car to remove any loose dirt and grime.
- Lubricate: Spray the surface with a detailing spray to provide lubrication.
- Clay: Gently rub the detailing clay over the surface in straight, overlapping passes.
- Wipe: Wipe away any residue with a clean microfiber cloth.
13. New Technologies in Scratch Repair
The field of scratch repair is constantly evolving with new technologies. This section explores self-healing paints and nano-coatings, providing insights into how these advancements are changing the way we maintain and protect our car’s paint.
13.1. Self-Healing Paints
Self-healing paints contain polymers that can repair minor scratches and swirl marks when exposed to heat.
13.2. Nano-Coatings
Nano-coatings are ultra-thin, transparent layers that provide superior protection against scratches, UV rays, and environmental damage.
14. Cost-Effective Solutions for Scratch Repair
Repairing scratches doesn’t have to break the bank. This section provides cost-effective solutions, including DIY kits and budget-friendly products, helping you maintain your car’s appearance without overspending.
14.1. DIY Kits vs. Individual Products
-
DIY Kits: DIY scratch repair kits offer a convenient and affordable way to repair minor scratches. These kits typically include polishing compounds, applicators, and microfiber cloths.
-
Individual Products: Purchasing individual products allows you to customize your scratch repair process and choose the specific products that best suit your needs.
14.2. Budget-Friendly Products
Many affordable polishing compounds, waxes, and sealants can provide excellent results without costing a fortune. Research and compare products to find the best value for your money.
15. Preparing Your Car for Sale: Scratch Removal
Removing scratches is an essential step in preparing your car for sale. This section explains why first impressions matter and how scratch removal can increase your car’s resale value, helping you get the best possible price.
15.1. First Impressions Matter
A clean, scratch-free car makes a positive first impression on potential buyers and can increase their interest in your vehicle.
15.2. Increasing Resale Value
Repairing scratches and paint imperfections can significantly increase your car’s resale value. Buyers are often willing to pay more for a car that is in good condition and well-maintained.
16. Safety Precautions When Repairing Scratches
Safety should always be a top priority when repairing scratches. This section emphasizes working in a well-ventilated area and wearing protective gear, ensuring you protect yourself from potential hazards.
16.1. Working in a Well-Ventilated Area
Work in a well-ventilated area to avoid inhaling harmful fumes from polishing compounds and chemicals.
16.2. Wearing Protective Gear
Wear gloves and eye protection to protect your skin and eyes from chemicals and abrasive particles.
17. Tips for Achieving a Professional Finish
Achieving a professional finish requires attention to detail and patience. This section provides tips on patience, proper lighting, and following manufacturer’s instructions, helping you achieve the best possible results.
17.1. Patience is Key
Take your time and work carefully to achieve a professional finish. Rushing the process can lead to mistakes and poor results.
17.2. Proper Lighting
Work in a well-lit area or use a detailing light to ভালোভাবে see the scratches and imperfections on the paint.
17.3. Following the Manufacturer’s Instructions
Always follow the manufacturer’s instructions for the products you are using. This will ensure that you are using the products correctly and safely.
18. The Impact of Car Color on Scratch Visibility
Car color can significantly impact the visibility of scratches. This section discusses how scratches appear on dark versus light colors and the unique challenges of repairing metallic paints.
18.1. Dark vs. Light Colors
Scratches are generally more visible on dark-colored cars because they create a contrast against the dark paint. Light-colored cars tend to hide scratches better.
18.2. Metallic Paints
Metallic paints can be more challenging to repair because they contain metal flakes that can be difficult to match. It is important to use touch-up paint specifically designed for metallic finishes.
19. How to Fix Scratches on Different Parts of Your Car
Different parts of your car may require different scratch repair techniques. This section provides specific guidance on fixing scratches on bumpers, mirrors, and plastic trim.
19.1. Bumpers
Bumpers are often made of plastic and may require special polishing compounds and techniques to avoid damaging the surface.
19.2. Mirrors
Mirrors can be easily scratched, so it is important to use gentle polishing techniques and avoid harsh abrasives.
19.3. Plastic Trim
Plastic trim can be sensitive to chemicals and abrasives, so it is important to use products specifically designed for plastic surfaces.
20. Long-Term Benefits of Maintaining Your Car’s Paint
Maintaining your car’s paint offers long-term benefits beyond aesthetics. This section discusses how proper paint care can prevent rust and maintain your car’s value.
20.1. Preventing Rust
Maintaining your car’s paint helps prevent rust by protecting the metal surface from exposure to moisture and environmental elements.
20.2. Maintaining Value
A well-maintained car with a pristine paint job retains its value longer and is more attractive to potential buyers.