How To Fix Gas Smell In Car Effectively
Does the perplexing gas smell in your car have you concerned? Discover effective methods to eliminate that unpleasant odor and ensure your vehicle’s safety with insights from CARDIAGTECH.NET. Keep your car running smoothly by exploring solutions for fuel leaks, faulty gas caps, and more, while also finding the best diagnostic tools for the job, leading to superior car maintenance and performance.
1. Identifying the Source of the Gas Smell
Before diving into fixes, let’s pinpoint what’s causing that gas smell in your car. Identifying the source is the first and foremost thing to do before performing any fix. This could range from minor issues like a loose gas cap to more significant problems such as fuel line leaks or engine malfunctions. A thorough inspection can save time and prevent potential hazards.
1.1. Common Causes of a Gas Smell
Several factors could contribute to a gas smell inside your car. Here’s a breakdown:
- Fuel Line Leaks: These are a primary culprit. Fuel lines transport gasoline from the tank to the engine, and wear, corrosion, or damage from road debris can cause leaks.
- Loose or Faulty Gas Cap: The gas cap seals the fuel system. If it’s loose, damaged, or missing, it can lead to gasoline fumes escaping.
- Fuel Injector Leaks: Fuel injectors deliver gasoline to the engine as a fine mist. Leaks can drip fuel onto the engine, causing a noticeable smell.
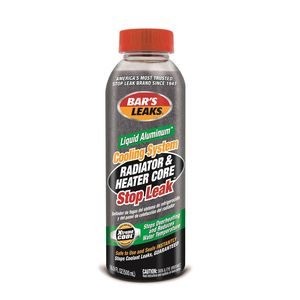
- Fuel Tank Leak: Though less common, cracks or holes in the fuel tank can leak gasoline, posing a significant fire hazard.
- Engine Running Rich: This means there’s too much gasoline and not enough air in the fuel mixture, causing unburnt fuel to exit through the exhaust.
- Oil Contamination: Gasoline can seep into the engine oil, especially with internal engine problems, producing a gasoline-like smell.
1.2. Initial Inspection Steps
Start with these simple checks to narrow down the cause:
- Check the Gas Cap: Ensure it’s tightly secured and in good condition.
- Look for Visible Leaks: Inspect around the fuel tank, fuel lines, and engine for any signs of gasoline leakage.
- Smell Around the Car: Pay attention to where the smell is strongest to help identify the source.
- Check the Engine Oil: Look for a gasoline smell or a thinner consistency than usual.
2. Fixing Fuel Line Leaks
Fuel line leaks are a frequent cause of gas smells in cars. Addressing them promptly is crucial for safety and efficiency. The fuel line, responsible for carrying gasoline from the tank to the engine, can develop leaks due to wear and tear, corrosion, or damage from road debris.
2.1. Identifying Fuel Line Leaks
- Visual Inspection: Look for damp spots or gasoline drips along the fuel lines, especially near joints and connections.
- Smell Test: The gasoline smell will be strongest near the leak.
- Pressure Test: A mechanic can perform a pressure test to identify leaks in the fuel system.
2.2. Tools and Materials Needed
To fix fuel line leaks, gather these essential tools and materials. Consider the options available at CARDIAGTECH.NET to ensure you have the best equipment for the job:
- Wrench Set: For loosening and tightening fuel line connections.
- Screwdrivers: Both flathead and Phillips head for removing protective covers.
- Safety Glasses: To protect your eyes from fuel splashes.
- Gloves: Chemical-resistant gloves to protect your hands.
- Drain Pan: To catch any spilled fuel.
- New Fuel Lines or Hoses: Replacement parts matching your vehicle’s specifications.
- Hose Clamps: To secure the fuel lines tightly.
- Fuel Line Cutter: For clean and precise cuts on fuel lines.
2.3. Step-by-Step Repair Guide
Follow these steps to repair fuel line leaks effectively:
- Safety First: Disconnect the negative terminal of the battery to prevent sparks. Work in a well-ventilated area away from any open flames or heat sources.
- Locate the Leak: Follow the fuel lines from the tank to the engine, checking for any signs of leakage.
- Drain the Fuel: Place a drain pan under the fuel line to catch any spilled fuel.
- Disconnect the Fuel Line: Use a wrench to loosen the connections. Be prepared for some fuel to spill out.
- Remove the Damaged Section: Cut the damaged section of the fuel line using a fuel line cutter.
- Install New Fuel Line or Hose: Connect the new fuel line or hose, ensuring it is securely attached with hose clamps.
- Tighten Connections: Use a wrench to tighten all connections, but be careful not to overtighten.
- Reconnect Battery: Reconnect the negative terminal of the battery.
- Test for Leaks: Start the engine and check for any new leaks around the repaired area.
2.4. Products Recommendation from CARDIAGTECH.NET
CARDIAGTECH.NET offers a range of high-quality tools ideal for fuel line repairs. Here are a few recommendations:
- Fuel Line Pliers: For easy removal of stubborn fuel lines.
- Hose Clamp Pliers: To install and remove hose clamps quickly and efficiently.
- Fuel Pressure Tester: To ensure the fuel system is operating at the correct pressure after the repair.
3. Addressing a Loose or Faulty Gas Cap
A loose or faulty gas cap is one of the simplest issues to resolve when dealing with a gas smell in your car. The gas cap plays a crucial role in sealing the fuel system and maintaining pressure within the tank.
3.1. Identifying a Faulty Gas Cap
- Visual Inspection: Check for cracks, damage, or a loose fit.
- Check Engine Light: A faulty gas cap can trigger the check engine light due to pressure loss in the fuel system.
- Smell Test: The gasoline smell will be noticeable around the gas cap area.
3.2. Tools and Materials Needed
- New Gas Cap: Purchase a replacement gas cap that matches your vehicle’s make and model.
3.3. Step-by-Step Replacement Guide
- Remove the Old Gas Cap: Unscrew the old gas cap.
- Inspect the Filler Neck: Check the filler neck for any damage or debris. Clean it if necessary.
- Install the New Gas Cap: Screw on the new gas cap until it clicks, ensuring a tight seal.
- Reset Check Engine Light (if applicable): If the check engine light was triggered, you might need to reset it using an OBD-II scanner or by disconnecting the battery for a few minutes.
3.4. Benefits of a Proper Gas Cap
- Prevents Fuel Evaporation: A tight-sealing gas cap prevents gasoline from evaporating, saving you money on fuel.
- Maintains Fuel System Pressure: Proper pressure is essential for the fuel system to function correctly.
- Reduces Emissions: A sealed fuel system reduces harmful emissions into the atmosphere.
4. Repairing Fuel Injector Leaks
Fuel injector leaks can lead to a noticeable gas smell and affect engine performance. Fuel injectors deliver gasoline to the engine in a fine, high-pressure mist. If an injector leaks, it can drip fuel onto the engine or other components under the hood.
4.1. Diagnosing Fuel Injector Leaks
- Smell Test: A strong gasoline smell near the engine is a key indicator.
- Visual Inspection: Look for wet spots or gasoline residue around the fuel injectors.
- Engine Performance Issues: Rough idling, poor acceleration, and decreased fuel efficiency can indicate fuel injector problems.
- OBD-II Scanner: Use an OBD-II scanner to check for error codes related to fuel injector performance.
4.2. Tools and Materials Needed
- Wrench Set: For loosening and tightening fuel injector connections.
- Screwdrivers: For removing protective covers.
- Safety Glasses: To protect your eyes from fuel splashes.
- Gloves: Chemical-resistant gloves to protect your hands.
- New Fuel Injectors: Replacement injectors matching your vehicle’s specifications.
- Fuel Injector Cleaner: To clean the fuel injectors and remove any deposits.
- OBD-II Scanner: To reset the check engine light and monitor engine performance.
4.3. Step-by-Step Repair Guide
- Safety First: Disconnect the negative terminal of the battery. Work in a well-ventilated area.
- Locate the Leaking Injector: Identify the leaking injector by visual inspection or by using an OBD-II scanner to check for error codes.
- Remove the Fuel Rail: Disconnect the fuel lines and electrical connectors from the fuel rail. Remove the fuel rail from the engine.
- Remove the Injector: Carefully remove the leaking injector from the fuel rail.
- Install New Injector: Install the new fuel injector into the fuel rail, ensuring it is securely seated.
- Reinstall Fuel Rail: Reinstall the fuel rail onto the engine, reconnect the fuel lines and electrical connectors.
- Reconnect Battery: Reconnect the negative terminal of the battery.
- Test for Leaks: Start the engine and check for any new leaks around the injectors.
- Reset Check Engine Light (if applicable): If the check engine light was triggered, reset it using an OBD-II scanner.
4.4. High-Quality Tools from CARDIAGTECH.NET
CARDIAGTECH.NET provides the tools needed for fuel injector repairs. Consider these products:
- Fuel Injector Removal Tool: For easy and safe removal of fuel injectors.
- Ultrasonic Fuel Injector Cleaner: To thoroughly clean fuel injectors and restore their performance.
- Fuel Rail Pressure Tester: To ensure the fuel system is operating at the correct pressure.
5. Handling Fuel Tank Leaks
A fuel tank leak is a serious issue that requires immediate attention. Cracks or holes in the tank, often due to impact or corrosion, can leak gasoline, posing a significant fire hazard.
5.1. Identifying Fuel Tank Leaks
- Strong Gasoline Smell: A potent gasoline smell near the rear of the car is a primary indicator.
- Visible Leaks: Look for gasoline drips or wet spots under the fuel tank.
- Fuel Efficiency Drop: Noticeably decreased fuel efficiency can suggest a leak.
5.2. Tools and Materials Needed
- Safety Glasses: To protect your eyes from fuel splashes.
- Gloves: Chemical-resistant gloves to protect your hands.
- Drain Pan: To catch any spilled fuel.
- New Fuel Tank: Replacement fuel tank matching your vehicle’s specifications.
- Wrench Set: For loosening and tightening fuel tank straps and connections.
- Screwdrivers: For removing protective covers.
- Jack and Jack Stands: To safely lift and support the vehicle.
- Fuel Siphon: To safely remove fuel from the tank.
5.3. Step-by-Step Repair Guide
- Safety First: Disconnect the negative terminal of the battery. Work in a well-ventilated area away from any open flames or heat sources.
- Drain the Fuel Tank: Use a fuel siphon to remove as much fuel as possible from the tank.
- Lift the Vehicle: Use a jack and jack stands to safely lift and support the vehicle.
- Disconnect Fuel Lines and Electrical Connectors: Disconnect the fuel lines and electrical connectors from the fuel tank.
- Remove the Fuel Tank Straps: Loosen and remove the fuel tank straps that hold the tank in place.
- Lower and Remove the Fuel Tank: Carefully lower the fuel tank to the ground and remove it from the vehicle.
- Install New Fuel Tank: Position the new fuel tank under the vehicle and lift it into place.
- Secure the Fuel Tank Straps: Secure the fuel tank straps, ensuring the tank is held firmly in place.
- Reconnect Fuel Lines and Electrical Connectors: Reconnect the fuel lines and electrical connectors to the fuel tank.
- Lower the Vehicle: Lower the vehicle back to the ground.
- Refill the Fuel Tank: Add fuel back into the tank.
- Reconnect Battery: Reconnect the negative terminal of the battery.
- Test for Leaks: Start the engine and check for any new leaks around the fuel tank.
5.4. Equipment from CARDIAGTECH.NET
CARDIAGTECH.NET offers essential equipment for fuel tank repairs:
- Fuel Tank Strap Wrench: For easy removal and installation of fuel tank straps.
- Fuel Siphon Pump: To safely and efficiently remove fuel from the tank.
- Adjustable Jack Stands: For secure and stable support while working under the vehicle.
6. Addressing an Engine Running Rich
When the engine runs rich, it means there’s too much gasoline and not enough air in the fuel mixture. This can result in unburnt fuel exiting the vehicle through the exhaust, producing a noticeable gas smell.
6.1. Identifying an Engine Running Rich
- Gasoline Smell from Exhaust: A strong gasoline smell coming from the exhaust is a primary indicator.
- Poor Fuel Economy: Noticeably decreased fuel efficiency.
- Black Smoke from Exhaust: Black smoke indicates incomplete combustion.
- Rough Idling: The engine may idle roughly or stall.
- OBD-II Scanner: Use an OBD-II scanner to check for error codes related to the air-fuel mixture.
6.2. Potential Causes of an Engine Running Rich
- Faulty Oxygen Sensor: The oxygen sensor measures the amount of oxygen in the exhaust and sends this data to the engine control unit (ECU). A faulty sensor can provide incorrect data, causing the engine to run rich.
- Defective Mass Airflow (MAF) Sensor: The MAF sensor measures the amount of air entering the engine. If it’s defective, it can provide incorrect data, leading to an improper air-fuel mixture.
- Leaking Fuel Injectors: Leaking injectors can deliver too much fuel into the engine.
- Faulty Fuel Pressure Regulator: A faulty fuel pressure regulator can cause excessive fuel pressure, leading to a rich condition.
- Clogged Air Filter: A clogged air filter restricts airflow to the engine, causing it to run rich.
6.3. Tools and Materials Needed
- Wrench Set: For loosening and tightening connections.
- Screwdrivers: For removing protective covers.
- OBD-II Scanner: To check for error codes and monitor engine performance.
- New Oxygen Sensor, MAF Sensor, or Fuel Injectors: Depending on the diagnosis.
- Air Filter: Replacement air filter.
- Fuel Pressure Tester: To measure fuel pressure.
6.4. Step-by-Step Repair Guide
- Safety First: Disconnect the negative terminal of the battery.
- Check for Error Codes: Use an OBD-II scanner to check for error codes related to the air-fuel mixture, oxygen sensor, or MAF sensor.
- Inspect the Air Filter: Remove the air filter and check if it’s clogged. Replace if necessary.
- Check the Oxygen Sensor: Locate the oxygen sensor(s) in the exhaust system. Use an OBD-II scanner to monitor their performance. Replace if faulty.
- Check the MAF Sensor: Locate the MAF sensor in the air intake system. Clean the sensor using a MAF sensor cleaner. Replace if faulty.
- Check Fuel Injectors: Inspect the fuel injectors for leaks. Replace if necessary.
- Check Fuel Pressure Regulator: Use a fuel pressure tester to measure fuel pressure. Replace the fuel pressure regulator if it’s not within the specified range.
- Reconnect Battery: Reconnect the negative terminal of the battery.
- Test Drive: Test drive the vehicle to see if the issue is resolved.
6.5. Quality Tools from CARDIAGTECH.NET
CARDIAGTECH.NET offers tools to diagnose and fix engine running rich issues:
- OBD-II Scanner: To read and clear diagnostic trouble codes.
- MAF Sensor Cleaner: To clean MAF sensors and restore their performance.
- Fuel Pressure Test Kit: To accurately measure fuel pressure and diagnose fuel system issues.
7. Addressing Oil Contamination
Gasoline can sometimes seep into the engine oil, especially if there is a problem with the engine’s internal components. This contamination usually occurs over time and can produce a gasoline-like smell, particularly noticeable when the engine is running or just after it’s been turned off.
7.1. Identifying Oil Contamination
- Gasoline Smell in Oil: A gasoline smell when checking the oil level.
- Thin, Watery Oil: The oil may appear thinner and less viscous than usual.
- High Oil Level: An unusually high oil level on the dipstick.
- Engine Performance Issues: Rough idling, decreased fuel efficiency, and potential engine damage.
7.2. Potential Causes of Oil Contamination
- Piston Ring Wear: Worn piston rings can allow gasoline to leak into the crankcase.
- Cylinder Wall Damage: Damage to the cylinder walls can also allow gasoline to leak into the oil.
- Excessive Idling: Prolonged idling can cause incomplete combustion and gasoline to seep into the oil.
- Short Trips: Frequent short trips don’t allow the engine to reach its optimal operating temperature, leading to incomplete combustion.
7.3. Tools and Materials Needed
- Wrench Set: For removing the oil drain plug.
- Oil Filter Wrench: For removing the oil filter.
- Drain Pan: To catch the old oil.
- New Engine Oil: Replacement oil matching your vehicle’s specifications.
- New Oil Filter: Replacement oil filter.
- Funnel: To pour new oil into the engine.
7.4. Step-by-Step Oil Change Guide
- Warm-Up Engine: Run the engine for a few minutes to warm up the oil.
- Safety First: Ensure the vehicle is on a level surface and the parking brake is engaged.
- Locate the Oil Drain Plug: Find the oil drain plug under the engine.
- Place Drain Pan: Position the drain pan under the oil drain plug.
- Remove the Drain Plug: Use a wrench to remove the oil drain plug, allowing the old oil to drain completely.
- Remove the Oil Filter: Use an oil filter wrench to remove the old oil filter.
- Install New Oil Filter: Lubricate the rubber gasket on the new oil filter with fresh oil. Screw the new oil filter into place by hand until it’s snug.
- Reinstall the Drain Plug: Reinstall the oil drain plug and tighten it with a wrench.
- Add New Oil: Open the oil fill cap on top of the engine. Use a funnel to pour in the correct amount of new oil.
- Check Oil Level: Use the dipstick to check the oil level. Add more oil if necessary.
- Start Engine: Start the engine and let it run for a few minutes. Check for any leaks around the drain plug and oil filter.
- Check Oil Level Again: Turn off the engine and check the oil level again. Add more oil if necessary.
7.5. Products Recommendation from CARDIAGTECH.NET
CARDIAGTECH.NET offers the best equipment for oil changes and engine maintenance:
- Oil Filter Wrench Set: For easy removal of various oil filter sizes.
- Magnetic Drain Plug: To capture metal particles and prevent engine wear.
- Oil Drain Pan with Splash Guard: To prevent spills and keep your work area clean.
8. Using Diagnostic Tools for Accurate Assessment
Diagnostic tools are invaluable for accurately assessing the source of a gas smell in your car. These tools help pinpoint the exact problem, saving time and ensuring effective repairs.
8.1. Importance of Diagnostic Tools
- Accurate Identification: Diagnostic tools provide precise data, helping to identify the root cause of the gas smell.
- Time-Saving: They reduce the time spent on manual inspections and guesswork.
- Comprehensive Analysis: These tools can assess various engine parameters and fuel system components.
- Error Code Reading: Diagnostic tools can read error codes stored in the vehicle’s computer, providing valuable insights.
8.2. Key Diagnostic Tools
- OBD-II Scanner: Reads error codes, monitors engine performance, and resets the check engine light.
- Fuel Pressure Tester: Measures fuel pressure to diagnose fuel system issues.
- Multimeter: Tests electrical components such as sensors and wiring.
- Smoke Machine: Detects leaks in the fuel system and vacuum lines.
- Compression Tester: Checks cylinder compression to assess engine health.
8.3. Step-by-Step Guide to Using an OBD-II Scanner
- Locate the OBD-II Port: Find the OBD-II port, usually located under the dashboard on the driver’s side.
- Connect the Scanner: Plug the OBD-II scanner into the port.
- Turn On the Ignition: Turn the ignition key to the “on” position without starting the engine.
- Read Error Codes: Follow the scanner’s instructions to read any stored error codes.
- Interpret Error Codes: Use a reference guide or online resources to interpret the error codes.
- Clear Error Codes (if necessary): After addressing the issue, clear the error codes using the scanner.
- Test Drive: Test drive the vehicle to ensure the problem is resolved.
8.4. Top Diagnostic Tools from CARDIAGTECH.NET
CARDIAGTECH.NET offers a selection of high-quality diagnostic tools:
- Professional OBD-II Scanner: Provides advanced diagnostic capabilities, including live data streaming and component testing.
- Wireless Bluetooth Diagnostic Adapter: Connects to your smartphone or tablet for convenient diagnostics.
- Automotive Multimeter Kit: Includes various accessories for comprehensive electrical testing.
9. Preventing Future Gas Smells
Prevention is key to avoiding gas smells in your car. Regular maintenance and proactive measures can help keep your vehicle running smoothly and prevent future issues.
9.1. Regular Maintenance Tips
- Routine Inspections: Schedule regular inspections with a trusted mechanic to identify and address potential issues early.
- Check and Replace Gas Cap: Ensure the gas cap is in good condition and tightly sealed. Replace it if it’s damaged or loose.
- Fuel System Cleaning: Periodically use a fuel system cleaner to remove deposits and keep the fuel injectors clean.
- Oil Changes: Perform regular oil changes to prevent oil contamination.
- Air Filter Replacement: Replace the air filter as recommended to ensure proper airflow to the engine.
- Check Fuel Lines: Inspect fuel lines for any signs of wear, corrosion, or damage.
9.2. Driving Habits to Avoid
- Avoid Running on Empty: Consistently running the fuel tank near empty can cause the fuel pump to overheat and draw in sediment, potentially leading to fuel system issues.
- Minimize Short Trips: Frequent short trips can prevent the engine from reaching its optimal operating temperature, leading to incomplete combustion and oil contamination.
- Avoid Excessive Idling: Prolonged idling can cause incomplete combustion and gasoline to seep into the oil.
9.3. High-Quality Products for Preventive Maintenance from CARDIAGTECH.NET
CARDIAGTECH.NET offers a variety of products to help you maintain your vehicle and prevent gas smells:
- Fuel System Cleaner: Cleans fuel injectors and improves fuel efficiency.
- Engine Oil Flush: Removes sludge and deposits from the engine.
- Air Filter: High-quality air filter to ensure proper airflow to the engine.
10. Why Choose CARDIAGTECH.NET for Your Automotive Needs
When it comes to maintaining and repairing your vehicle, choosing the right supplier for tools and equipment is crucial. CARDIAGTECH.NET stands out as a premier provider of high-quality automotive tools, diagnostic equipment, and repair solutions.
10.1. Quality Products
CARDIAGTECH.NET offers a wide range of products that meet the highest standards of quality. From essential hand tools to advanced diagnostic equipment, every item is selected for its durability, accuracy, and performance.
10.2. Expert Support
CARDIAGTECH.NET provides expert support to help you find the right tools and equipment for your specific needs. The knowledgeable staff can offer guidance and answer any questions you may have.
10.3. Competitive Pricing
CARDIAGTECH.NET offers competitive pricing on all products, ensuring you get the best value for your money. You can find affordable solutions without compromising on quality.
10.4. Comprehensive Solutions
Whether you’re a professional mechanic or a DIY enthusiast, CARDIAGTECH.NET offers comprehensive solutions for all your automotive needs. You can find everything from diagnostic tools to repair parts, making it a one-stop shop for vehicle maintenance.
10.5. Customer Satisfaction
CARDIAGTECH.NET is committed to customer satisfaction. With a focus on providing excellent service and high-quality products, they strive to exceed customer expectations and build long-lasting relationships.
Experiencing a persistent gas smell in your car can be alarming, but with the right knowledge and tools, you can address the issue effectively. From identifying the source to performing necessary repairs and preventive maintenance, this guide provides a comprehensive approach to fixing gas smells in your car. Trust CARDIAGTECH.NET to supply you with the tools and equipment needed to keep your vehicle running smoothly and safely.
Don’t let a gas smell linger in your car. Contact CARDIAGTECH.NET at 276 Reock St, City of Orange, NJ 07050, United States or Whatsapp: +1 (641) 206-8880 for expert advice on selecting the right tools and equipment for your automotive needs. Our team is ready to assist you in enhancing your work efficiency and ensuring a safer driving experience. Visit CARDIAGTECH.NET today and let us help you maintain your vehicle with confidence.
FAQ Section
-
What are the most common reasons my car smells like gas?
The most common reasons include fuel line leaks, a loose or faulty gas cap, fuel injector leaks, fuel tank leaks, an engine running rich, and oil contamination.
-
Is it dangerous if my car smells like gas?
Yes, it can be dangerous. Gasoline is flammable, and a gas smell could indicate a leak, posing a fire hazard.
-
Can a loose gas cap cause a gas smell?
Yes, a loose, damaged, or missing gas cap can cause gasoline fumes to escape, leading to a gas smell.
-
How can I check for fuel line leaks?
Look for damp spots or gasoline drips along the fuel lines, especially near joints and connections. You can also perform a pressure test.
-
What does it mean if my engine is running rich?
It means there’s too much gasoline and not enough air in the fuel mixture, causing unburnt fuel to exit through the exhaust.
-
How can I tell if gasoline is seeping into the engine oil?
Check for a gasoline smell when checking the oil level, a thin, watery oil consistency, and an unusually high oil level on the dipstick.
-
What tools do I need to fix a fuel line leak?
You’ll need a wrench set, screwdrivers, safety glasses, gloves, a drain pan, new fuel lines or hoses, hose clamps, and a fuel line cutter. CARDIAGTECH.NET offers all these tools.
-
Can I fix a fuel tank leak myself?
Fixing a fuel tank leak can be dangerous and is best left to a professional. However, if you have experience, you’ll need safety glasses, gloves, a drain pan, a new fuel tank, a wrench set, screwdrivers, a jack and jack stands, and a fuel siphon.
-
How can I prevent my car from smelling like gas in the future?
Schedule regular inspections, check and replace the gas cap, use a fuel system cleaner, perform regular oil changes, replace the air filter, and avoid running on empty.
-
What is the role of oxygen sensor in preventing gas smell?
The oxygen sensor measures the amount of oxygen in the exhaust and sends this data to the engine control unit (ECU). A faulty sensor can provide incorrect data, causing the engine to run rich and producing a gas smell.